
Hello my Stampin’ Friends!
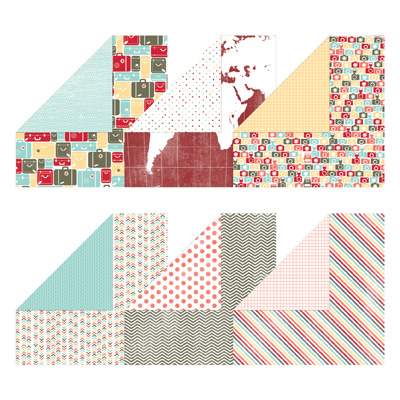
Smile! On day four of my “I Am Me” Designer Series paper showcase, I have decided to use the paper with the cute little camera’s on. Here is a pic of all the sheets and their backsides! With that in mind … I decided to make my card a “picture” card. It’s really easy when you use the framelits … I chose the NEW “Circle Collections” (130091) Framelits to match the lens of the cameras!
This is my sister Ruthie. We were at our family reunion and were having fun with the photo opportunities! I believe that was back in the 90’s … She looked great, glad you can’t see my hair-do! LOL
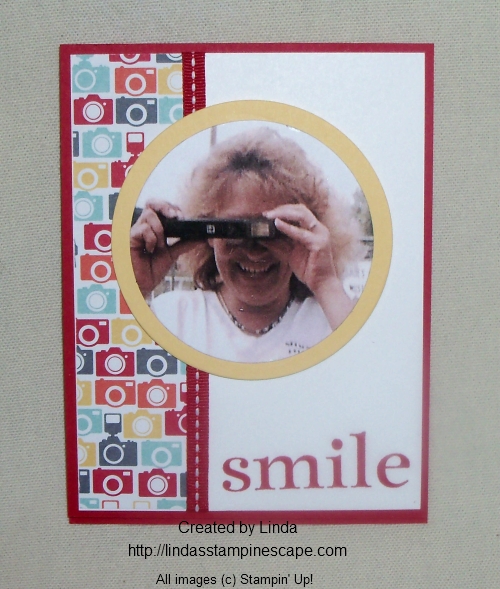
I figured since I was using a photo on the front of my card, I would make an “easel card”. How cool is that … and easy. I used the “Happy Day” stamp set (W-130294 / C-130297) for both the front and inside of the card. You will find this stamp set is great for scrapbooking too.

To hold the card front (easel) in place, I used the Brights Collection (130931) Candy Dots … how “yummy” are they! And I combined them with the Candy Dots Brad Bases (132293) page 171. I love the way the look together.
I also like how the candy dots and the circle framelits tie into the camera theme of the card.
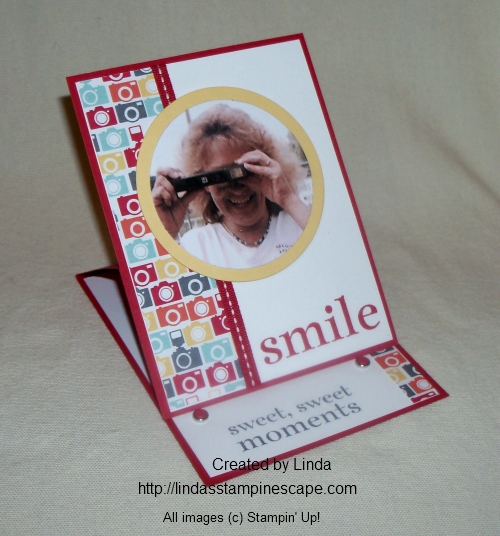
To create the easel … begin with a half sheet of cardstock 4-1/4″ x 11″ … fold it in half to create your base. Now “fold” the top flap of your base card in half. Create your card front (4-1/4″ x 5-1/2″) and secure to the bottom half of the top flap of your base card. You can see by the photo that only the bottom half of the top flap and the card front are adhered together… this allows the card to lay flat for mailing.
I have 3 more cards coming in my “I Am Me” Designer Paper Showcase.
Thanks for stopping by!


