Hello Stampin’ Friends ~
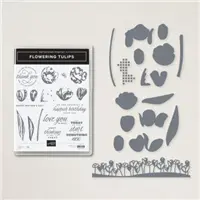
Today I have a card from the amazing Flowering Tulips bundle … along with a full tutorial! I have had many requests for samples highlighting this bundle, so let the creativity begin!! I will be sharing more samples over the next few days.

1. Before you start stamping, cut the following pieces:
• 5-1/2″ x 8-1/2″ (14 x 21.6 cm) Pale Papaya Cardstock
• 2-1/2″ x 4-1/4″ (6.4 x 10.8 cm) Basic White Cardstock
• 7/8″ x 2-1/2″ (2.2 x 6.4 cm) Basic White Cardstock
• 3-1/2″ x 4-1/2″ (8.9 x 11.4 cm) Old Olive Cardstock
• 3″ x 3″ (7.6 x 7.6 cm) Pale Papaya Cardstock
• 3″ (7.6 cm) White 3/4″ (1.9 cm) Frayed Ribbon
2. Fold the Pale Papaya 5-1/2″ x 8-1/2″ (14 x 21.6 cm) Cardstock in half to create
the card base.
3. Stamp the x image in Flirty Flamingo ink on the front of the card base at top
right and bottom left.
4. Stamp the tulip leaves and stems in Old Olive ink on the 3-1/2″ x 4-1/2″
(8.9 x 11.4 cm) Old Olive Cardstock. Die cut using the Tulips Dies and
Stampin’ Cut & Emboss Machine.
5. Die cut two tulips from the Pale Papaya 3″ x 3″ (7.6 x 7.6 cm) Cardstock.
Stamp the petal image in Pale Papaya ink on the back. Fold so the stamped
petal is visible.
6. Adhere the leaves, stems and tulips to the Basic White (7/8″ x 2-1/2″;
2.2 x 6.4 cm) Cardstock.
7. Adhere the White 3/4″ (1.9 cm) Frayed Ribbon over the tulips.
8. Stamp the sentiment in Flirty Flamingo ink on the Basic White 7/8″ x 2-1/2″
(2.2 x 6.4 cm) Cardstock. Adhere over ribbon using Stampin’ Dimensionals.
9. Use Stampin’ Dimensionals to adhere the assembled Basic White
2-1/2″ x 4-1/4″ (6.4 x 10.8 cm) Cardstock to the center of the card base.
Thank you for taking time out of your day to visit my blog!
Have a great day ~

TODAY’S STAMPIN’ SUPPLY LIST … If you liked the products used in today’s projects, I have links for you below. Just click on the item you would like more information on, or to begin your shopping. It will take you directly to my website. Thank you ♥