Hello Stampin’ Friends,
Today I’m going to share the video that I created going through step by step how I created the cards I shared with you yesterday. I will leave the cards on today’s post so you can check them out again, along with the key ingredients I used to make my cards … Enjoy the video!
Once all your colors are cut, I pull them apart and create a rainbow pattern. I used the Tombo Liquid glue to secure my pattern …

I stamped my greeting from Circle Sayings in Daffodil Delight and Starry Sky, then punched out with the coordinating 2-3/8″ punch. I used Stampin’ Dimensionals to pop it up and embellished it with the blue Tinsel Gems.
My next card is assembled as the first and then stamped with VersaMark ink … it’s a watermark ink so it works perfectly on the rainbow of color. This is a simple technique that many of us forget about, but it looks so cool ….

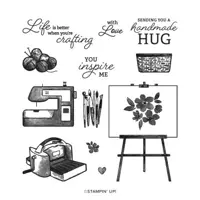
The flowers come from the Crafting with You stamp set as does the greeting that I stamped in Starry Sky. It was then die cut with the Stylish Shapes dies. I put a few scrap pieces on the back and trimmed them down to embellish my card.
The last card was assembled as the rest were but before I assembled it to the cardbase, I ran it the the Cut & Emboss Machine ….

Any one of our embossing folders would look great on these patterned die cuts in the Patchwork Pieces dies, and just another easy technique to change up your card and add some texture to your card.
I’ve got several more cards to make with the left over pieces … I’ll warn you, once you get started, you will have so much fun creating with these die. Have fun!! Thanks for checking in with me today.