
Hello Stampin’ Friends ~
Welcome to a Free Tutorial Sunday, where creativity knows no bounds and fun is always at the forefront! Are you ready to embark on a crafting adventure filled with and easy and innovative fold? Well, you’re in luck because today we’re diving headfirst into a world of paper crafting delight, fueled by the spirit of sharing and the joy of trying something new!
Let me introduce you to the Biggest Wish Thank You “FUN FOLD” Card …

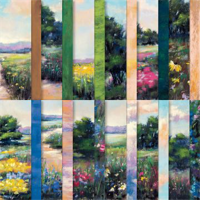
At the heart of today’s tutorial lies the captivating allure of the Biggest Wish Stamp Set and the enchanting charm of the Meandering Meadows Designer Series paper. These two crafting treasures are our companions on this journey of discovery as we explore this easy to make fun fold card and let our imagination run wild, so many different patterns to choose from.
Cardstock Measurements:
- Blueberry Bushel Cardstock (card base): 5 ½” x 9 ¼”
- Meandering Meadows DSP: 6” x 6” piece
- Very Vanilla Cardstock: 5 ¼” x 3 ½”
- Very Vanilla Cardstock: Scrap piece for the sentiment
Instructions:
- Cut a piece of Blueberry Bushel cardstock to 5 ½” x 9 ¼”.
- On the 9 ¼” side, score your cardstock at 1 ½” and 2 ¾”. Turn your paper 180 degrees, and score the other end of your cardstock at 1 ½” and 2 ¾”. Fold and burnish your card base as shown in the top view of the pictures above.
- Use a piece of 6″ x 6″ Meandering Meadows Designer Series Paper (DSP) to create the focal points for your card.
- Pay attention to the direction of the pattern in your DSP. Cut off ¾” from the top or bottom of your 6″ x 6″ piece, depending on what part of the design you want to keep. You’ll end up with a piece measuring 6″ wide and 5 ¼” tall.
- Cut the 6″ x 5 ¼” DSP piece into three pieces. Two pieces will be 1 ¼” x 5 ¼”. The remaining piece will be 3 ½” x 5 ¼”. If you’re using a DSP that has a continuing design, like the one I used, cut the 1 ¼” x 5 ¼” pieces from either side, leaving the 3 ½” x 5 ¼” piece from the middle of the design.
- The 3 ½” x 5 ¼”DSP piece is adhered to the center of the card.
- The two DSP pieces measuring 1 ¼” x 5 ¼” are adhered to the sides of the card, as pictured. You could also turn these pieces over and adhere them to the sides of the card. Some DSP designs work really well with this option since both sides of the paper coordinate well with each other.
- Use the ¾” strip that you cut off your original piece of 6″ x 6″ DSP as decoration on the front of the card. This strip helps bring the design together.
- Use Blueberry Bushel ink and the thanks scripted stamp from the Biggest Wish stamp set to create your sentiment. Stamp the sentiment onto a scrap of Very Vanilla cardstock. Punch out the sentiment using the Heartfelt Hexagon Punch.
- Before adding the sentiment, you may want to embellish your card a little. Put a few glue dots in the middle of my DSP strip and lay some of the gold Simply Elegant Trim onto the glue dots. This will allow you to shape the trim into a faux bow.
- The sentiment is added with dimensionals to give it a little more pop!
- Finally, the cards needed some bling, right?! Add a few of the gorgeous Brushed Brass Butterflies on the center panel of the card.
- To add your message, simply cut a piece of Very Vanilla cardstock to 3 1/2″ x 5 1/4″. Add that piece to the back of the center panel.
If you enjoy the tutorials and love fun folds and the Meandering Meadow Designer Paper, join me on Tuesday night at 6:30 on my Linda’s Stampin’ Escape Facebook page. I will be going LIVE with a great Fun Fold done two different ways!

Thank you for taking time out to visit … Enjoy your Sunday.


Beautiful!
Thank you Karen! It was actually made by one of the members of the Design/ Tutorial group I’m in. Always nice to be able to someone else’s expertise. Great team of designers. Thanks again.