Witches Happy Haunting …

Hello Stampin’ Friends ~

I hope you all got to enjoy the beautiful weekend, we were blessed with a fabulous fall day! I love this time of year.

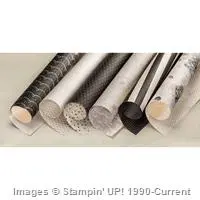
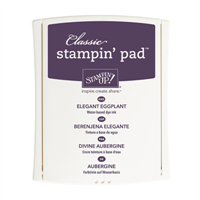
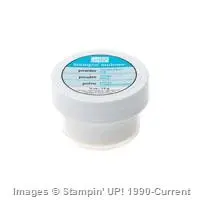
Yesterday I used the large stripes from the “Timeless Elegance” designer paper, and today I’m going to highlight the lace pattern. Who better to wear lace than a witch! I stamped her hat in Elegant Eggplant and heat embossed it with the Iridescent Ice emboss powder.

hat-2

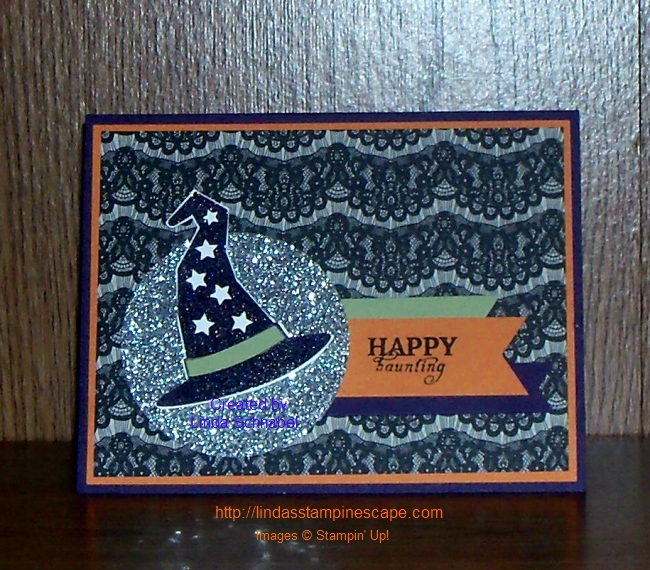
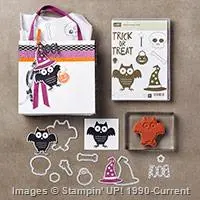
Her hat … oh yes, that came from the Howl-o-ween Bundle; The Howl-o-ween Treats stamp set and Boo to You Framelits Dies. It’s so cute and so much fun to play with. To create the focal point, I placed the hat on a silver 2-1/2″ circle.

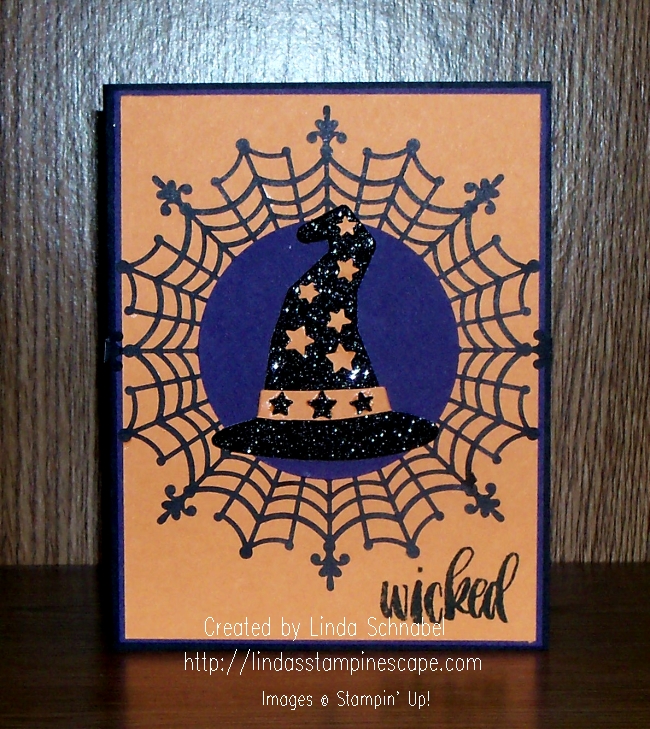
I love to use purple, green and orange for Halloween so my color choices for today’s card was Elegant Eggplant, Pear Pizzazz, Pumpkin Pie which I used for my tags and base for the card. I finished my edges with the Triple Banner Punch … it can really make a banner from any size of cardstock, not just the 3 that are slotted for!

hat-1

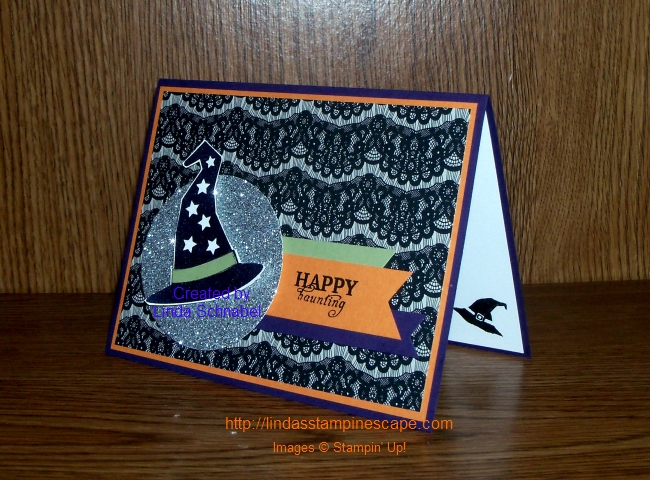
As for my “Happy Haunting” greeting … I took that from my September Paper Pumpkin stamp set. Paper Pumpkin has some awesome “exclusive” stamps! It is really worth trying it out at least. CLICK HERE.

I hope my card inspired you to use your designer papers for any type of project … it’s always more fun to think outside the box!

Thank you for stopping by today ~

Have a marvelous Monday!

blog-closing-small

TODAY’S STAMPIN’ SUPPLY LIST … Click on any item for details or to begin shopping.  


Simply Sunday: Ghostly Greetings

Hello Stampin’ Friends,

Hope you are enjoying your holiday weekend! Did you get a chance to see yesterday’s post and the cute Witches Hat!? Well today, I have a bit more Halloween for you for my Simply Sunday card share.

The quickest and easiest way to create a cute card is to begin with cute paper (or a beautiful card with beautiful paper). Stampin’ Up has many flavors of designer paper to fit your needs.

Today I have chosen the “Happy Haunting” designer paper, and another simple choice is the “Happy Haunting” cardstock pack. These colors were picked to coordinate with your designer paper!

000_2506

There are soooo many cute patterns in the “Happy Haunting” designer paper but I just had to use the ghosts first! And what does a ghost say when he wants to scare you? Boo! I cut the “Boo” out of the new “Black Glimmer” paper. Don’t forget that you can bundle the “Boo to You” framelit dies with the “Howl-o-ween” stamp set and save 15%.

I wanted to highlight my greeting so I used a banner created with the “Triple Banner” punch. Then I grounded my banner with the Rhinestones – coloring them with a black Sharpie™ marker. The finished banner was mounted with the dimensionals to give the card “dimension!”

000_2504

Now … did you catch my ghostly guy inside the card? I created the little eyes with the “White Perfect Accents” that are found in our main catalog (pg. 161) in the embellishments. I colored them with a Sharpie™ marker as well.

Keepin’ my Sunday’s simple with Designer Paper and a few helpful accessories. I hope you enjoyed it.

Thanks so much for taking time out of your holiday weekend and spending it with me.

Have a wonderful day & continue to have a safe and happy holiday weekend.

blog-closing-small


Simply Sunday … BOO!

Hello Stampin’ Friends ~

Today I have a fun Halloween card to share with you… A simple black and white card.

I am using the “Boo to You” Framelit Dies again today (pg. 49 / Holiday Catalog) along with the”Black Glimmer Paper” (pg.47 / Holiday Catalog).

000_2488

The eyes were created by simply punching out two “Extra Large Ovals” out of the Black Glimmer paper. I then faced the glitter sides together and cut a slant across the top… Now your eyes will both slant in.

To create the pupil of the eye, I simply cut a notch out of the eye with a scissors … if your a perfectionist, you can use the corner of a square punch.

000_2490

I used the new “Fine-Tip Glue Pen” (pg.43 Holiday Catalog) to adhere my “BOO!” greeting to the card front. I hope you had a chance to see my tips for using the glue pen in yesterday’s blog post.

The items in the Holiday Catalog will be available to you soon … Sept. 1st, 2015! If you don’t have a demonstrator or a catalog, I’d be happy to get one to you … just leave a comment below.

Thank you for popping in today ~

I hope yours is a good one!

blog-closing-small

TODAY’S STAMPIN’ SUPPLY LIST …


Wonderfully Wicked …

Hello Stampin’ Friends ~

Wooo … ran into technical difficulties again! But we got them worked out and I can share the “Wickedly Cute” card that I have made for you today.

For those who know me … you know I love Halloween and all things “Fall”, so I’m going to grab the coolest items out of the new Holiday catalog to show you! I knew the minute I saw the stamp set Project Life’s “Seasonal Snapshot 2015 … and the stamp Wicked” that I had to team it up with the “Boo to You” Framelit Dies! And really … would you use anything else but the “Black Glimmer Paper”?!!

000_2484

The Project Life’s “Seasonal Snapshot 2015 Stamp set is so fun and versatile … It’s starts you out with “Back to School” and carries you through, well January (snowflakes) and everything in between! And it is bundled with the Card Collection and Accessory Pack … See Page 38 of your Holiday Catalog.

000_2470

So … what do you think of the “Spider Web Doilies”? They are so much fun and easy to use … and you get 24 of them for only $4.50! I used the new “Fine-Tip Glue Pen” (pg.43) to adhere my spider web doily to the Pumpkin Pie paper.

I have some tips for you for using your “Fine-Tip Glue Pen” …

First, before trying to use your glue pen, remove the cap and pull off the protective cover.  I can’t tell you how many times I’ve tried to use my Crystal Effects without pulling the tab off of it before cutting the tip bigger (oh my … we all learn the hard way! LOL)

000_2472

Secondly, there is a “pin” built into the cover of your glue pen to keep the tip from clogging up! Use your finger to guide the pin back into the glue tip.

000_2477

I also used the “Fine-Tip Glue Pen” to attach my stars to the hat … can you see where the star’s came from?

000_2483

To create some fun on the inside of my card too, I used the “Confetti Star’s Border” punch and punched out a bottom border. I then used the stars to add color to my hat on the front.

I created my focal point by punching a 2-1/2″ circle of Elegant Eggplant behind my had. The hat is popped up with dimensionals to create some additional dimension.

Sounds like a lot of steps (not really) but it was super simple and fun to make…

000_2484

I hope you found my card wickedly cute! I have a lot more Halloween cards up my sleeve and can’t wait to share with you.

Thank you for hanging out with me!

Enjoy your day ~

blog-closing-small

TODAY’S STAMPIN’ SUPPLY LIST …

The items highlighted from the 2015 Holiday Catalog will be available to order / http://www.lindaluvs.stampinup.net on September 1st, 2015 / Here are the items from the current catalog …