
Hello my Stampin’ Friends!
How are you today! I am simply fabulous … and totally excited to share this card and some fun stampin’ tips with you! I know that I have been doing my “Fast -n-Furious” on Friday’s but the ideas for this card, just kept blooming ….
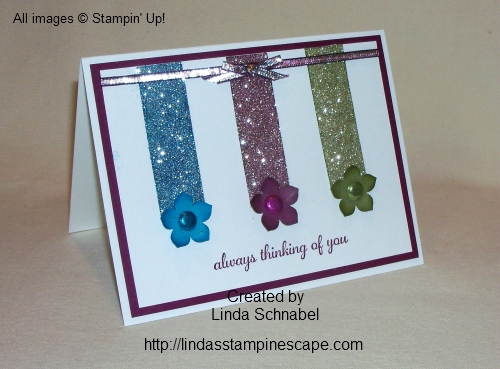
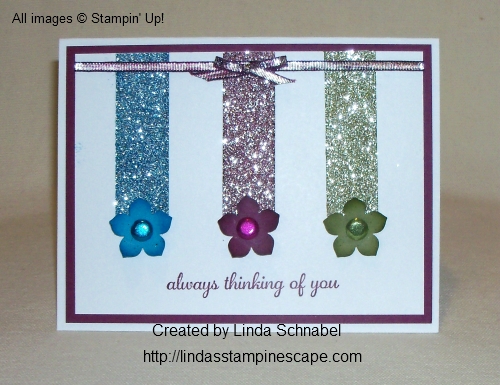
My idea was to show you a simple and pretty card showcasing the “Glimmer Brads” that are currently featured in our “Weekly Deals”. Punch 3 flowers with the Petite flower punch and put a coordinating color brad into it. That was my original idea.
Then I thought … oooh, wouldn’t it be pretty if I put some glimmer paper behind it? Aaahh … then I thought, why don’t I dye the silver glimmer paper to match the cardstock and glimmer brads! Hmmm … good idea!
Oh, but it didn’t stop there, I needed a ribbon! I have 3 bolts of the silver ribbon from the “Celebrate the Everyday” catalog … so I’ll use that! Hmmm… wonder if you can dye that too? Answer … YES! Yes, you can!
So … what do you think? Glitter lovers rejoice … all the shine without all the glitter mess. I will take you step by step through the card and share how I created it.
You will need the Silver Glimmer paper and Silver Ribbon, along with the bottles of ink refills to coordinate with your cardstock, Sponge daubers and the Glimmer Brads. If you do not want inky fingers … you may want so gloves too! LOL (I’ll post ingredients at the end, as always)
To dye the Silver Glimmer paper, I dampened my sponge dauber with water … it really helps move the ink around. It should be damp … not wet. Put a few small drops of the ink onto the glimmer paper and begin to “daub” your paper. You’ll be making the motion of a sewing machine … up and down with the dauber (You cannot slide the dauber across the glimmer paper) until the ink is spread evenly onto the paper. You can always add more ink … either to your paper or to the dauber itself.
Now that you have ink on your daubers, I gently brushed them on the ends of my punched flowers to create a bit more dimension. I then used my bone folder to slightly curl up the edges of the flower. I poked a hole in the center of my flower with my Paper Piercing tool and then inserted the coordinating glimmer brad.
To dye the silver ribbon … simply place your dauber over the ribbon, and pull the ribbon out from under the dauber. The ink on the dauber will dye your ribbon. Turn the ribbon over and repeat the process. It looks best when dyed on both sides.
Make sure you give the paper and the ribbon time to dry, otherwise you will get ink marks on your card base. If you have the new Stampin’ Up! heat gun … you can use the low setting to help dry it.
I hope you are as excited as I am to play with these fabulous techniques. I just can’t believe that I never thought of dying that silver ribbon before!! You know me, I love to dye my ribbons.
Watch for more projects from me using these dying techniques! Don’t be afraid to send me “your” creations (you can e-mail me a photo at: lindaluvs2stamp@aol.com
Thank you so much for sharing your day with me!
Have a fabulous Friday!!

JUST A NOTE: You will get the sale price when you purchase the Glimmer brads, even though it does not show here. The “Express Yourself” stamp set that I used for my card share today is a “HOSTESS” set which you can get FREE with an order of $150 or more.
Please let me know if you have any questions: lindaluvs2stamp@aol.com


