Hello Stampin’ Friends ~
Today I have a cute card that highlights the Reverse Masking technique. Usually we use masking to cover an image so we can stamp over it to create depth on our cards … today, we will use “reverse masking” to create a focal point on our card.
I used the Layered Square dies to cut out a “mask” to begin my card. The mask is secured onto my card front and prepared to sponge color in the “space” ….
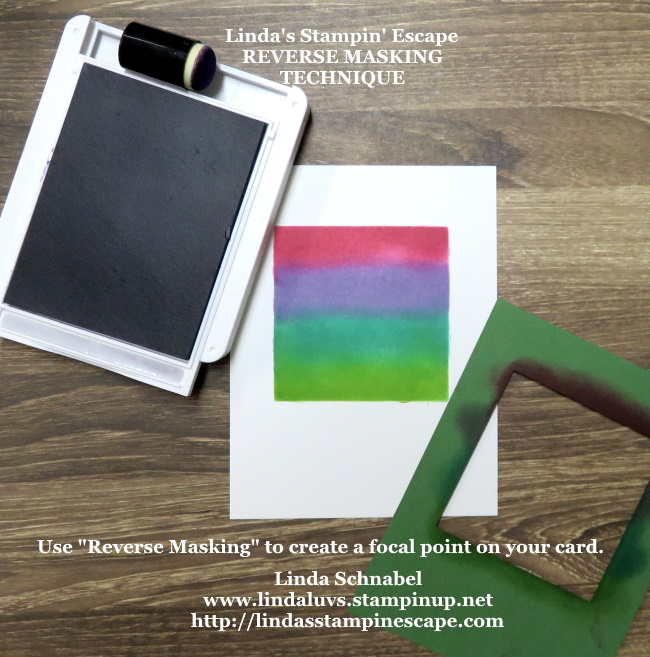
Once the mask is removed, you have a colorful focal point on your card front. You can do many things at this point and I’ll be showing some of those yet this week, but today ….
Our twist is to run it through your embossing machine. I used the Hammered Metal 3-D embossing folder … love the texture it adds to this card!

Now … with the crack of a handle we’re going to run the Well Written dies through the die cut machine to create our “friend” greeting and our hearts! Simple … Sweet … mount, Complete!

So with a simple reverse image, a little embossing and a die cut greeting, we have a cute card that was easy to make but will produce a big impact!
Thanks for hanging out with me today, stop back tomorrow and I’ll share another way you can decorate a this simple reverse image technique.
Have a great day ~

Here is a list of the ingredients used for today’s card … Click on any item for more information or to begin shopping. Thank you!