
Hello Stampin’ Friends ~
Today I’d like to share my technique video and three (3) cute cards with you today and the dimensions for cutting your cardstock!! This is a re-post but wanted to share it again as a reminder, and for my new subscribers … It’s soooooo cool!
I’m excited to share today’s cards and video with you … the FLOATING ELEMENTS Technique is really easy to create. With the help of an open die; like the oval … we created Easter Eggs!! Sit back, grab a cup of coffee and enjoy the video ~
So simple to create and aren’t they just the cutest!? With just one sheet of cardstock, some designer paper, your adhesive sheets and an “open” OVAL die you can create these cute Easter Egg cards. I’ll start with the one I made in the video …

In the video, I talked about the alignment of the pinks and how they draw your eye around the card, so I decided I was going to align my embellishments in the same way … that little bit adds so much texture to our card (even though the floating elements add texture as well). I also added a little bow to my butterfly which ties in the white and pink beautifully.
White Cardbase: 8-1/2″ x 5-1/2″ Layers: 5-1/4″ x 4″ and 5″ x 3-3/4″
Oval Dies and Foam Adhesive Sheet: Cut to 3″
Designer Paper strips: 3″ x 3/4″
The next card was our surprise card … this little beauty would be cute as a gift tag! I used the “subtles” designer paper on this one ~

I am going to be totally honest with you … I think the “Floating Element” looks better when we used the slightly smaller strips of the adhesive sheet; this way you cannot see the foam at all so it really appears to be “floating”.
I stamped my greeting directly onto the designer paper and accented it with another butterfly. This butterfly has a little “bling-bling” with the help of our Rhinestones.
During the video I talked about using the Adhesive Sheets with word dies, today I’m using the alphabet dies with the adhesive sheets and designer paper …

Just place your designer paper strips onto the adhesive sheets and align your alphabet dies onto it … I used a little scotch tape to hold down my letters, washi tape works nice too.

Once everything was secure, I ran it through my Die Cut & Emboss machine and created the card …
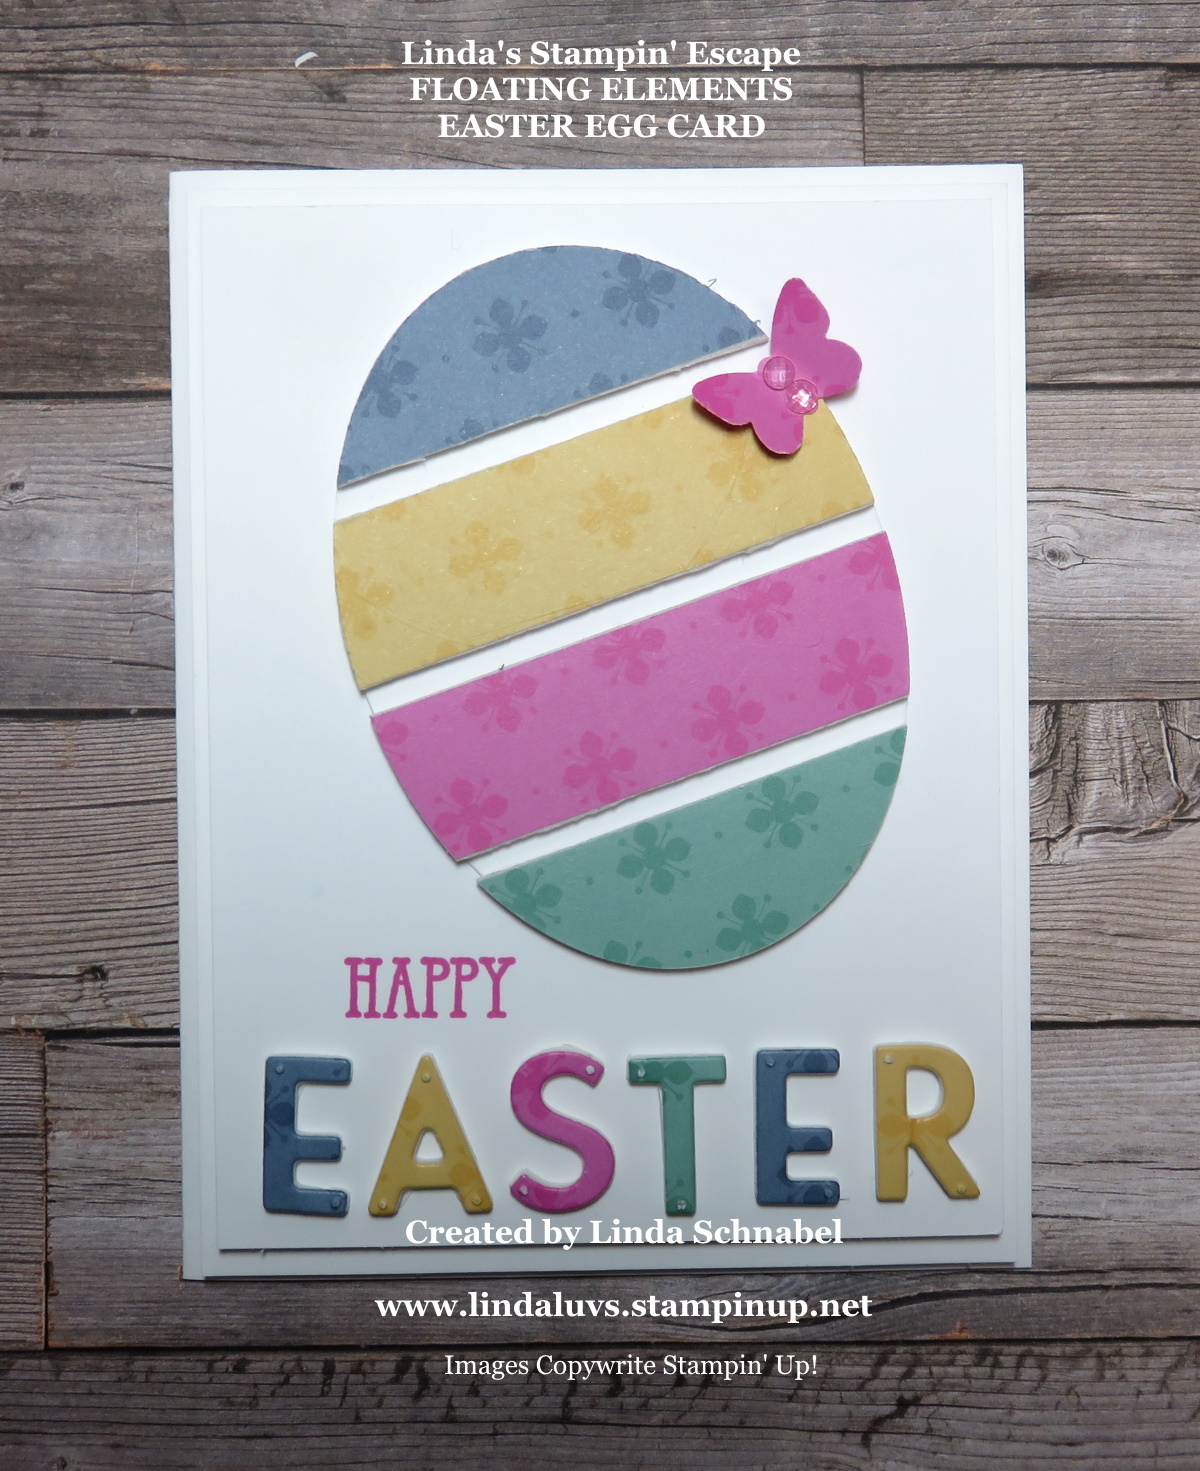
I added a little “HAPPY” to my Easter Card and another little butterfly to balance out the card and to finish it off nicely.
The Adhesive Sheets are a wonder … I love them, and now you know you can use them for much more than “popping” something up, you can create an entire technique around them … the Floating Elements Technique!

Thank you so much for hangin’ out with me today!
I hope your day is a good one ~


