Hello Stampin’ Friends ~
Just a quick reminder that I will be on my Linda’s Stampin’ Escape Facebook page LIVE tonight with my Technique Tuesday demonstration of “Reverse Masking” …


Hello Stampin’ Friends ~
Just a quick reminder that I will be on my Linda’s Stampin’ Escape Facebook page LIVE tonight with my Technique Tuesday demonstration of “Reverse Masking” …
Hello Stampin’ Friends ~
I hope you had a beautiful Thanksgiving with your family, and if you are outside of the US … I hope you had a wonderful day too! We don’t all celebrate the same holidays together but many celebrate Christmas so I wanted to share several cards that I have created from the “Wonder of the Season” Memories and More Card Pack ….
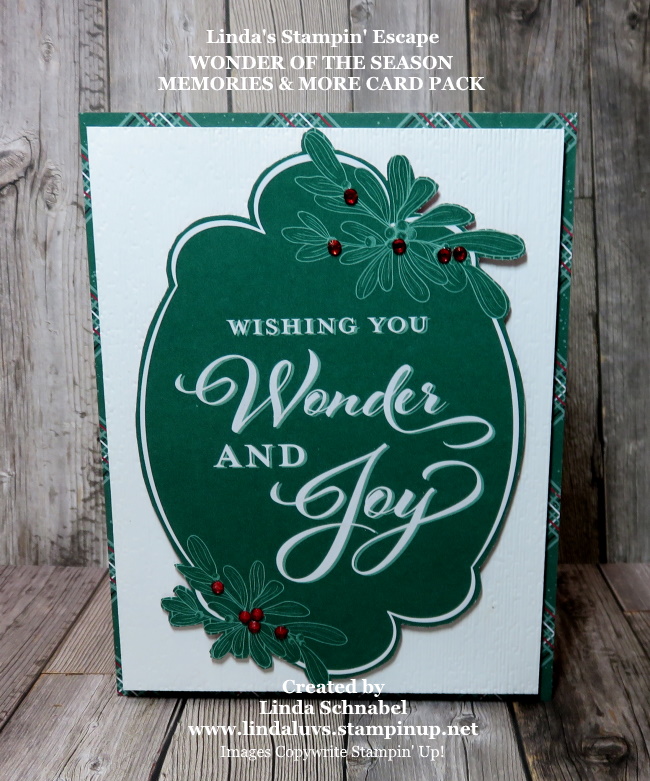
This card was created from one of the 4 x 6 inch cards … I cut out the design and it fit onto my card front perfectly!

My goal for sharing all of these together is so you can see how versatile using a card pack can be …
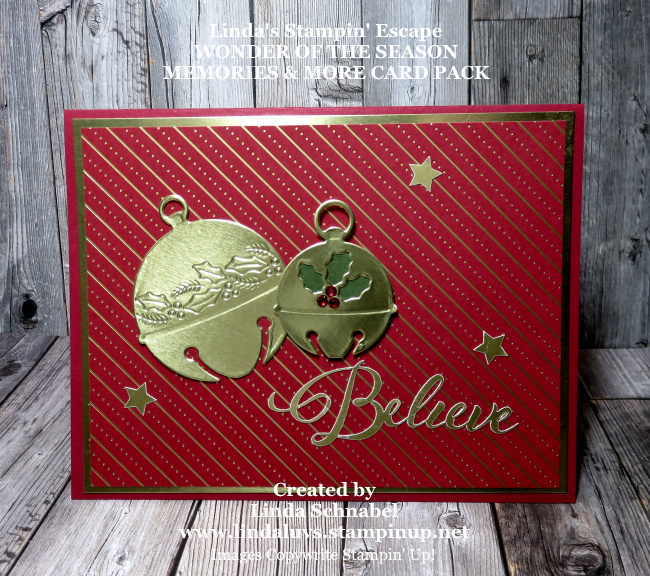
This is one of my favorites … I just trimmed down this pretty card that was red and gold, layered some gold behind it and cut out two of the bells from the Sounds of the Season Dies. The “Believe” and Stars come with the Card Pack!

More bells … these are printed right onto the card … I just trimmed it down, added Wink of Stella to the bells and Shimmery Crystal Effects to the berries and stamped on a greeting!!

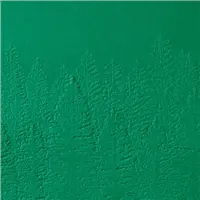
This cute little card uses one of the 4 x 3 inch cards. I simply added a mat to the back and embossed the Whisper White background with the Old World 3-D Embossing Folder …. for a “snowy” effect!
You can’t get much simpler than this … This is two of the same card!! On one side you get the holly background, and on the other you get the greeting, so I simply cut out the greeting on one card and mounted it onto the background card! Little wink of stella on the greeting and I was done!
Thank you for joining me today! I hope you have another wonderful day and stay safe.

Hello Stampin’ Friends ~
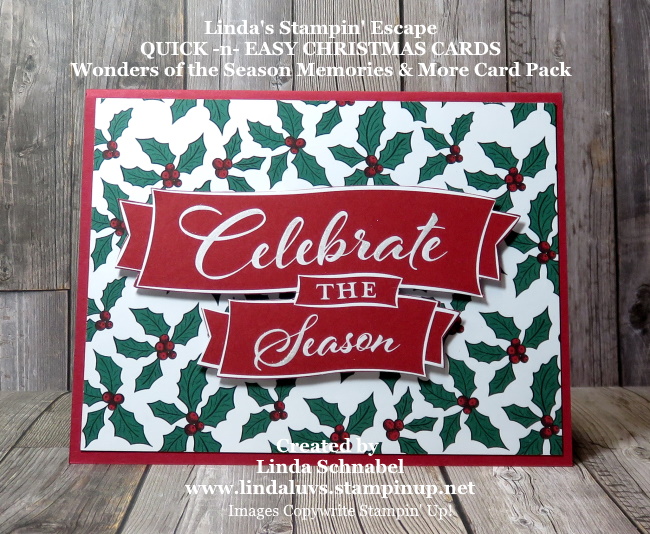
Ever need a Christmas card … FAST? It think we have all been there … so today I would like to share with you a Quick -n- Easy Christmas Card that I created with the Wonder of the Season Memories and More Card Pack.
I didn’t even have to break out the stamps and ink! This was just a little cutting and some stampin’ dimensionals…
I just took one of the small cards (4″ x 3″) and cut a piece of Shaded Spruce cardstock for a mat … that made the color in the center of the card pop.
I didn’t have to add the backdrop of Whisper White but I wanted a little texture and dimension, so I embossed it with the Old World 3-D Embossing Folder, and then mounted that to a Whisper White card base. SIMPLE … that is it!

There are so many different cards inside this card pack … perfect for quick cards, scrapbooking and even Christmas tags for your gifts!!
Enjoy the rest of your day, and I thank you for stopping by.

Hello Stampin’ Friends ~
I have an exciting announcement from Stampin’ Up! They are hosting a 24 hour FLASH SALE from the Annual Catalog (the real big one!)This sale is for ONE DAY ONLY … November 24th. Soooo … I will kick off my Countdown to Christmas Party in conjunction with this sale, this way you can qualify for the Prizes … please join us!

Stampin’ Up!s On Line Extravagonza is putting the ANNUAL CATALOG on SALE!!

There is a small list that is excluded, but that means the rest of the Annual (BIG) Catalog is yours to shop from at a discount. This sale does not include the Holiday Catalog.
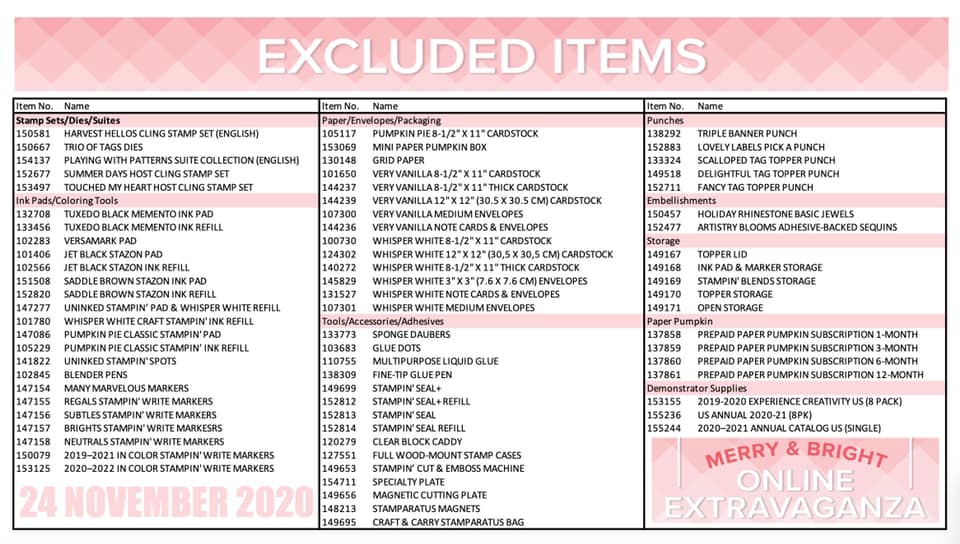
This is the PERFECT time to do your Holiday Shopping for the Crafter / Cardmaker / Scrapbooker in your family! And when you join the party, you could WIN some FREE Prizes as well. Why not have FUN while you SHOP …
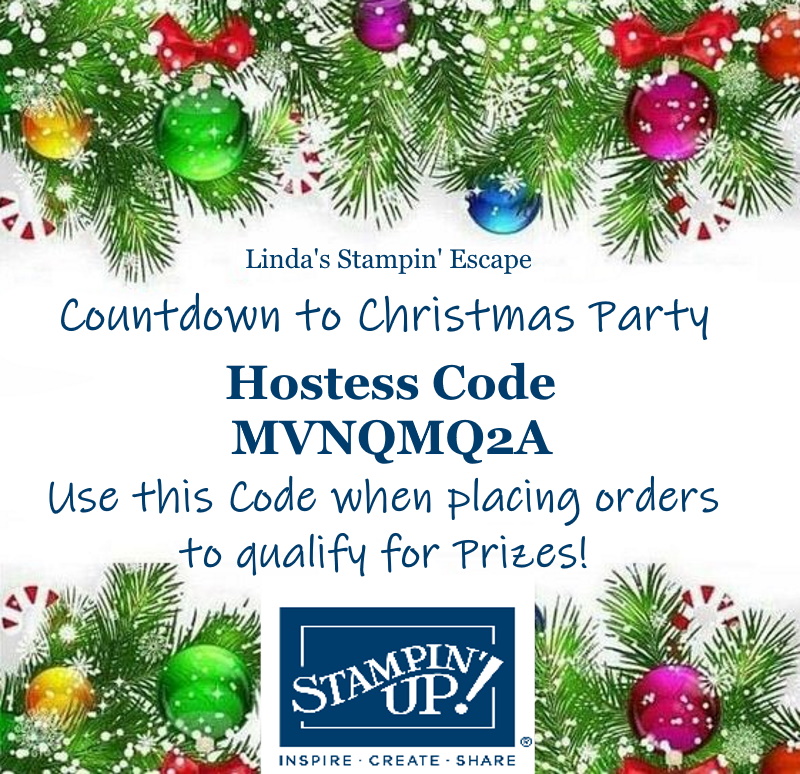
The party is on Saturday the 28th … but Shop Early on TUES. Nov. 24th to get in on the SALE prices, then join us Saturday for the FUN!
Hello Stampin’ Friends ~
Hope you have been doing good since I’ve seen you last. It has been a couple days but I have been partying with my stampin’ friends on Facebook. It was a blast and we’re ready to do it again.
I’m sharing a video today of one of the LIVE sessions, it features the Poinsettia Place suite …
I hope you enjoyed a little sneak peek into this fun filled weekend! If you missed it, let me know if you would like an invitation to my next “Virtual Party” … we will be celebrating Small Business Saturday and kicking off the Holidays!! You will also get in glimpse into the upcoming Mini and Sale-a-bration catalog!
I’ll be back tomorrow with a card share. Thank you for checking out my blog post today…. Hope your day is a good one!!
Hello Stampin’ Friends ~
I hope you are looking forward to a wonderful weekend relaxing, stamping or enjoying family or friends. I’ll have been having fun demonstrating LIVE projects, hosting fun games and getting to know my stampin’ friends even better during my Holiday Catalog Virtual Retreat Party … this will be held on Facebook from Friday, October 30th through Sunday, November 1st.
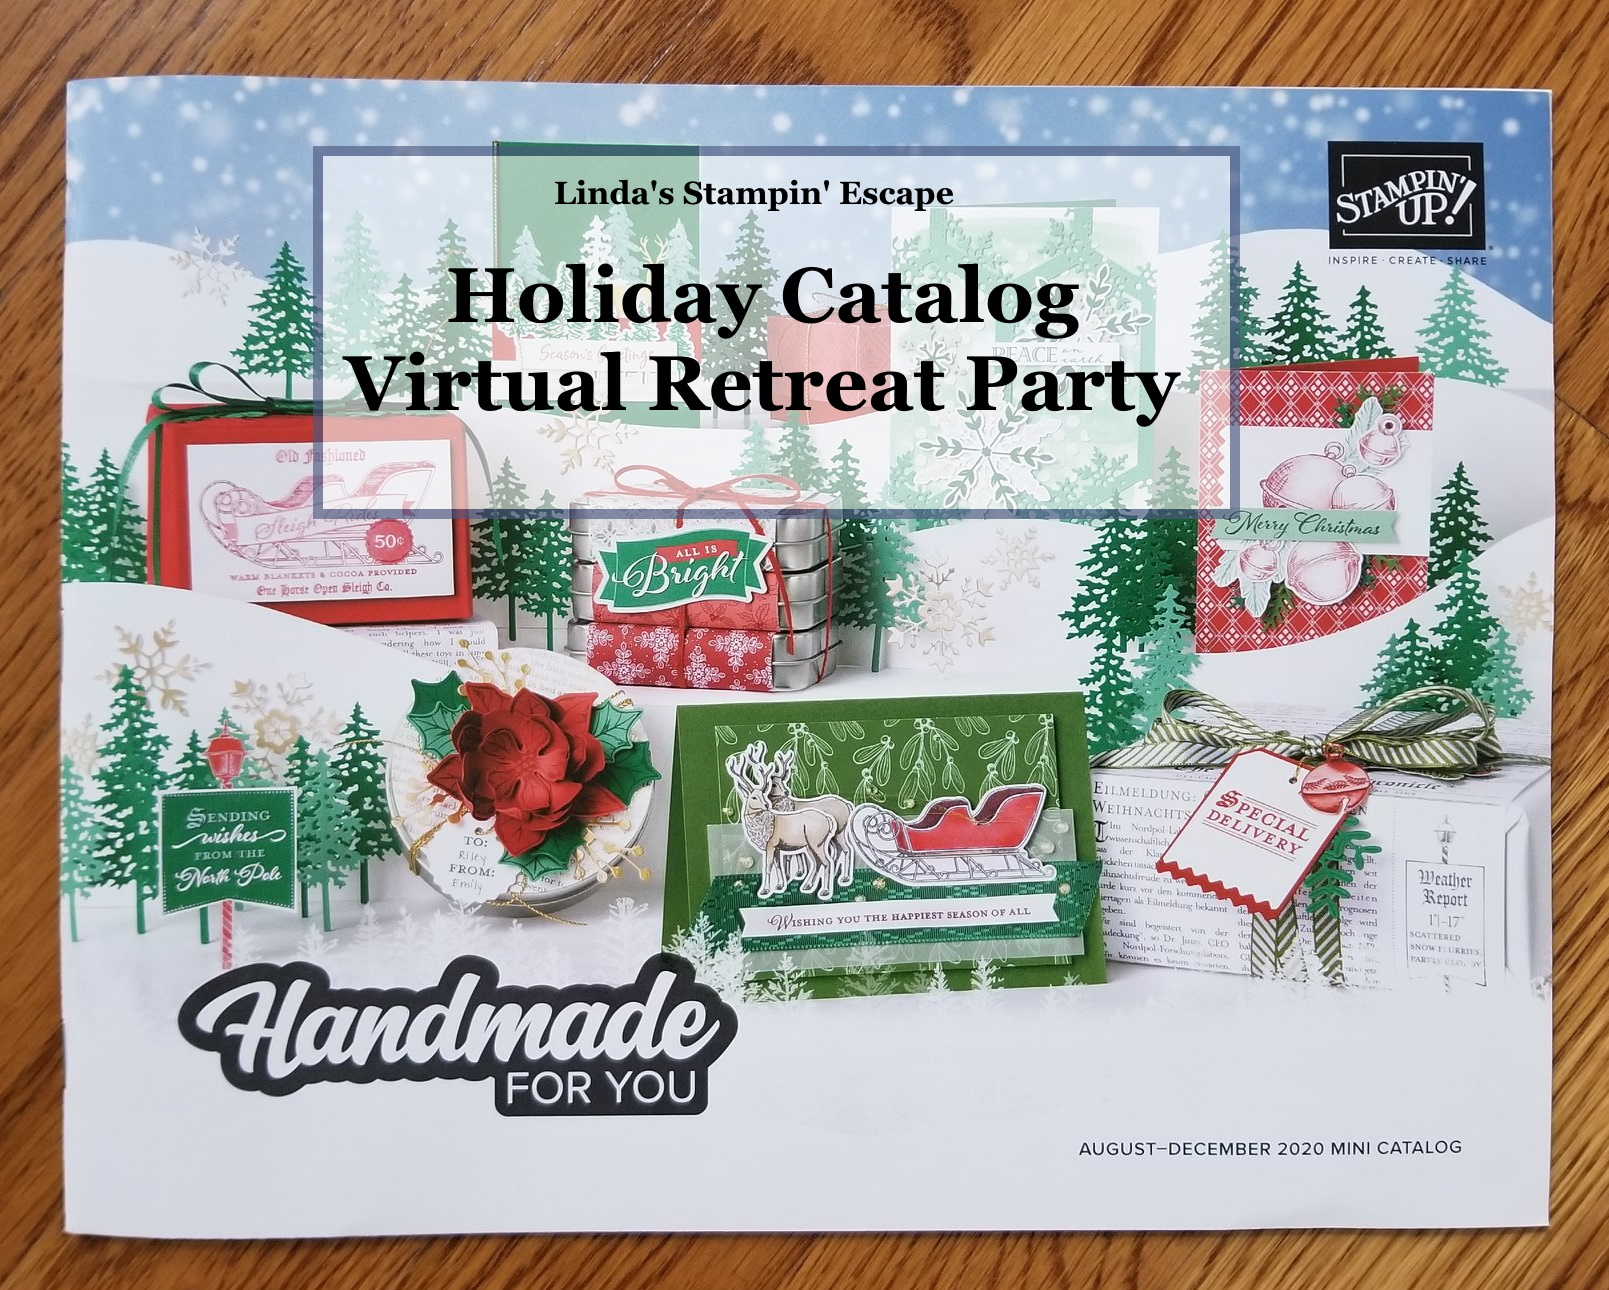
There will be plenty of FUN, Card samples and demonstrations, and Great Deals!! You should check it out!
If you would like to join in on the FUN … Copy this link: https://www.facebook.com/groups/1497489893793307/ and put it in the Search Box … then request to be a member! I would love to have you join us! It’s going to be a party!!
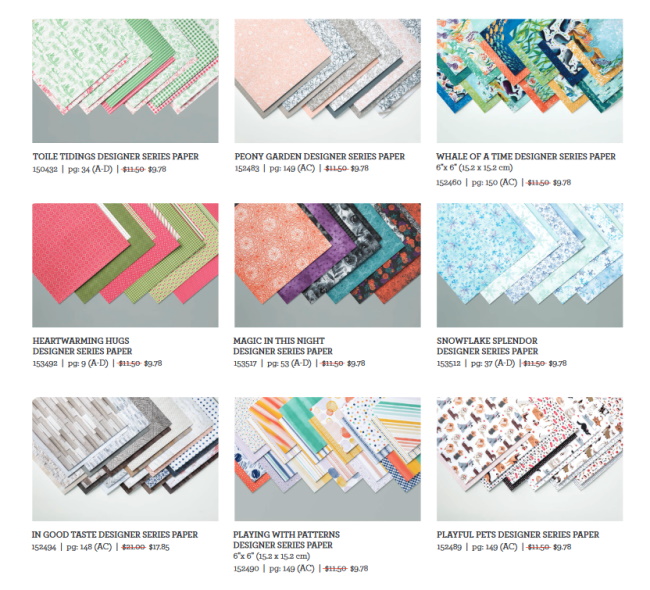
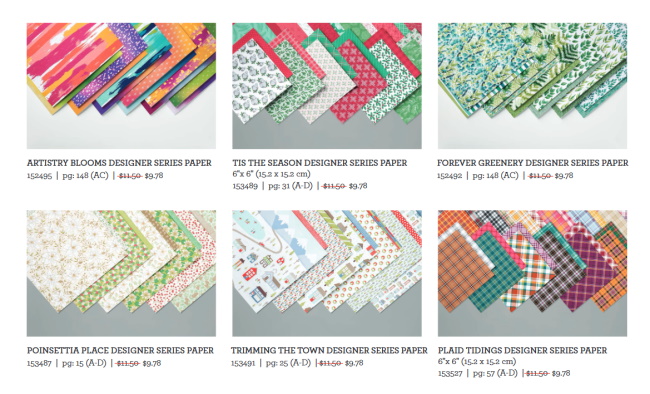
Tomorrow is the last day to order any of the 15 Designer Series papers that are on sale for 15% Off.
Thank you for the visit, meet you back here tomorrow with a fun project.
Hello Stampin’ Friends ~
I hope you had a wonderful weekend relaxing, stamping or enjoying family or friends. I have been having fun planning and preparing for my upcoming Holiday Catalog Virtual Retreat Party … this will be held on Facebook from Friday, October 30th through Sunday, November 1st.
I’ll be sharing projects with you here all week in conjunction with what I’ll be sharing before and during the Holiday Catalog Virtual Retreat Party.
If you would like to join in on the FUN … Copy this link: https://www.facebook.com/groups/1497489893793307/ and put it in the Search Box … then request to be a member! I would love to have you join us! It’s going to be a party!!
Thank you for the visit, meet you back here tomorrow with a fun project.
Hello Stampin’ Friends ~
Today I’m going to share the Video from my Tuesday night Facebook Live … Yes, I figured out how to upload it into today’s post. For those who could not make the live presentation, I thought you would love to see how easy it is to create the Window Sheet Card ….
I hope you enjoyed the video and the card! So easy to make and so fun to receive such a unique card. I would like to invite YOU to join me next Tuesday for another technique ….

I’ll be back tomorrow with another card featuring the Toile Greetings Designer Series paper … but it won’t be Christmas!!
Have a great day ~
Hello Stampin’ Friends ~
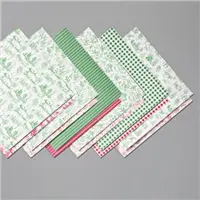
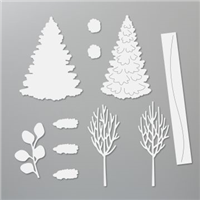
Today I have an adorable “Window” card to share with you that I created with the In the Woods Dies and the Toile Tidings Designer Series paper (Save 15% through Oct.31st, 2020).
I usually share my Technique Tuesday video with you today but I could not get it to download … but you can check it out on my Linda’s Stampin’ Escape Facebook page.
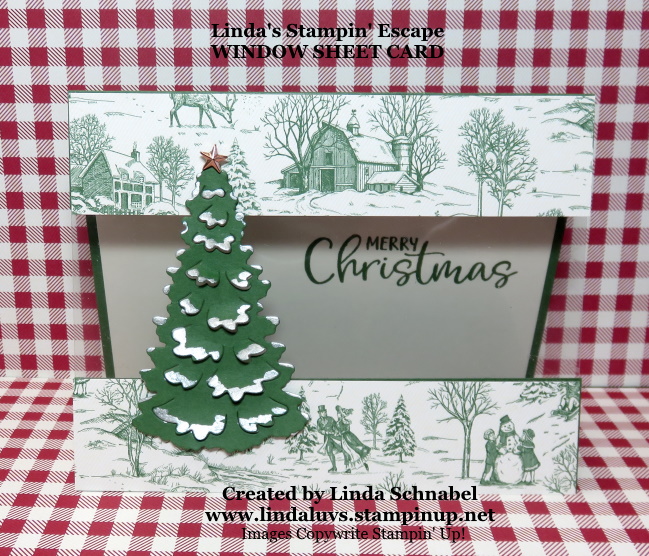
Let’s begin with dimensions: Start with a 6-3/4″ x 5-1/2″ piece of cardstock … I used Garden Green for today’s card. Your cardstock will sit into your paper cutter horizontally (or landscape). You will score at 4-1/4″ and cut at 5-1/2″ … this cut will leave you a 1-1/4″ x 5-1/2″ piece.
Your window sheet will be cut just shy of 5-1/2″ x 4-1/4″. Now, align the 1-1/4″ x 5-1/2″ piece that was cut off and align it with the bottom of your card. Sliding in your inside layer into your card, you can align it so you can stamp your greeting. The Merry Christmas comes from the exclusive stamp set enclosed in this months Paper Pumpkin.
Once the greeting is stamped and the cardstock is secured inside, we can align the window sheet to the top flap of your card. Then align the 1-1/4″ x 5-1/2″ piece to the bottom of the card, then secure the window sheet to it.
The Toile Greetings Designer Series paper will then go over the top and bottom pieces (covering them up) and the window will be securely in place … Now it’s time for our tree! The die cut tree is multi-dimensional, once we pulled the branches up, I painted them with Shimmer Paint.
Once the paint dries you can mount your tree onto your card. I did mine with the Mini Dimensionals but you could mount it directly to the card front. As far as our pretty star … that embellishment was voted on by my Facebook Live views last night.
I thank you for joining me today, have a good one!
TODAY’S STAMPIN’ SUPPLY LIST … If you liked the products used in today’s projects, I have links for you below. Just click on the item you would like more information on, or to begin your shopping. It will take you directly to my website. Thank you ♥
Hello Stampin’ Friends ~
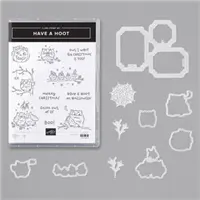
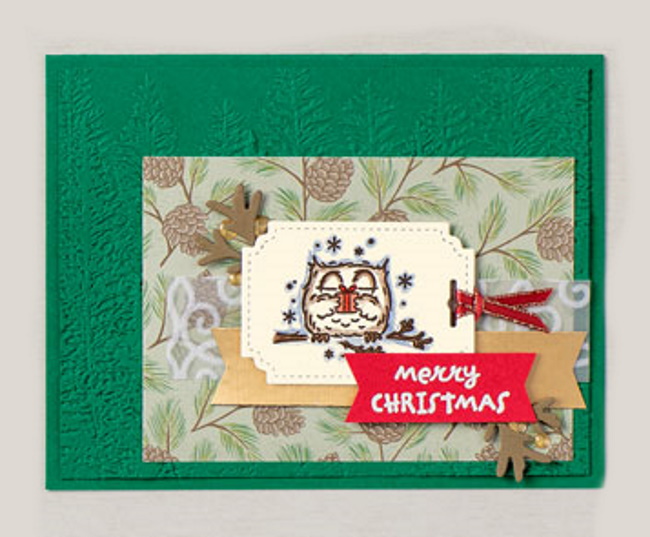
Today I’m going to share the “Have a Hoot” stamp set while showing a progression of simply stamping to the avid stamper who wants it all … These cards were created by the home offices of Stampin’ Up!
Let’s begin with our first card …

CASUAL
We kept things simple on the first version of this cute card. A few simple layers, a splash of color, ribbon, and a sentiment popped up using Stampin’ Dimensionals. This cheerful, little project takes just minutes to make and would be the perfect solution for a casual crafter workshop.
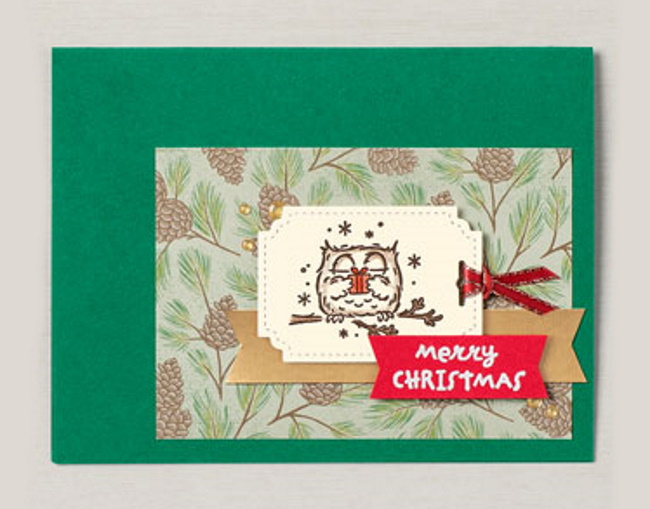
AVID
Step up the charming second card by running the tag through the Stampin’ Cut & Emboss Machine using the Peek-A-Hoot Dies for a stitched-edge look. Fold the gold-trimmed satin ribbon in half, insert the ends through the hole in the tag, then pull them snugly through the loop at the end of the ribbon. We added a little extra pop to this card with a layer of Poinsettia Place Designer Series Paper, some Gold Glitter Enamel Dots, and heat embossing.
STEPPED-UP AVID
Our fanciest card is a real hoot. We embossed the card front using the Stampin’ Cut & Emboss Machine and the Evergreen Forest 3D Embossing Folder, adhered die-cut branches, and added a strip of Plush Poinsettia Specialty Paper. Perfect!
Whoo wouldn’t love to have a Christmas cardmaking party featuring these cute, outdoorsy cards? We certainly wood . . . er . . . would! Ask me about a “Facebook Virtual Party”!!
I thank you for joining me today, hope your day is good one! Enjoy the kick-off to the weekend ~
TODAY’S STAMPIN’ SUPPLY LIST … If you liked the products used in today’s projects, I have links for you below. Just click on the item you would like more information on, or to begin your shopping. It will take you directly to my website. Thank you ♥
Hello Stampin’ Friends,
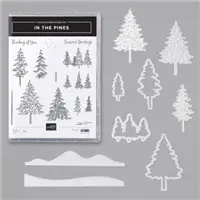
I hope you enjoyed my introduction to the In the Pines Bundle yesterday. This is such a pretty set and can be used for any occasion, who doesn’t love a walk through the pines! Here is a pic of yesterdays cards in case you missed them …

I also shared the directions for these cards yesterday. I love the sentiments on these cards and thought you would love them too! Here is the stamp set and coordinating dies ….

Time to share the beautiful card I have for you today … I’m not really looking forward to snow right now, but I wanted to share how versatile this stamp set is …
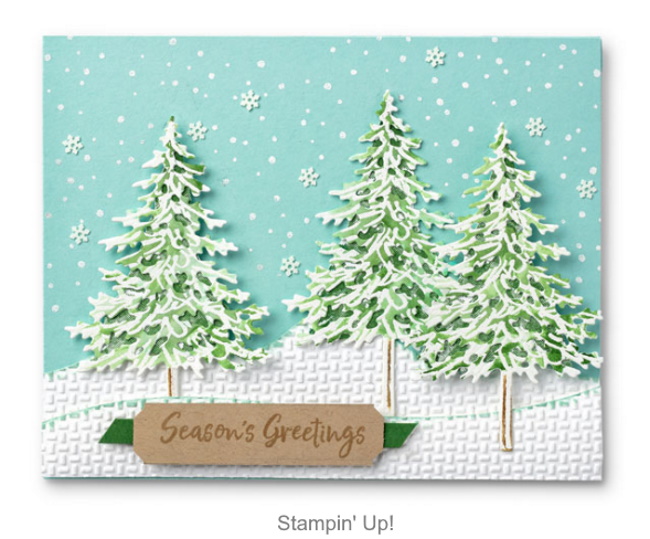
You will stamp the trees with the solid tree stamp and cut them out with the open tree die. On Whisper White, stamp the outline tree, emboss it with white emboss powder and watercolor the images with Mint Macaron …. when dry, cut the “detailed” peek through tree die.
They used the wrapped in texture embossing folder for the snow, and heat embossed the falling snow. The Snowflake Sequins add a lovely touch to the falling snow (background is Pool Party).
The greeting is stamped on Crumb Cake and punched out with the Lovely Labels Pick a Punch. There is a piece of Shaded Spruce behind it to make it pop! Such a pretty and serene card.
Thank you so very much for taking a stroll over to my blog today. I appreciate it and wish you a wonderful day today ~
TODAY’S STAMPIN’ SUPPLY LIST … If you liked the products used in today’s projects, I have links for you below. Just click on the item you would like more information on, or to begin your shopping. It will take you directly to my website. Thank you ♥
Hello Stampin’ Friends ~
Today I’ve got some cards from our Stampin’ Up! home office … cute and quick to make, you’ll fall in love …
BEAUTIFUL JOURNEY CARD
5-1/2″ x 4-1/4″

ADVENTURE AWAITS CARD
4-1/4″ x 5-1/2″

Cute right? And simple … Love these cards. Thanks for dropping in and checking out my blog today.
Enjoy this beautiful day ~
Hello Stampin’ Friends ~
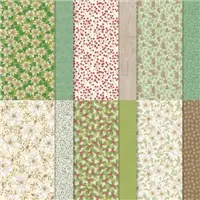
Today I’d like to share some cards that I have made with our “Forever Greenery” Designer Series paper … All week long I will be sharing samples with you that highlight some of the designer papers that will be going on sale Thursday, October 1st!

I will post a full list of the designer papers that are included in this sale tomorrow!
Today I’d like to start with the Forever Greenery Designer Series paper. This is the first package I opened up when I got my Annual Catalog pre-order in! The patterns are so pretty and so very versatile ….
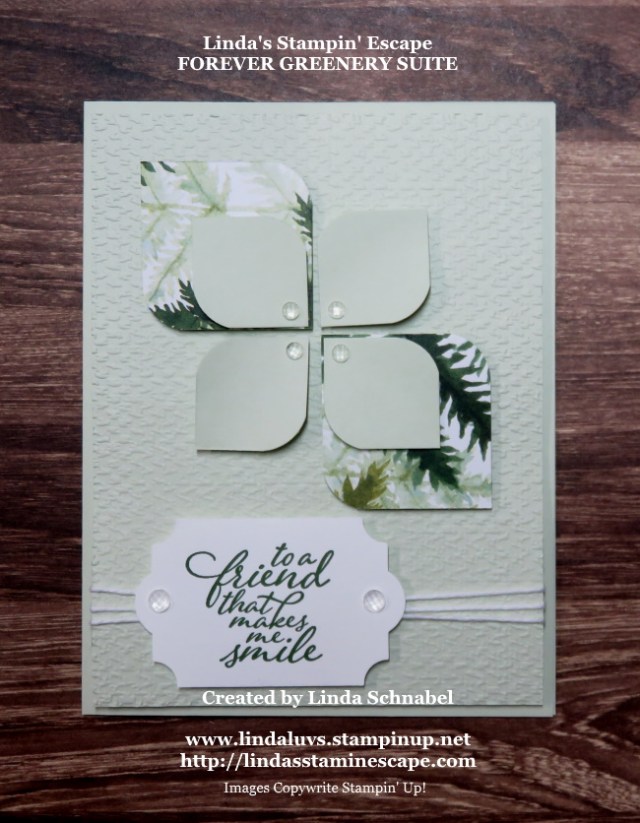
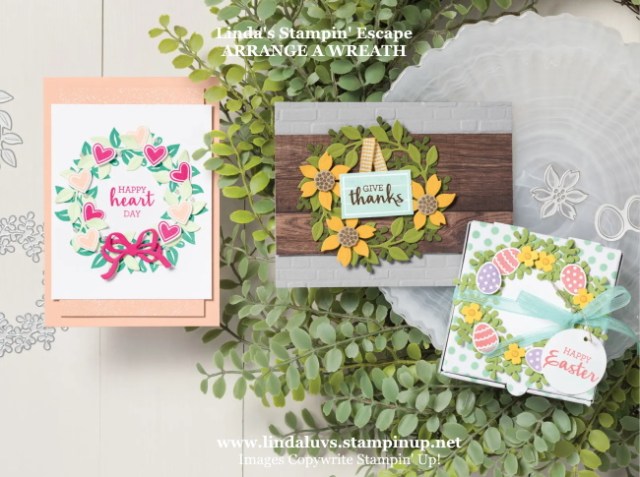
My first card here was just a fun play on using squares of designer paper … then you use your corner rounder on two opposite sides. Here is a version that shows how much layering there is ….

You can view the entire post by CLICKING HERE … you’ll learn more about this card and it’s assembly.
Next up is another pattern from the Forever Fern Designer papers …
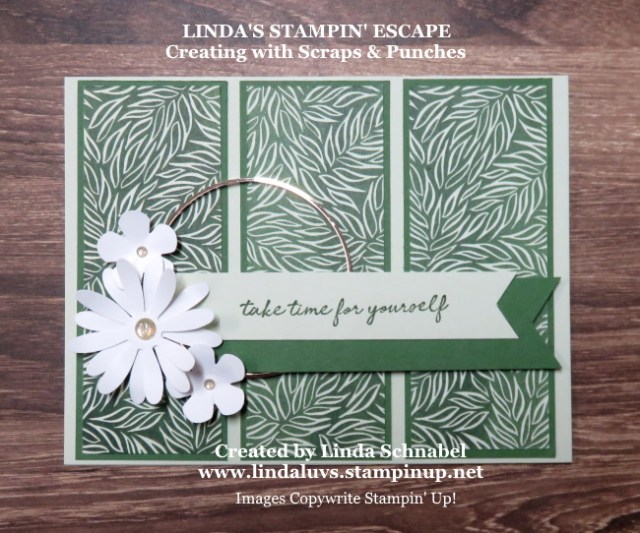
Click Here to view the original blog post for this card.
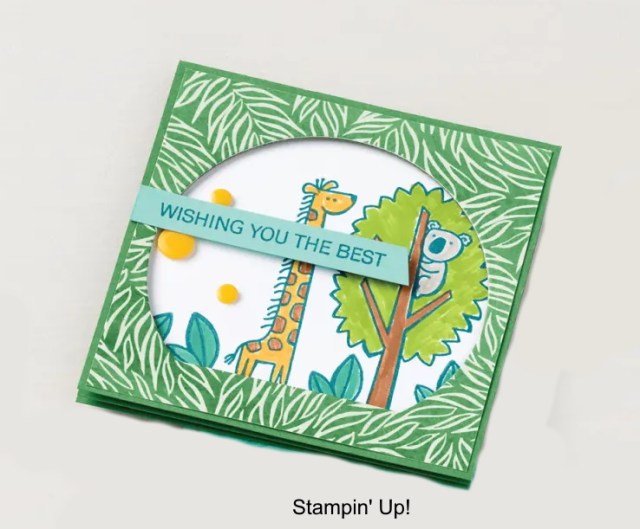
This is one of my favorites patterns because it is perfect for any type of card … male or female, this would also make the perfect background for a kids card using the Zoo Globe stamp set …
The Forever Fern Designer Paper was teamed up with the Field of Flowers bundle for this next card ….
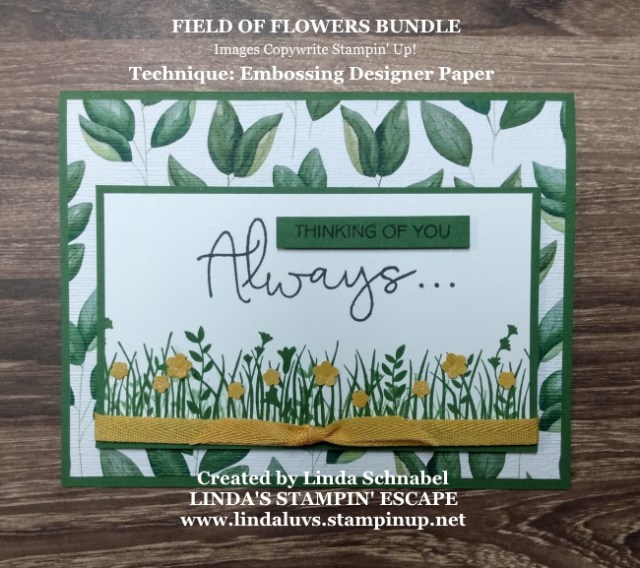
Did you know that embossing your designer paper can add a wonderful texture to your card and still provide the design you’ve wanted … it’s a Win, Win! I love this simple technique. Try embossing your designer paper – here I used the Subtle embossing folder. CLICK HERE to view original post.
I have more samples that I will be sharing on Saturday … many of the designer papers! Join me for my FACEBOOK LIVE Celebration of World Card Making Day!
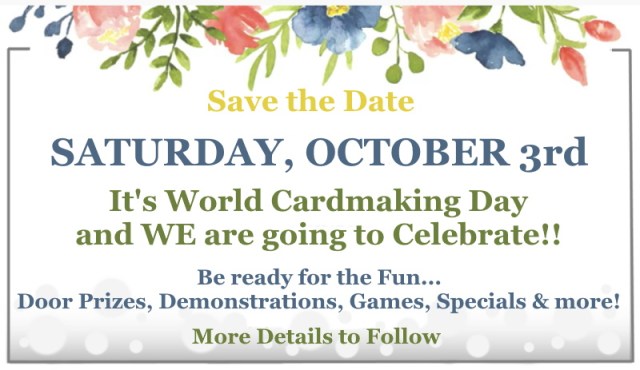
I will be hosting this ALL DAY EVENT this Saturday on my Linda’s Stampin’ Escape Facebook page … We’d love to have you join us!! Bring your friends. Gather in the comfort of your home, stamp with your friends and join me for my live presentations … I will have a schedule coming soon.
Thank you for joining me today!
Happy Monday ~
September’s seasonal kit includes double-sided patterned paper, a multi-occasion stamp set, and a variety of dainty die-cut designs—all in a special, collectible box! Make pretty packaging for tiny treats, add flair to a traditional fall card, or decorate your home with handmade autumn accents.
With this festive collection of fall-themed supplies, creating custom crafts for any autumn occasion is a piece of pumpkin pie. Whether you’re celebrating ghosts and ghouls, a day of thanks, or the staples of the season, celebrate your way with this month’s kit! To help you get started, take a look at this video.
They have such cute projects to make this month … check back tomorrow to see what alternative projects I’ve created with this kit.
Meanwhile the upcoming Paper Pumpkin ….

The Joy to the World Paper Pumpkin Kit has been thoughtfully released in preparation for the season of spreading joy. October’s Paper Pumpkin kit was designed to bring people together—connecting them with one another and spreading joy with each other around the world! With die-cut sentiments in English, French, and German, subscribers can send holiday cheer to their friends across the globe—in their language.
Let me know if there are any questions you have with the upcoming Paper Pumpkin … If your ready, you can SUBSCRIBE HERE.
Thanks for stopping by, see you tomorrow with my alternative projects!
To CASE (Copy and Share Everything) is something nearly every experienced papercrafter does on a regular basis. You see a card in our catalog, or on Pinterest, focus on something you like about it, then re-create it with your own spin. (Click on the Pinterest above to go to my page)
You can add layers or simplify the project, but the main point is to enjoy being inspired by the work of others. Our minds start working when we study and learn from a project someone else has made.
So pick up the catalog and look through the pages until you find something that really makes you want to pull out all your crafting supplies and start working. Copy the project, then use the following ideas to make it your own:
Thank you for stopping by today, I hope you found this post helpful. We all CASE … it helps inspire us, and that is my intention when I share my creations with you each day.
Enjoy the day ~