Embrace Spring with the Meandering Meadow Bundle

Hello Stampin’ Friends ~

As the blossoms bloom and the air fills with the sweet scent of flowers, it’s time to celebrate the arrival of spring in all its glory. If you’re seeking the perfect set to bring your floral fantasies to life, look no further than the Meandering Meadow Bundle.

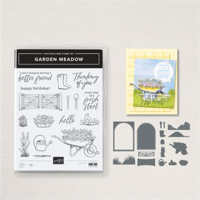
Picture this: a picturesque scene of a garden in full bloom, with a charming wheelbarrow overflowing with vibrant flowers, and a watering can ready to nourish the blossoms. That’s exactly the imagery you can create with the Meandering Meadow Bundle, and what I chose for today’s card …

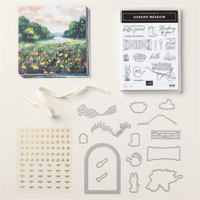
One of the highlights of the Meandering Meadow Bundle is its versatility. From creating whimsical garden scenes to adding floral accents to any project, the possibilities are endless.

What’s more, the coordinating dies make it a breeze to cut out your stamped images with precision, allowing you to effortlessly layer and embellish your designs. Whether you’re a seasoned stamper or just starting out, you’ll find that this bundle is both versatile and fun to work with.

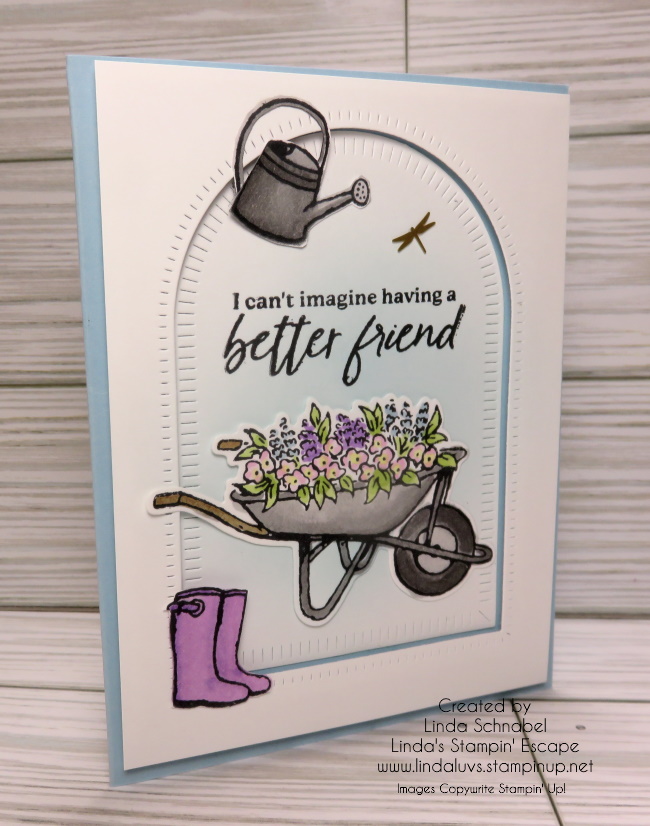
Using a basic layout, I used the die-cut arch included in the Meandering Meadow Bundle. This decorative frame adds depth and dimension to your artwork, providing the perfect finishing touch to your cards, scrapbook pages, and more. A touch of color behind the wheelbarrow to make it pop, using the Blending Brushes and Stampin’ Blends to seamlessly color our designs.

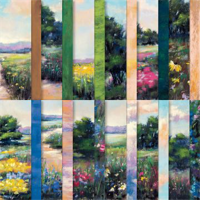
So, whether you’re crafting cards to send to loved ones or creating keepsakes to cherish for years to come, the Meandering Meadow Bundle is sure to inspire creativity and delight. Embrace the beauty of the season and let your imagination blossom with this versatile and charming set. I hope you were inspired to bring a little spring inside with the Meandering Meadow Bundle … there is a whole suite, and I know you’ll fall in love with the designer paper!

Thanks for joining me today,

Creating Fun Folds with Meandering Meadows Designer Paper

Hello Stampin’ Friends ~

Are you ready to add an extra dimension to your cardmaking projects? Let’s dive into the world of fun folds with the delightful Meandering Meadows Designer Paper from Stampin’ Up! In this blog post, we’ll explore two variations of the classic “Z” fold, showcasing the gorgeous patterns of the Meandering Meadows paper while minimizing leftovers.

I will also be sharing the dimensions with you for both cards. Both uniquely different, and both easy to make, beautiful and a joy to share. Let’s take a look at the Classic “Z” Fold….

  • Cardbase: 8 1/2″ x 5 1/2″ … Score at 2 1/8″ and 4 1/4″
  • Designer 6″ x 6″ Paper: Cut off 3/4″ from bottom (this depends on your design) Then cut into 3 – 2″ pieces. I like to keep them in alignment to show the beautiful paper design.
  • Basic White Cardstock: 2″ x 5 1/4″ to be used on right side for greeting / sentiment

Attach your designer paper and cardstock as shown below. The left sides folds like an accordion showing the first piece of your designer paper and your sentiment … what a lovely surprise when opened!

The second card uses the same dimensions and scoring of the card base, but we are adding a fun twist to it. You will still see the “Z” layout!

  • Cardbase: 8 1/2″ x 5 1/2″ … Score at 2 1/8″ and 4 1/4″ plus a 5 1/5″ x 4 1/4″ piece of coordinating cardstock
  • Designer 6″ x 6″ Paper: Cut off 3/4″ from top (this depends on your design) Then cut at 4″ … you will have a 2″ piece remaining. I like to keep them in alignment to show the beautiful paper design.
  • Basic White Cardstock: 4″ x 5 1/4″ to be used on the inside for greeting / sentiment
  • Attach 4″ piece of designer paper onto 1/4 sheet of cardstock. Close card base like a regular card, and at the score line, fold it back onto itself (creating the Z) and putting adhesive ONLY on the folded panel / attach the front of your card.
  • Attach the 2″ piece of designer paper onto the right side of the Basic White paper. Attach basic White paper to inside of card.
  • Stamp sentiment and embellish card as desired.

By incorporating the Meandering Meadows Designer Paper into these creative fun folds, you not only maximize the use of your paper but also create captivating cards that are sure to delight recipients. Head over to my online store to find these products under “Online Exclusives” and unleash your creativity today!

Hey, if you liked my cards today, don’t forget to give me a LIKE at the bottom of this page! If you need the product, head on over to my online store or just use the links below.

Thank you for joining me today.

FREE Tutorial Sunday! Biggest Wish Fun Fold Card

Hello Stampin’ Friends ~

Welcome to a Free Tutorial Sunday, where creativity knows no bounds and fun is always at the forefront! Are you ready to embark on a crafting adventure filled with and easy and innovative fold? Well, you’re in luck because today we’re diving headfirst into a world of paper crafting delight, fueled by the spirit of sharing and the joy of trying something new!

Let me introduce you to the Biggest Wish Thank You “FUN FOLD” Card

At the heart of today’s tutorial lies the captivating allure of the Biggest Wish Stamp Set and the enchanting charm of the Meandering Meadows Designer Series paper. These two crafting treasures are our companions on this journey of discovery as we explore this easy to make fun fold card and let our imagination run wild, so many different patterns to choose from.

Cardstock Measurements:

  • Blueberry Bushel Cardstock (card base):  5 ½” x 9 ¼”
  • Meandering Meadows DSP:  6” x 6” piece
  • Very Vanilla Cardstock:  5 ¼” x 3 ½”
  • Very Vanilla Cardstock:  Scrap piece for the sentiment

Instructions:

  • Cut a piece of Blueberry Bushel cardstock to 5 ½” x 9 ¼”.
  • On the 9 ¼” side, score your cardstock at 1 ½” and 2 ¾”.  Turn your paper 180 degrees, and score the other end of your cardstock at 1 ½” and 2 ¾”.  Fold and burnish your card base as shown in the top view of the pictures above.
  • Use a piece of 6″ x 6″ Meandering Meadows Designer Series Paper (DSP) to create the focal points for your card. 
  • Pay attention to the direction of the pattern in your DSP.  Cut off ¾” from the top or bottom of your 6″ x 6″ piece, depending on what part of the design you want to keep.  You’ll end up with a piece measuring 6″ wide and 5 ¼” tall.
  • Cut the 6″ x 5 ¼” DSP piece into three pieces.  Two pieces will be 1 ¼” x 5 ¼”.  The remaining piece will be 3 ½” x 5 ¼”.  If you’re using a DSP that has a continuing design, like the one I used, cut the 1 ¼” x 5 ¼” pieces from either side, leaving the 3 ½” x 5 ¼” piece from the middle of the design.
  • The 3 ½” x 5 ¼”DSP piece is adhered to the center of the card.
  • The two DSP pieces measuring 1 ¼” x 5 ¼” are adhered to the sides of the card, as pictured.  You could also turn these pieces over and adhere them to the sides of the card.  Some DSP designs work really well with this option since both sides of the paper coordinate well with each other.
  • Use the ¾” strip that you cut off your original piece of 6″ x 6″ DSP as decoration on the front of the card.  This strip helps bring the design together.
  • Use Blueberry Bushel ink and the thanks scripted stamp from the Biggest Wish stamp set to create your sentiment.  Stamp the sentiment onto a scrap of Very Vanilla cardstock.  Punch out the sentiment using the Heartfelt Hexagon Punch.
  • Before adding the sentiment, you may want to embellish your card a little.  Put a few glue dots in the middle of my DSP strip and lay some of the gold Simply Elegant Trim onto the glue dots.  This will allow you to shape the trim into a faux bow. 
  • The sentiment is added with dimensionals to give it a little more pop!
  • Finally, the cards needed some bling, right?!  Add a few of the gorgeous Brushed Brass Butterflies on the center panel of the card.
  • To add your message, simply cut a piece of Very Vanilla cardstock to 3 1/2″ x 5 1/4″.  Add that piece to the back of the center panel.

If you enjoy the tutorials and love fun folds and the Meandering Meadow Designer Paper, join me on Tuesday night at 6:30 on my Linda’s Stampin’ Escape Facebook page. I will be going LIVE with a great Fun Fold done two different ways!

Thank you for taking time out to visit … Enjoy your Sunday.