
Hello Stampin’ Friends ~
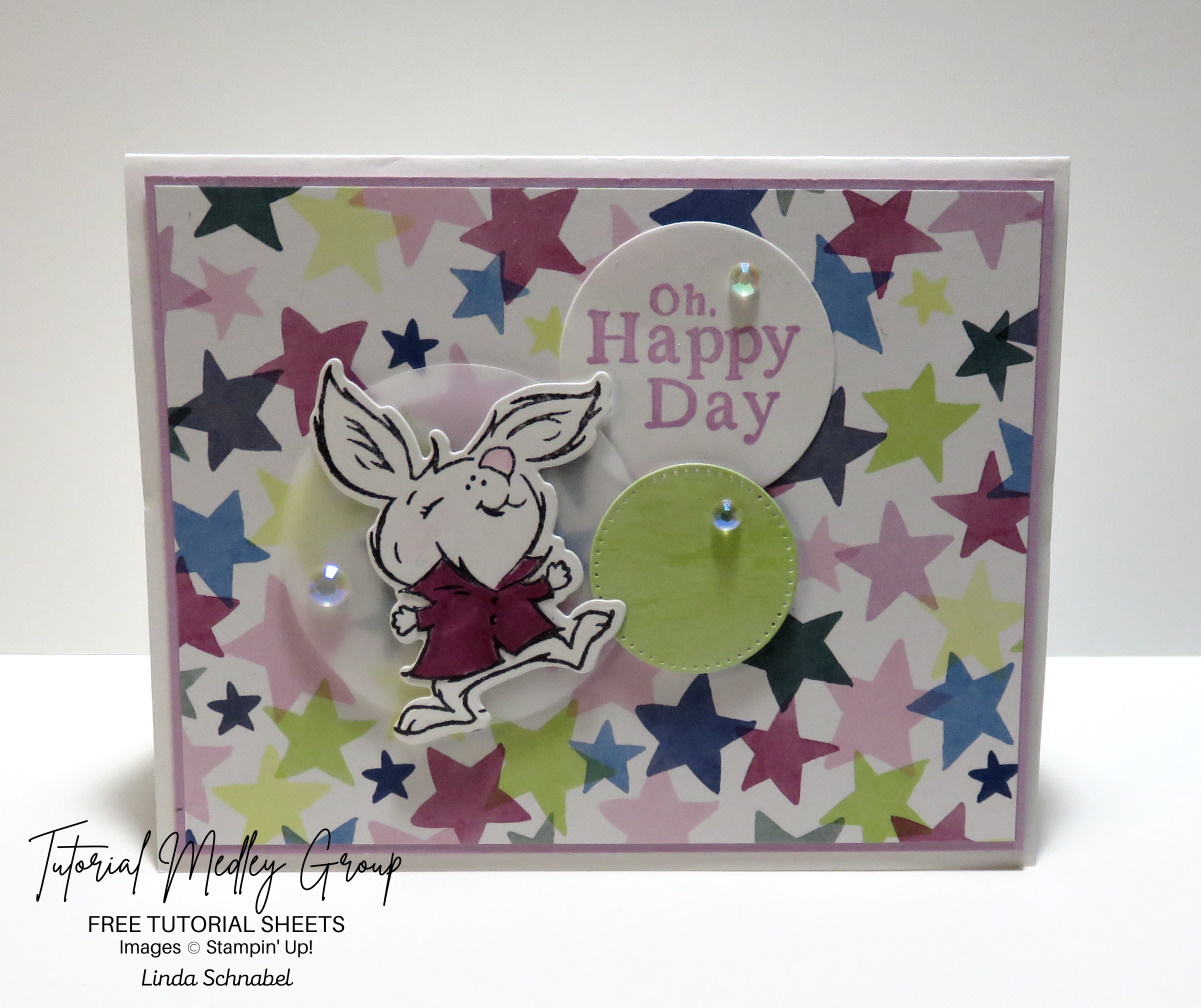
Bunny lovers rejoice!! Today I’m sharing my Oh Happy Day card; and it’s perfect for a kids birthday. I created for the Tutorial Group that I belong to … so, you will get not only the dimensions to today’s card but step by step instructions. Wooo Hoo!
Measurements:
- Basic White Cardstock: 8 ½“ x 5 ½” and 2 pieces of 3” x 2”. One for bunny & one for greeting.
- Fresh Freesia: 5 ¼“ x 4”
- Designer Paper: 5 1/8” x 3 7/8” and scrap of Lemon Lime Twist to die cut.
Instructions:
- Score your 8 ½“ x 5 ½” White Cardbase at 4 ¼“ then fold and burnish.
- Attach your Fresh Freesia cardstock to the front of your card base.
- Layer Stars Bright & Beautiful Designer paper on top of your Fresh Freesia.
- Stamp bunny onto one small Basic White in Memento Ink
- Color bunny’s shirt with Berry Burst Stampin’ Blends and the nose with the Bubble Bath Stampin’ Blends
- Die cut bunny
- Stamp greeting in Fresh Freesia and die cut with a medium circle die
- Die cut Lemon Lime Twist Designer Paper with smallest circle die
- Die cut Vellum Cardstock with one of the larger circle dies
- Attach Bunny directly onto die cut Vellum Cardstock circle
- Using dimensionals “behind” the bunny, attach to card front
- Align greeting by tucking a small area under vellum and secure directly to card front.
- Using Dimensionals, attach small Lemon Lime Twist circle onto card front
- Embellish card with 3 Iridescent Rhinestones
Thank you for joining me today … Hope this card brought a little light into your Monday and some inspiration too.
Have a great day ~


