One great layout … Two beautiful cards!

Hello Stampin’ Friends ~

Today I’d like to share one of my favorite “quick -n- easy” card layouts that gives you that WOW look, without all the work! You’ll love the ease … they’ll love their card!

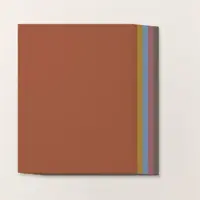
Ready for some fun!? Let’s begin with the card base … Start with a piece of 8 1/2″ x 4 1/4″ cardstock (I will supplies colors later when I share the cards) Score and fold at 4 1/4″. This give you a 4 1/4″ x 4 1/4″ square base. This means your inside piece and the designer paper on the front is 4″ x 4″. I love this dimension for my designer paper because it means you get 9 fronts from one sheet!!

Now here’s where the magic really starts to shine! Once you’ve created your base layers, it’s time to add a die-cut shape to the top half of your card. This simple step transforms your layout from “pretty” to “WOW!” in just seconds.

Just be sure your total card height stays within 5-1/2″ so it still slips perfectly into your envelope. Trust me—once you see how easy these are to make, you’ll be making these all the time!

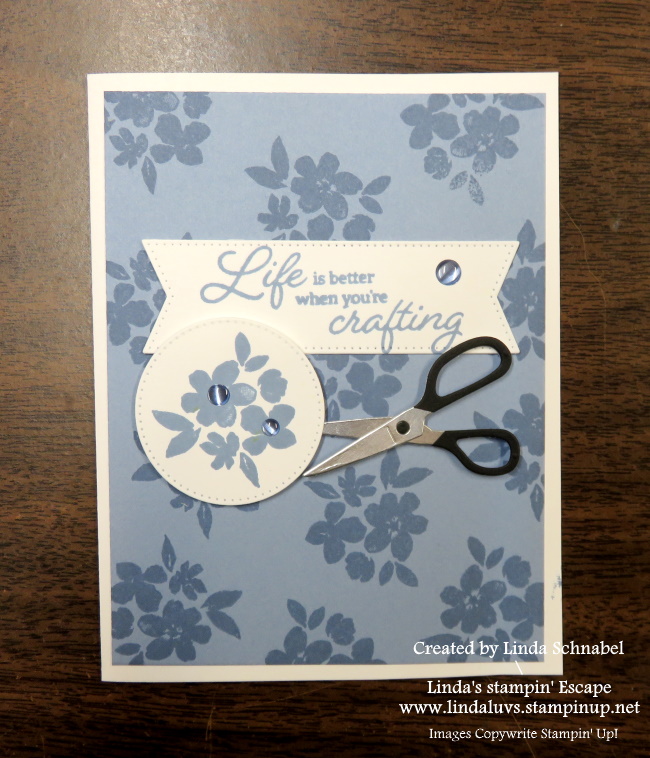
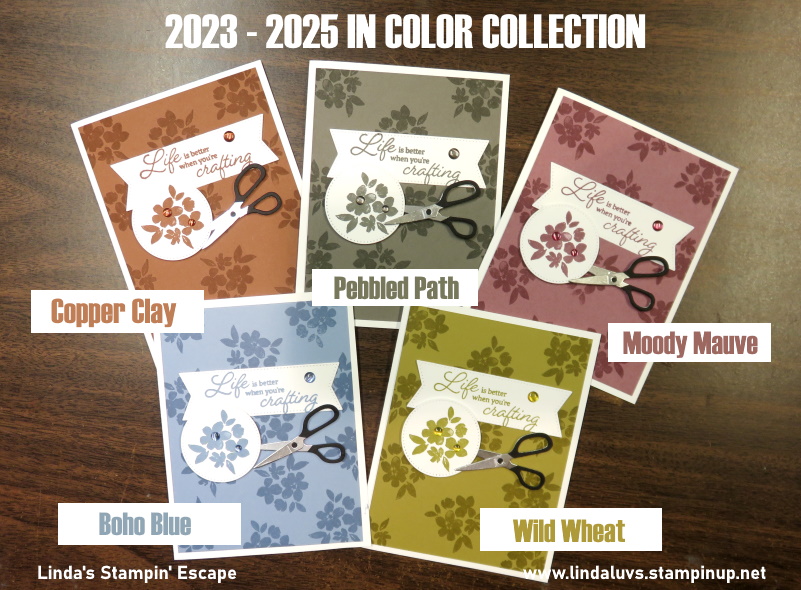
Circles are hands-down my favorite die-cut shape to play with—they’re classic, clean, and instantly eye-catching! On our first card, I paired the Stylish Shapes dies with the Spotlight on Nature die, and oh my goodness… that combination creates the coolest rugged, textural look! If you want to step up your layers like I did on the card (verses my instructions above), just trim your Calypso Coral cardstock to 4″ x 4″ and your Beautiful Gallery Designer Paper to 3-3/4″ x 3-3/4″.

From there, I stamped the florals from the Gallery Blooms Bundle, colored them with Stampin’ Blends, and die-cut those beauties to tuck around the circle. Those little floral clusters pull the whole design together and make the focal point pop!

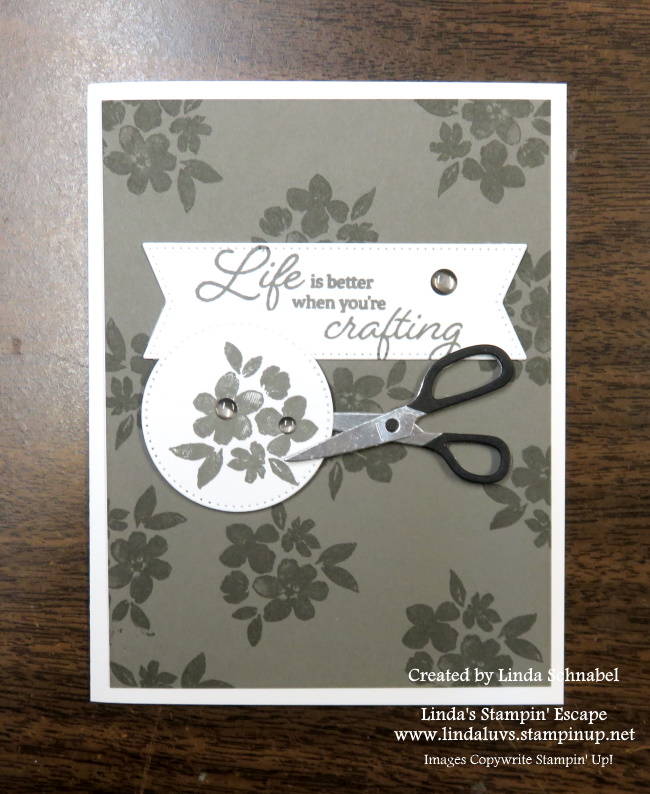
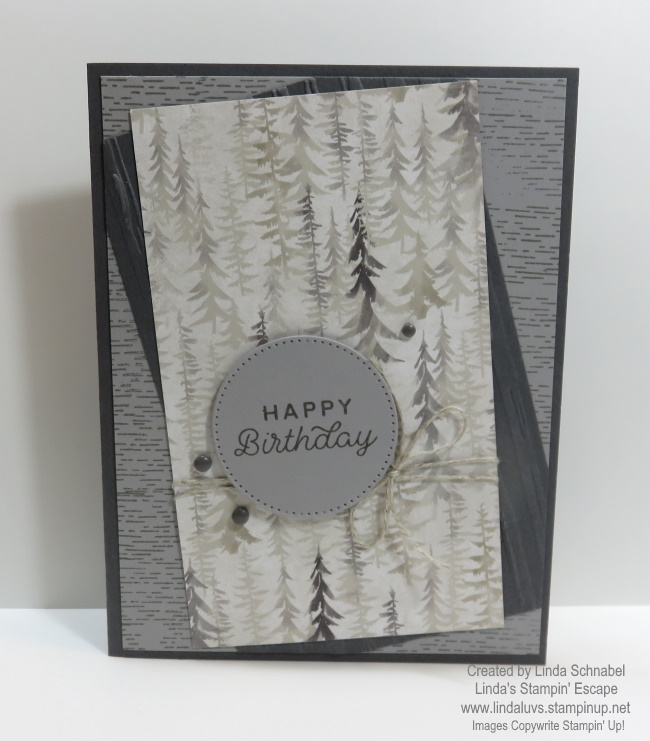
But here’s the fun part about this layout… you don’t have to stick with circles! Let your creativity run wild with any of Stampin’ Up!’s amazing layering dies. For my second card, I reached for the Everyday Arches Bundle, and it completely changed the feel of the layout—same concept, totally different vibe.

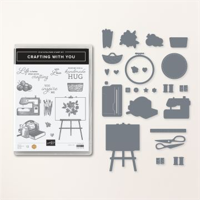
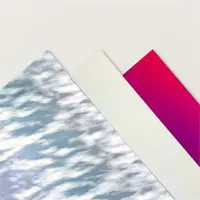
One of the stars of this card is the Everyday Arches Bundle from Stampin’ Up!. This versatile bundle includes a clean and elegant 13-stamp photopolymer set along with 10 nesting arch dies. The stamps feature heartfelt sentiments in graceful arched shapes—perfect for encouragement, friendship, or thank-you cards. Now pair it with the Everyday Skies 6″ × 6″ paper … an absolutely dream! One side features hand-painted cloudscapes, evoking sunrise, sunset, or the calm of an overcast day, while the other side offers more subtle, all-purpose patterns. Even better? The Everyday Skies DSP is on the Last Chance list and currently discounted to $8.75, so this is a fantastic time to grab it before it’s gone.

I’m absolutely in love with how this layout comes together — it’s clean, but with so much personality. Like I said, it’s one of my favorites, and you can see how this one pattern can looks so differently when changing out dies and papers!

If you’re looking for a layout that’s both powerful and effortless, give this one a try. Thanks!

Let’s Make a Great Impression! 🌻

Hello Stampin’ Friends ~

Today’s blog post is all about texture, dimension, and one absolutely gorgeous sunflower! I’m thrilled to spotlight two cards featuring the Sunflower 3D Embossing Folder, one of the newly released Online Exclusives. So many of you reached out and told me this was a product you were excited to see in action—and I can definitely see why!

Both of today’s cards use simple, approachable techniques that anyone can try—yet they pack a serious WOW factor. Whether you’re a beginner or a seasoned stamper, this folder is going to bring a touch of nature’s beauty to your paper crafting in the most elegant way.

The first card is simply layering cardstock colors to create an impact, and what better colors to use on this 4th of July weekend … than Red, White & Blue!! (Real Red, Basic White, and Blueberry Bliss that is!)

This embossing folder is stunning. It creates such a bold, detailed impression that you almost don’t need to add anything else—but of course, I couldn’t resist playing around with and really let that sunflower shine.

Besides the Sunflower 3D Embossing Folder, I used the Right Words stamp set, and the Stylish Shapes Dies. I wanted to use minimal products so you could easily recreate these cards.

If you’d like to see the magic of creating this simple card … join me on my Linda’ Stampin’ Escape FACEBOOK page on Tuesday Night, July 8th to see me create this card, and another fun technique! Just click on the link and then FOLLOW ME and change your notifications to “all” so you don’t miss a thing!

Are you imagining the possibilities. From heartfelt vibes to late summer sunshine, the Sunflower 3D Embossing Folder adds warmth, charm, and texture to any project. Have you grabbed this folder yet? Or is it still on your wish list? …. I have a fun promo going on this month – a drawing for a cute Strawberry Slush colored TOTE! For each $50 spent (before Ship/Hdlg) your name will go in a drawing to be done on Friday, August 1st!

Happy stamping,
Linda 🌻

What’s YOUR favorite NEW 2023-2024 In Color?

Hello Stampin’ Friends ~

Now that you have had time to play with the NEW 2023-2024 In Colors…. Which new In-Color is YOUR favorite?

Here you can get a close up look at them. I am using the New “Crafting with You” bundle … wow, this is fun to play with. I have much more playing to do!! lol

Let’s begin with the Boho Blue …

Each of my cards are made exactly the same so you can get the “real” effect of the color! I began with a Basic White base and then I stamped onto my In Color card front (Boho Blue) with the coordinating In Color ink.

The next card is the Pebbled Path ….

After stamping the “color on color” (which is an old technique I still use a lot) I stamped the In Color floral piece and greeting, both of which are from the “Crafting with You” bundle.

Next up is the Moody Mauve ….

Once I had the greeting and flowers stamped onto the white in the coordinating ink, I die cut them using the Stylish Shapes dies. These dies are so versatile and a must have in your stamping supplies.

Speaking of die cuts, let’s take a look at that adorable scissors ….

This little cutie is pretty easy to make. I die cut one out of Silver Foil and a second set out of Basic Black. Using my Paper Snips as an example, I cut the black handle part to look like my Paper Snips!! I then used the Liquid Glue to attach the black scissor tops .

A Glue Dot was used to hold the two pieces of the scissors together and then I popped the little black circle into the circle area of the scissors. Easy peasy!

Next up is the Wild Wheat ….

Not one of my favorites to start with, but I appreciated it much better when using it with the Designer Papers that coordinate with this color! Who knew!!

The last of my 2023-2024 In Colors is the Copper Clay …

I love this color, it’s so pretty and we were in need of a rich earth tone! Now, to finish off my cards, I used the 2023-2024 In Color Dots … I wanted to show you how beautifully they coordinate with the cardstock and ink.

Which of the NEW 2023-2024 In Colors is YOUR favorite. I’d like to know, and you can just leave your answer in the comments below. Thank you.

I have a list of supplies for you below, including the “Multi-packs” of the In Colors for your convenience.

Thank you for sharing a part of your day with me.

Simply Sunday: Birthday Greetings

Hello Stampin’ Friends,

Today I’m going to share a warm and natural card I created for a birthday and I am using the One Horse Open Sleigh designer paper. This pretty woodsy pattern is just to beautiful not to use it for as many occasions as you can think of.

I used the grays for my base and background; Basic Gray and Smoky Slate so the brown tones in the designer paper would shine through. The Smoky Slate cardstock was stamped with a design you can find in the Gone Fishing stamp set … I think it makes the type of lines you may find on a White Birch tree.

On the Basic Gray mat, I embossed it with the “stripes” from the Stripes & Splatters 3-D embossing folder to give the card a wonderful texture and looked like bark to me.

I stamped the greeting in Basic Gray onto Smoky Slate and then die cut it using the Stylish Shapes Circle die. I used the Linen Thread to add a natural embellishment to the card, and then secured the greeting over the top using Stampin’ Dimensionals. This added some dimension to the card.

Also adding dimension and texture were the Classic Matte Dots in gray that I enhanced the greeting with.

I love the soft tones of the Once Horse Open Sleigh designer paper and how the added little touches to this card really tie it all together. And it is very gender neutral with these colors.

Thank you for taking time out of your Sunday to stop and visit with me. I will share a Christmas card with you tomorrow using this same pattern of designer paper. Till then, enjoy the rest of your day.

Do You Believe?

Hello Stampin’ Friends ~

I have been sharing cards the past several day using the Stargazing Suite / Reach for the Stars bundle but Did You Know that TODAY is world UFO Day!! My timing couldn’t be better … LOL

There used to be quiet a stigma around believing in UFO’s however the latest survey states 65% believe their is life beyond us … Men are more inclined to believe in extraterrestrial life — 70 per cent versus 60 per cent of women. More than three-quarters of people under the age of 30 are believers versus 57 per cent of those over 50 years old.

Meanwhile, I’m just having FUN making cards, and I created a UFO just for this day. I used the circle die from Stylish Shapes because it added texture, then I die cut the larger of the rings, both were die cut from the Holographic paper ….

I cut the exposed circle from the bottom as I wanted to make it look like a spaceship and not a planet with rings! I then added 3 windows, also known as the Black Square Brads! If I was to do my windows over, I would follow the line of the ring instead of being straight across.

I die cut three flames that power my UFO from some of the 1/2 planets on the designer paper.

My greeting comes from the Layered Leaves stamp set and was die cut with the banner from Stylish Shapes. I also cut a mat for behind it. Both the mat and the card base are Blackberry Bliss … YES, you can use colors that are not listed on the coordinating color list for your designer paper. The Blackberry really pulled the darker shades out.

The mat to my designer paper is the Holographic paper … but before I glued down my designer paper, I cut that UFO and stars out first. I don’t want to waste any of that cool specialty holographic paper … I use up every bit. Needless to say, I have lots of extra stars! I used some on this card.

So …. What do you think? Did I nail it? Does it look like a UFO? I have to say, playing with this suite has taken my mind to places I normally don’t think of when stamping … it’s FUN!

Speaking of fun, hope you are having some this weekend!

Thank your for popping in today.

Please Note that the Designer Paper is NO Longer on sale … Sale ended 6/30 however this blog post was created prior to the end of the sale.

Congratulations … It’s a Girl!!

Hello Stampin’ Friends ~

It’s so exciting when we are blessed with a grandchild or a “great” … they just fill our hearts. So today I made a quick & simple Congratulations … It’s a Girl card. It would be just as easy to make an It’s a Boy card too because I’m using the Bright & Beautiful Designer paper!

This is the same designer paper I used yesterday and WOW, this pack has 48 – 6″ x 6″ sheets with 12 different patterns. This is the perfect party pack with the watercolor washes, stripes, stars, confetti, and more, you will be able to create cards and more for any occasion.

I started with the Bubble Bath base (8-1/2″ x 5-1/2″ scored and folded at 4-1/4″) and then chose my designer paper to match … I thought the one with the little pink bubbles/dots would be cute, and on the other side is the ombre pattern you see. I did cut one piece to 4″ x 5-1/5″ and the other to 4″ x 1-3/4″, all from the same sheet.

Once I secured those two pieces together, I added a strip of the Sweet Sorbet Metallic ribbon to hid my edge and to create some texture and a little bling for our new princess. (No … the are no new little girls blessing our family, but there will be a little boy in the near future ❤ ) Now let’s attach the card front to the base, and I just did that with my Stampin’ Seal. I used the Liquid Glue to attach the ribbon.

I created my greeting using the Alphabest stamp set, and then die cut it using the Stylish Shapes dies. I used the circle because of the little circles in the paper but because of the ombre style paper. I added a little bow to that with a Mini Glue dot and popped it up with the Stampin’ Dimensionals. To finish the front, I added 3 of the Berry Burst Tinsel Gems/4 pack.

On the inside, I used a piece of scrap designer paper and then ran the ribbon on the inside to. This was layered onto a 4″ x 5-1/4″ piece of Basic White cardstock. The “Congratulations” stamped in Bubble Bath comes from the Wonderful Thoughts stamp set.

This cute It’s a Girl card is so easy to make, I just hope that delivery will be just as easy … we’ve been there!! lol Thanks for taking a time out from your holiday weekend to take a peek.

Have an amazing rest of your weekend.

Here is a list of ingredients that I used to create today’s card ….

What’s YOUR favorite In Color?

Hello Stampin’ Friends ~

Today I am highlighting the NEW 2023-2024 In Colors. Here you can get a close up look at them. I am using the New “Crafting with You” bundle … wow, this is fun to play with. I have much more playing to do!! lol

Let’s begin with the Boho Blue …

Each of my cards are made exactly the same so you can get the “real” effect of the color! I began with a Basic White base and then I stamped onto my In Color card front (Boho Blue) with the coordinating In Color ink.

The next card is the Pebbled Path ….

After stamping the “color on color” (which is an old technique I still use a lot) I stamped the In Color floral piece and greeting, both of which are from the “Crafting with You” bundle.

Next up is the Moody Mauve ….

Once I had the greeting and flowers stamped onto the white in the coordinating ink, I die cut them using the Stylish Shapes dies. These dies are so versatile and a must have in your stamping supplies.

Speaking of die cuts, let’s take a look at that adorable scissors ….

This little cutie is pretty easy to make. I die cut one out of Silver Foil and a second set out of Basic Black. Using my Paper Snips as an example, I cut the black handle part to look like my Paper Snips!! I then used the Liquid Glue to attach the black scissor tops .

A Glue Dot was used to hold the two pieces of the scissors together and then I popped the little black circle into the circle area of the scissors. Easy peasy!

Next up is the Wild Wheat ….

Not one of my favorites to start with, but I appreciated it much better when using it with the Designer Papers that coordinate with this color! Who knew!!

The last of my 2023-2024 In Colors is the Copper Clay …

I love this color, it’s so pretty and we were in need of a rich earth tone! Now, to finish off my cards, I used the 2023-2024 In Color Dots … I wanted to show you how beautifully they coordinate with the cardstock and ink.

Which of the NEW 2023-2024 In Colors is YOUR favorite. I’d like to know, and you can just leave your answer in the comments below. Thank you.

I have a list of supplies for you below, including the “Multi-packs” of the In Colors for your convenience.

Thank you for sharing a part of your day with me.