Hello Stampin’ Friends ~
Do you have beautiful paper tucked away because you’re just not sure where to make that first cut? You’re certainly not alone! Several of you asked how to cut those gorgeous scenic papers without losing the beauty of the design, so that became the inspiration for my Facebook LIVE. Today, I’m sharing the replay, five finished cards, and a cutting guide to help you turn ONE sheet of Alpine Winter Designer Series Paper into something you’ll be excited to send!
Stampin’ Up!’s Alpine Winter Designer Series Paper captures that peaceful winter feeling with snowy mountains, evergreen trees, wood textures, and buffalo plaid. The package includes twelve 12″ × 12″ sheets, two each of six double-sided designs, giving you a lovely mix of scenery and coordinating patterns. It’s the kind of paper that makes you want to step right into the picture!
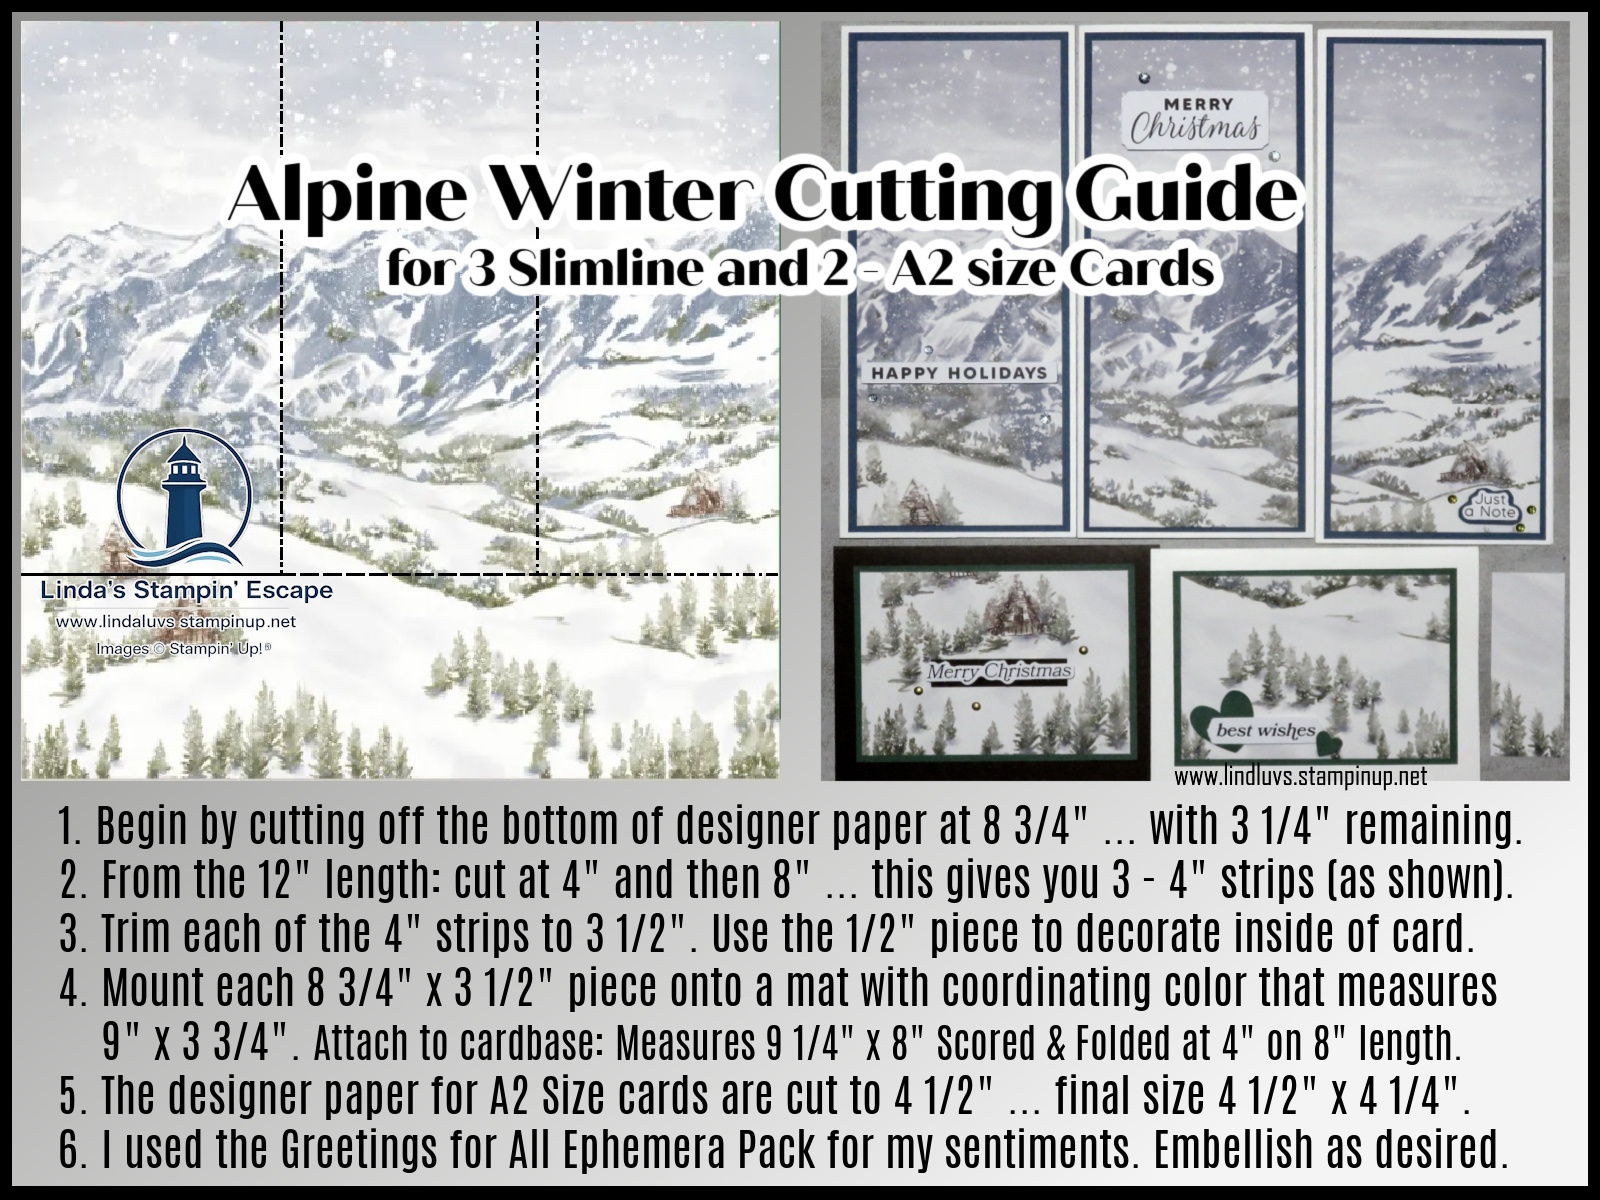
For these cards, I chose the snowy mountain scene. Those beautiful peaks deserve to be the focal point, and the slimline format gives them room to shine. Placed side by side, the three tall cards show how the scenery continues across the paper, yet each card has its own beautiful view.
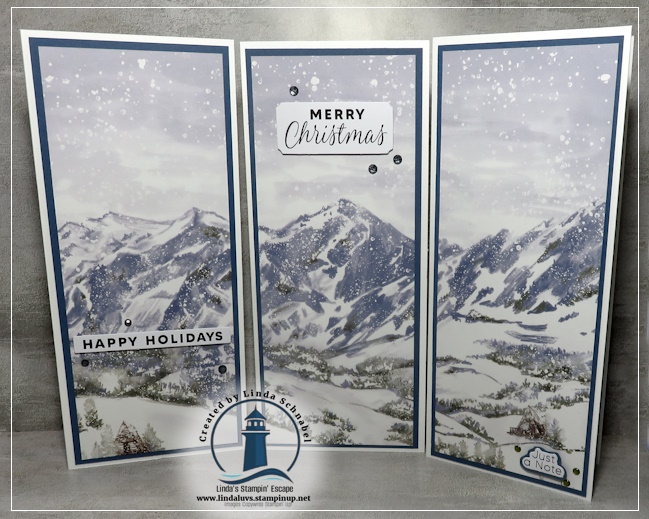
Simple layers frame the artwork, while small touches of sparkle and a greeting finish each card without covering up the scenery. And notice how a change of sentiment takes us from Christmas and holiday wishes to a simple “Just a Note.” Winter scenery can be enjoyed beyond Christmas!
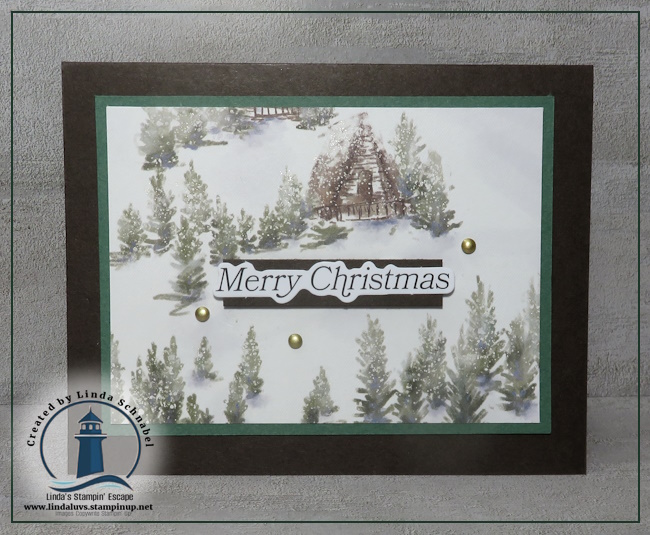
But we’re not stopping at three cards! The remaining sections of the sheet become two additional cards featuring snowy trees and a cozy cabin. One has a rich, dark frame with a Christmas greeting …
while the other pairs a white card base with green layers, little hearts, and “best wishes.”
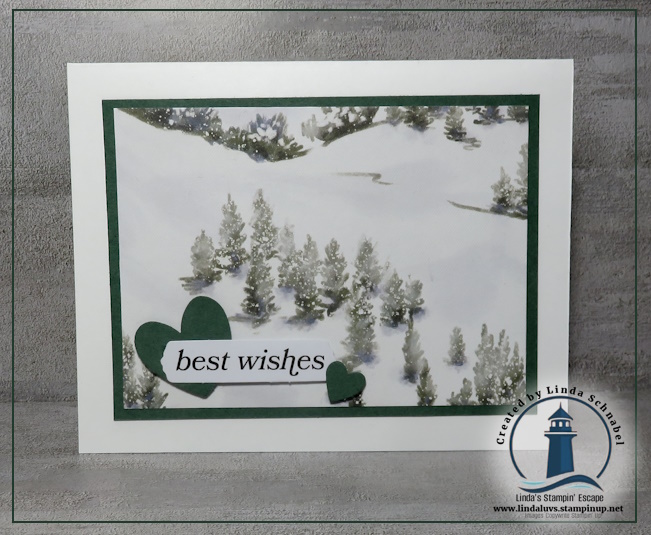
Five cards from one sheet, with a different little piece of winter on each one!
For easy finishing touches, I featured the Greetings for All Mix & Match Ephemera Pack. This pack offers precut sentiments in different styles for thank-yous, hellos, congratulations, and more. Its black-and-white designs make it easy to pair with different papers, and you receive six sheets, two each of three designs. It’s a handy option when your card just needs the right words!
Ready to see where those cuts go? In the video replay, I’ll walk you through how I divided the paper and brought these five cards together. Keep the cutting guide (BELOW) nearby so you can follow along and then try it yourself.
I hope this gives you the confidence to pull out a favorite sheet and make that first cut. You don’t need to cover beautiful paper with lots of extras. A thoughtful layout, a few layers, and a greeting can let the design do the work.
If you’d like to create along with me, you can find the Alpine Winter Designer Series Paper and Greetings for All Mix & Match Ephemera Pack in my online store. I’d love to help you turn that “too pretty to cut” paper into cards someone will treasure!
Thank you for spending a little of your day with me. Come enjoy a little creative escape!
Happy Stampin’!
Linda



🍂 A little fall color, a little candy corn… and a SWEET deal for your creative side! 💙
Through October 31, join my Stars by Design team for $100 and receive a $125 product coupon PLUS $50 in Stampin’ Rewards. That’s $175 to spend on products you love!
The treats keep coming with demonstrator discounts on future purchases, early access to new products, and friendships with others who understand the excitement of pretty paper! 🥰