Triple Time Technique: Season of Cheer Card

Hello Stampin’ Friends ~

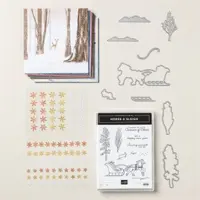
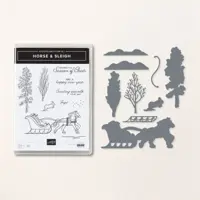
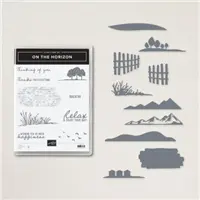
Today I have a sweet card that invites you to take a walk into nature. I’m using the Triple Time Technique on today’s card with the One Horse Open Sleigh Designer Paper and the New Nested Essentials Dies. So simple to make but with a very dramatic effect.

Ready? Pick out your favorite pretty paper pattern and some fun dies. I used two dies for my card, you will also need a sheet of coordinating cardstock. I am using Early Espresso …. cut in half 8-1/2″ x 5-1/2″ then score at 4-1/4″ for you fold.

Next we will cut your 6″ x 6″ designer paper down to 4″ x 5-1/4″. Position your dies evenly onto your designer paper and run it through your die cutting machine.

Use your extra cardstock to “mat” your die cut designer paper …. I actually glues my die cuts directly out of the designer paper and fussy cut around it, but if your a bit more of a perfectionist, you could line it up in your paper cutter and trim it to your desired width. You can see that mine is not perfectly even but just as effective.

Attach the outer piece of designer paper directly to your cardfront, then you’ll align the largest of the two die cuts to the pattern of the paper … I used Stampin’ Dimensionals to attach it, then you’ll do the same with the smaller one.

To finish off the card I stamped the greeting directly onto the designer paper. Yes, I know that’s risky but the photopolymer stamps make it so much easier! I used the bronze snowflakes from the suite to complete it. Again, super simple to make yet it has such an impact!

Thanks for hangin’ out with me today. Enjoy your weekend, I’m entertaining two of my great grandchildren ❤ so much fun!

Triple Time with New Horizons

Hello Stampin’ Friends ~

Grab a cup of coffee because I have another video to share with you today … I’ll show you how cool your cards will look when you team up the New Horizon Designer Paper and Stitched Rectangle dies with the Triple Time technique.

I will highlight two different designs from the New Horizons paper. Sit back and relax and let’s get the video started …

I love how easy it is to create cards using designer paper and the triple time technique. So much texture and style without disrupting the beauty of the paper. Just look and how the lines in the landscaping still align ….

I stamped my greeting and the birds directly onto the designer paper and then added the mats and layered it all together. The little acrylic dots were added to draw your eye around the card, and yes … you may have noticed that I did move one of the dots to the left hand side to create a better balance.

Both of my cards are using the Evening Evergreen as the card base and mats … it highlights the pastels on the first card and really makes the greens pop on our second card.

This layering I not only added dimension but the pretty daffodil flower! You can do anything with this technique and the stunning New Horizons designer paper. Here is a close up of all that dimension …

Thank you for hanging out with me today.

Have an amazing day ~

TODAY’S STAMPIN’ SUPPLY LIST … If you liked the products used in today’s projects, I have links for you below. Just click on the item you would like more information on, or to begin your shopping. It will take you directly to my website. Thank you ❤

Triple Time Stamping Technique

Hello Stampin’ Friends ~

Today I’d like to share a great technique … step by step, and new stamp set and a refresher on a coloring technique. I actually shared this technique with you on Sunday, however one of my customers reached out to me and and asked if I would share a video … so I used this for my LIVE demonstration last night for Technique Tuesday!

Let me introduce you to the Hand-Penned Petals from the beautiful Hand-Penned Suite on pages 104 & 105 of our Annual Catalog this is highlighted using the Triple Time Stamping Technique ….

I invite you to watch the video so you can see step by step how I created the cards …

Pretty simple … don’t you think? Here are those dimensions again (I also added them to the video in the comment section) The colored cardstock I used was Fresh Freesia!

  • Basic White: 2 @ 5-1/4″ x 4″ … 4-1/4″ x 3″ …. 3-1/4″ x 2″
  • Colored Cardstock: 8-1/2″ x 5-1/2″ (fold in half) … 4-1/2″ x 3-1/4″ …. 3-1/2″ x 2-1/4″

I promised I would share a second card with you, one done in the Soft Succulent and I also created it in the portrait position and used the Dual Oval punch for my greeting …

I just love the softness of the flowers when you use the Stampin’ Blends … it almost looks as if it was water colored. I added touch of texture and softness around my greeting by added a ripple of ribbon behind it.

I thank you for stopping in for a visit today, I hope you enjoyed the video and the second sample, and that it inspires you to try one of these techniques.

Hope you have a wonderful day ~

TODAY’S STAMPIN’ SUPPLY LIST … If you liked the products used in today’s projects, I have links for you below. Just click on the item you would like more information on, or to begin your shopping. It will take you directly to my website. Thank you