Hello Stampin’ Friends ~
Shake it, Shake it baby … oooh, oooh!! I am excited to share with you today to cards that I created for my Technique Tuesday, Facebook LIVE. I’m sharing a super simple way to make Shaker Cards that I saw at my OnStage event last weekend.
The demonstration was done by fellow demonstrator Rosemarrie Gonzalez. She shared a really fun new suite with Ice Cream cones and Popcicles … your going to love it! But until then, let me know you the technique. Sit back for a few minutes and watch my Facebook LIVE from last night. Just click on the image below to watch the video …
Isn’t that a cool idea … using clear envelopes to create shaker cards. So quick and easy!! I had so much fun making the cards. You begin with your 8-1/2″ x 5-1/2″ card base scored at 4-1/4″ … fold in half. Your designer paper will be cut 4″ x 5-1/4″ – you could put some cardstock behind it if your want it a little sturdier for tying bows.
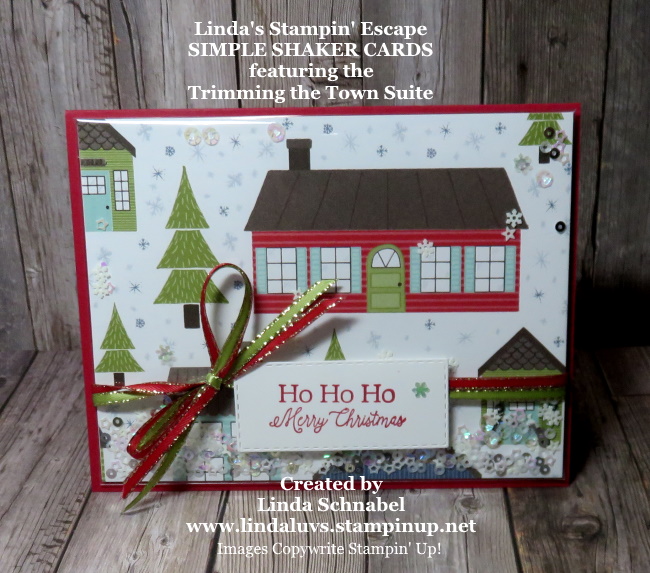
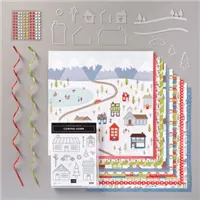
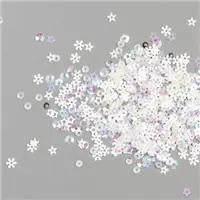
On this card I used the Trimming the Town Suite … I’ve used the designer paper and the All the Trimmings Ribbon Combo. The Snowflake Sequins are encased in the Clear Envelope.
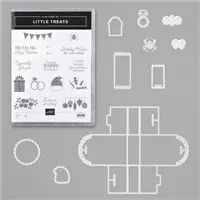
The sweet little greeting comes from the Little Treats stamp set from the Little Sweets Bundle.
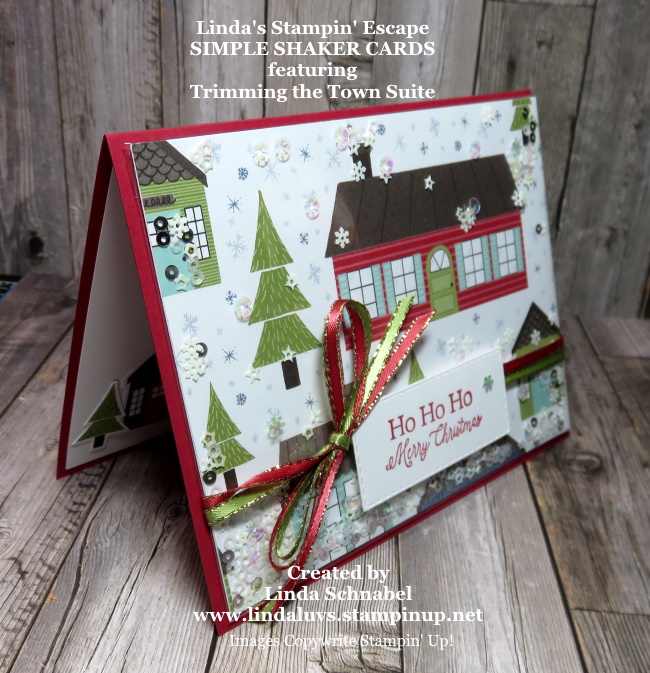
I had some die cut pieces left over from our Holiday Catalog & Virtual Retreat Party and used them on the inside of the card. They are die cut from the designer paper!
My next card is made for my daughters December birthday, and features the Feels Like Frost Designer Series Paper.
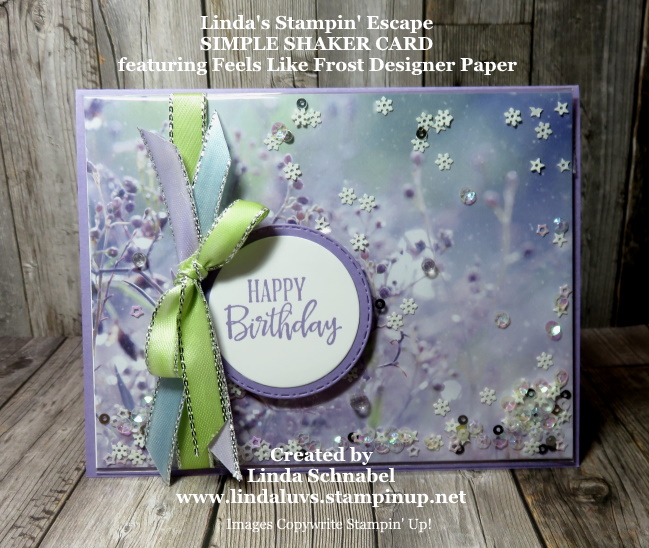
I began with a Highland Heather base and then slide my Feels Like Frost into the Clear Envelope before sprinkling in the Snowflake Sequins in. I was amazed at the change in the sequins … it picked up the color from the designer paper.
The ribbon was the fun part and accented the stunning paper, beautifully! I used the Layered Circle die and the stitched edge die from the Warm Hugs bundle.
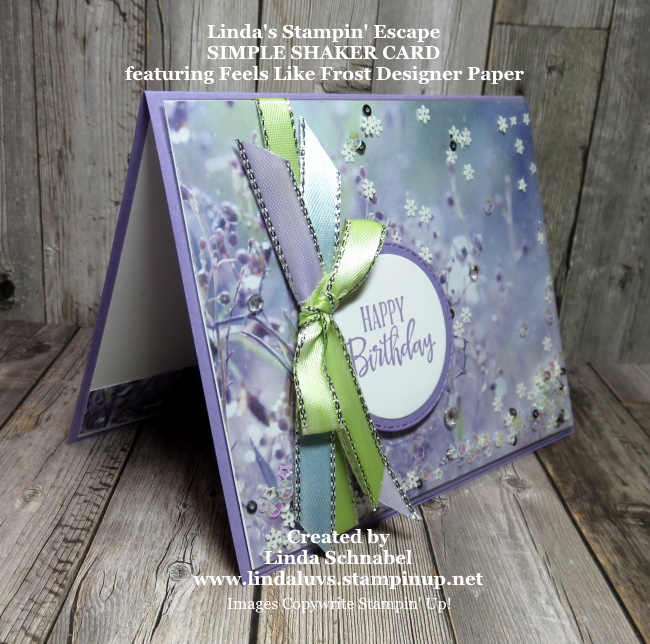
When I trimmed the designer paper down to 4″ x 5-1/4″ … I used a piece of the scrap on the inside of the card. The Metallic Edge Ribbon is easily dyed with the Stampin’ Blends. You can also use our regular markers or even your ink refills!
I hope you enjoyed seeing how easy it is to create the fun and beautiful cards. Don’t forget you can even embellish the outside a little too!!

Thanks so much for hanging out with me today. Hope you were inspired to create “Shaker Cards” like I was when I saw it. I have listed the items used in the cards for your convenience.
Have a wonderful day ~

TODAY’S STAMPIN’ SUPPLY LIST … If you liked the products used in today’s projects, I have links for you below. Just click on the item you would like more information on, or to begin your shopping. It will take you directly to my website. Thank you ♥