Hello Stampin’ Friends ~
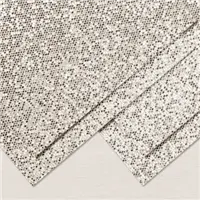
I’m so excited to share my tips and techniques from last nights Facebook Live video along with the cute card I created. I’m going to show you two ways to “color” or dye the fabulous “Bedazzled” Paper from the Sale-a-bration catalog .. then I’ll be sharing a few more tips on coloring.
Join me for a sit down while I show you these great tips and how I got to finish my card!
I have to chuckle a little when I watch this back … I don’t know how I can misplace things when they are sitting right beside me!! Jitters … I guess. You can tell when I get a little nervous, I start talking faster! I’ll just keep practicing … but if you like the projects and you get some good information from this … that’s what it’s all about.
I love the way this card turned out … and I hope you give it a try! Remember the Be Dazzling Specialty paper is a Sale-a-bration item and is FREE with a qualifying purchase. I’ll have a list of ingredients below for you.

Your base is Old Olive and measures 8-1/2″ x 5-1/2″ and you will score at 4-1/4″. The other Old Olive piece will measure 3-1/4″ x 3-3/4″ and will be the mat for the pumpkin. The card front is Very Vanilla and measures 4″ x 5-1/4″ … the small Vanilla piece is 3″ x 3-1/2″ and both were embossed with the Tasteful Textile Embossing Folder to give the card a soft texture.

I used Pumpkin Pie Stampin’ Blend to color / dye my ovals and the Old Olive to color my leaves. I also used the Old Olive Stampin’ Blends to dye my White Bakers Twine which I wrapped around a paint brush (let dry) to create my curly vines.
The stem for my pumpkin came from the Beauty of the Earth Designer Series paper… lucky I didn’t throw that little piece of scrap away!! Now it’s time to layer all together. Remember to start with one oval that should be front & center … the other two will go on each side.

My greeting comes from the Festive & Bright stamp set … I purchased this one because it contains many holidays so I can use it longer! You will have to stamp your greeting “before” you emboss it with your embossing folder.
Now I had some more fun with the beautiful White Glitter Organdy ribbon … If you have Stampin’ Blends … you can dye this any color you want!! OMGosh, it’s sooo pretty! The glitter picks up the color you’re dying it and totally transforms it.
I hope you enjoyed the video and all the tips I’ve share to expand the usage of your products … I wouldn’t be doing my job if I didn’t share the full value of these amazing items.
Thank you so much for joining me today. I hope you have a wonderful day.

TODAY’S STAMPIN’ SUPPLY LIST … If you liked the products used in todays projects, I have links for you below. Just click on the item you would like more information on, or to begin your shopping. It will take you directly to my website. Thank you ♥