Daisy Delights: Two Guest Stampers!

Hello Stampin’ Friends ~

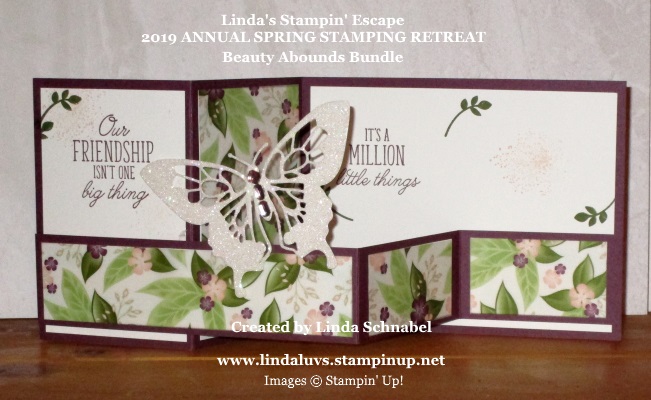
Hope you are enjoying the beautiful weather … it’s been amazing and it’s suppose to be gorgeous today too. OK … I’m not the local weather person, so let me talk more about what I’m good at, stamping!  Today I have two really cute cards that were created by my Spring Retreat Attendees Kellie and Michelle.  The spring floral cards both used the Daisy Punch, which by the way … will be in the upcoming catalog and has another stamp set to coordinate with it!

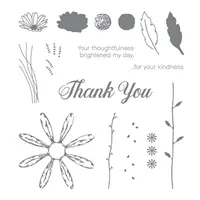
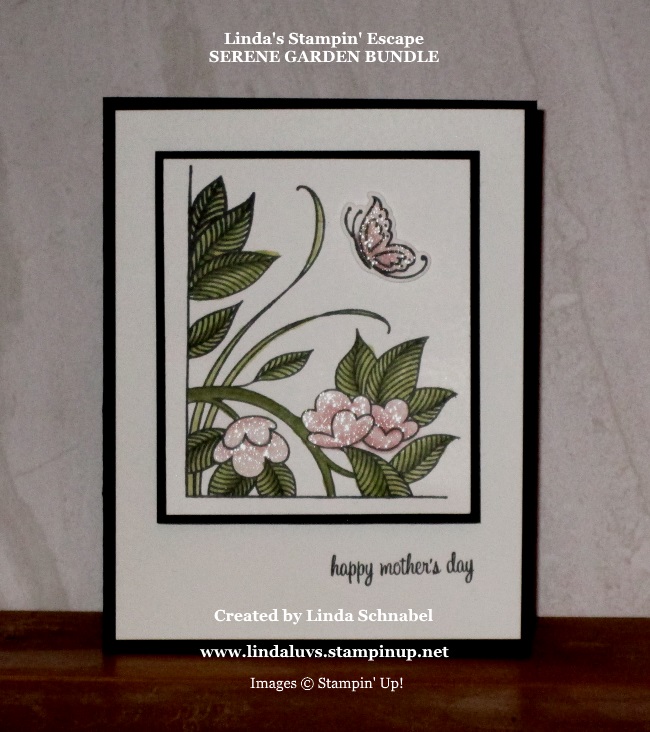
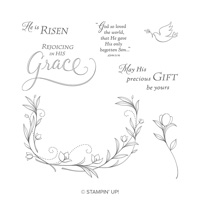
Let’s start with Kellie’s card, she used both the Daisy Punch and the Daisy Delights stamp set…

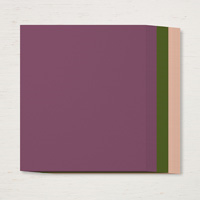
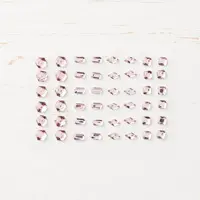
I believe Kellie used Blushing Bride and Whisper White as her core color pallet.  The white background was embossed with the Petal Burst Embossing Folder.  I love the little Happy Birthday Banner … it’s so cute and adds a sweet touch to the card.  One of my favorite embellishments, the Faceted Gems! Whether you use the Gold or the Clear, you can’t go wrong and I just love them with this daisy punch!

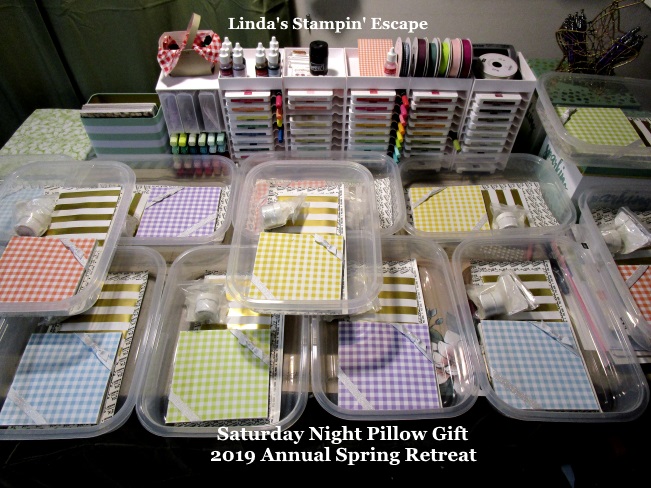
Count your petals on Michelle’s card …

Is this a card saying … He love me, he loves me not?  I’m not sure but it’s really cute!  Michelle’s daisies were punched out using the beautiful Shimmery White cardstock (No Wink of Stella needed!) this cardstock has a shimmer of it’s own,

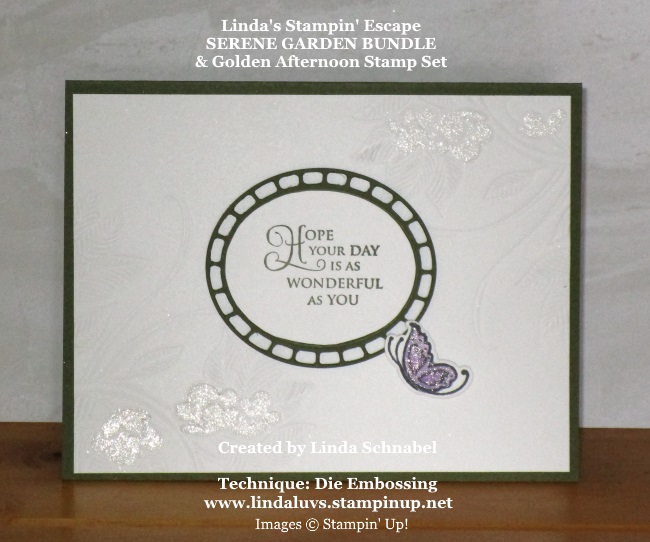
Michelle’s color pallet consists of white and the beautifully bold Daffodil Delight, bright and happy! Her background was created using the Layered Leaves Embossing Folder and was cut into 3 panels to highlight each transition of the daisy

Don’t you just love a punch that can create two totally different styles of cards… That’s what I call “cost effective”! lol

Thank you so much for taking time out of your day to join me in “picking daisies”.

Enjoy your day ~

TODAY’S STAMPING SUPPLY LIST: If you would like to purchase any of the items used in creating these cards and don’t have a demonstrator, I’d be honored to be your creative coach. With each $50 purchase, you will receive a Rewards Point, when you collect 10, I will send you a coupon for a FREE Stamp set of your choice. Just click on any of the items to get to my online store. If you have any questions, please message me.


A Little Smile …

Hello Stampin’ Friends ~

Paper Pumpkin and Stampin’ Up! are all about sharing kindness through creativity. And as dedicated as we are to making a difference with our papercrafting, sometimes we just don’t have a card on hand when we need it most.

Enter June’s Paper Pumpkin kit. It helps subscribers share acts of kindness whenever inspiration strikes—and in a fun and easy way. See how we used the June kit to spread kindness and get a peek at the design in this exclusive video, then subscribe today!

Here is the link to subscribe today …. https://www.paperpumpkin.com/en-us/sign-up/?demoid=26646

If you are “NEW” to Paper Pumpkin … June is a good time to subscribe if you love beach-themed fun that lets you spread kindness all summer long. The kit design is fresh and new—with a look you don’t typically see.

If you are one of my existing subscribers … the June kit has a special design for the unique purpose of spreading random acts of kindness. Now that you watched the video, you got a glimpse of the kit in action. Plus you’ll have a stash of cute cards to share whenever the opportunity presents itself.

If your a past subscriber or put your Paper Pumpkin on hold … you may want to return for an original, uniquely designed kit that we created to help you make a difference. This kit will make brightening someone else’s day easier than ever.

Let me know if you have any questions about Paper Pumpkin … you have until June 10th to subscribe for this fun kit.

Thanks for stopping by today, I’ll see you tomorrow with two cards from our Retreat Swap.

Have a good day ~

Two for Tuesday: Sponging Technique

Hello Stampin’ Friends ~

How have you been enjoying the Serene Garden cards so far?  I have another one for you today … it was inspired by the winning Attendee Swap Card Contest at my Spring Stamping Retreat this past weekend.  Kathie’s card was well received and won the contest with its “Resist / Sponging” Technique and then you will see how I used her card to inspire me to create the “Serene Garden” card …

Kathie embossed both the small flowers on the base and the larger flowers which she did on Vellum Cardstock.  The vellum flowers were punched out.  Kathie created a beautifully soft pop of color by sponging it over the flowers.  With a little wipe of a kleenex … you’ll remove the extra ink off the embossed flowers and they white will pop through.  It’s so pretty, it inspired me to do the same technique on my Serene Garden card.


I stamped the main image in the lower left hand corner of my card, sponged the Flirty Flamingo over the top, then wiped off the excess ink off the embossed image to make the white pop.  Using the Flirty Flamigo Stampin’ Write marker, I added some depth to the flowers and then topped it off with Wink of Stella for that touch of glitter!

I also embossed a piece of Flirty Flamingo with white emboss powder using the elegant bird … once it was embossed, I sponged Flirty Flamingo over the head and tail to create some dimension. The wings were highlighted with Wink of Stella and the bird was cut out with the coordinating dies.  My greeting is from the Colorful Seasons Stamp set and was stamped in Flirty Flamingo.

It is amazing how a technique like embossing teamed up with some simple sponging can turn a card into a work of art.  I really like the monochromatic color as well.  Sometimes simple is better.

Thank you for hanging out with me for a bit today…

I hope your day is a good one.

TODAY’S STAMPING SUPPLY LIST: If you would like to purchase any of the items I used to create this card and don’t have a demonstrator, I’d be honored to be your creative coach. With each $50 purchase, you will receive a Rewards Point, when you collect 10, I will send you a coupon for a FREE Stamp set of your choice. Just click on any of the items to get to my online store. If you have any questions, please message me.


Serene Garden Die Embossing Technique

Hello Stampin’ Friends ~

Hope you all enjoyed a wonderful weekend.  I had a very nice weekend, my niece Carla took me out to lunch and brought me a bouquet of tulips. Then on Sunday we went to the Cher concert … amazing!!

Today I have a very special card for you, another Serene Garden card that shows you an amazing technique … embossing with your dies!!

You can easily do this with the BigShot Embossing Mats.  Here is a video to explain these a little better than a whole bunch of my words! lol

I love all that you can do when you have the BigShot Embossing Mats.  I do mine just a bit differently, I layer my mat under my cardstock to I don’t have to used the cutting side of the die face up! Either way you do it, you will love the results.

I also have another Stampin’ Tip: If the blue pad does not give you a deep enough emboss, and the gray is too deep … Use the blue mat but stick a piece of cardstock underneath the first cutting plate to give it just a bit more height… a shim in fact.

The embossed background on the card is somewhat subtle but in the hand, it’s amazing and with the Wink of Stella on the flowers the card is truly a beauty.  You get a pop of color with the greeting and our Highland Heather butterlfy.

I did share with you yesterday that this bundle is retiring and so are the Embossing Mats, if you would like these, I have a link below or you can contact me and I will help you get these in your stamp room.

Thank you for stopping back today to see yet another sample from the Serene Garden bundle, but I’m not stopping here … I have another one for you tomorrow.

Have yourself a great day today, and I’ll meet you back here tomorrow.

STAMPING SUPPLY LIST FOR TODAY’S PROJECT … If you do not have a demonstrator, I’d be honored to have you as a customer and stampin’ friend. If you like this technique and card and need to purchase supplies, just click on any of the items below, it will take you to my online store. Thank you so very much.


Simply Sunday: Serene Garden

Hello Stampin’ Friends ~

I hope this day finds you well … and I wish all you ladies out there a Happy Mothers Day… we all nurture in some way or another. Today I have the perfect stamp set to celebrate women everywhere; the Serene Garden stamp set.  I find this stamp set simply stunning and I just had to have it. It has a bit of that Art Deco flair so I did it in black and white and a touch of pink …

The whispy flow of the greenery really draws your eye to the card and it was colored using the Stampin’ Blends … same with the flowers, they were gently colored with the Petal Pink duo to create some depth.  I colored the butterfly the same way and cut it out with the coordinating die. Let’s not forget that Wink of Stella … that is what gives the flowers and butterfly that beautiful sparkle.

The entire piece was popped up with the Stampin’ Dimensionals and the greeting comes from the Itty Bitty Greetings stamp set.

I am sad that this beautiful stamp set, Serene Garden will be retiring in less than a month. Stop back tomorrow, I have another card I’d like to share with you that my clubs did this month.

Till then, enjoy your day! Thank you for taking time out of your day to visit with me.

TODAY’S STAMPING SUPPLY LIST: If you would like to purchase any of the items I used to create this card and don’t have a demonstrator, I’d be honored to be your creative coach. With each $50 purchase, you will receive a Rewards Point, when you collect 10, I will send you a coupon for a FREE Stamp set of your choice. Just click on any of the items to get to my online store. If you have any questions, please message me.


Saturday Showcase: Three Guest Stampers

Hello Stampin’ Friends ~

Wooo Hooo … it’s Saturday! Time to relax and have some fun.  I hope that you have enjoyed seeing part of what we do at our Annual Stamping Retreats. Today I would like to share with you, three cards done by our Retreat Attendee’s for the Swap Contest.  I choose these three first because they all use the products that I have been highlighting all week.

Let’s begin with Karie …

Karie used the amazing Beauty Abounds stamp set which we used several times during our retreat and it also embellished their Door Tags and Mantle Gifts.  Karie’s card utilized both the full dies that come in the bundle.  Karie used Gorgeous Grape with the base die and Highland Heather with the “delicate” die cut that goes on top of the Grape.

Love the little “bubble” stamp that she used to create her background … and each butterfly is embellished with the Enamel Glitter Dots.  Karie’s card finished in the top 3!!

Our next card is from Jane …

Jane’s card is stunning and used the Wonderful Romance Bundle teamed with the Be Mine Stitched Framelits dies, and the Floral Romance Specialty Designer paper (sold out) that I used on yesterday’s card.

The layers and intricate work done on this card is amazing … one of my favorite swap cards.  The hearts are cut out and the heart frame is laid into the front, while the designer paper was tucked behind it all to create a beautifully delicate look. The layering of the die cut leaves draws your eye to the greeting creating a perfect focal point to your card.  You’ll also notice the sweet little butterflies that also come from the Beauty Abounds bundle.

The last of today’s card comes from Sarah W.

Sarah chose to use the Beautiful Promenade Bundle and the Pretty Promenade Designer Series paper from the Annual Catalog.  Sarah highlighted her designer paper by layering it onto Mossy Meadow cardstock. I love that she used the pretty lattice background which comes from the Rose Trellis Thinlits dies (no longer available) … it really draws the eye to the flower!

The cute little butterflies come from the Butterfly Gala bundle which included the stamp set and coordinating punch and can be found in the Occasions catalog.

These three ladies … Karie, Jane and Sarah W. clearly took our Spring Stamping Retreat theme “Butterflies & Blooms” to heart.  Each card encompassed the theme and was created with heart. I will be sharing more of the Retreats Swap cards but I also want to share more of the “RETIRING” stamp set. I have to play with them one more time before they go!!

Tomorrow I’ll be back with a special little card that clubs did this month, and that I dedicate to my Mom for Mother’s Day.

Thank you for stopping by my blog today … enjoy your Saturday!

TODAY’S STAMPING SUPPLY LIST: If you would like to purchase any of the items I used to create this card and don’t have a demonstrator, I’d be honored to be your creative coach. With each $50 purchase, you will receive a Rewards Point, when you collect 10, I will send you a coupon for a FREE Stamp set of your choice. Just click on any of the items to get to my online store. If you have any questions, please message me. 


Our Friendship – Z Fold Card

Hello Stampin’ Friends ~

As we come to an end of the week, we also are coming to the end of our Stamping Retreat so I’m sharing one more of our cards. We used the Beauty Abounds bundle for our last stamping session.  All of the cards were beautiful but because part of their pillow gift for that night was the Glimmer Paper … I had to show them a beautiful card using it.

We have so much fun at our retreats, it never fails to amaze me how a group of ladies who do not know each other when they arrive are swapping phone numbers before they leave!  So I’ll be sharing some of the pictures I caught while we stamped …

As we gathered for our last stamp session for the evening, everyone came back full of smiles and ready to stamp! We are using the Beauty Abounds bundle on another “Z Fold Card”.  The Floral Romance Designer paper used on this card is no longer available, but many of the other items I shared with you all week are available (even most on the retiring list). This is the last card of the evening …

There is that glimmer paper, in the form of a beautiful butterfly! While preparing for the retreat, I precut out all the butterflies from the large butterfly die. Simply cut a piece of glimmer paper the size of the butterfly you want to cut out and rolll it through the BigShot.

The greetings used on the card all come from the Butterfly Beauty Thinlits Dies in the Beauty Abounds bundle…

The Petal Pink Rhinestone Gems embellish the butterfly to create the body and draw your eye right to the card, now there is a focal point … so pretty.

The ladies are enjoying the stamp session while working on the last of the cards …

but this group … well, they were a little punchy and were playin’ with me while I was taking the pictures! Gotta love it!

It was a great day of stamping, and we finished off with another beautiful card.  Our next stop was back to the house for dessert and to find out who won the Card Contest.

I hope you enjoyed todays card and all of the cards that I shared from our annual spring retreat.  There were plenty more projects that they made but some things that happen at reatreat … stays at retreat! lol

I will be back tomorrow to begin sharing some of the swap cards, until then I hope you consider joining us at our next retreat, our annual Fall Holiday Stamping Retreat which will be held the first weekend of November … just be sure to get on my mailing list.

Have a beautiful day !

TODAY’S STAMPING SUPPLY LIST: If you would like to purchase any of the items I used to create this card and don’t have a demonstrator, I’d be honored to be your creative coach. With each $50 purchase, you will receive a Rewards Point, when you collect 10, I will send you a coupon for a FREE Stamp set of your choice. Just click on any of the items to get to my online store. If you have any questions, please message me. 

If you order the Beauty Abounds Bundle … I will send you the dimensions and instructions for todays card free.  Thank you! Linda


You’re Unstoppable Card with Glitter Technique

Hello Stampin’ Friends ~

Hope you are doing well today, a bit gloomy outside but we are one day closer to the weekend and that is always a ray of sunshine!!  Today I will be sharing another card from our Stamping Retreat afternoon session.  This is one of my most requested techniques … Creating your own glitter paper!  I have been doing this for years, ever since I learned how to heat emboss, I have been creating “glimmer paper”!

When our Iridescent Ice embossing powder was discontinued I thought all was lost, but then Stampin’ Up! introduced the Adhesive Sheets and I was back it glimmer heaven.  However, the Adhesive Sheets are on the discontinued list … so, you will want to order them right away!!  I am using the Pretty Promenade Designer Series paper, although any of your favorites will work … I’ve even glittered the Bokeh style papers!!

You can see the sparkle on the card, just like stars in the sky … it’s so pretty!!  And you can’t go wrong with the Pretty Promenade Designer Paper, perfect for Mother’s Day or Grandma’s birthday! My grandmother would have loved this card, flowers and sparkling (now I know where I get it from!) lol

Technique: Glitter Designer Paper

  1. You begin by cutting your Adhesive sheets to the size of your designer paper.  Your adhesive sheets have an edge that you can hold onto when pulling the protective backing off the adhesive (This is where you want to begin measuring your adhesive sheets) or your adhesive will be short on your designer paper. 
  2. Once it’s cut and you peel back the backing – carefully place your designer paper onto adhesive. Make sure the side you want glittered is the side your laying onto the adhesive. 
  3. Then rub it down with your bone folder to secure, and peel off the protective sheet and expose the adhesive on your designer paper.
  4. WHAT HAPPENS IF THERE IS A SPOT OR SECTION THAT DID NOT ADHERE?  Simple … take out your Snail and run it over any place that does not have adhesive! A very simple way to ensure full coverage!  
  5. Now you are ready to dip your designer paper into your Dazzling Diamonds Glitter.  Place a piece of paper over the top and rub your bone folder over the top to secure all the glitter.  Sometimes I use a “block” that I put my stamps on to push the glitter into the adhesive, it’s just bigger than the bone folder.  Both work
  6. Time to create a beautiful card … Have fun!

Once the designer paper was transformed to glimmer paper, we added the Mossy Meadow gorgeous die cut from the Beautiful Promenade bundle, it really compliments the glitter.  The greeting, same as yesterday’s card came from the Strong and Beautiful Stamp Set and we added one of the Petal Pink Rhinestone Gems.

Did you know that the Beautiful Layers Thinlits Dies that comes in the bundle also has a die to cut an envelope piece … I love it, and what better way to coordinate your entire card that you are sending out.

This designer paper is stunning and is on the retiring list 😦 so sad, but there is still time to get it, I have added a link below. It is also something I tucked into my guests Saturday night Pillow Gift. There was plenty of designer paper left over once I cut for their cards, so, I cut them into 4 x 6 sheets and tucked them into a pretty envelope, along with adhesive sheets, Dazzling Diamonds Glitter, and some Gingham Gala Designer paper and Glitter Sheets!!

Each guest got 2 sheets of each color in the Gingham Gala Designer Paper and 4 sheets each of 3 colors of the Glimmer Sheets. The top was put on and it was tied up with a pretty bow.

I hope you enjoyed todays technique card share as much as all the ladies at our retreat enjoyed making it … I would love to hear your thoughts below, thank you.

Have a wonderful day, and thanks for stopping in to visit.

STAMPING SUPPLY LIST FOR TODAY’S PROJECT … If you do not have a demonstrator, I’d be honored to have you as a customer and stampin’ friend. If you like this technique and card and need to purchase supplies, just click on any of the items below, it will take you to my online store.  Thank you so very much. 


Strong and Beautiful …

Hello Stampin’ Friends ~

As we continue through our Annual Spring Retreat, I have a very special card to share with you.  As you saw in earlier posts, our theme was Butterflies and Blooms, and came from the inspiration of the strong a beautiful women in our lives, this card is dedicated to one such women, my niece Carla ❤  She is the daughter of my sister Eileen, and as she had to let her Mom go, she stood strong and carried on to complete all the duties the world and our lord called upon her …

I think we all know women who day after day dig deep into their strengths and carry on. I thought this card was so fitting for our afternoon session. I used the “Beautiful Promenade” bundle and “Pretty Promenade” Designer Series paper to enhance my “Z” Fold card.  This designer paper is stunning and I was thrilled that I could use my Blackberry Bliss cardstock. Yum, Yum!

When it comes to a “Z” card … there are no special dimensions.  I wanted my beautiful greeting to be the focal point of my card so my “Z” is actually larger than what you may have seen on other cards.  You know … there are no rules in stamping, just opportunities to create your own masterpiece!  The trick to the “Z” is to make sure the dimension for the “center” fold is the same on both the base and the center or “Z”.

The beautifully delicate flowers on this card and the frame created by the Beautiful Promenade stamp set, encase and highlight the greeting that moved me to purchase this stamp set… “Strong & Beautiful”.  As I said earlier, we all have women in our lives that have been amazingly courageous, whether fighting their own battle or supporting another who was struggling … here’s to those women ❤

I can’t image a better way to tell someone you care, then to send them a handmade card telling them how proud you are of them for all they do … they inspire us all.

Thank you for spending some time with me today. Stay beautiful, stay strong and stay kind.

TODAY’S STAMPING SUPPLY LIST … If you like the project shown today and would like purchase supplies, just click on the link. I’d be honored to help you out if you do not have a demonstrator.  Thank you. Linda


Spring Retreat Morning Session: Love You to Pieces Bundle

Hello Stampin’ Friends,

I hope you enjoyed a peek into my stamping retreats that I shared yesterday.  Today I’m going to share one of the cards that we made during our morning session but before we get into that, I want to share the view I was blessed with while I prepared the guests breakfast …

This is really a retreat!  So while the breakfast bakes are in the oven, and the fresh fruit is being sliced, the smell of the coffee brewing begins to fill the air.  Before you know it, the kitchen begins to fill with friendly faces and good mornings.

Once we are all gathered around the table and we finish our breakfast, we head over to our stamp room and begin our session with the fabulous “Love You to Pieces” bundle.

This was the second of the cards that we made in our morning session.  I teamed up the “Love You to Pieces” with the Wood Textures Designer Series Paper Stack and the heart dies from the “Meant to Be” bundle. To soften the look I added the Petal Pink/Whisper White Variegated Ribbon.

We stamped our Petal Pink in Black StazOn and then cut the puzzle heart out with the die.  I shared a fun tip with my guests to put a little tape on the back of the heart before taking it out of the die … then there is no struggle trying to put it together on the card!

After the cards are done, our lunch is brought in and we all gather to eat. It was a beautiful day outside so once lunch was done, many guests went out for walks, drove around the grounds or went to the gift shoppe… more to come tomorrow.

Thanks you for joining me today, I’ll be sharing our afternoon session with you tomorrow.

Have a great day ~

TODAY’S STAMPING SUPPLY LIST … If you would like to order any of the products used in todays card share, just click on any of the photos and it will take you directly to my stamping store. Thank you.


I’m Back! 2019 Spring Stamping Retreat

Hello Stampin’ Friends ~

I hope you all had a wonderful weekend, because my was fantastic!  So, today I want to bring you into my Stamping Retreat experience, and share some cute samples / gifts. Our theme for this year was suggested by Kathie, one of our attendees; Butterflies and Blooms… to honor my Mom and my sister Eileen, and all the women in our lives who are strong and courageous.

My apologies for the lack of posts this weekend but I was prepping, cooking and packing for my annual Spring Stamping Retreat this past weekend.  It is always my mission that my guests have a stress free, relaxing yet fun weekend.  Mission accomplished!  I have truly been blessed by the lovely ladies who attend my retreats, and this year was no different.  I love when perfect strangers meet … and by then end of the weekend, they are swapping phone numbers and email addresses.

My guests are greeted at the door by either myself or my helper Cindy.  As they enter the dining room with a wonderful huge table which we all fit around (yes, my retreats are smaller for cozy, personal touch) they find the fireplace adorned with my “Mantle Gifts” … they decorate the room all weekend, but each guest gets to take one home before the leave…

OK … let’s get a little bit closer look at these cute little gift boxes.  I used the Floral Romance Specialty Designer Paper (which I noticed this morning in no longer available) and wrapped it around the Lustrous White Mini Gable Boxes, oh my are they pretty! The leaves and butterfly came from the Beauty Abounds bundle from the Occasions Catalog … and the little flower – not sure which set that came out of!! Here is a closer look …

Each butterfly and flower on these boxes were given a touch of the Wink of Stella, and really brought the twinkle of the boxes out.

Next we take our guests to there room … each room has door tags with our guests name on them …

The tags were stamped with the “His Grace” stamp set and the butterflies are from the “Beauty Abounds” set … again, the flowers and the butterfly were touched up with the Wink of Stella.

They have a welcome gift on their bed. This retreats gift was a notepad decorated with the Petal Promenade Designer Series paper and a mechanical pencil to match! And our tag was hand stamped “So Happy You’re Here” …

Once our guests are all settled in, they can relax by the fireplace or enjoy the beautiful lake view.  We all seemed to gather around the dining room table and got to know each other before we sat down to eat a home cooked meal … Friday nights are usually two homemade soups, french bread and salad with all the fixin’s!

Our next adventure for the weekend is to head off into our stamping room, I’m all set up and ready for my guests …

Their stamping spots are all ready for them, and all their projects are pre-cut, bagged and labeled “per stamp session” and ready for them to use! Is it extra work for me? … Maybe, but I do it while I’m watching tv or enjoying a quiet night … Remember, my retreats are designed for an “escape” from the stress … just relax and have fun stamping!!  There bags also included Stampin’ Dimensionals and all the embellishments (and then some) needed for thier projects.

Even though our theme for the weekend was “Butterflies and Blooms” … I wanted to kick off our Friday with a little extra FUN, thus the polka dot bags. It goes with my Friday night theme “Sweetest Thing” bundle from the Occasions catalog…

I couldn’t resist, and the jar behind the greeting sign, matches the one in the bundle perfectly!! Oh, and I knew not to put too much candy out there because my attendee’s like to bring treats for their fellow stampers, and here is just the beginning of what we had!!

There was even more added to our table … lol.  This picture was shared by one of our new attendee’s; Sarah W. Her and her mother-in-law Jane were a pleasure to stamp with. I have been blessed by meeting so many wonderful ladies through my retreats … I love my job!! Here is Sarah and Jane …

Well … I can’t stop here, I have to show you the projects that we did on Friday night with the Sweetest Thing bundle.  Just like you, I head over to Pinterest for a little inspiration, so the card on the right was cased from fellow demonstrator; Leena Girsh… it’s so cute, a few minor additions; the Glitter Enamel Dots from the Annual Catalog.

Our second card was a “Shaker Card” I created using the Stitched Shapes Framelits dies … we used them a lot over the weekend. And our last project for the night was this cute little treat cup using all of the cute accessories in the “How Sweet It Is” product suite, including the designer paper, reversable ribbon and the cute tags! I have the products listed below.

Sorry for the long post but there is so much to share, and this is only our first evening together! I will be sharing more of my stamping retreat with you all week, including the amazing swap card that our attendee’s created.

Thank you so much for hanging around and waiting for this post, I appreciate your loyalty and love having you as part of my stampin’ tribe! aka “family”.

Have a wonderful week ~

TODAY’S STAMPIN’ SUPPLY LIST … If you would like to purchase any of the items listed below to create the projects you have seen here, just click on the item and it will take you directly to my stamping store.  You can also use HOSTESS CODE: 9AARKUTJ if you choose.


Guest Stamper: Golden Afternoon Stamp Set

Hello Stampin’ Friends ~

Today I have another swap card from our Onstage event.  The card features the Golden Afternoon stamp set that you can find in the Occasions catalog.  I would love to give credit to the demonstrator who made this card, however, there was no name on it … just the comment “Cased by Francie”.

This card is so pretty and she did her watercoloring using the Water Color Pencils and the Watercolor paper.  This is another set that I had to have but did not find time to use it until … retreat!!  Our ladies will be using the sentiments from this stamp set on a couple of the cards that we are making.  I share some of them with you soon.

Tomorrow I will be sharing the new In-Colors with you! Can’t wait for you to see them showcased this way.

Thank you for coming over to my blog today. Have a yourself a great day ~

TODAY’S FEATURED STAMPIN’ SUPPLIES …


Guest Stamper: OnStage Swap

Hello Stampin’ Friends ~

As promised, I’m going to share one of my swap cards from our April 2019 OnStage event … this card was created with the “Best Catch” bundle which can be found on page 44 of the Occasions Catalog.  Now, even if this stamp set does not retire from the catalog, it will no longer be bundled, so if you want to save 10% … you will want to order it before the new catalog is released.

Although there was no “official” name on the back of my swap, but inside the card, there was and email so the creator of this card is Rhonda Syverson!!  I only took a few cards with me to this event, mostly to share with my table mates but I had two left over … so, today and tomorrow you will see those swaps (and I love them both).

Don’t you love how Rhonda did her background? It appears as she inked her folder and then ran it through the BigShot to give it that fun background.  She also did some amazing coloring on her fish … I love this stamp set and have not used it yet so I really wanted to make sure I got one of Rhonda’s card.

Join me again tomorrow to see another swap … totally different than Rhonda’s card today, but both share forms of coloring.

Thanks for joining me today.

STAMPIN’ SUPPLIES USED ON TODAY’S CARD …


New Catalog Sneak Peek: Follow Your Art

Hello Stampin’ Friends ~

Today I have another sneak peek inside the new Annual catalog for you. I’m going to be sharing one of the Make & Takes that we made at our OnStage event that I attended.  It comes from the new “Follow Your Art” product suite which is perfect for all of my crafting friends ….

Our card highlights some of the items in the Follow Your Art suite … you can see the stamped images; rolls of ribbon, greeting and the button background. you’ll also notice the cute designer series paper.

This product suite is more than just the stamp set and dies bundle which we are used to (which is still an option to purchase and save 10%) but now, with one item number …. you can purchase the entire suite which includes that stamp set, dies, designer paper, embossing folder, embellishment kit, washi tape and more!!  I can’t wait for you to get your catalogs!!

So no matter what your crafting pleasure is, this suite will have something fun for you to enjoy!  Did you notice the little Stampin’ Up! boxes … they are so cute, and what a clever way to give a gift of crafting than in that box.

Make sure to stop back all week, and bring your friends … I will be posting some swap cards, cards designed with the new IN-COLORS and more!

Thank you for sharing a part of your day with me today, I’ll see you tomorrow.

Simply Sunday ~ A Little Hello

Hello Stampin’ Friends ~

Today I have a cute card that may bring the feel of a warm sunny day … what the heck, they were threatening snow yesterday!!  Ha, Ha … left my shovels out, just in case!  My card share today features the beautiful Lillypad Lake bundle, and I wanted to create that “lake” feel … I hope it takes you to the warmth and wonder of the lake.

I started with the worn wood look with one of the designer papers from the Wood Textures DSP.  I cut out my background in Whisper White with the new Rectangle Stitched Framelits Dies … it will create the focal point, and was sponged with Balmy Blue.  The sun was cut from the dies included in the bundle.

Our bird was stamped and then cut again with the coordinating dies.  the water is also a die that we cut in Balmy Blue … before we attached it we covered that entire area on the sponged white with our Snail adhesive.  The bottom 1/3 of the piece was coated with the Snail, then we laid the die cut (which I’m using as waves/water) onto the piece … then we dipped it into the Dazzling Diamonds Glitter and WOW!!  We just pushed the glitter down onto the Snail to hold it better … It looks so cool.

I finished off my card with “a little hello” and some pearls which I colored with the Soft Suede stamping blends … it really looked nautical!  Most of the time when I make “glitter designer paper” … I use the Adhesive sheets, but this was such a small area and the Snail worked perfectly for this quick technique!!  Easy and looks great, you can’t get simpler than that.

Thank you for joining me at the lake today, I hope you enjoyed our little journey into nature.

Have a wonderful day ~

TODAY’S STAMPIN SUPPLY LIST … if you enjoyed the card I shared with you today and would like to purchase any of the supplies, they are listed below for you.  You may pick on any of the images to view …