Wednesday WOW: Springtime Impressions Thinlit Dies!

Hello Stampin’ Friends ~

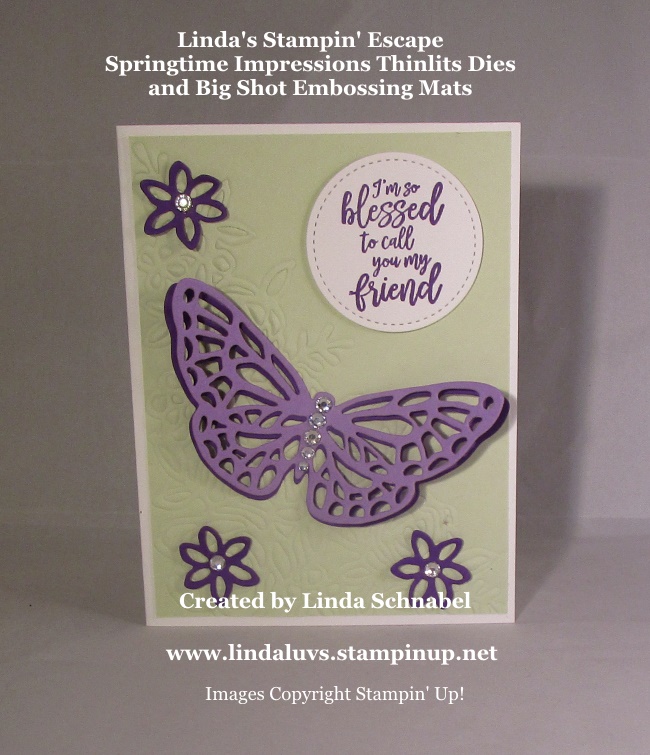
As promised, I’m back today with another card I’d like to share with you from the Springtime Impressions Thinlit Dies! Super simple card that will wow anyone who receives it.

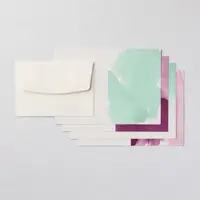
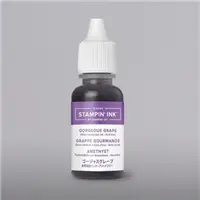
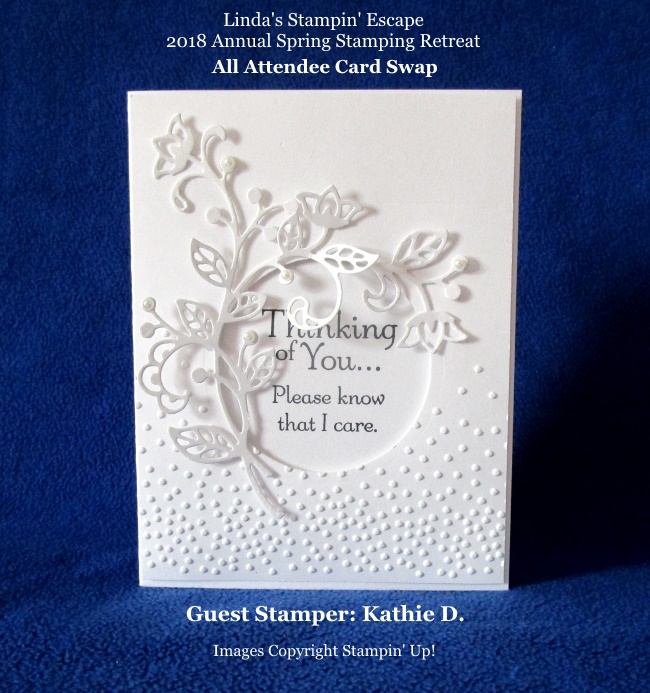
I began with the Delightfully Detailed Note cards and Envelopes … this time I chose the Blackberry Bliss!  I was super excited when I heard them announce this was one of the colors coming back – I just love it!!

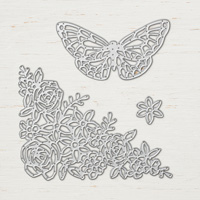
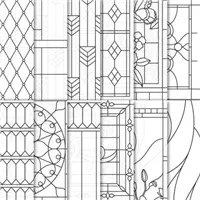
Then I simple cut out the floral pattern die (which I showed you yesterday how to emboss with the new mats) and I did that out of Very Vanilla cardstock.  To adhere the die cut … I flipped it over and used the sponge dauber to apply the Tombo glue. It works so nice – just make sure you have a scrap piece of paper underneath so you can toss it and not get your work area full of glue.

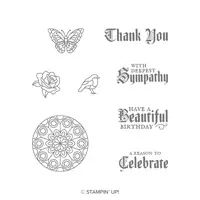
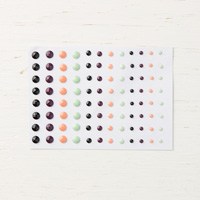
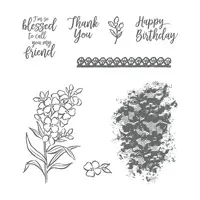
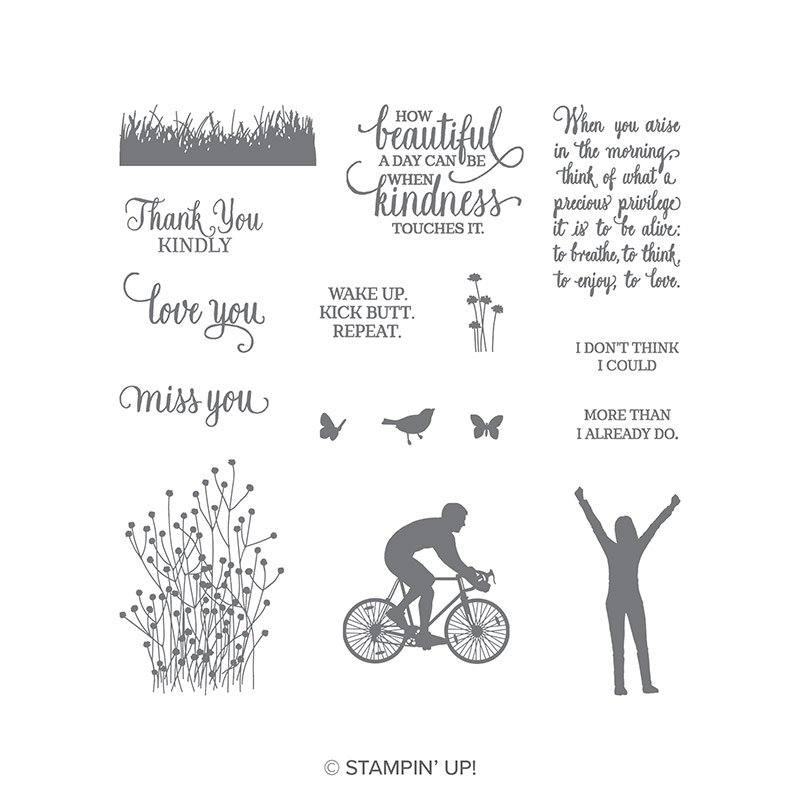
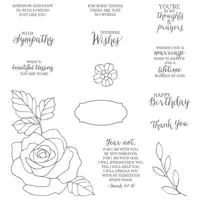
My greeting comes from the Painted Glass stamp set (I would advise to get the bundle!!) I used the Blackberry Bliss ink to stamp it and then punched it out with the Pretty Label punch. I used the new Faceted Dots in Blackbery Bliss to anchor my greeting.

Last, I covered the entire die cut piece with Wink of Stella … it looks gorgeous! The photo does not do this justice. I would however add the Wink of Stella “before” I adhere my die cut piece. That took me longer than making the whole card!! lol

Super simple but elegant birthday card and the Stella just pushed it over the top.  I thank you for checking back and I hope you enjoyed see the “original” use of this fabulous die.

Have a great day ~

TODAY’S STAMPIN’ SUPPLY LIST …


Technique Tuesday: Embossing with Dies!!

Hello Stampin’ Friends ~

I am so excited to share this awesome technique with you!! I love this because it makes your stampin’ dollars stretch and makes really cool effects on your cards!! I’m talking about the new Big Shot Embossing Mats!!

Your favorite Framelits, Thinlits, and Edgelits dies can do more when paired with the Embossing Mats. Use with cutting dies to emboss instead of cut!! I used the beautiful “Springtime Impressions Thinlits” to create this amazing background …

I embossed the floral pattern onto the new Soft Sea Foam cardstock. I simply began with the base plate, then the white plate; included in the embossing mat package, then the blue mat, my cardstock, the die and finally the cutting plate on top … roll it through, and your image is embossed onto your cardstock!!

This gives you a nice close look at how the die actually embossed the cardstock!  Now you have two different ways to use your dies!!  You could do the same with these pretty butterflies!!

I used the new Gorgeous Grape and Highland Heather cardstocks to cut out my butterflies and layered them.  I loved the heather against the sea foam but wanted that extra pop of color … and that is why I layered the butterfly.  The cute flowers also come in the die set.

The beautiful greeting comes from the Southern Serenade stamp set, was stamped in the Gorgeous Grape and cut out with the Stitched Framelit dies.  I finished off my card by embellishing with Rhinestones … a little bling never hurt anyone! lol

I thank you for joining me today to see this new product / technique!!  This will definitely be on my upcoming Class List. Stop back tomorrow and I’ll share a card created with the Springtime Impressions … cut!

Have a wonderful day ~

TODAY’S STAMPIN’ SUPPLY LIST …


Bouquet Blooms Bundle by Stampin’ Up!

Hello Stampin’ Friends ~

Today I’d like to share a bundle that may just get overlooked in the catalog … there is sooo much to look at!! This stamp set and die create the cutest cards.  Watch the video and Stampin’ Up! Demonstrator Development Manager, Natalie White, give you tips and tricks of the Bouquet Blooms Bundle along with showing some amazing samples.

Isn’t that interesting?  I think that is such a cool card!! Watch my calendar because I will be hosting a card class using this bundle in July or August, I’m setting up the schedule now.

Here is the cute card that is in the Stampin’ Up! catalog that got me interested in this bundle!!  I’m ordering mine so I can create a fun class for you!!

Thank you for stopping by on this beautiful Monday … I hope you have a good day, and a wonderful week ahead!!

Happy Stampin’

Simply Sunday: Delightfully Detailed Suite

Hello Stampin’ Friends ~

Today I’d like to share with you a product suite that I totally fell in love with… the Delightfully Detailed suite by Stampin’ Up!  It contains a “bundle” of a stamp set with really cool sayings and sweet font and a coordinating punch!

That’s not all … it has the most awesome Laser Cut specialty paper you will fall in love with!!  How do I know, because I did!! Here is a simple card I created using the laser cut paper and the Delightfully Detailed Note Cards and Envelopes.

I used the Tombo Glue and sponge dauber to gently add adhesive on the back and then adhered it to the note card. The greeting and envelope was stamped with the coordinating stamp set “Detailed with Love”.  I used the punch to round the corners on my strip of paper and then punched it with the cute little decor side.

Stampin’ Up!’s Delightfully Details Suite is great for all levels of crafters! They have built in coordination that are perfect for memory keeping, card making, gift tags, or embellishing any kind of project. Watch the video below for a better feel of this entire product suite …

I think this suite is stunning and so easy to create with.  I can’t wait to add the Memories and More card pack to add to my collection!!  I’d love to hear what you think … feel free to share your thoughts below.

Thank you so much for sharing your Sunday with me.

Have a wonderful day ~

TODAY’S STAMPIN’ SUPPLY LIST …


Hand Delivered …

Hello Stampin’ Friends ~

It’s true … the 2018-19 Annual Catalog went live yesterday!! So many awesome new stamp sets, bundles, framelits and accessories!! Time to have some fun!!

Let me share with you … “Hand Delivered”. This fun stamp set is fun and whimsical allowing you to create some really cute cards! This stamp set is a “host” stamp set which you can earn for FREE in several different ways … You can place a qualifying order, you can host a book show, or you can gather a few friends, invite me over and we can party!! Stampin’ Party!!

Did you enjoy making paper dolls as a kid? Then you’ll enjoy the feel of this set which lets you create beautiful ladies for many beautiful occasions.  Such a fun stamp set … don’t forget (you can earn it FREE).

It’s a great time to host a stampin’ party … the Catalog is all new and there is so much to see!  I’d love to share the fun with you and your friends, and help you earn a bunch of it for FREE!!  Let’s chat … lindaluvs2stamp@aol.com

Thanks for checking out my post today, and let me know if you would be interested in hosting a stamping party. I can show you and your friends a few things and then we’ll get to stamping!!

Have yourself some fun today!!

Lilypad Lake

Hello Stampin’ Friends ~

Well it looks like it turned out to be a beautiful day yesterday after all!! I hope you didn’t miss my card yesterday I created with the Enjoy Life Stamp set and Graceful Glass designer paper. I guess I wasn’t the only one who liked it … at last look yesterday the card was “pinned” 14 times and shared 5x on Facebook!!  Thank you 🙂

Today I have a peek into the new catalog and the fabulous new bundle; Lilypad Lake!  June officially kicks off summer and many of us like to head to the lake to enjoy some water fun or just soak in the view … well you will get those feelings when you share cards created with this bundle …

Lilypad Lake Stamp Set with its serene sentiments will aid you in sending out calm vibes to your loved ones.  There are 10 rubber stamps included in the set.

The Lakeside Framelits Dies will create beautiful die-cut lakeside sceneries in record time with Framelits dies and the Big Shot. Run the wave Framelit through your Big Shot several times to create a full card front texture piece. Waves can also easily be trimmed for variable height.  The die set includes 8 dies.

I think this is the perfect stamp set for the Lake lovers in your family or for Father’s Day! Great for birthdays too.

Thank you very much for stopping by today.  I’ll bring you another goodie from the catalog tomorrow.

Have a great day!

Today’s Stampin’ Supply List …

How Beautiful a Day Can Be …

Hello Stampin’ Friends ~

How are you on this beautiful day? I know they say it’s going to rain today, but I’m looking for the beautiful side of the day!!  They say whatever you think … you attract! So who doesn’t want a beautiful day?

I am excited to share with you a beautiful card … I told you yesterday about the Stampin’ Blends and that they are coming back. And on Tuesday I shared one of my favorite suites in the new catalog, the Graceful Glass. So I’m combining these two to bring you my creation …

I chose to keep a very simple color pallet … Whisper White!!  I did this so I could really highlight the “Graceful Glass” pattern of the Iris’s. I had a hard time choosing which pattern from the papers!!

I used the Old Olive Light & Dark Stampin’ Blends and the Rich Razzleberry Light & Dark to color my Iris’s and added a touch of the Dark Daffodil Delight in the center of them. Once colored … I trimmed down the design to fit with the verse I wanted to use … ENJOY LIFE is the beautiful stamp set this verse comes from!

This was a must have for me (pg. 58 New Catty) the verses the fonts … Love ’em!! The cute little butterflies also come with the set and I couldn’t resist using the Enjoy Life stamp set with the Graceful Glass designer paper!

To adhere the Graceful Glass vellum to the strip of Whisper White, I put a dab of Tombo glue onto a scrap piece of paper and used my finger to gently add some adhesive. It’s a very thin layer, I could barely see what I put directly onto the back … and you can’t see it from the front!!  Wooo Hooo!! Now there is a Stampin’ Tip you can put in the bank 🙂

This card is so easy to make and is so beautiful … and I am so hooked on this stained glass paper. I guess a rainy day would be a great day to sit down, relax and start to color!!  Hmmm … I guess that would create a relaxing, “beautiful” day!

Thank you so much for stopping by today!  Let me know if you have any questions on how I created today’s card.

Have a “beautiful” day ~

Stampin’ Supply List for Today’s Card ….


Stampin’ Blends Current Colors Now Available

Hello Stampin’ Friends ~

Good news! All of our current colors of Stampin’ Blends are in stock and available for purchase in our North American markets. Thank you for your patience as we worked to restock this popular product. Our new Stampin’ Blends colors are still on track to be available mid-June. We’ll let you know as soon as we have more information.
Let your creativity loose with Stampin’ Blends, Stampin’ Up!’s alcohol-based blending markers in their exclusive colors. Here, Shannon shows you how to color and blend with different colors–resulting in beautiful creations you’ll love sharing with others. To get your own Stampin’ Blends markers, visit http://www.lindaluvs.stampinup.net or contact me by clicking on the contact me button above!

I’m so excited that these fabulous Stampin’ Blends are available again!! Please let me know if you have any questions for me … I’m here for you.

Thanks for dropping in today so I could share this great news with you!! Stop back tomorrow to see what I’ve created with the marvelous markers!!

Have a great day ~

New Catalog & Graceful Glass Suite

Hello Stampin’ Friends ~

I hope you had a wonderful weekend with family & friends.

The launch of the new annual catalog is only three days away! To help celebrate and introduce all the great new products, Stampin’ Up! created this stop-motion video to share with you! AND if you are on my mailing list because you are a club member, hostess or on-line shopper with me … Your catalog is in the mail (or available for pick-up)!!

Did you catch a glimpse of the new butterfly … it’s so pretty!! It’s from the new “Springtime Impressions” thinlits dies and coordinates with Garden Impressions Suite and the Abstract Impressions Stamp Set.

I also want to introduce you to one of my favorite suites in the new catalog, the Graceful Glass. Here is Brian from the home office to share some tips on using this amazing new product suite …

The Graceful Glass suite by Stampin’ Up! is perfect for any occasions as shown by the greetings in the stamp set.  For those of you who love to color … you will truly fall in love with this product suite because the designer paper is a must have complement to the stamp and dies bundle!

Thank you so much for joining me today!

Enjoy the sunshine and your day ~

Fun & Easy Card Layout …

Hello Stampin’ Friends ~

Today I’m going to share a card layout with you done two different ways to show you how one fun layout can create multiple card looks!

My first card I created for the Spring Stampin’ Retreat … the idea behind this card was to show a totally different way to use the “Ribbon of Courage” stamp set. We did ours in Black & White but this could have easily been colored with Stampin’ Markers or the Watercolor Pencils ….

I started with the Petal Passion Designer Series paper from the Occasions catalog and the fabulous Petal Passion Product Suite. This sweet -n- simple card has so much dimension just from just a quick run through the Bigshot.

We used two of the Square dies and cut them out at the same time … the inner one is stamped and popped up with Stampin’ Dimensionals. The greeting was stamped on the side as it fit perfectly!!

Now … with a twist of your wrist (and cardstock) you have the same layout but from another perspective!

See … with a twist of your cardstock your new card is magical!!  I used the Myths & Magic product suite to create this cute little card, perfect for any little girls birthday card!

I am sad to say … this is one of the stamp sets that is on the discontinued list and will be gone forever in only a couple of days!! The designer paper is a “specialty” paper which means it has Iridescent  glitter designs on one side and colorful all occasion designs on the other!!  Hard to see on the photo but the little bubbles glitter as does the mermaid herself … LOVE IT!!

So … what do you think about this fun, dimensional layout!! Great right and can be done either vertical or horizontal to create many different look … just add new paper!! Our designer papers are fabulous tools to use when you need to create simple cards that look amazing!!

Thank you for checking back with me! I think tomorrow we need to see what’s in that NEW Catalog!!

Have an awesome day ~

TODAY’S STAMPIN’ SUPPLY LIST …


Simply Sunday: Design with papers!

Hello Stampin’ Friends ~

Today I’d like to share some cards with you that shows how easy cards are to create when working with our beautiful designer series papers ….

Here are the fun designer papers from the “True Gentleman” Designer paper. There a 12 different patterns in our packages so it’s so easy to find the perfect ones to go together for your card.

This one was so much fun to play with … the “Coffee Break” Designer Series paper. Great for your coffee lovers!

The “Picture Perfect Party” Designer papers is one of my favorite paper stacks because it not only has great patterns to use but many are “picture” perfect … like the cute little party favor that I cut out from another pattern sheet and added as an embellishment!! This one is very versatile!

See what I mean … so versatile and each one looks so different! Oh yes … and SIMPLE & FUN to make!!  Another one of my favorites is the Wood Textures Paper stack.  It’s so popular … it will be in the upcoming catalog!! I am thrilled 🙂

Today I will close with cards from our newest designer paper …

Enjoy your weekend and I invite you to stop back tomorrow to see how my cute little card layout will look so different depending on the designer papers you use!!

Thanks for taking time out of your holiday weekend and Sunday to spend a part of it with me.

Guest Stamper: Kathie D.

Hello Stampin’ Friends ~

Looks like summer is upon us!!  I actually had my air conditioner on yesterday and will put the second one in upstairs today!! I believe in being comfortable when I’m at home and I don’t like to sweat … so, if this is going to be my cleaning weekend, I’m putting in the air!!  AND … the sooner I get done with my cleaning – I can get to my stamping and play with all the new stuff I have (yes, I’ve still got a BIG Wish List when the catalog comes out next week)!

Well on with the good stuff … Yesterday I told you I had something good planned and I do, today I’m sharing the WINNING Card from the All Attendee Card Swap at our Annual Spring Retreat! Our winner is chosen by votes collected by the attendee’s themselves. Here is Kathie’s winning card …

Kathie’s stunning card was created with the Flourish Thinlits Dies and the Softly Falling Embossing Folder … got to love that BigShot!!  Kathie gently brought the floral piece around the opening / greeting.  Not sure if Kathie used the punch or circle framelits create the circle but it adds a beautiful layer of dimension.

The floral piece was also embellished with our pearls and it adds a little more dimension and elegance. Our them was “Cards to show we Care” and this one is beautiful!! This layout would work well for any occasion from Wedding, to announce a new baby to Sympathy.

Thank you for joining me today, I hope you enjoyed Kathie’s card as much as we all did at the Stampin’ Retreat…. it is stunning!

Have yourself a fabulous day today … and enjoy the holiday weekend.


A Match Made in Heaven – or Stampin’ Up!

Hello Stampin’ Friends ~

Because perfectly coordinated products have always been one of Stampin’ Up!’s key strengths— they have designed June’s Paper Pumpkin kit as a stepping stone to coordinate with a spectacular product suite in the annual catalog. Wooh!

The uniquely designed June kit and coordinating suite give you the opportunity to expand your creative experience … from crafting with a single kit to creating with a full range of products offered by Stampin’ Up! . . . Wow! Sounds like a match made in heaven!!

Now is the perfect time to try out Paper Pumpkin and see what the FUN is all about, or re-start your subscription! We’ve missed you and the kits keep getting better and better!!

Thanks much for checking out my blog post today! Stop back tomorrow … I’ve got something good planned!!

Have an awesome day!!

Check out the Paper Pumpkin options …


Watercoloring Florals ….

Hello Stampin’ Friends ~

Today I’m sharing a card from a very versatile stamp set, the Petal Pallet. I’ve shown you many styles from this stamp set … for example just this past May 14th with the “Life is so much Better” card.

This beautiful card is quite easy to create. I choose Smoky Slate because I wanted the card to be a little softer than stark black.  I stamped several of the leaf images into the corner, and the floral piece was stamped in Black Momento ink on a separate piece of paper …

The floral image was cut out using the coordinating dies.  (Remember, this bundle will retire at the end of this month).  I then used the Aqua painter to watercolor my flowers in Bermuda Bay and Old Olive.

The floral piece was attached with Stampin’ Dimensionals and the greeting from the stamp set “Rose Wonder” was stamped on the front. The front was also attached to the Smoky Slate base with the dimensionals.

This beautiful card could easily be made into a Birthday card … or Get Well … your choice. I hope you enjoyed and that it inspired you to create a few of your own.

Enjoy your day and thank you for checking in with me today!

TODAY’S STAMPIN’ SUPPLY LIST …

New In-Colors & Tips on New Pads!!

Hello Stampin’ Friends ~

With all the excitement over the New Catalog release, the new In-Colors and the Color Re-Vamp I thought I would share some fun tips that Stampin’ Up! has shared with us … I’ll also share a tip or two of my own.

First up are these cute cards featuring the 2018–20 In Colors! Including Blueberry Bushel, Call Me Clover, Grapefruit Grove, Lovely Lipstick, and Pineapple Punch, these colors are a bouquet of hues that lend well to any project.

I love the new In-Colors … they are so bright and fun!! Looks like “primary” colors and the rest of our color line fill in all the gaps with beautiful hues of everything in between!!

Next up is a video explaining our NEW Ink Pads …

My hands are not what they used to be so opening with a full hand is not as easy for me … However, I have found if I put my thumb and pointer finger in the groove, I just give a little twist – just like opening a compact (and most of us know how to do that). I myself find that a bit easier.

I’ll see if I can create a short video on how I open the new ink case if you think that will help.

Till then … Thank you for joining me!

Have a bright and colorful day~