“Birthday” Card in a Box!

Hello Stampin’ Friends ~

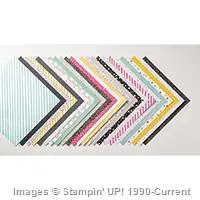
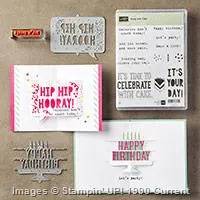
Today I am going to share with you another of our Spring Retreat Cards. It’s a “Card in a Box” created with the It’s My Party Designer Series Paper and Balloon Celebration Bundle.

I’m going to let you in on a money saving tip … Items that are in the Occasions Catalog as bundles may be in the upcoming 2016-17 Annual Catalog – but they will NOT be bundled, so if you like any of the bundles in the catalog … snag them up NOW and save 15%.  Again, they will not be bundled, this is the “largest” discount you will get on these items.

000_3314

There are several different ways and dimensional layouts out there to create the “Card in the Box” however I like to demonstrate and share the easiest way to create projects and cards. Life is just more fun when we aren’t stressing over such things.

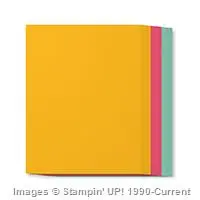
We started our project just like you would a 2-4-6-8 box. Once the box was adhered together we used the back as our area for writing our greetings. All other flaps were decorated with the different patterns of designer paper.

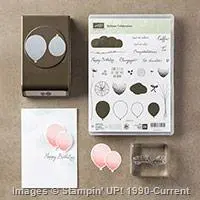
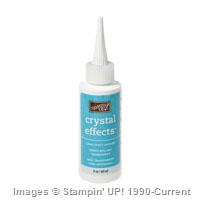
We punched out the balloons with the “Balloon Bouquet Punch”. On this card I stamped the balloons with the dotted balloon image in the stamp set to create more dimension.  I also added a white highlight with the chalk marker and then added a light, even coat of Crystal Effects (retiring!) on my balloons. This gave it a nice sheen.

000_3318

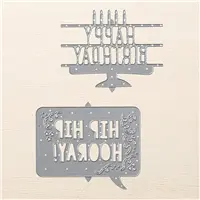
Our birthday greeting was die cut from the “Party Pop-Up” thinlits dies out of the beautiful “Dazzling Diamonds” Glimmer paper! The entire card is quite dramatic and a favorite of my grandchildren!

If you would like the instructions and “a card in the box” … just place an on-line order of $25 or more. I also have a monthly deal that if you order $35 or more, you will receive directions & a minimum of 1 sample from my Monthly Technique Club projects!  If you can’t choose between the two … you can get both by placing a $50 or more order in May.  Please use Hostess Code: HEESBTSZ

Retirement List

Don’t forget to check out the RETIREMENT LIST located on the right side bar of my blog and get the items you need before they retire on May 31st … especially Bundles and Ink-Refills (the markers and other items are already sold out).

I appreciate you taking time out of your day to visit my blog.

Have a fabulous day!

blog-closing-small

Today’s Stampin’ Supply List …

Simply Sunday: Happy Birthday

Hello Stampin’ Friends ~

Today we will keep it short and simple … I know many of you are preparing for your Super Bowl parties!

So let’s begin with our beautiful stamp set “Helping Me Grow” and the hyacinth flower. I chose Perfect Plum and Whisper White for my color combination … simple.

000_3114

I heat embossed the hyacinth with the White Emboss powder then highlighted the flower by sponging some ink over the flower. It also creates a bit of a shadow around the blooms. Wipe off any excess ink with a tissue so it does not smear.

The greeting was stamped from the Rose Wonder stamp set … you will also notice that I used the die from the Rose Garden Thinlits Dies. I love that Stampin’ Up! creates their stamp sets to coordinate with each other.

000_3112

Sweet and Simple … don’t we all love cards like this! Thank you for stopping in.

Enjoy your game day, no matter what you are doing!

blog-closing-small

TODAY’S STAMPIN’ SUPPLY LIST …

000_3114

Sweet, Sweet Candy …

Hello Stampin’ Friends ~

Happy Weekend to you! Many of you know besides being a Stampin’ Up! demonstrator, a blogger, Mom of 3, grandma of 11 and great-grandma of one … I also manage the candy store in my hometown.

So, what do you think I thought of when I say that little candy stamp in this months Paper Pumpkin kit?

Yep … a sweet but simple card featuring the candy! I used it to create the background …

000_2600

I wanted plenty of color so I chose the Daffodil Delight, Crisp Cucumber, Watermelon Wonder and Wisteria Wonder and stamped that little candy stamp all over!

Then I chose the “You’re So Sweet” as my greeting and stamped it in Watermelon… that is when I decided to create a banner to highlight the greeting. For a bit more pop of color I added the Daffodil Delight and Crisp Cucumber behind it. (Subliminal message: Green and Gold)

The entire card front was matted with the Watermelon Wonder to make the greeting stand out and then that was layered onto the Whisper White background.

000_2602

Cute & fun card for any occasion … birthday, sweet sixteen or just because!

Thank you for joining me today ~

I hope your day is filled with fun and lots of color!

blog-closing-small

TODAY’S STAMPIN’ SUPPLY LIST …


Color Combination … put to the test!

Hello Stampin’ Friends,

How are you doing this fabulous day?  I’m feeling better every day, so I felt it was time to challenge my brain!   I decided to pick a color combination … then design the card.  What was I thinking?  In reality, it wasn’t that hard.  You’ll understand as you follow me through the steps.

It began with the Sweet Taffy designer paper and my choice of “Pumpkin Pie” …

000_1260

Once I had the designer paper color, I when through the Color Coach to get my color pallet for my card.  As you can see … Cherry Cobbler and Night of Navy completed my color combination.

For some fun and texture I embossed the base of my card with the new “Large Polka Dot”  embossing folder.  Oh boy … this one is going to get used a lot!

000_1266

With the base done, it was time to adhere the designer paper, I matted it with the Night of Navy and scalloped one edge with the Scallop Edge Border punch.  The combination of these two colors emit a burst of energy!

Next I wanted a focal point that really stood out, so I picked the Hostess stamp set: Bloom with Hope.  This is the perfect stamp set to play with your Blendabilities, and as you have seen if you follow me … I use it a lot.

I used the Pumpkin Collection of Blendabilities, then added the Cherry Cobbler.  These two combined created such a warm and beautiful flower.  The Old Olive collection was used for the greenery and ties in nicely with the color scheme.

000_1261

I used the Circle Framelit dies to cut out my flower image, then chose the 2-1/2″ punch to mat it because it is smaller & there was not as much of the Cherry Cobbler cardstock showing.   I used the Cherry Cobbler for the mat so it would pull out the cherry highlights out of the flower.

Finally my greeting … I must say, I have wanted to use the “Endless Birthday Wishes” stamp set for a long time, so I pulled the Happy Birthday from there!  This is the cutest stamp set and is Photopolymer.  If you like your stamps clear and stickin’ to your blocks … these are for you!

000_1265

The greeting was popped up with the Stampin’ Dimensionals.  I tried really hard to add a 3rd circle (in the flower shop, we always designed with odd numbers) but on this card … it just didn’t work!  Sometimes less is more.

Stay tuned because in the next few days I’ll tell you how you can get the Bloom with Hope Hostess set and a Free color collection of Blendabilities Markers!

Hope you enjoyed today’s card and it’s brightens your day a bit.

Take care ~

blog-closing-small