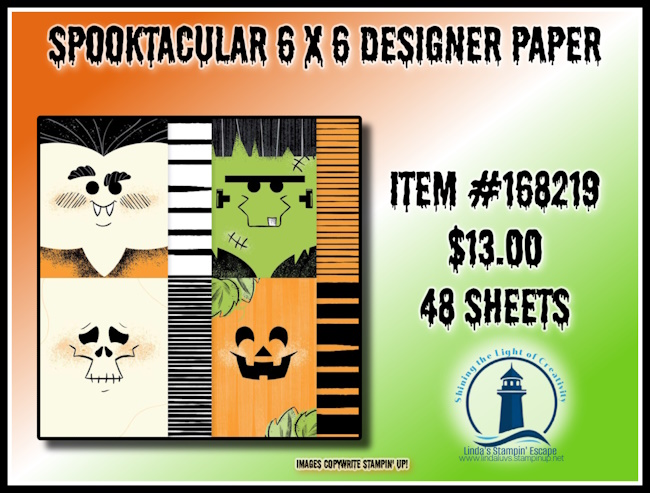
If you’re looking for a quick and easy way to create Halloween treats, party favors, or little surprise gifts, you’re going to love the Spooktacular 6″ x 6″ Designer Series Paper!
One side of each sheet features adorable spooky characters—a pumpkin, Frankenstein, skeleton, and vampire—while the reverse side showcases a coordinating striped pattern. The designs do all the work for you, making it easy to create fun projects with minimal supplies and maximum impact.
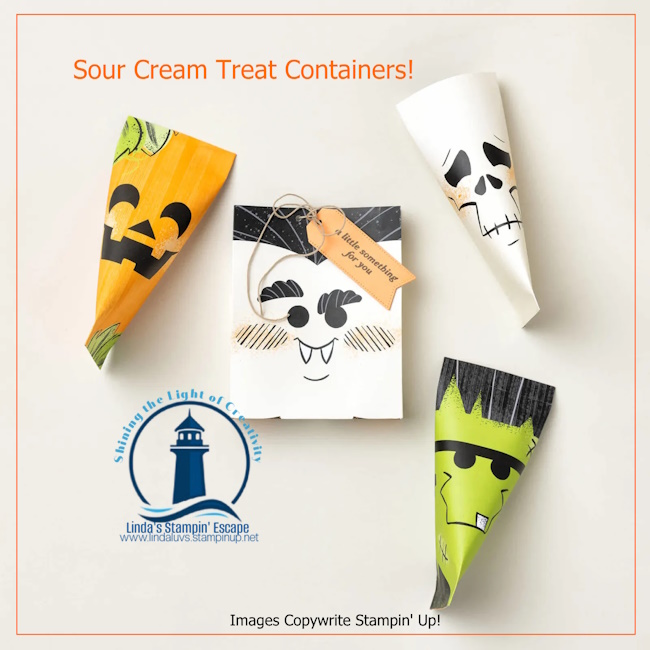
Today I’m sharing a few Sour Cream Container 3-D Gift Pouches, and they couldn’t be easier to make! With just a few simple folds and your favorite Spooktacular paper, you’ll have a festive treat holder ready for candy, gift cards, small gifts, party favors, or classroom treats.
What I love most about this paper is that each character creates a completely different look without requiring any stamping, coloring, or fancy techniques. Simply cut, fold, adhere, and you’re ready to spread a little Halloween fun!
🎃 Mark your calendars! 🎃
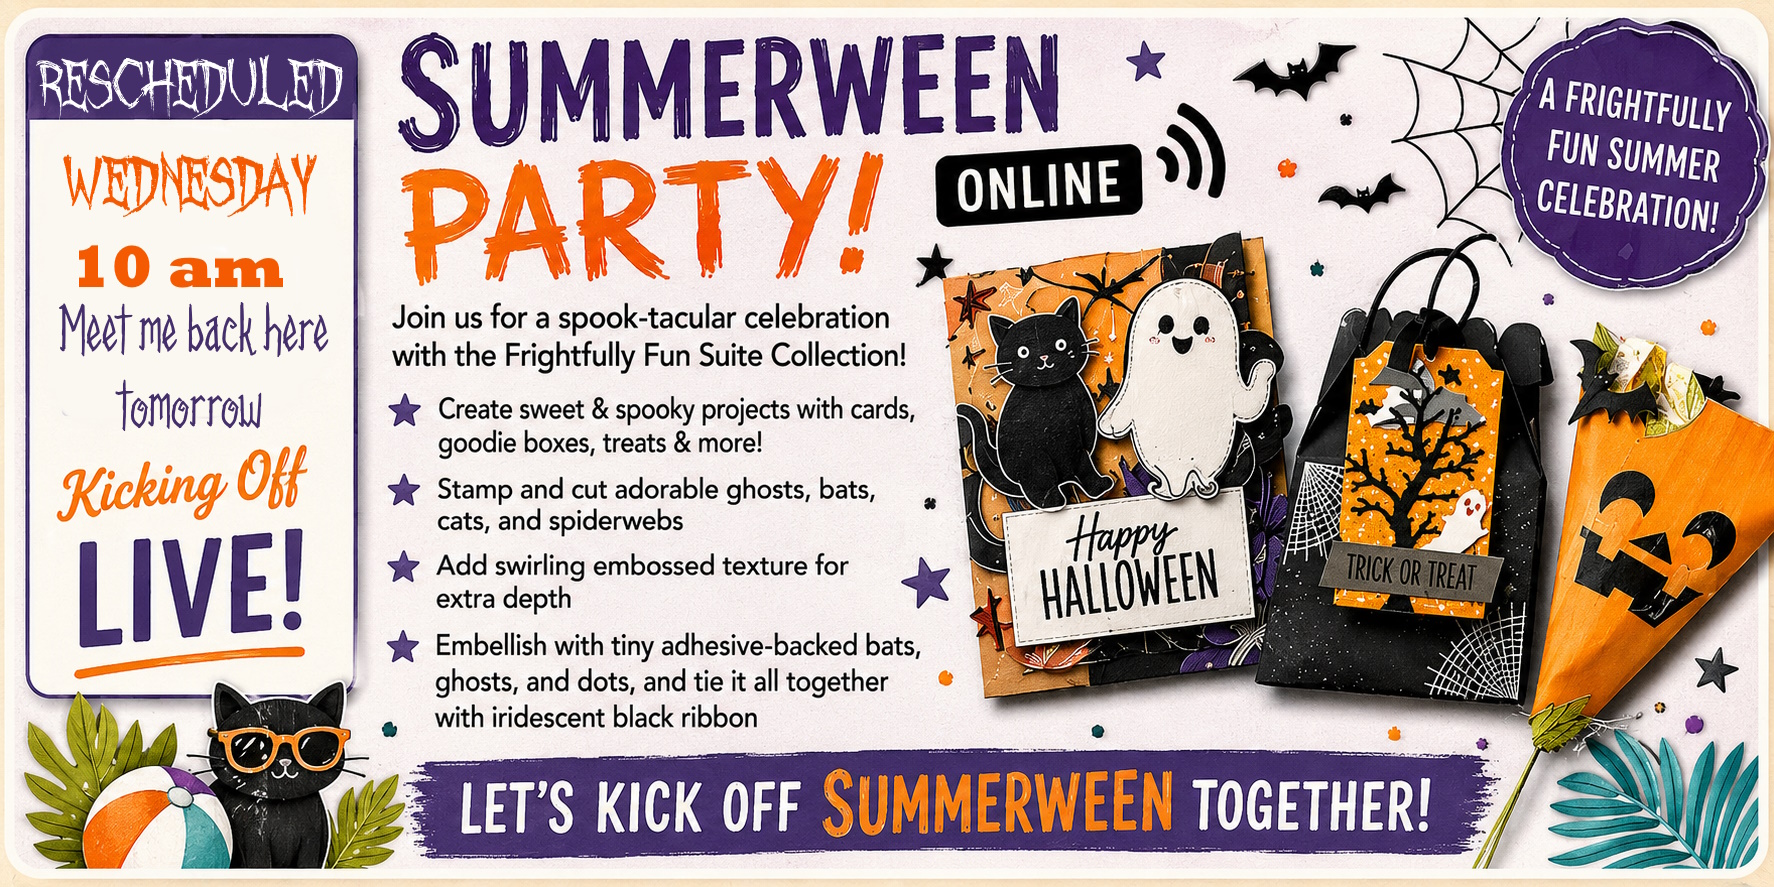
The Spooktacular 6″ x 6″ Designer Series Paper will be available beginning July 1st as part of Stampin’ Up!’s exciting new Online Exclusives Release. If you love creating for Halloween, you’ll want to add this paper to your wish list right away. The playful characters and coordinating patterns make it perfect for cards, treat holders, party favors, scrapbook pages, and so much more…. And JOIN ME for my Summerween Party on Facebook!
Whether you’re creating projects for grandchildren, Halloween parties, coworkers, neighbors, or trick-or-treaters, this paper makes it simple to create something handmade and memorable.
Now I have to ask…
Which one is your favorite? 🎃 Pumpkin 🧛 Vampire 💀 Skeleton 🧟♂️ Frankenstein
I think they’re all adorable, but I’d love to hear which spooky friend steals the show for you!
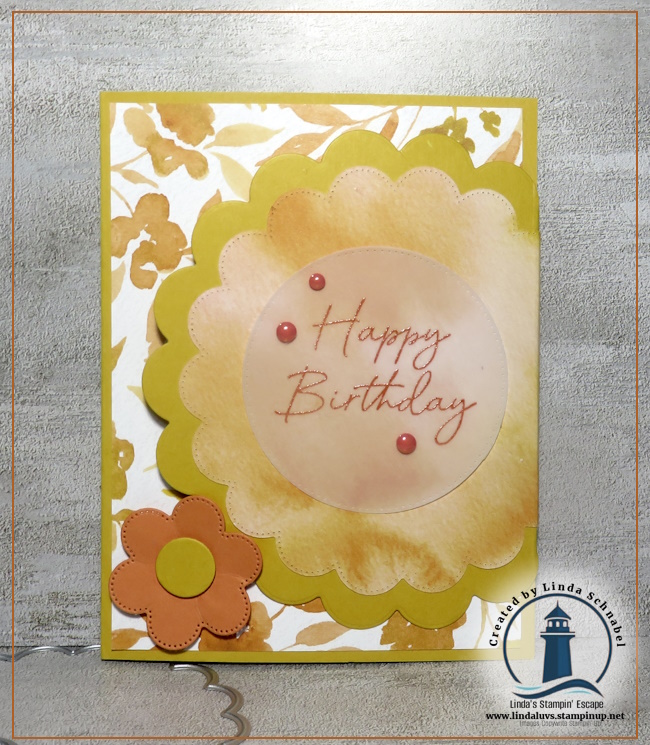
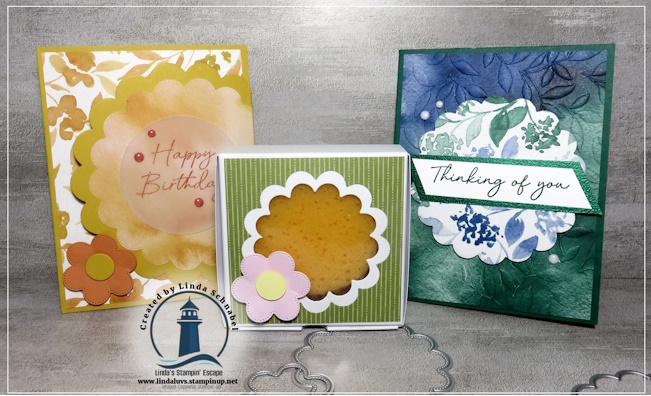
Today I have something extra special to share with you! I paired the sweet and versatile Scalloped Blooms Bundle with the gorgeous Garden Poetry Designer Series Paper to create not one, but two delightful projects. Best of all, I’ve included the video tutorial below so you can craft right along with me!
Our first project is a cheerful birthday card featuring layers of scalloped circles, soft ink blending, and warm peach and lemon tones. The Garden Poetry Designer Paper provides the perfect backdrop, adding just enough floral beauty without overwhelming the focal point. A simple flower accent and a few embellishments complete this happy design.
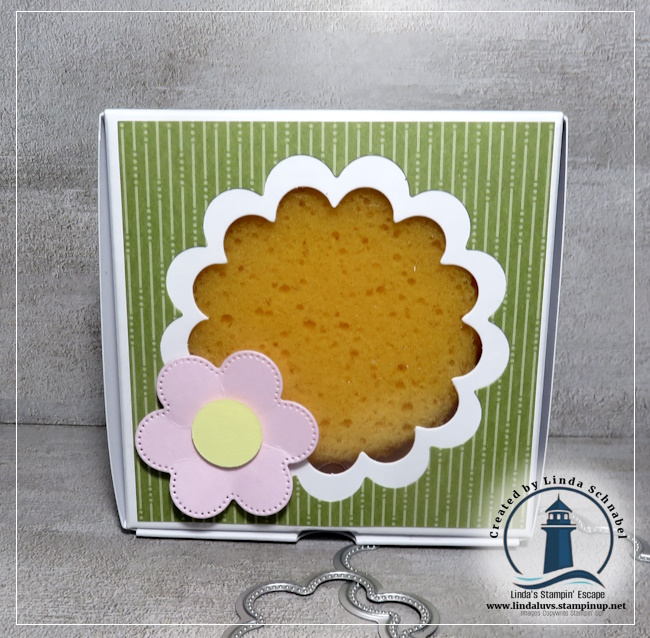
But why stop at a card? I also created an adorable 3-D treat holder featuring a scalloped window and sweet flower accent. It’s perfect for small gifts, candies, party favors, or just adding a little surprise to someone’s day. These kinds of projects are always fun to make and even more fun to give!
One of the things I love most about the Scalloped Blooms Bundle is how easily the dies and sentiments can be mixed and matched for cards, gift packaging, and so much more. And paired with the soft colors and beautiful patterns found in the Garden Poetry Designer Series Paper, the possibilities are endless.
If you’ve had your eye on the Garden Poetry Designer Series Paper, now is the time to grab it! This beautiful paper has made its way onto the Last Chance List, which means once it sells out, it will be gone for good. Last Chance products can disappear quickly, and some favorites don’t last long.
So pour yourself a cup of coffee, watch the video below, and join me as we create these two charming projects together. I hope they inspire you to pull out your supplies and enjoy a little creative escape of your own!
I hope your Easter Sunday is filled with joy, peace, and a little time to enjoy the beauty of the season—whether that’s with family, a quiet moment of reflection, or a bit of creativity in your craft space. Today I’m sharing two sweet projects that celebrate everything we love about spring… soft colors, fresh blooms, and a touch of whimsy.
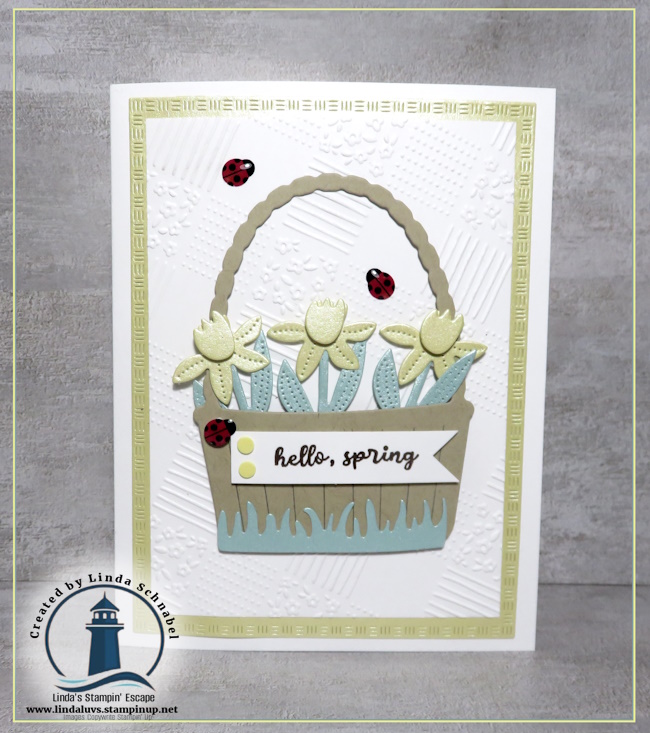
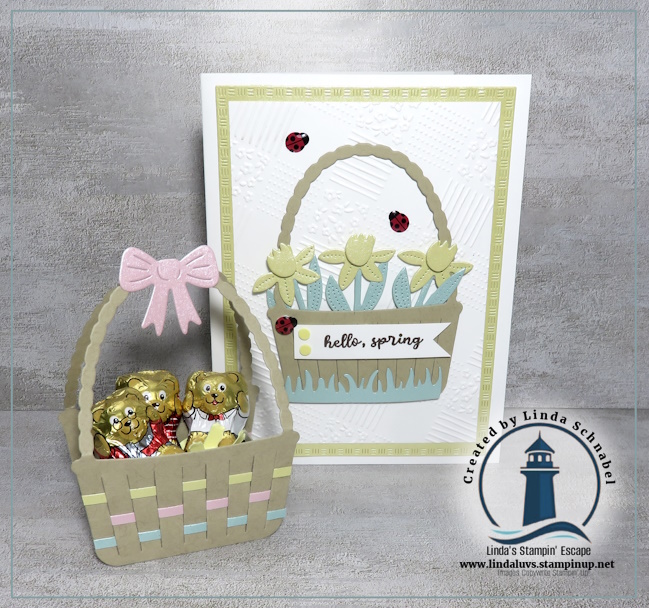
This card is such a lovely way to welcome the season! While the Easter Basket Dies used here are now retired, the design itself is timeless and easy to recreate with similar shapes and dies you may already have in your collection.
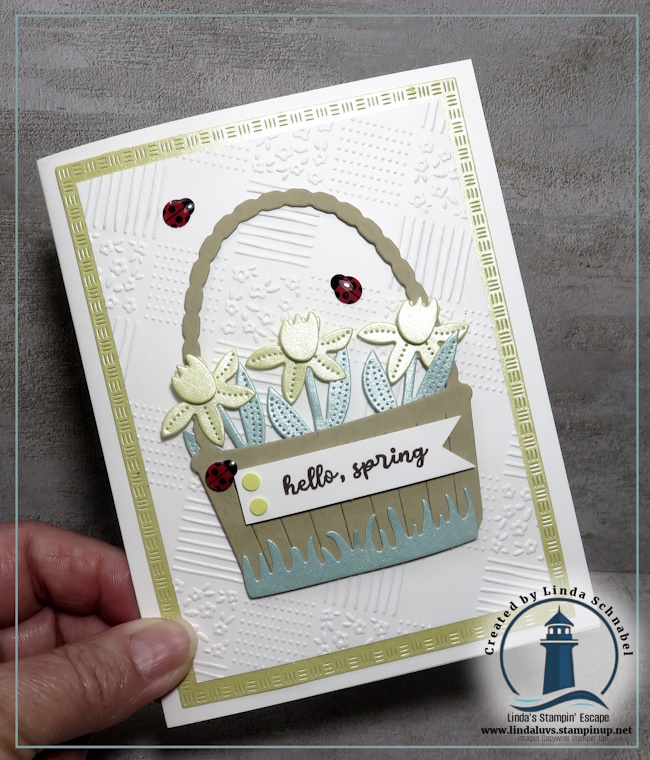
One of my favorite details on this card is the embossed background—instead of running the cardstock straight through the embossing folder, I angled it slightly. This simple little twist creates a completely different look, adding movement and visual interest without any extra supplies. It’s a great reminder that sometimes all it takes is a small change to spark new creativity!
The soft florals (those adorable daffodils and one of the main reasons I purchased this bundle) tucked into the basket, paired with those adorable little ladybugs, bring this card to life in such a cheerful way. It’s the perfect combination of sweet and simple.
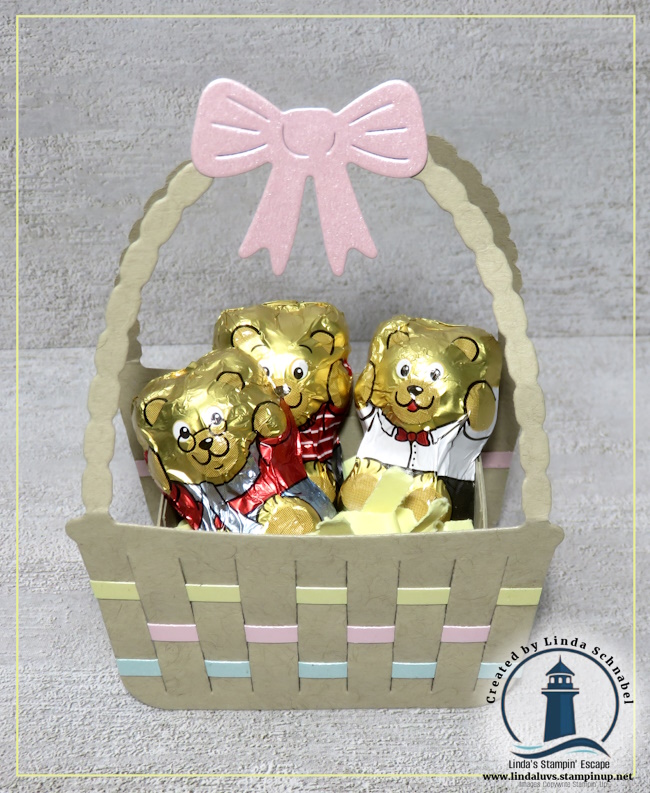
Now let’s talk about this little basket… isn’t it just the cutest? This project was created using two basket die cuts, along with a small handmade box tucked inside to hold all the goodies.
I love how the layered strips give it that woven basket look, and the soft pastel accents make it feel perfectly springy. Add a sweet bow to the handle and fill it with chocolates or small treats, and you’ve got a thoughtful handmade gift that’s sure to bring a smile.
This is a wonderful project for:
Easter place settings
Small gifts for friends or grandchildren
Craft fairs or party favors for Spring!
And the best part? You can easily customize the colors and embellishments to fit any occasion beyond Easter.
As we celebrate today, I just want to take a moment to wish you a beautiful and meaningful Easter. Whether you celebrate the season for its faith, its renewal, or simply the joy of springtime, I hope your day is filled with love, warmth, and inspiration.
Thank you for spending a little time with me today—it truly means so much.
Halloween is creeping closer, and now is the perfect time to get your hands on the Spooky Sweet Suite Collection! Whether you’re a seasoned crafter or just getting started, this suite makes it frightfully fun to create handmade treats, cards, and party favors that your ghouls and goblins will love.
🕸️I’m so excited to announce that this Friday, I will host Halloween Week here on the blog! Each day I’ll be sharing cards, projects, and more to spark your creativity and inspire you to head into your craft room for some spooky fun. 👻From playful ghosts to charming treat holders, you’ll find plenty of ideas to bring a little extra magic to your Halloween crafting. 🎃Here are a few fun ideas to get you started …
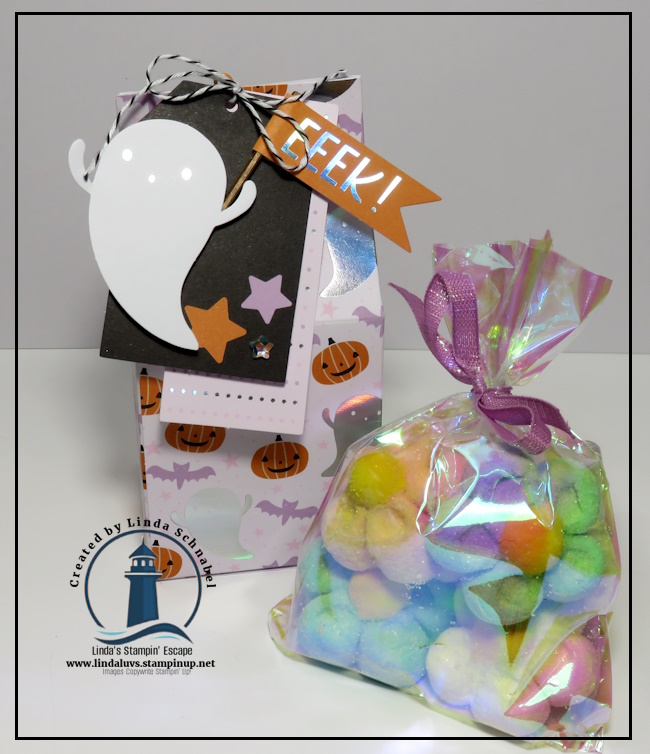
🎃 First up: I shared how to dress up a simple jar by using the tag elements from the patterned paper. A little ribbon, a sparkle or two, and voilà — a spooky-sweet gift that’s both cute and quick!
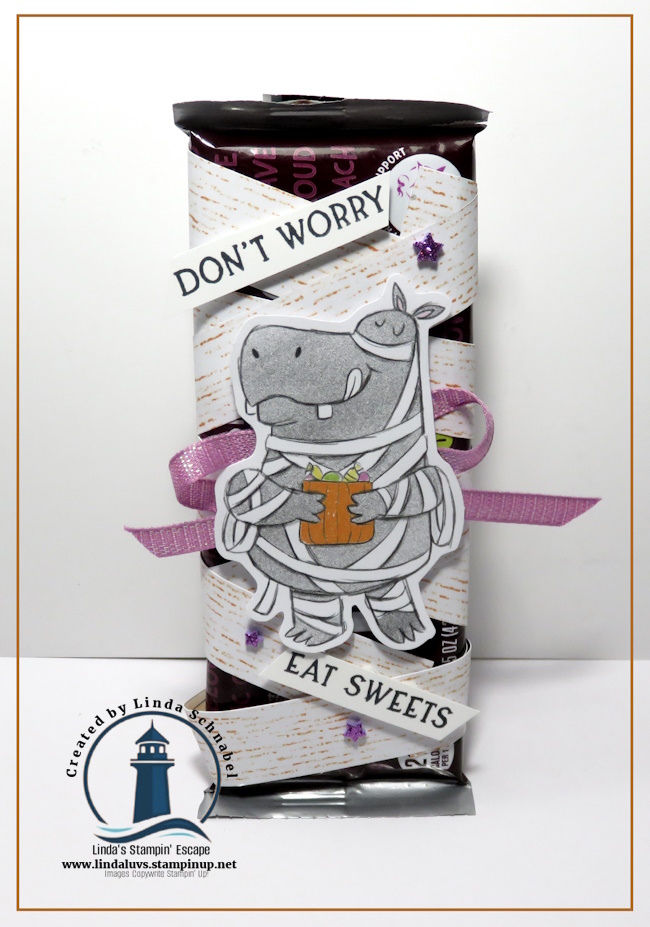
🍫 Next up: We wrapped a classic Hershey bar to look like a mini mummy! Using torn strips of designer paper, we gave it some fun texture, then added a die-cut straight from the paper pack — no stamping required! These treats are perfect for school parties, coworkers, or BOO’ing your neighbors!
💡 Want to see how it’s done step-by-step? You can catch the full video replay CLICK HEREand enjoy the magic along with me!
The Spooky Sweet Suite Collection has everything you need to bring your Halloween crafting to life — from costumed critter stamps 🐶🐱 and coordinating dies (yes, there’s a haunted house!) to not-so-spooky patterned paper, treat bags, glittering star embellishments, and shimmery ribbon. It’s designed to mix, match, and make your projects as boo-tiful as they are fun.
🛒 Ready to add this suite to your spooky stash? Trust me, you don’t want to miss it! Head to my online store to grab your bundle or click the links below and start crafting those hauntingly cute treats today.
💀 Until next time… stay sweet and spooky, my friends! Happy Haunting & Happy Stamping! — Linda 💜🦇
Halloween is creeping closer, and now is the perfect time to get your hands on the Spooky Sweet Suite Collection! Whether you’re a seasoned crafter or just getting started, this suite makes it frightfully fun to create handmade treats, cards, and party favors that your ghouls and goblins will love.
🕸️ This past Wednesday during our Facebook Party LIVE, I showcased two super fun Halloween treat ideas using this adorable suite!
🎃 First up: I shared how to dress up a simple jar by using the tag elements from the patterned paper. A little ribbon, a sparkle or two, and voilà — a spooky-sweet gift that’s both cute and quick!
🍫 Next up: We wrapped a classic Hershey bar to look like a mini mummy! Using torn strips of designer paper, we gave it some fun texture, then added a die-cut straight from the paper pack — no stamping required! These treats are perfect for school parties, coworkers, or BOO’ing your neighbors!
💡 Want to see how it’s done step-by-step? You can catch the full video replay CLICK HEREand enjoy the magic along with me!
The Spooky Sweet Suite Collection has everything you need to bring your Halloween crafting to life — from costumed critter stamps 🐶🐱 and coordinating dies (yes, there’s a haunted house!) to not-so-spooky patterned paper, treat bags, glittering star embellishments, and shimmery ribbon. It’s designed to mix, match, and make your projects as boo-tiful as they are fun.
🛒 Ready to add this suite to your spooky stash? Trust me, you don’t want to miss it! Head to my online store to grab your bundle or click the links below and start crafting those hauntingly cute treats today.
💀 Until next time… stay sweet and spooky, my friends! Happy Haunting & Happy Stamping! — Linda 💜🦇
Today we’re going to discover the versatility and elegance the Beautiful Gallery Designer paper encompass. Whether you’re drawn to its moody landscapes or delicate floral sketches, this collection provides the perfect backdrop for projects that feel both classic and creatively fresh. I can’t wait to share these fun and creative ideas with you!
Step into an old-world art gallery with the exquisite Beautiful Gallery 6″ x 6″ Designer Series Paper—a true masterpiece in papercrafting! This collection captures the charm of classic European galleries with its moody landscapes, delicate floral sketches, and richly textured backdrops. Whether you’re drawn to the soft, weathered brushstrokes or the deep, dramatic tones, this paper has something to stir the artist in every crafter.
With a versatile palette that includes Basic Beige, Calypso Coral, Mossy Meadow, Secret Sea, and Peach Pie, alongside grounding neutrals like Smoky Slate, Crumb Cake, and Early Espresso, you’ll find endless ways to let your creativity flow. Add layers of elegance to a scrapbook page, create a card that feels like a canvas, or make tags that look like they belong in a museum gift shop. This paper is more than pretty—it’s expressive, eclectic, and beautifully bold.
Looking for a unique way to showcase the stunning patterns in the Beautiful Gallery Designer Series Paper? Simply frame it! I selected two of my favorite designs and placed them in classic frames—instantly transforming them into elegant, gallery-style art pieces. Pair them with cherished family photos, like snapshots of grandparents or meaningful moments, and create a heartfelt collage on your wall. It’s a simple yet sophisticated way to bring both beauty and memory into your home décor.
Here’s another fun and unique way to display this beautiful paper—I used an open-faced frame to create a birthday card “stand”! How clever is that? It turns a handmade card “front” into a piece of framed art, perfect for someone to display on their desk at work or at home. It’s a thoughtful twist on traditional card-giving and a lovely way to let your creativity shine beyond the envelope.
One of my favorite ways to stretch the use of designer paper is by stamping directly onto it—and the Beautiful Gallery DSP is perfect for this! When I came across the stunning seascape design, I immediately pictured it with the lighthouse image from the Framed Scenes Stamp Set. With just a bit of simple coloring, the scene came to life! It’s amazing how easily you can transform patterned paper into a custom focal point. I used it to create a one-of-a-kind card that blends artistic texture with heartfelt stamping—truly the best of both worlds.
The Beautiful Gallery Designer Series Paper is truly a must-have for any crafter who loves to blend artistry with versatility. Whether you choose to frame it as stunning wall art, create unique card displays, or personalize it with your own stamped images, this collection offers endless possibilities to inspire your creativity. (Note: All frames were purchased at the $ $tore)
I hope these project ideas encourage you to explore the timeless beauty and flexible designs of Beautiful Gallery DSP in your own crafting. Happy creating!
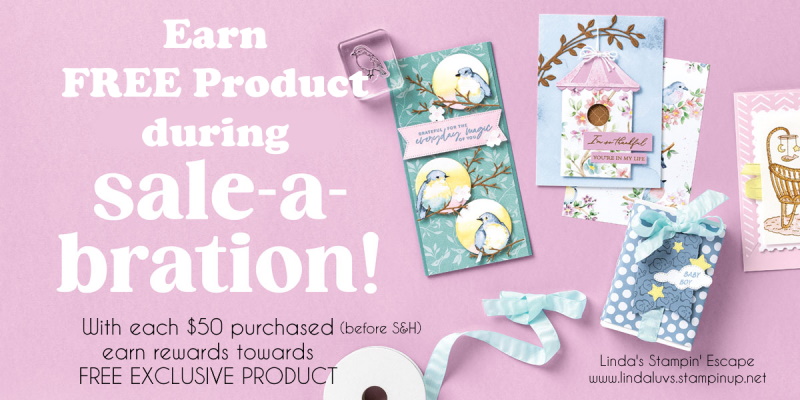
Don’t forget, Stampin’ Friends — there’s still time to get in on my Tote-lly Awesome July Giveaway! With every $50 order (before shipping & tax), your name goes into the drawing to win this adorable Strawberry Slush Craft Tote—perfect for carrying your supplies in style. Whether you’re crafting at home or heading to a class, this tote is a must-have!
Get your order in by July 31st to be entered… drawing to be held August 1st!
Today, I’m thrilled to give you an exclusive sneak peek of the NEW Gallery Blooms Bundle—and trust me, this one is going to make your creative heart flutter! Whether you’re a cardmaker, scrapbooker, or tag creator, this bundle has something special for everyone. Available to order beginning May 6th!
🎥 Be sure to watch today’s video where I walk you through this gorgeous bundle up close, along with the Beautiful Gallery 6″ x 6″ Designer Series Paper. You’ll also get a peek at several of the cards and projects I’ve created using these stunning new products.
✂️ The Gallery Blooms Bundle is truly a floral dream. It includes:
Detailed flower shapes perfect for layering or standalone features
Versatile rectangle dies that add a gallery-style flair to any project
You can stamp and die cut your favorite florals to build a lush paper bouquet, or use the open rectangles to highlight a single bloom like a work of art. The dies are incredibly versatile and lend themselves beautifully to both clean and layered designs.
Whether you’re making a bold floral focal point or crafting a soft vintage-inspired layout, this bundle offers creative possibilities for every style.
On this beautiful piece of Designer paper I teamed it up with the Framed Scenes stamp set and stamped the Lighthouse directly onto the paper and colored it. It’s so much fun to mix and match out bundles for even more creative opportunities.
🖼️ Beautiful Gallery Designer Series Paper: Let’s talk about this paper—it’s not your average floral print!
The Beautiful Gallery 6″ x 6″ Designer Series Paper is like stepping into an old-world art gallery. You’ll find:
Moody landscapes
Elegant floral sketches
An eclectic mix of painterly textures and rich colors
These dramatic designs add instant depth and character to any project. Use them as card backgrounds, tag toppers, or scrapbook accents—you really can’t go wrong. I especially love how the more artistic prints pair so well with the detailed dies in the bundle. It’s truly a match made in paper-crafting heaven!
Look …. they are perfect for framing! Add a picture to the mix and create a warm and beautiful gallery of your own. Here’s the one I created for a friend – doesn’t it make the perfect gift that they could put on their mantle or their desk at work!?
🌟 Get Inspired!
Below the video, I’ve posted the cards and projects I shared so you can take a closer look. You’ll see a variety of ideas—
📅 Mark Your Calendar!
The Gallery Blooms Bundle and Beautiful Gallery Designer Paper will be available to order starting May 6th. Be sure to add it to your wish list—you won’t want to miss this one!
Let me know in the comments which project was your favorite or how you plan to use this stunning new suite. And if you’re ready to create a paper gallery of your own, make sure you’re subscribed so you don’t miss more inspiration coming your way!
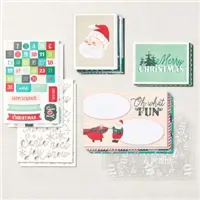
🎄 It’s the third day of Christmas, and I’m so excited to share a creative and thoughtful gift idea for the season: Stampin’ Up!’s Kits Collection! Even better, we’ve just introduced two brand-new kits that are perfect for gifting or crafting your own holiday fun. Whether you’re shopping for seasoned stampers or someone new to crafting, these kits are an all-in-one creative escape.
Introducing Our Two New Kits
Perpetual Beauty Calendar Kit This kit is perfect for crafting a 12-month calendar to keep you organized and inspired all year long. The included stamp set lets you customize each month, while the precut paper pieces and stickers make decorating quick and easy. The end result? A calendar as unique as your schedule. Whether it’s for yourself or someone special, this calendar is a practical yet beautiful gift!
Cherry Blossom Treat Boxes Kit Adorable and elegant, these DIY treat boxes are a gift-giving dream! Perfect for weddings, baby showers, birthdays, or holidays, these treat boxes feature unique slotted petals at the top that fold together to create a lovely blossom. The cool, soothing tones work year-round, making them perfect for any occasion.
As a Wisconsinite, I can’t help but think of Door County’s famous cherries! Imagine tucking a sweet Door County treat into one of these charming boxes—ideal for holiday gifting, Valentine’s surprises, or even spring gatherings. However, you don’t have to live in Wisconsin to enjoy these adorable treat boxes!
Why Our Kits Make Perfect Christmas Gifts
Everything Included: No additional tools or supplies are necessary—just open the box and start creating!
Simple Instructions: Step-by-step guides make these kits easy for beginners and a joy for experienced crafters.
Versatile Usage: Gift a kit to someone crafty, or use it to host a fun and festive evening with friends.
Let your imagination run wild: craft calendars for grandparents, create treat boxes filled with goodies for teachers or neighbors, or gather your friends for a holiday craft night.
💡 Pro Tip: Pair a kit with a few handmade treats, a favorite tea, or a festive mug to make your gift extra special!
Great to be back … It’s the moment we’ve all been waiting for – the September-December Mini Catalog is officially LIVE! 🎉 From festive stamps to dazzling designer papers, this catalog is overflowing with everything you need to make your holiday season truly magical. Whether you’re a card-making enthusiast or a scrapbooker at heart, there’s something for everyone in this spectacular collection.
Holiday Magic at Your Fingertips
This year’s Holiday Mini Catalog is bursting with creative potential. Imagine crafting your holiday cards with stunning new stamp sets, coordinating dies, and gorgeous designer papers. The catalog includes everything from cozy winter scenes to elegant holiday florals, ensuring that your projects will stand out in style. And don’t forget the embellishments! With glittery accents, beautiful ribbons, and more, you can add the perfect finishing touches to all your holiday creations.
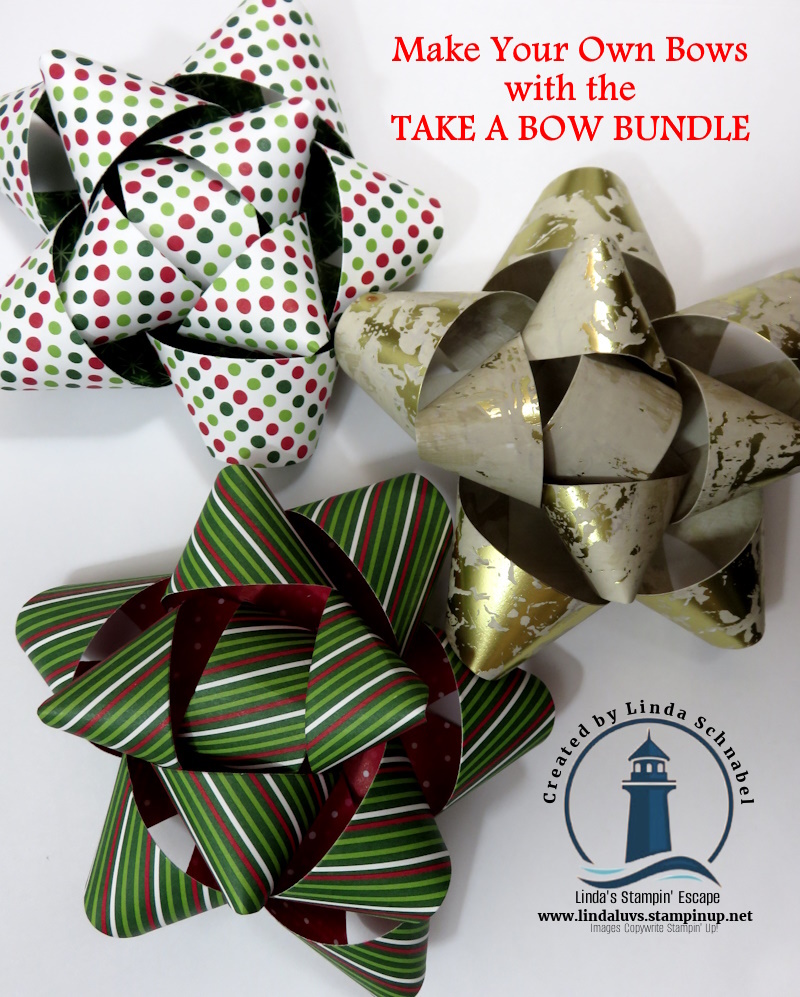
Here are a couple projects I made during my Facebook LIVE yesterday … featuring the “Take a Bow Bundle”
I also wanted to share another project you can do with your “bow” strips – create a background for a card. Along with the awesome Take a Bow designer paper, I incorporated some of the die cuts from the “A Little Bit Festive” pieces!
Introducing the Scrapbooking Catalog & New Cardstocks
But wait, there’s more! Alongside the Holiday Mini Catalog, Stampin’ Up! has also launched the brand-new Scrapbooking Catalog – a digital-only guide filled with everything you need to preserve your precious memories. Whether you’re a seasoned scrapbooker or just getting started, this catalog is a treasure trove of inspiration. Check out the video walkthrough showcasing some of the products …
I’d also like to share the video introduction of the Two-Tone Cardstocks. These versatile papers are designed to coordinate perfectly with your scrapbook layouts, giving your pages a polished and professional look. With a range of rich, complementary colors, these cardstocks are perfect for capturing the essence of the holiday season.
The wait is finally over – you can now shop all the goodies you’ve been eagerly awaiting! Whether you’re planning to make your holiday cards, scrapbook your family memories, or both, these catalogs are packed with everything you need to make this season unforgettable.
Let’s kick off this holiday season with creativity, joy, and a whole lot of crafting! I can’t wait to see what you create with these fantastic new products. Watch for upcoming classes too!
Today, March 14th, marks National Children’s Craft Day—a day dedicated to celebrating creativity, imagination, and the joy of crafting with kids.
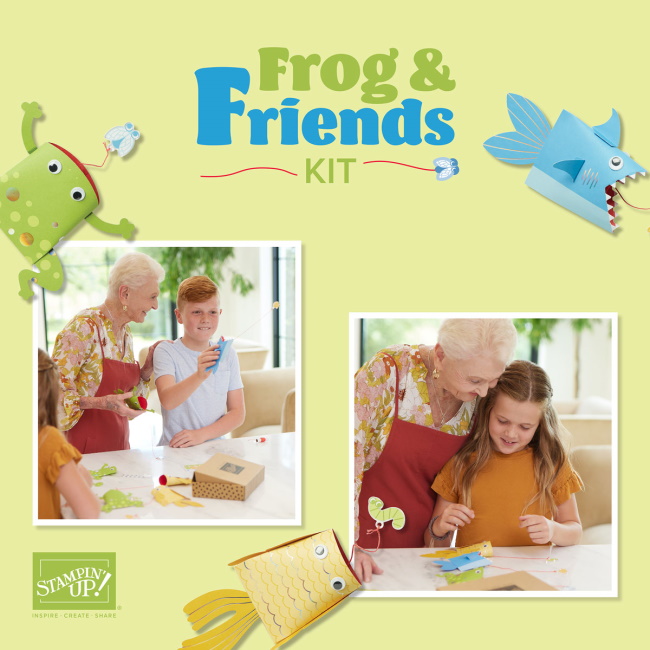
What better way to commemorate this special day than by exploring a delightful craft kit designed for children? Enter the Frog & Friends Kit by Stampin’ Up! This charming kit offers a fun cup-and-ball game featuring three adorable designs, promising hours of entertainment and bonding time for families.
The Frog & Friends kit is not just about crafting; it’s about creating memories, fostering creativity, and encouraging quality time spent together.
The Frog & Friends Kit comes with all the materials needed to create three unique cup-and-ball games, each featuring a lovable frog design. From vibrant colors to cute details, every element of this kit is designed to spark joy and imagination in children.
Crafting is more than just a hobby—it’s an opportunity for kids to learn, explore, and express themselves. Here’s why the Frog & Friends Kit stands out as an excellent choice for National Children’s Craft Day and beyond:
Engaging Activity: The cup-and-ball game included in the kit provides a fun and interactive way for children to enhance their hand-eye coordination and concentration skills while having a blast.
Adorable Designs: Who can resist the charm of friendly frogs? The whimsical designs featured in the kit are sure to captivate children and ignite their creativity.
Quality Family Time: In today’s fast-paced world, finding time to bond as a family is invaluable. The Frog & Friends Kit offers a wonderful opportunity for parents and children to come together, engage in a shared activity, and create lasting memories.
Educational Benefits: Crafting promotes cognitive development, problem-solving skills, and fine motor skills in children. With the Frog & Friends Kit, kids can enjoy a fun crafting experience while reaping the educational benefits it offers.
Ready to embark on a crafting adventure with your little ones? You can easily find the Frog & Friends Kit in my online store or by following the link provided below. Additionally, a helpful video tutorial is available to guide you through the crafting process, ensuring a smooth and enjoyable experience for all.
As we celebrate National Children’s Craft Day, let’s embrace the joy of creativity and imagination with the Frog & Friends Kit by Stampin’ Up! Whether you’re crafting with your own children, hosting a crafting party, or simply looking for a fun activity to enjoy together, this delightful kit promises endless entertainment and cherished memories. Get ready to hop into a world of creativity and fun with the Frog & Friends Kit today!
Thank you for spending part of your day here with me,
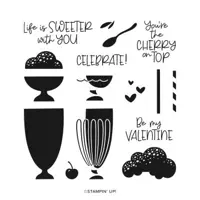
Today I have a 3-D project to share with you that has a touch of scrapbooking flair! As the temperature drops, there’s no better time to embark on a journey of artistic expression, and the Bee Mine Suite is here to make it even more enchanting. This whimsical assortment features an array of “bee”utifully designed stamps & papers; from buzzing bees and honeycomb patterns to sweet sentiments that evoke the warmth of heartfelt emotions.
I want to share and inspire you with this cute creation ….
Let’s start with what makes this a 3-D project … this cute little picture frame that I picked up at the $$1.25 Store! This is a cute picture frame to begin with and holds a 4″ x 3″ photo, so that is the measurement of my designer paper. These cute little projects make the PERFECT Grandparents Gift on Valentines Day and cute to have around the house as your 3-D Scrapbook. Friends love these too!
The photo montage can be easily moved into your scrapbook. I attached the bee and jar of honey with a glue dot (Just enough to hold it) and then using your Take Your Pick tool… you can remove it as well to go into your scrapbook.
The sentiment, bee and jar of honey all come from the Bee Mine Suite. I used the Circle Die from Stylish Shapes and the banner die from Nested Essentials to embellish my creation and to create the focal point! And yes, that is my Armani again. This one is going to his mama for Valentines Day ❤
Whether you’re assembling a scrapbook filled with cherished memories or working on a whimsical 3-D project, the Bee Mine Suite provides the perfect elements to bring your vision to life. I’ve got links to the products used today below.
Thank you for joining me today.
Don’t miss out on the opportunity to turn your projects into extraordinary works of art. Click, create, and let your imagination soar with the Bee Mine Suite today!
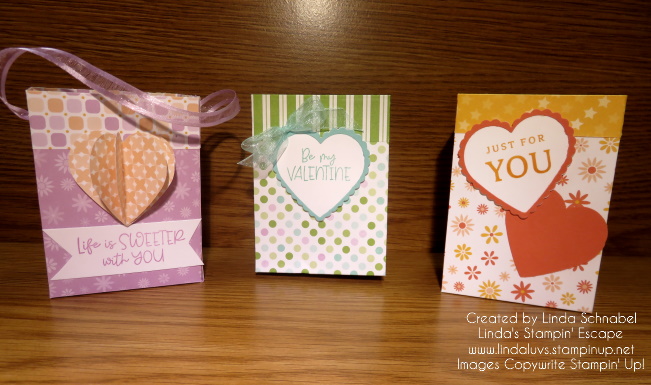
Happy Wednesday! Today I will be sharing the replay of my Facebook LIVE presentation from last night: Punchin’ with Heart: Creating Cute Valentine Treat Boxes I’m going to show you how quick & easy it is to make these cute boxes along with some fun tips for your Heart Punches. Did I mention cards too!!
Grab a beverage, sit back, relax and join me for my replay and the things that happen when your LIVE!
Hope you enjoyed and caught those tips! Here are the dimensions for the boxes. Start with a 12″ x 12″ – cut in half so you have a 12″ x 6″ sheet to start with.
Score at 2″ – 5″ – 7″ and 10″ at 11″ cut off end.
Turn paper 90 degrees and score at 1″
Turn 180 degrees and score at 1″
Burnish all score lines and cut and trim as shown in the video
Here is the card I created in the video too …
Thank you for hanging out with me today. I hope you enjoyed these cute boxes and were inspired to create some yourself.
Here is a list of ingredients used in today’s card. You can click on any one for more information about the product, or to begin shopping at my OnLine store. Thank you for your support.
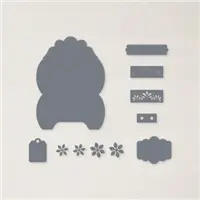
Today I had a request to share how I created a cute little Gift Basket from the Pillow Box Die … You’ll be surprised at how easy this is to make! The designer paper being used is discontinued but if you have this die … you can create baskets for ANY occasion!
I have the dimensions for the inner box in the video but I thought I would share them again. Start with a 7-1/4″ x 5-1/2″ piece of cardstock and score at 2″ on all for sides. Then you will cut on the score lines on the 7-1/4″ length sides (ref. Video) You should have also seen the cute little baskets I made for the Mantle Gifts for my Holiday Stampin’ Retreat!
The ladies watching LIVE had plenty of ideas they could use these for … Baby Showers, Wedding Showers, Birthday Parties, on the table for the Holiday’s … a teachers Gift or a cute little gift for a co-worker. The possibilities are endless, and that cute little basket is priceless!
I have listed the ingredients below for your shopping convenience. Let me know if you have any questions.
Are you a paper hoarder like me? I always love having a stash of designer paper in many different patterns that I can use at a moments notice, and creating a gift bag is such an occasion.
Creating your own Gift Bag is so easy and then you can create a coordinating card to go with it. Today’s post has a cute bag highlighting the Santa’s Delivery paper ….
I love this Santa Express gift bag created by Stampin’ Up! Concept Artists for the July-Dec Mini Catalog.
Here are the measurements to recreate this project at home:
1- Start with 8-1/2″ x 11″ piece of designer paper.
2- On 11″ side, score at 4-1/4″, 5-1/4″, 9-1/2″, 10 1/2″.
3- On 8-1/2″ side, score 1″ and 6-1/2″.
4- Fold at 6-1/2 mark first for the flap and then glue the rest of the bag together.
Enjoy making gift bags for your friends and loved ones.
Here are the products used in today’s post … Click on the item for more information or to purchase.
Today I’ll be sharing my Facebook LIVE replay for you. We created a cute little Gift Basket from the Pillow Box Die (Retiring) … You’ll be surprised at how easy this is to make!
I have the dimensions for the inner box in the video but I thought I would share them again. Start with a 7-1/4″ x 5-1/2″ piece of cardstock and score at 2″ on all for sides. Then you will cut on the score lines on the 7-1/4″ length sides (ref. Video) You should have also seen the cute little baskets I made for the Mantle Gifts for my Holiday Stampin’ Retreat!
The ladies watching LIVE had plenty of ideas they could use these for … Baby Showers, Wedding Showers, Birthday Parties, on the table for the Holiday’s … a teachers Gift or a cute little gift for a co-worker. The possibilities are endless, and that cute little basket is priceless!
I have listed the ingredients below for your shopping convenience. Let me know if you have any questions.
Stop back tomorrow … I have something interesting to show you using this die!! Thank you so much for joining me today!
TODAY’S STAMPIN’ SUPPLY LIST … If you liked the products used in today’s projects, I have links for you below. Just click on the item you would like more information on, or to begin your shopping. It will take you directly to my website. Thank you ♥