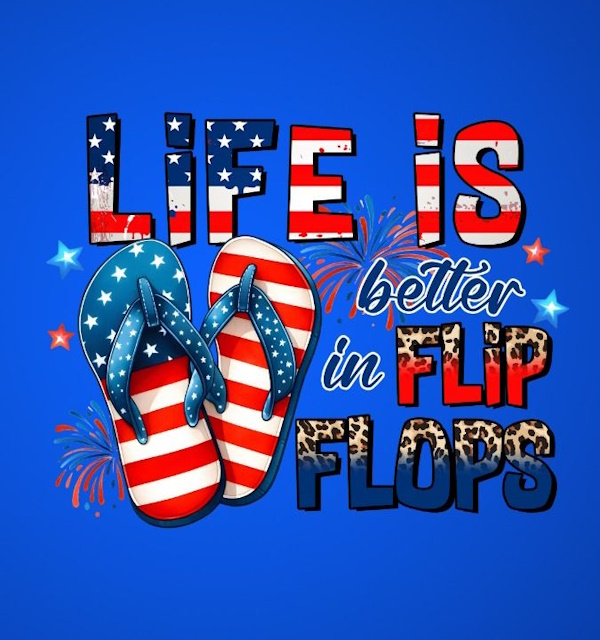
Happy 4th of July! Life Really Is Better in Flip Flops!

🇺🇸 Happy 4th of July Stampin’ Friends ~

I hope your day is filled with everything that makes summer special—family gathered around the table, laughter that carries through the backyard, the smell of something delicious on the grill, and fireworks lighting up the evening sky. Whether you’re celebrating with a big crowd or enjoying a quiet day by the lake, I hope you take a moment to relax, soak in the sunshine, and make a few wonderful memories.

When I think of summer, one thing always comes to mind… Flip flops! 🩴

They seem to have a magical way of reminding us to slow down, kick off our worries, and enjoy life’s simple pleasures. That’s exactly the feeling that inspired today’s projects featuring the Splash & Relax Bundle. It’s a collection that captures everything we love about summertime—from beach days and sunshine to carefree afternoons by the water.

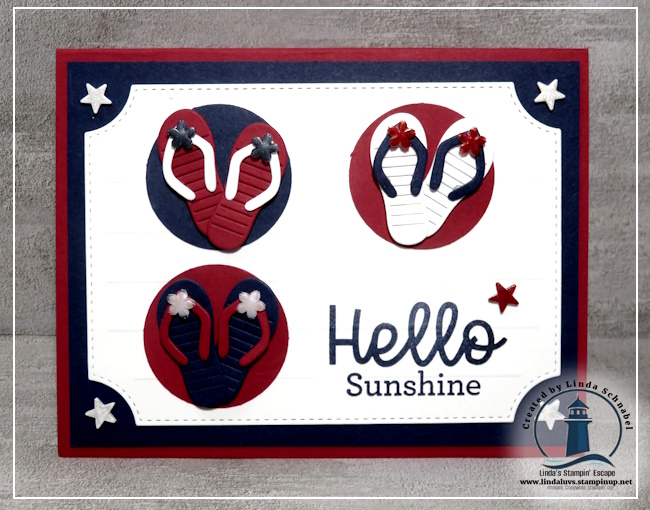
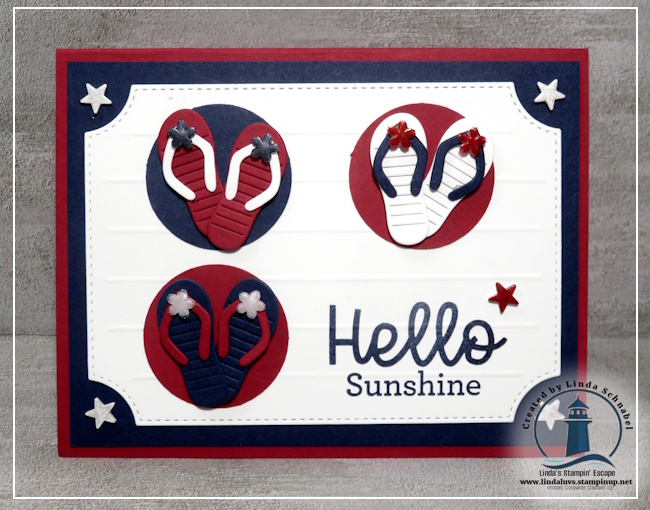
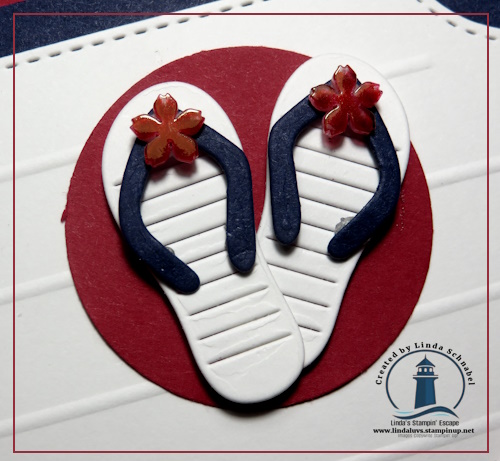
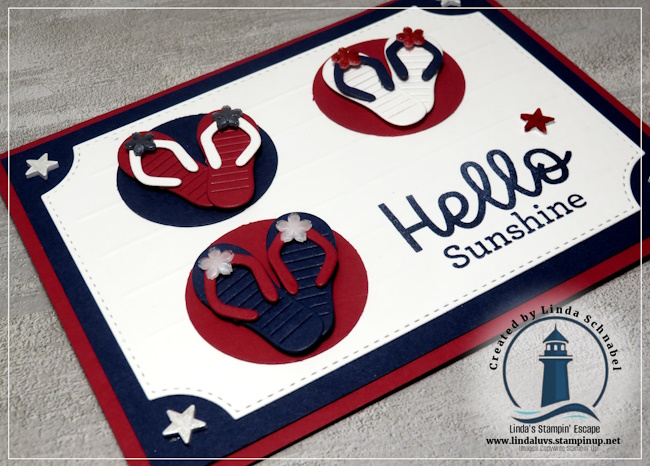
My first card is a little tribute to Independence Day, featuring three pairs of patriotic flip flops in classic Real Red, Night of Navy, and Basic White. It’s bright, cheerful, and the perfect reminder that even a simple pair of sandals can become the star of a handmade card!

If you’d like a closer look at how this card came together, along with additional photos and tips, you can read more about it here: (CLICK THIS LINK)

After the fireworks fade, summer continues—and so does the inspiration!

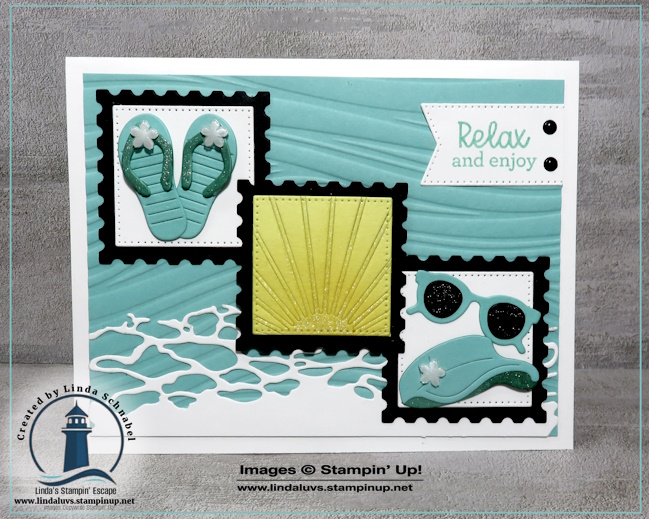
For my second project, I traded the patriotic colors for calming shades of Coastal Cabana and Basic White. I wanted this card to feel like a peaceful afternoon by the water.

Although the Wave Embossing Folder quickly disappeared from the Last Chance List, I couldn’t resist using it here to create the movement of rolling water. To enhance that beachy feeling, I layered in the Rolling Waves Dies, adding texture, the appearance of waves with a motion that almost makes you hear them.

The adorable flip flops, visor, and sunglasses all come from the Splash & Relax Bundle, making it easy to build a scene that says, “Vacation mode: ON!” … and of course, I added some Wink of Stella to make it all sparkle!

To finish everything off, I created my version of the summer sun using the sun die from the Sunset Coast Bundle, then framed each little beach element with the Perennial Postage Dies. Those postage-style frames create the perfect little snapshots of summer adventures.

One of the things I love most about the Splash & Relax Bundle is how easily it creates that carefree feeling we all crave this time of year. Filled with playful beach-inspired images like flip flops, visors, sunglasses, and seaside accents, this bundle lets you turn ordinary cardstock into a relaxing getaway—no packing required!

As we celebrate America’s birthday today, I want to thank YOU for being such an important part of my stamping community. Your encouragement, your friendship, and your enthusiasm make this creative journey so much fun, and I’m grateful that we get to share it together.

Have a safe, happy, and memory-filled Fourth of July!

May your day be full of sunshine, your evening sparkle with fireworks, and may your flip flops take you somewhere wonderful.

Happy Stamping,
Linda 🩴🇺🇸☀️

Wild Bunch Meets Nature’s Symphony – An Adorable Koala Card

Hello Stampin’ Friends!

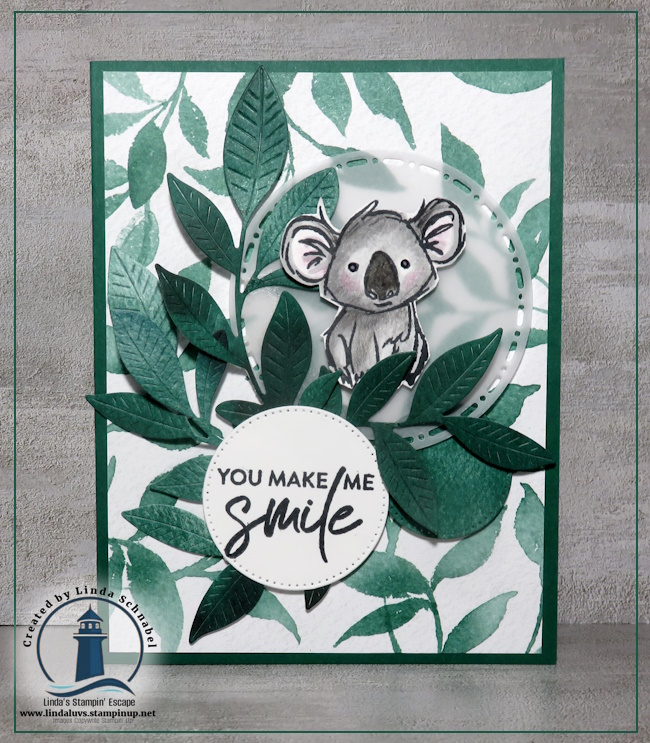
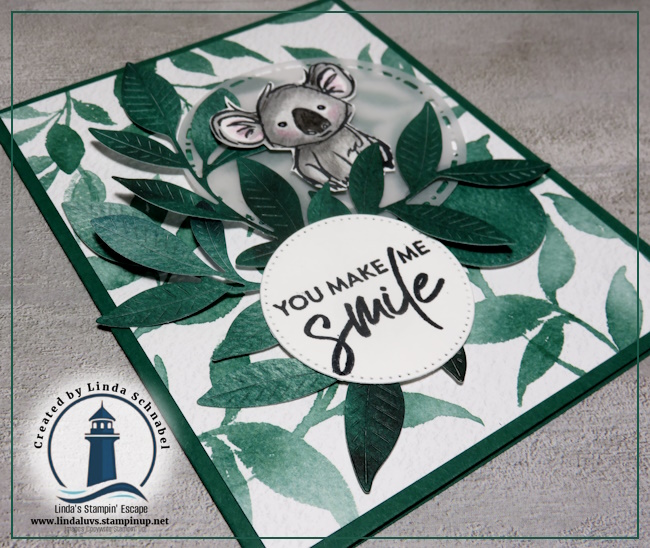
Today’s card features one of my favorite little critters from the Wild Bunch Stamp Set—this adorable koala! I have to admit, I smiled the entire time I was creating him. There’s just something about that sweet face peeking out from all those leaves that makes this card extra special.

One of the things I love most about card making is combining products from different collections to create something unique, and that’s exactly what happened here. The sweet koala from Wild Bunch paired beautifully with the foliage from the Nature’s Symphony Bundle, giving this card a lush, tropical feel.

The background was kept simple with a piece of Garden Poetry Designer Series Paper, and then the fun began! I used that same designer paper to die cut all of the leaves. Layering them in various shades created wonderful dimension and texture, making it look like our little friend is happily nestled among the branches. I absolutely love how all those layers came together!

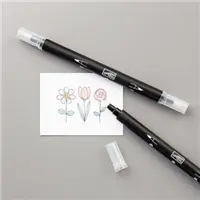
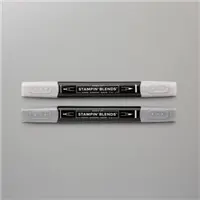
For the koala, I wanted soft shading and lots of character, so I reached for two favorite coloring tools. The base coloring was done with Smoky Slate Stampin’ Blends, and then I added extra depth and softness with Watercolor Pencils. Combining the two mediums gives the image a hand-painted look while still keeping the coloring easy and fun.

The stitched circle frame helps draw your eye right to the star of the card, and the cheerful sentiment, “You Make Me Smile,” seemed like the perfect finishing touch. After all, that’s exactly what this little guy does!

I hope today’s card inspires you to mix and match products from your own craft room. Sometimes the most unexpected combinations turn out to be the most delightful. Until next time, keep creating, keep experimenting, and most importantly, have fun along the way!

Wild Bunch Playful Penguins Fun Fold Card

Hello Stampin’ Friends!

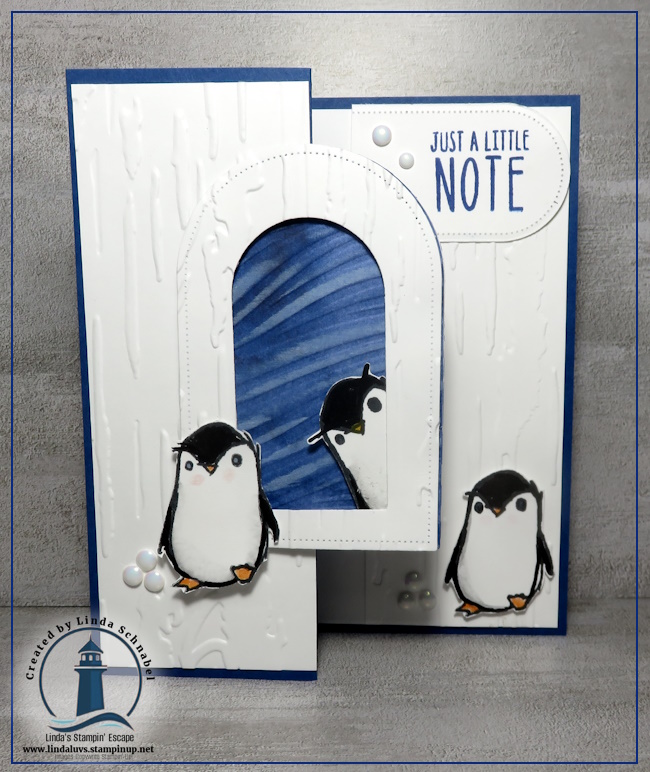
These playful penguins from the Wild Bunch stamp set are having a little fun with today’s adorable fun fold! I wanted to create a scene that looked like a snowy igloo, and these curious little cuties seemed perfect for peeking in and out of their icy home. Their sweet expressions and playful poses make this card impossible not to smile at!

Begin with an 8½” x 5½” piece of Blueberry Bliss cardstock. Score and fold it at 4¼”. Then fold the top flap back onto itself to create the fun front panel. The inside layer is Basic White, with a 2″ x 5¼” strip embossed along the exposed edge. You’ll also need a matching embossed panel for the front flap. Any embossing folder would work beautifully, but I think the Brick Embossing Folder would be especially fun if you’re trying to create the look of an igloo.

For the igloo opening, I used the Everyday Arches Dies to create the doorway. Inside, I added Blueberry Bushel Designer Series Paper from the Garden Poetry collection and embossed it with the Wave Embossing Folder. To give it a chilly, wind-blown appearance, I lightly dragged White Craft Ink across the raised ridges, creating the look of drifting snow and blowing winter winds.

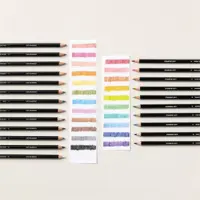
The three penguins were colored with a combination of the Smoky Slate Stampin’ Blends and the Watercolor Pencils with Blender Pen …. and arranged so they appear to be popping in and out of the igloo. I can just imagine them gearing up for a snowball fight!

Now I have to ask… which penguin steals the show? 👀 Is it the little one peeking through the igloo, the curious fellow on the left, or the sweet penguin on the right? 🐧🐧🐧

I hope this playful card inspires you to have a little fun with your stamps and try a creative fold or two. Sometimes the cutest cards are the ones that tell a story and make us smile!

Wild Bunch: A Little Cow with Big Memories

Hello Stampin’ Friends,

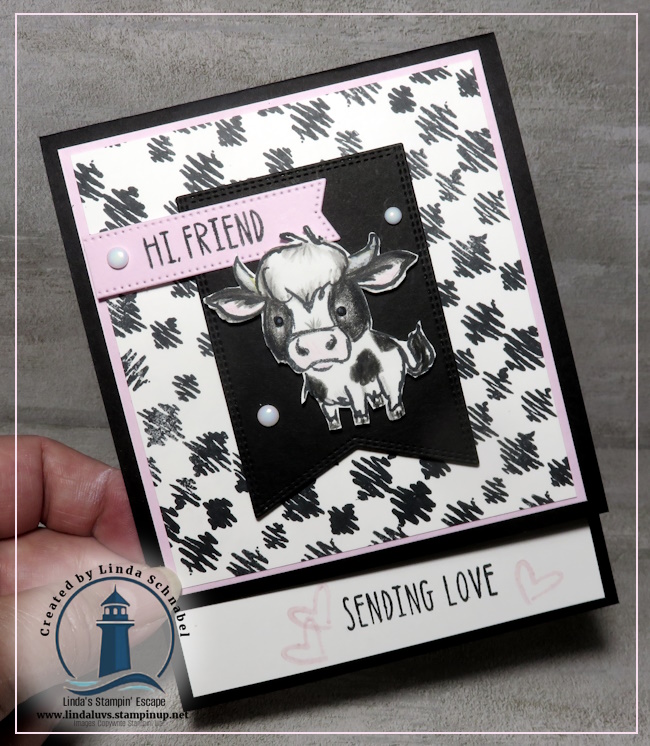
Today I’m sharing another adorable critter from the Wild Bunch Stamp Set, and this little cow completely stole my heart! As soon as I saw her, I knew she had to become a Holstein—the same kind of cows I remember from my Grandma and Grandpa’s dairy farm when I was growing up.

Those memories came rushing back while I was coloring. Early mornings, country roads, and fields dotted with black-and-white cows are all part of my childhood story. Then, of course, I started thinking about my daughter. When she was little, she was absolutely fascinated with cows! Every road trip included an excited announcement of, “Cows!” whenever she spotted them out the car window. It became such a habit that even years later, I had to stop myself from pointing them out every time I saw one! 😂

For this card, I kept the color palette simple—just black and white, just like my little Holstein, with a soft pop of pink for a sweet touch. The background was stamped with Memento Ink to create a fun, playful pattern that lets our star of the show take center stage. The black tag behind the cow was die cut using the Nested Essentials Dies, while the soft pink greeting banner was created with the Stylish Shapes Dies. Together, they add just the right amount of layering and help draw your eye directly to our adorable little friend.

And speaking of coloring… don’t put those Watercolor Pencils away just yet!

That’s exactly what I used to bring this little cutie to life. One of the things I love most about watercolor pencils is how easy they are to use. They’re perfect for newer stampers who may be a little intimidated by coloring techniques, but they also offer plenty of possibilities for experienced crafters who already own “all the things” (or so they claim! 😉).

With just a little shading and blending, you can add depth, dimension, and personality to your stamped images without needing a huge collection of markers or specialty tools. They’re affordable, versatile, and honestly one of the most underrated products in my craft room.

They’re also a favorite when the grandkids come over. The watercolor pencils are easy for little hands to use, and these adorable animals from the Wild Bunch Stamp Set always bring smiles to their faces. Watching them color and create reminds me why I fell in love with stamping all those years ago—it’s not just about making cards; it’s about making memories.

This month’s Product of the Month is the Wild Bunch Stamp Set, and I can certainly see why. These sweet little critters have a way of bringing out stories, smiles, and a whole lot of creativity.

Thanks for stopping by today and sharing a little walk down memory lane with me. I hope this card inspires you to pull out those watercolor pencils, create something fun, and maybe even revisit a few happy memories of your own along the way.

Wild Bunch Week: Creative Coloring with the Cute Little Snail

Hello Stampin’ Friends!

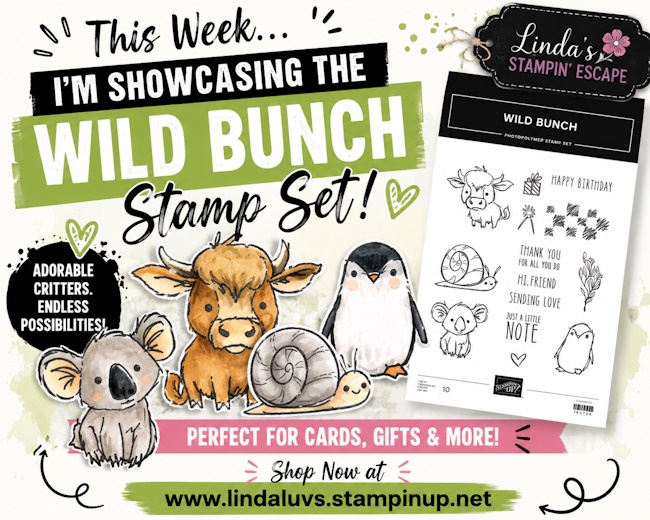
I’m here today with not only a cute card, but also a fun announcement! Over the next week I’ll be sharing projects featuring the adorable critters from the Wild Bunch Stamp Set, which just happens to be the Stampin’ Up! Product of the Month. The moment I saw these little characters, I knew I had to add them to my collection!
Even better, you can get this stamp set for only $5 with a qualifying $75 order from my online store. I hope you’ll follow along all week for inspiration, and be sure to join my Facebook Community for even more ideas and creative fun (CLICK HERE).

Since it’s Monday, I thought we’d begin with this adorable little snail. Let’s be honest—some Mondays start a little slow and steady around here too!

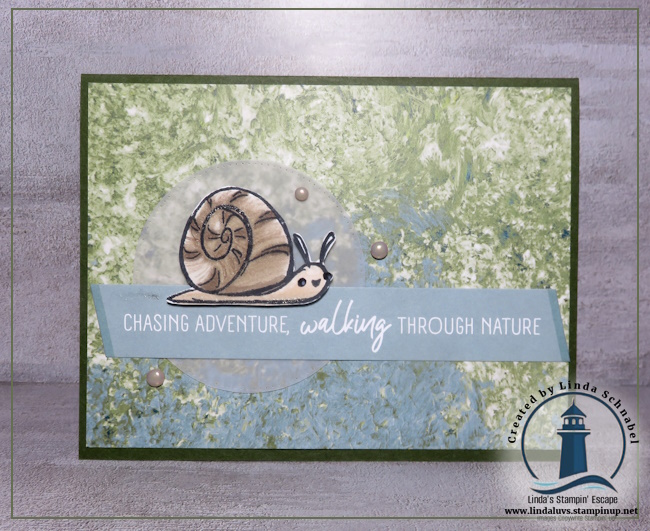
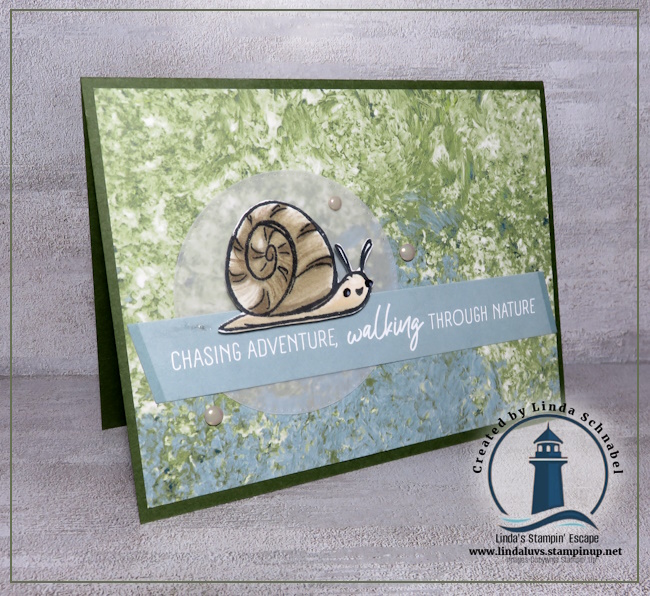
I’m also keeping today’s card nice and simple. The Old Olive card base measures 8-1/2″ x 5-1/2″, scored and folded at 4-1/4″. The greeting and 5-1/4″ x 4″ card front designer paper come from the Exploring Nature Scrapbook Kit. Yes, I use scrapbook kits for all sorts of projects! I couldn’t resist pairing this greeting with a snail—something about the word “chasing” made me smile.

Behind the greeting, I’ve tucked a vellum circle cut using the second-largest circle die from the Stylish Shapes Dies, one of my absolute must-have die sets. The vellum softens the background while helping the greeting stand out beautifully.

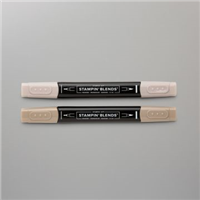
Now let’s talk about our little snail! This cutie was colored using what I call a double-medium technique. I started with Stampin’ Blends, using Crumb Cake for the shell and Ivory for the body to establish the base colors. Then I brought in my Watercolor Pencils Assortment 1 and used Early Espresso to add the natural lines and texture you would see on a real snail shell.

One of the things I love most about crafting is experimenting with different supplies together. Don’t be afraid to mix your coloring mediums! Stampin’ Blends and Watercolor Pencils complement each other beautifully and can add extra depth and detail to your projects.

For a little extra fun, I added a trail of Wink of Stella behind the snail and a touch along the bottom of his body. It’s subtle, but it catches the light beautifully and adds a whimsical touch. To finish the card, I embellished it with three Pearls of Beauty in Crumb Cake.

Thank you so much for stopping by today! I hope this sweet little snail brings a smile to your face and inspires you to try mixing your favorite coloring mediums. And you can pick him up anytime this month in my Online Store … take a look HERE.

Don’t forget to stop by my Facebook Community for even more Wild Bunch inspiration this week. Then next week we’ll be switching gears and having some spooky summer fun as I begin sharing projects featuring the Frightfully Fun Suite Collection for Summerween!

Until next time, keep creating and remember—sometimes slow and steady creates something beautiful.

Just click on the store to begin shopping or Click on the links above

Sparkling Celebrations 🌟 Double Your Cards with These EASY Paper Pumpkin Alternatives!

Hello Stampin’ Friends ~

If you love getting even MORE from your crafting supplies, then today’s projects are going to inspire you! ✨ In this replay of my Facebook LIVE, I’m sharing three alternative card ideas created with the May 2026 Sparkling Celebrations Paper Pumpkin Kit — and each one shows just how versatile this kit can be. By changing layouts, adding a few simple techniques, and thinking outside the box, you can create cards that look completely different from the original kit designs while still using the beautiful elements included in the box.

Be sure to watch the video replay below for all the tips, techniques, and little details that really bring these cards to life.

CLICK HERE TO VIEW ON YOUTUBE!

Card #1 – Layered Tree Line Technique ✨

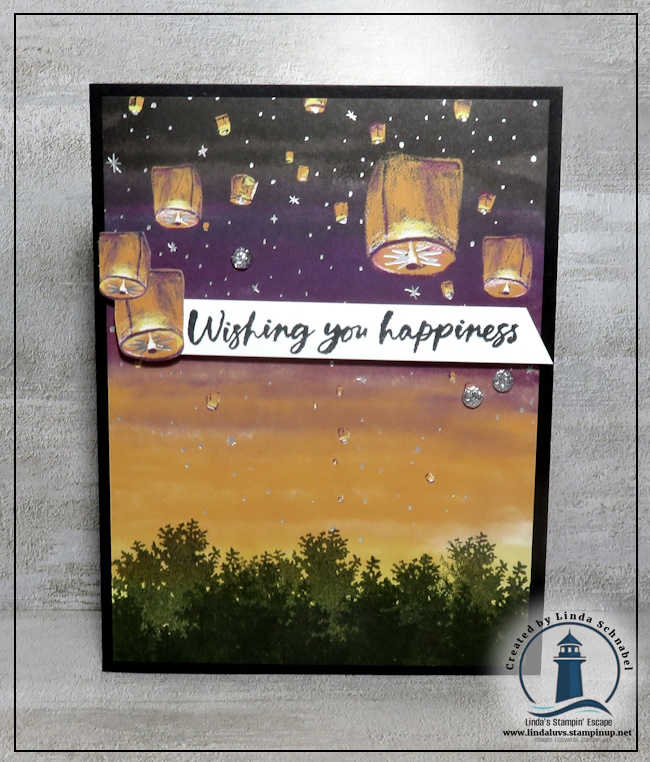
This first card may look detailed, but the layered tree line effect is actually incredibly simple to create! I love how the dark silhouette grounds the glowing sky and floating lanterns, creating a peaceful evening scene. The best part? This technique can be used on SO many different styles of cards — masculine cards, holiday scenes, nature cards, scrapbook layouts, and more. It’s one of those easy techniques that delivers a big WOW effect without a lot of extra work.

The sparkle accents and soft blended sky really help create a magical feeling on this design!

Card #2 – The “Lifted” Effect Card ✨

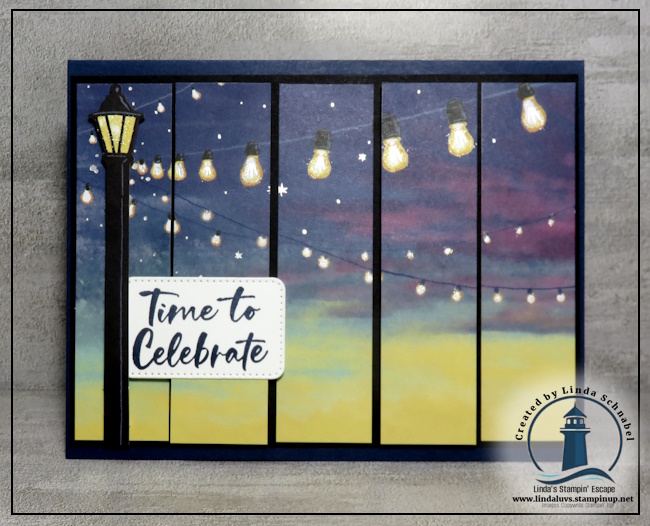
You’ll definitely want to watch the video to fully appreciate the dimensional “lifted” effect we created on this card! The added depth gives the scene so much movement and interest, almost like you’re looking out through a window at the glowing lights. And yes… I added Wink of Stella to all those tiny lights because a little shimmer makes everything better! ✨

This card is such a fun reminder that simple changes in layering and dimension can completely transform a project.

Card #3 – Window View Alternative 🌅

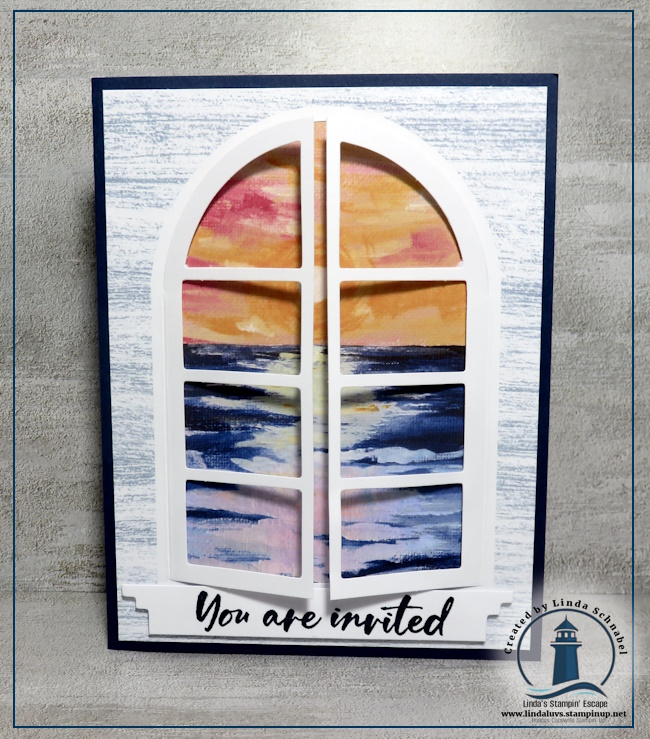
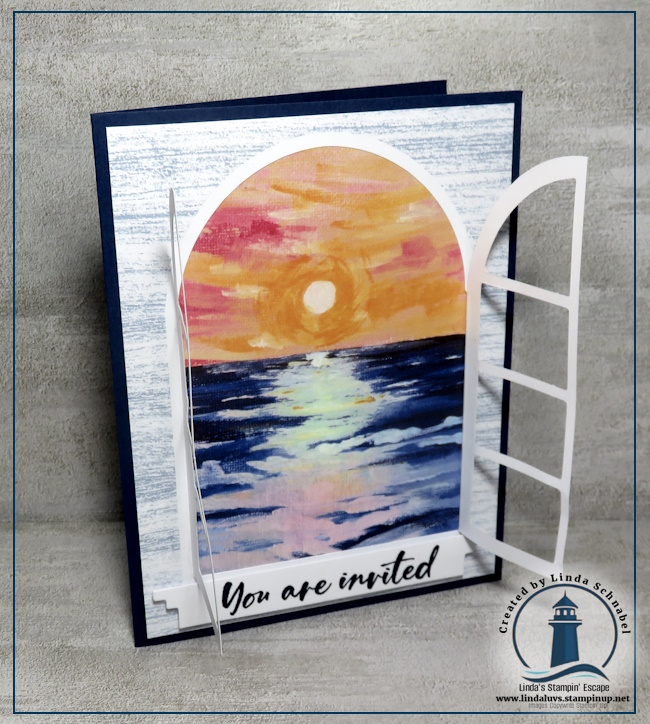
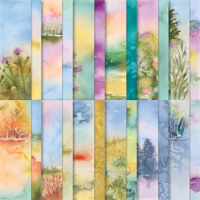
For this final alternative, I paired the design with the beautiful Scenic Coast Designer Series Paper to create a stunning sunset ocean view through the window frame. I absolutely love how peaceful and relaxing this card feels.

And here’s the exciting part — you could easily recreate this same idea using other Designer Series Papers too! Imagine this card with:

  • Thoughtful Journey Designer Series Paper
  • Splendid Autumn Designer Series Paper

Both of these papers are currently on the Last Chance List, which means you may be able to grab them at a discount while supplies last! That makes this a perfect time to stock up on versatile papers that work beautifully for cardmaking, scrapbooking, and alternative projects like these.

I hope these ideas inspire you to look at your Paper Pumpkin kits in a whole new way and encourage you to experiment with your supplies. Sometimes all it takes is a simple layout change or added detail to create something truly unique!

🎥 Be sure to enjoy the video replay and let me know in the comments below — Which card is YOUR favorite? 💙

Thanks for joining me today …

And don’t forget — Paper Pumpkin subscriptions of 3, 6, or 12 months also qualify for Stampin’ Rewards! 🎉 That means you can enjoy creative happy mail delivered right to your door and earn rewards toward future crafting goodies at the same time!

Red, White & Cute! 🇺🇸 A Fun Summer Card Idea

Hello Stampin’ Friends ~

If you’re dreaming of sandy beaches, sunshine, and carefree summer days, then the NEW Splash & Relax Bundle is about to steal your heart! Filled with playful beach-themed designs like flip-flops, visors, seaside accents, and cheerful greetings, this bundle is pure summertime happiness wrapped into paper crafting form.

Today I’m shining the spotlight on what may just be my favorite element in the bundle… the adorable Flip Flops! How cute are these? 🩴💙❤️

For this design, I chose a patriotic color palette featuring:

  • Real Red
  • Basic White
  • Night of Navy

These classic colors instantly create a fun summer vibe perfect for Memorial Day, the Fourth of July, or any patriotic celebration.

The flip-flops were simply die cut in my chosen colors and assembled using Glue Dots instead of adhering them flat. I absolutely love the little bit of lift and dimension the Glue Dots provide—it really helps those tiny details stand out and gives the card a playful, layered feel.

To make each pair of flip-flops pop even more, I mounted them onto punched circles using both Real Red and Night of Navy cardstock. This simple step frames the focal points beautifully while adding balance and bold contrast to the overall design.

For the background layer, I die cut the Basic White cardstock using the Branching Out Dies (currently on the Last Chance List 👀). I loved the soft stitched detail these dies added to the design. To create even more interest and texture, I pulled out my Simply Scored Tool and added subtle score lines across the white panel. It’s such an easy technique, but it gives the card wonderful dimension and a clean, beachy feel that pairs perfectly with the playful flip-flops.

And let’s talk embellishments! The tiny flowers on the flip-flops come from the Hues of Blue Flowers. I customized them using the Dark Real Red Stampin’ Blends marker so they would coordinate perfectly with my patriotic theme. Don’t forget this little trick when crafting—it’s an easy way to stretch your embellishment collection and perfectly match your projects!

I also colored the little star near the greeting with the same marker to keep everything cohesive and eye-catching. The sparkly stars themselves come from the Wonderful Stars Puffy Stickers, and of course, I couldn’t resist adding a touch of Wink of Stella for extra shimmer and sparkle. ✨

The greeting, “Hello Sunshine,” also comes directly from the Splash & Relax Bundle and fits this cheerful summer design perfectly.

What I love most about this card is its versatility. While it’s absolutely perfect for the summer season, Memorial Day, or Fourth of July celebrations, you could easily swap out the sentiment and create:

  • A birthday card for a veteran
  • A cheerful summer hello
  • A retirement card
  • A “thinking of you” card
  • Or simply a fun card for anyone who loves red, white, and blue!

This bundle truly captures those relaxed, happy summer vibes that make crafting so enjoyable. If you love playful dies, dimensional details, and versatile summertime designs, I highly recommend adding the Splash & Relax Bundle to your wish list before summer slips away!

Happy Stamping! 💙
Linda
Linda’s Stampin’ Escape – Shining the Light on Creativity
www.lindaluvs.stampinup.net

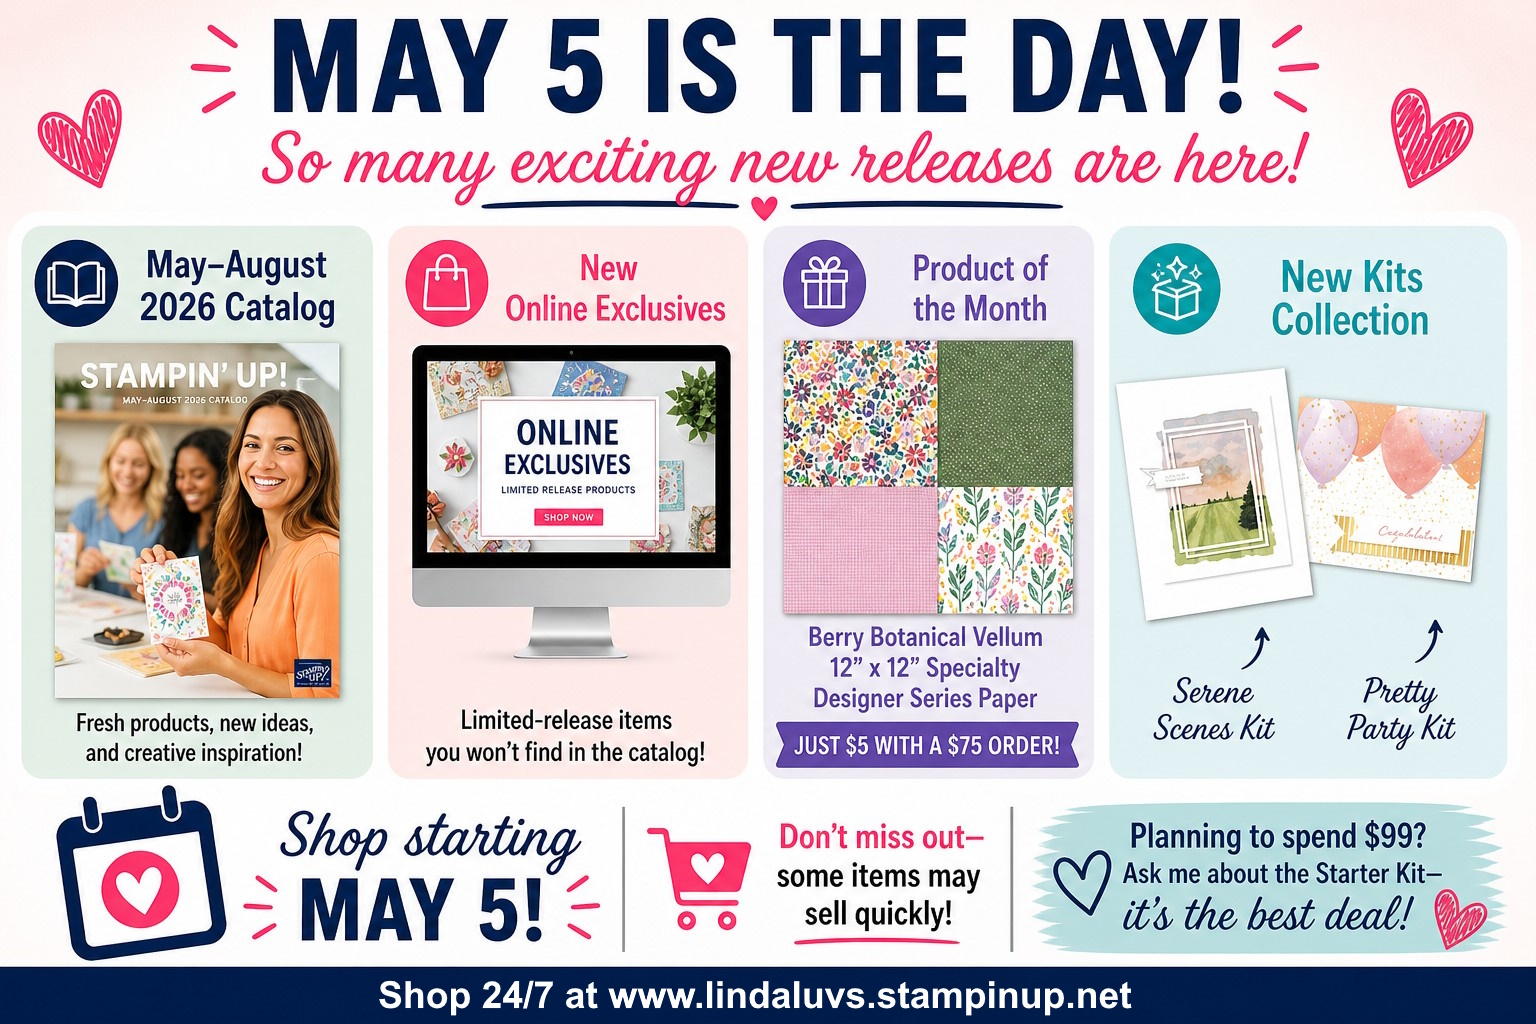
Today Is the Day!

Good Morning Stampin’ Friends!

Today is one of those days we wait for all year long… and it’s finally here! The brand-new May–August 2026 Catalog is officially LIVE, and oh my goodness—you are going to fall in love. From fresh new bundles to gorgeous designer papers and fun kits, there is truly something for everyone… whether you love cardmaking, scrapbooking, or quick and easy creative projects.

If you’re anything like me, you’ll want to grab a cup of coffee, sit back, and take your time flipping through all the beautiful inspiration. This catalog is filled with ideas that will spark your creativity and have you heading straight to your craft room!

And that’s just the beginning…

We also have New Online Exclusives available starting today! These are limited-release items that you won’t find in the catalog, which makes them extra special. If something catches your eye, don’t wait too long—these goodies have a way of disappearing quickly!

Now let’s talk about one of my favorite perks… the Product of the Month! 💕
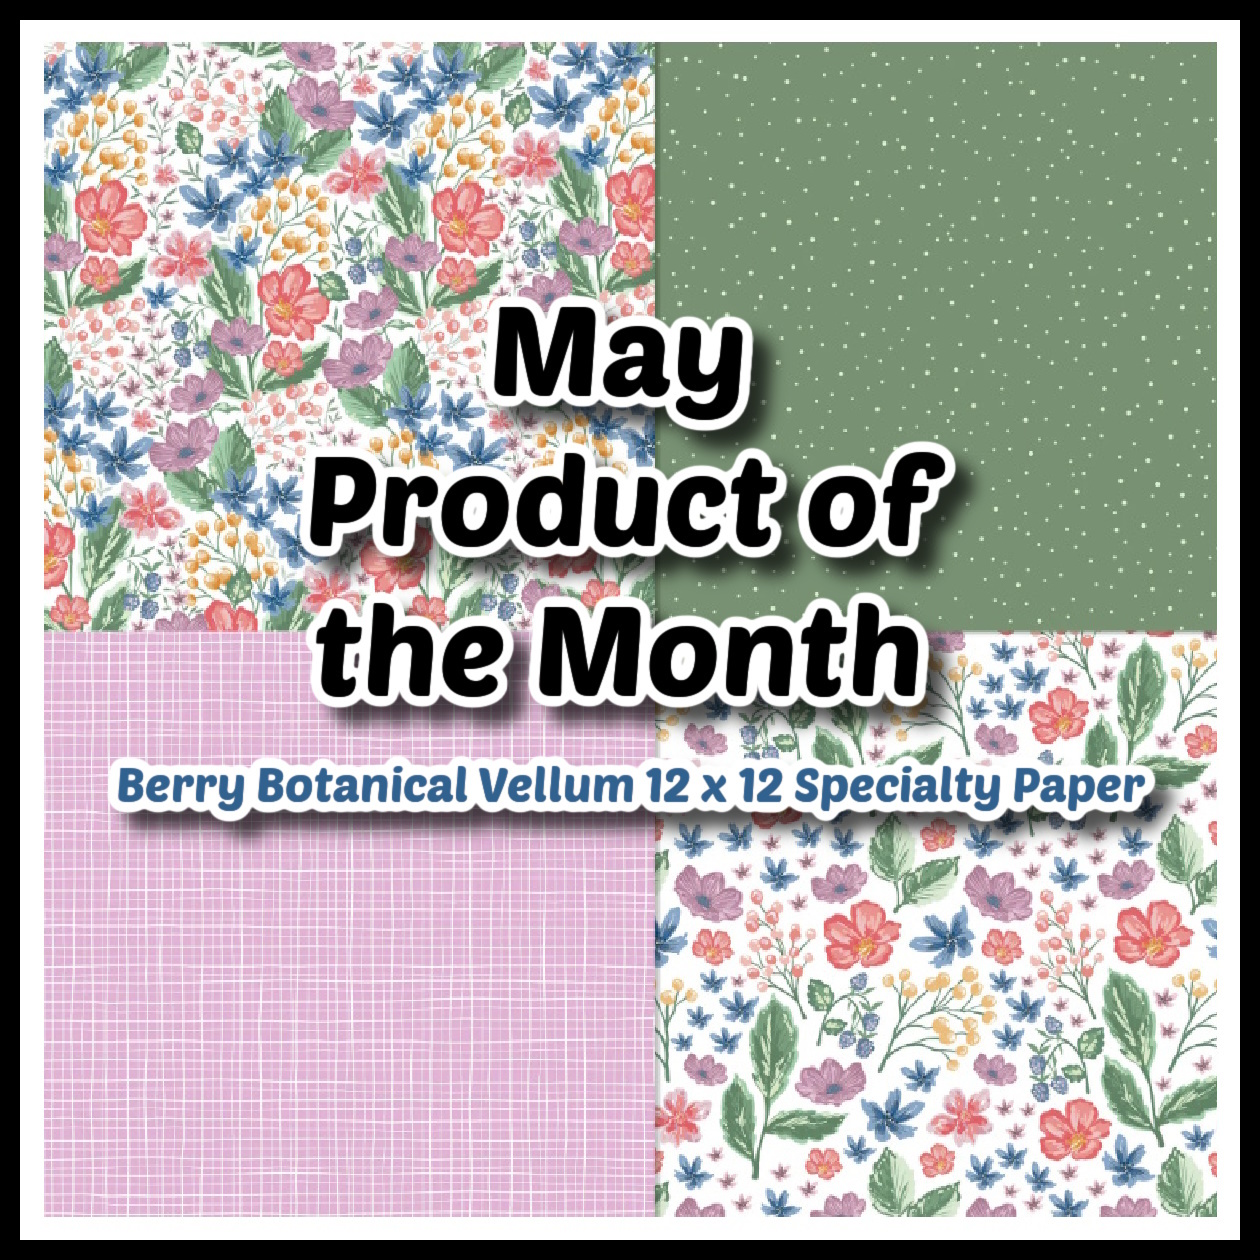
For May, you can get the Berry Botanical Vellum 12″ x 12″ Specialty Designer Series Paper for just $5 with a $75 order. It’s absolutely beautiful and such a fun way to add texture and elegance to your projects. I love being able to offer you something a little extra as a thank you for your orders!

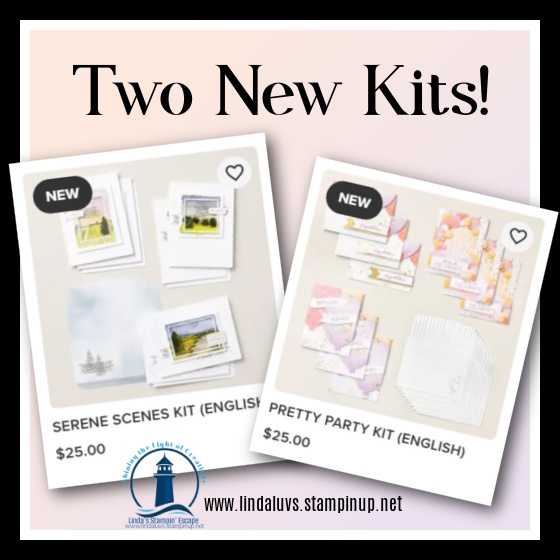
And if you’re looking for something simple and all-inclusive, the New Kits Collection is perfect. Whether you choose the Serene Scenes Kit or the Pretty Party Kit, these are designed to make crafting easy, relaxing, and fun—no guesswork needed!

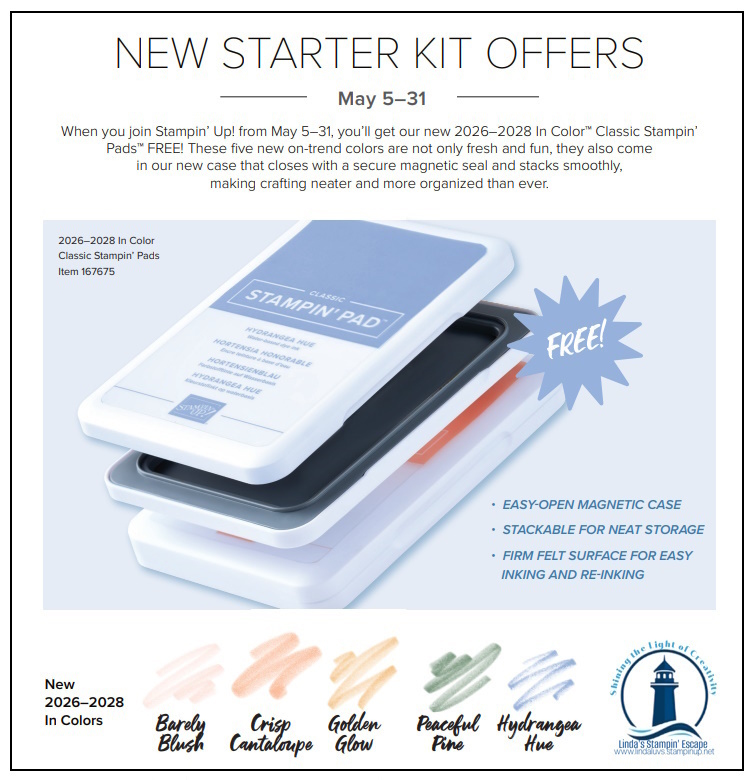
Now here’s something I always want you to keep in mind… if you’re planning to spend around $99, it might be the perfect time to consider the Starter Kit. It truly is the BEST deal! You’ll get to choose the products YOU love, enjoy a discount on future purchases, and be part of an amazing creative community. And with the current promotion, there are even more perks to enjoy—so don’t hesitate to reach out if you have questions!

One quick note, my friends… with all these exciting releases, some items may sell out quickly. If there’s something on your wishlist, I encourage you to grab it sooner rather than later so you don’t miss out.

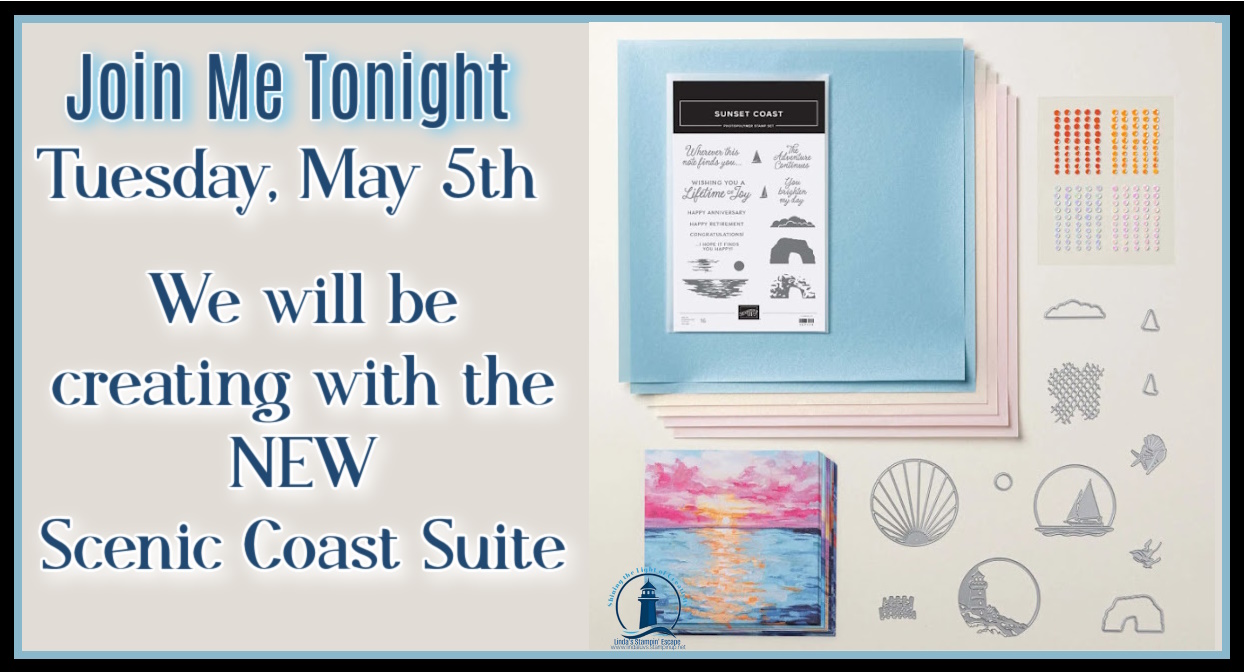
AND …. I invite you to join me LIVE tonight on my Facebook page as I share the NEW Scenic Coast Suite!

Happy Stamping! 💙
Linda
Linda’s Stampin’ Escape – Shining the Light on Creativity

A Little Lakeside Retreat… Creating Fun Summertime Cards

Hello Stampin’ Friends ~

There’s something so peaceful about sitting by the water… the gentle waves, the warm breeze, and that feeling of complete relaxation. Today, I’m bringing that same calming, carefree vibe right into your craft room as we create two beautiful summertime cards using the Waterside Retreat Designer Series Paper.

This collection truly captures the essence of a lakeside escape. With soft, sun-drenched colors, charming imagery, and patterns that feel both fresh and timeless, it makes creating stunning cards incredibly easy. In fact, this is one of those papers that does most of the work for you—perfect for those days when you want to sit down, relax, and just enjoy the creative process without overthinking every detail.

For today’s cards, I focused on letting the designer paper shine while adding just a few simple layers and embellishments to bring everything together. One card features a soft, all-over pattern with fish paired with the simple sentiment. Perfect for letting someone know they’re in your thoughts. Perfect for our friends and family who love to fish … watch the video for a fun tip.

The second card takes on a slightly more structured look, making it ideal for that warm summer day feel (think birthdays, thinking of you, or just because). I love how versatile this suite is… it truly gives you options for so many occasions!

You’ll notice how easy it is to mix and match these patterns, and how a simple die cut or focal point can completely transform the look. Whether you’re creating a quick card or taking a little extra time to add details, this paper supports both styles beautifully. It’s perfect for beginners and seasoned stampers alike.

And the best part? I’m sharing it all with you in today’s video! 🎥 You can watch step-by-step as I walk you through both card designs, share a few helpful tips along the way, and hopefully inspire you to pull out your own supplies and start creating.

CLICK HERE TO WATCH ON YOUTUBE

So pour yourself a cup of coffee ☕, or favorite beverage and settle into your favorite crafting spot, and let’s take a little creative escape together…

👉 Be sure to watch the video below and let me know in the comments—which card is your favorite?

Happy Stamping,
Linda 💙
Shining the Light on Creativity

A Lakeside Escape… You’re Going to Love This Easy Card!

Hello Stampin’ Friends ~

There’s something so peaceful about a quiet moment by the water… and today’s card captures that feeling beautifully using the Waterside Retreat Suite Collection featuring the Relaxing Waterside Bundle. If you’ve ever dreamed of escaping to a lakeside getaway—where the breeze is soft, the water gently rolls in, and time seems to slow down—this suite brings that experience right into your craft room.

The Waterside Retreat Suite is filled with everything you need to create calming, scenic cards with ease. From the sun-drenched Designer Series Paper to the detailed stamps and coordinating dies, each piece works together effortlessly. You’ll find images of lounge chairs, sailboats, books, and more—perfect for creating those serene, storybook moments. And let’s not forget the charming little anchor embellishments that add just the right finishing touch!

Today’s card really lets the Designer Series Paper shine. The soft shoreline scene sets the stage, creating a tranquil background that instantly draws you in. I added one of my absolute favorite dies from this suite—the Adirondack chair—and placed it front and center. Doesn’t it just invite you to sit down, relax, and take in the view? The added texture and dimension of the die really bring the whole scene to life, while still keeping the card simple and easy to recreate.

This is one of those designs that looks detailed and impressive, yet comes together quickly—perfect for when you want to create something beautiful without a lot of fuss. Whether you’re making a card for a friend, a retirement, or simply to send a little calm and encouragement, this suite makes it so easy to tell a story through your crafting.

If you’re ready to bring a little lakeside calm into your stamping, the Waterside Retreat Suite is one you’ll definitely want to add to your collection. It’s perfect for creating those peaceful, heartfelt cards that your friends and family will treasure. It’s in the NEW Catalog and will be available on Tuesday, May 5th … get ready!

Thank you so much for stopping by today… I always love sharing a little creative escape with you!

Happy Stamping,
Linda 💙

🚨 FLASH SALE ALERT! 🚨

Stampin’ Friends… this is one you do NOT want to miss!

On Saturday, May 2 ONLY, celebrate National Scrapbooking Day with 20% OFF select memory keeping products 🎉

Whether you’ve been thinking about starting a scrapbook, catching up on memories, or just stocking up on your favorite supplies… THIS is your moment.

But don’t wait… ⏰ this sale lasts just 24 hours and then it’s gone!

Tell me… what’s on YOUR wishlist? 💛

Two Stunning Cards with the NEW Sunset Coast Bundle

Hello Stampin’ Friends,

Oh my goodness… if you love the peaceful feeling of the shore, you are going to fall in love with the brand new Sunset Coast Bundle coming your way on May 5th! I am so excited to give you a little sneak peek today with two beautiful cards—including a stunning lighthouse card that I’ll walk you through step by step in my video tutorial.

MEASUREMENTS:

  • Cardbase: 11″ x 4 1/4″ – Score at 5 1/2″
  • Highland Heather Mat: 4 1/8″ x 4 1/8″
  • Designer Paper: 4″ x 4″ and 4″ x 1″
  • Die Cut Lighthouse: 3 1/2″ x 3 1/2″

This bundle truly captures that magical moment when the sun meets the water… soft skies, gentle waves, and all those sweet seaside details. With coordinating stamps and dies, you can build your own oceanfront scenes with sailboats, seashells, rock formations, and of course… lighthouses. Whether you’re creating a card for a retirement, an anniversary, a birthday, or someone stepping into a brand new adventure, the sentiments are just perfect.

What makes this bundle even more special is that it’s a Two-Step Stampin’ set, which means you can layer images to create depth, texture, and those gorgeous blended looks we all love. You’re in control of the colors, the intensity, and the final effect—so each card becomes uniquely yours. It’s one of those techniques that looks impressive… but is actually so relaxing and fun once you start!

Let’s take a look at the video …

Click HERE to View On YouTube

For today’s projects, I wanted to really let the bundle shine. The lighthouse card is a true standout—clean, peaceful, and full of dimension. And the second card? Just as beautiful, with those coastal elements coming together in a way that feels like a mini vacation right on your craft table. Be sure to watch the video below where I guide you through the lighthouse card step by step… I’ll share tips along the way to make it easy and enjoyable!

Now here’s the exciting part… this bundle will be available starting May 5th when the new catalog goes LIVE. And if this one is already calling your name (I know it called mine!), you’ll definitely want to be ready. New releases like this have a way of becoming fast favorites, especially when they’re this versatile and beautiful.

MEASUREMENTS:

  • Cardbase: 8 1/2″ x 5 1/2″ Score at 4 1/4″
  • Designer Paper: 5 1/4″ x 4″ … use the second largest square die from Stylish Shapes Dies to die cut / highlight the sunrise
  • Cut a 3″ x 3″ Black mat – place behind the designer paper and then over the top of the larger piece you cut from.
  • Die cut seagulls and greeting and position as desired.

✨ So here’s my little nudge, friend…
Take a moment to imagine the cards you could create—peaceful scenes, heartfelt messages, and projects that truly stand out. Then be ready to add the Sunset Coast Bundle to your collection as soon as it goes live.

Thank you so much for stopping by today and spending a little creative time with me. Don’t forget to check out the video, and be sure to click that FOLLOW button so you don’t miss more inspiration coming your way.

Until next time… keep shining your creativity! 💜
Linda

Escape to Serenity with the Waterside Retreat Suite

Hello Stampin’ Friends ~

Escape to a quiet moment on the shore with the Waterside Retreat Suite Collection. This beautiful new suite, arriving in the upcoming catalog this May, captures the breezy simplicity of a lakeside getaway. With serene imagery of lounge chairs, open books, sailboats, gentle waters, and peaceful shoreline scenes, it invites us to slow down and create cards that bring comfort, encouragement, and heartfelt connection.

Today, I’m delighted to share a handmade card inspired by this tranquil collection. My card highlights the stunning designer paper, which beautifully depicts a misty lakeside dock scene, instantly setting a peaceful and reflective tone. To enhance the sense of movement and life, I added delicate bird dies soaring across the sky, bringing dimension and a touch of nature to the card. The sentiment, created using the Prayers & Promises stamp set, offers a message of comfort and healing: “May you feel God’s care and healing as you recover.” This makes the card especially meaningful for sending encouragement during times when a gentle reminder of care is needed.

The calming colors and serene imagery of the Waterside Retreat Suite make it perfect for sympathy, thinking-of-you, masculine, encouragement cards or lakeside fun. Its versatility ensures it will quickly become a favorite for creating heartfelt projects that resonate with both the sender and the recipient.

Adding to the excitement, this suite coordinates beautifully with this month’s Paper Pumpkin kit, titled Lakeside Retreat. The kit includes exclusive designs and elements that complement the suite, allowing you to expand your creative possibilities and enjoy perfectly coordinated projects.

🚨 Important Reminder: Today is the final day to subscribe to receive this special Paper Pumpkin kit! If you love the peaceful lakeside theme, you won’t want to miss the opportunity to add these coordinating elements to your crafting collection. Subscribing ensures that this exclusive kit is delivered right to your door, ready to inspire your next creative escape.

As you look ahead to the new catalog release in May, be sure to add the Waterside Retreat Suite to your wish list. Its tranquil charm and versatility make it a timeless addition to any crafter’s collection.

Thank you for stopping by today. I hope this card inspires you to take a moment for yourself and enjoy the peaceful creativity that stamping brings. Be sure to subscribe to Paper Pumpkin before the day ends, and get ready to create your own lakeside escape!

Happy Stamping!
Linda

Adorable Arches Card Idea with the Garden Poetry Suite

Hello Stampin’ Friends ~

I hope you had a wonderful Easter / Spring Break! Have you ever had one of those moments where a simple shape turns into something beautiful? That’s exactly what happened when I saw a card made with the Everyday Arches Dies! Today’s card is one of those projects that came together so effortlessly, yet has such an elegant and eye-catching finish. If you love creating cards that feel both soft and sophisticated—with just a touch of “wow”—you’re going to fall in love with this one.

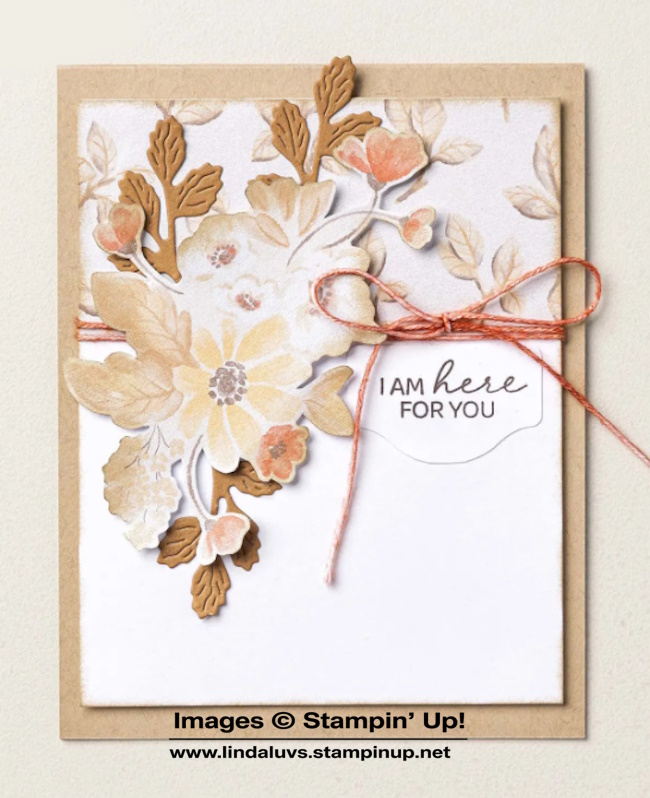
The Everyday Arches Dies are quickly becoming a go-to in my craft room. There’s something about those graceful curves that instantly elevate a design. Whether you’re layering, framing, or creating focal points, these arches add movement and interest without overwhelming your project. In today’s card, I paired them with the beautiful textures and rich tones from the Garden Poetry Suite—and oh my goodness… what a combination! The deep, vibrant background paired with delicate botanical elements creates a look that feels both bold and timeless.
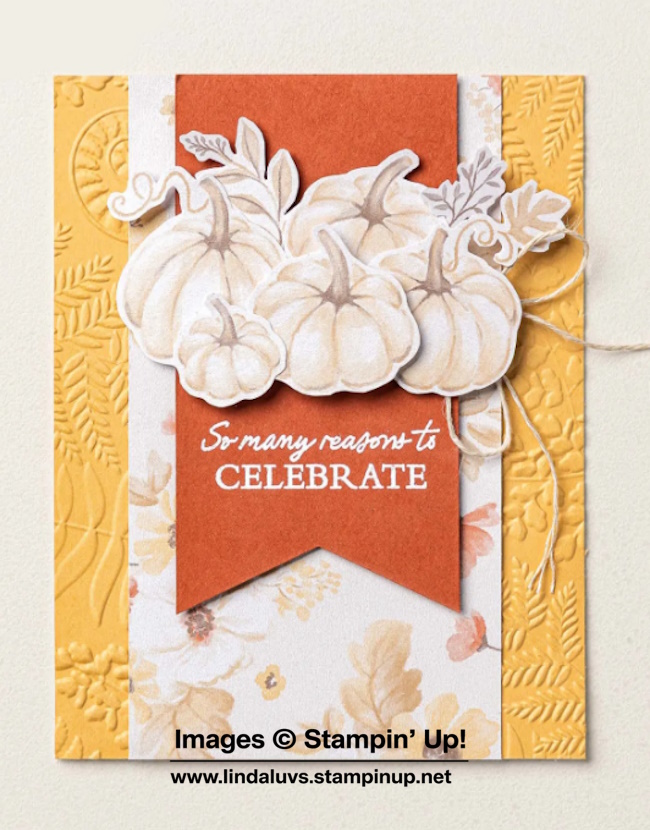
What I especially love about the Garden Poetry Suite is how effortlessly everything coordinates. From the designer paper to the dies and embellishments, it takes the guesswork out of designing and lets you focus on the fun part—creating! Whether you’re making a quick card or something a little more detailed, this suite gives you endless possibilities while still keeping things simple and enjoyable.
I’ve included a replay of my Facebook LIVE below where I walk you step-by-step through creating this card. You’ll see just how easy it is to bring these elements together, and I’ll share a few little tips along the way to help you get the most out of your dies and paper.

Be sure to watch the video and let me know—would you recreate this card, or would you switch up the colors and make it your own? Click HERE to view on YouTube!

As you’re watching, take a moment to imagine how you could use the Everyday Arches in your own crafting. They’re one of those tools that you’ll reach for again and again—perfect for everyday cards, special occasions, and even scrapbooking layouts. And when paired with a suite like Garden Poetry, it truly makes creating feel effortless and enjoyable.

If this card inspired you, I’ve included links below to the products I used so you can take a closer look and add them to your collection. Whether you’re crafting for relaxation, connection, or creativity… you deserve supplies that make you excited to sit down and create.

Thanks so much for stopping by today—I’m so glad you’re here 💕

Inspired by Nature Walk Designer Paper – A Warm Hello Card

Hello Stampin’ Friends ~

If you’re drawn to projects that feel calm, grounded, and quietly beautiful, today’s card is going to speak to you. The Nature Walk Designer Series Paper with Sticker Sheet brings such a subtle, organic touch to cardmaking, and it’s perfect for creating designs that feel inspired by nature without being busy or overwhelming. This is one of those collections that works effortlessly in the background—letting your focal point shine while still adding depth and interest. If you love cards that feel warm, earthy, and timeless, this is a paper pack you’ll want close at hand.

I started this card with an Early Espresso card base, cut to an A2 size of 8 1/2″ x 5 1/2″, then scored and folded at 4 1/4″. Early Espresso is one of my favorite base colors when working with nature-inspired designs because it adds instant warmth and richness. For the card front, I chose one of the beautiful distressed patterns from the Nature Walk Designer Series Paper—this one quickly became a favorite. It’s cut to 5 1/4″ x 4″, allowing that Early Espresso border to frame the design and give the card a polished, finished look.

The focal point of this card is where the magic really happens. I selected one of the mountain scene stickers from the coordinating sticker sheet. These stickers are such a joy to work with—they give you detailed artwork without extra stamping or coloring. I matted the sticker with Early Espresso cut from the Spotlight on Nature dies. These dies truly connect the entire design… I die cut another circle using a dark blue pattern from the Nature Walk Designer Series Paper, pulling color directly from the mountain scene.

Because I love designing in odd numbers, I added one more circle—this time in Basic White—to create space for the sentiment. The greeting comes from the Simply Said Stamp Set, keeping things clean and uncomplicated so the focal point remains the star. The layout itself is simple and balanced, centered around the mountain scene and supported by those layered circles.

To finish the card, I added just a few Pearls of Beauty. A small amount of embellishment is all this design needs—just enough to add a soft elegance without taking away from the natural, organic feel of the card.

This project is a wonderful reminder that you don’t need complicated layers or techniques to create something meaningful. The Nature Walk Designer Series Paper and Sticker Sheet do so much of the work for you, making it easy to create cards that feel thoughtful, warm, and inspired by the outdoors.

I hope this card inspires you to pull out your supplies and start creating. As always, I’m here to help—whether you need product details, inspiration, or a little creative encouragement.

Happy stamping, my friend. 🌿

An Unexpected Pairing: Cute as a Bug & Prayers and Promises

Hello Stampin’ Friends ~

Today we will be turning an unexpected product pairing into a beautiful heartfelt card. Sometimes the most meaningful cards come from unexpected pairings—and this project is a perfect example of that. As you’re browsing your craft room or flipping through the catalog, I want to gently encourage you to look beyond the obvious combinations and think about who you’re creating for. When you design with a specific person in mind, products often come together in ways that feel natural, intentional, and heartfelt.

At first glance, the Cute as a Bug Designer Series Paper and the Prayers and Promises Stamp Set may not seem like a natural match. Cute as a Bug is filled with charming ladybugs, fluttering friends, and picnic-perfect prints that immediately feel playful and lighthearted. But this particular berry pattern stopped me in my tracks. It reminded me of my grandma—warm, comforting, and familiar—and that personal connection made it the perfect choice for a card meant to offer encouragement and care. This paper beautifully demonstrates just how versatile designer paper can be when you let emotion, memory, and purpose guide your choices.

The Prayers and Promises Stamp Set is truly one of those foundational stamp sets that belongs in every stamp room. It shares words of faith, love, sympathy, and encouragement—sentiments we all reach for when someone we care about needs support. Having a go-to set like this allows you to create meaningful cards with confidence, knowing the message will be just right for the moment.

My card begins with an A2 card base in Blackberry Bliss (8½” x 5½”, scored and folded at 4¼”). I cut the Cute as a Bug Designer Series Paper to 5⅛” x 3⅞” and layered it onto a Mossy Meadow mat measuring 5¼” x 4″. The combination of these rich, earthy tones grounds the card and gives it a calm, reassuring feel—perfect for this style of sentiment. This is a color palette you’ll find yourself reaching for again and again.

The greeting was stamped in Blackberry Bliss ink onto Very Vanilla cardstock using a sentiment from Prayers and Promises. I die cut the sentiment with the Nested Essentials Dies, then die cut a second layer in Blackberry Bliss to place behind it. That extra layer adds a subtle pop of color and frames the greeting beautifully. I popped the sentiment up with Stampin’ Dimensionals to add just the right amount of dimension and draw the eye to the message.

To finish the card, I added a few Low Profile Sparkle Dots in green. These small details may seem simple, but they add a gentle touch of shine and tie everything together without taking away from the sentiment.

As you can see, these two seemingly different products blend seamlessly when used with intention. This card is a wonderful reminder that it’s not about following rules—it’s about telling a story, honoring a feeling, and creating something meaningful. If you enjoy designing cards that connect on a deeper level, these are products you’ll want to keep close at hand.

The next time you sit down to create, I invite you to start with a person, a memory, or a feeling—and then let your supplies fall into place. You may be surprised how beautifully unexpected combinations come together when you design from the heart. 💜

Until next time … Happy Stamping!