Sunflowers, Texture, and a Pop of Color—Yes, Please!

Hello Stampin’ Friends ~

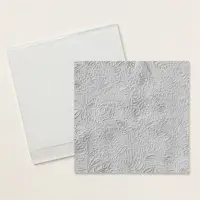
It feels so good to be back creating and sharing with you again—and today I’ve got two beautiful cards to show you, featuring the Sunflower 3-D Embossing Folder. I have to tell you, this folder is pure magic. My head is spinning with all the ideas and techniques I want to try using it—seriously, it’s a creative goldmine!

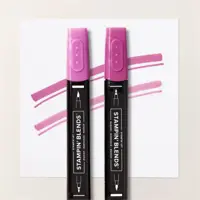
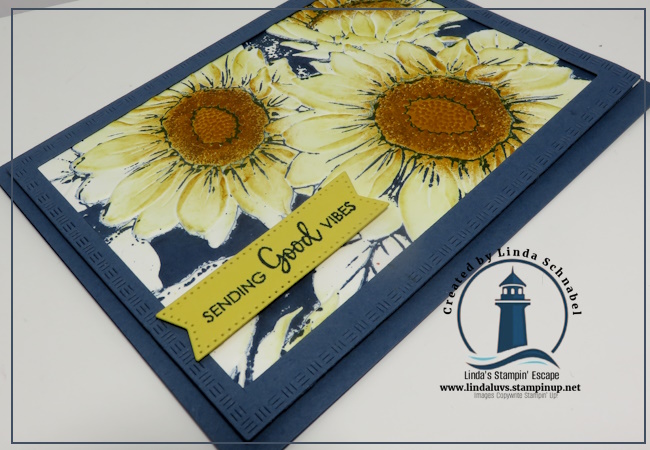
For both of today’s cards, I started with one of my favorite and super simple techniques: inking directly onto the embossing folder. Yep, you heard that right! I tapped my Misty Moonlight ink pad directly onto the side of the folder where the image is concave. Once your paper is inside and you run it through the Stampin’ Cut & Emboss Machine, the ink hugs all the right places and leaves you with the most amazing textured print. And that’s just the beginning!

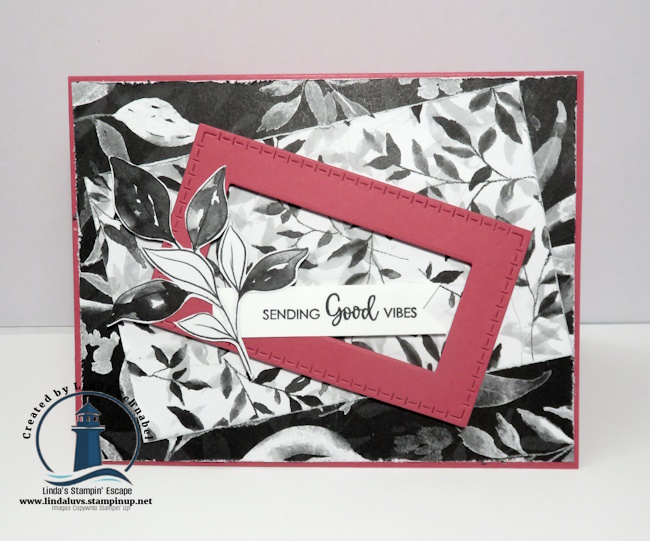
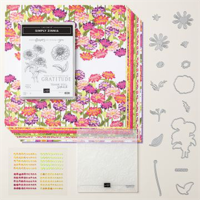
My first card design takes that embossed and inked background and cuts it into three panels (from a 5″ x 3 3/4″ piece). I mounted the panels onto a Misty Moonlight mat cut to 5 1/4″ x 4″, creating a striking visual with just a bit of white space between the strips. Then, to add a touch of softness and extra texture, I tied a simple bow with linen ribbon. The greeting? It’s from the Full of Charm Paper Pumpkin Kit—a great reminder of why I love and keep subscribing to Paper Pumpkin each month. Those exclusive stamp sets are treasures I reach for again and again!

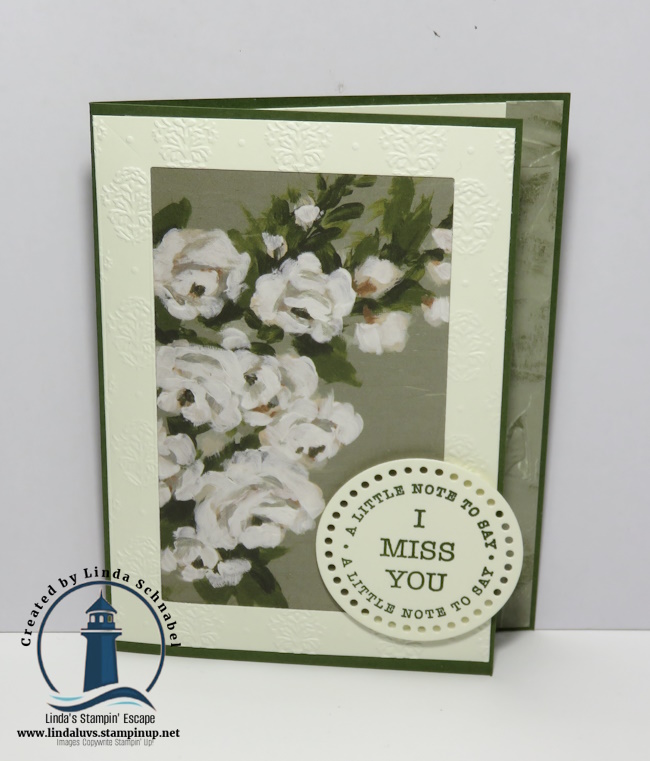
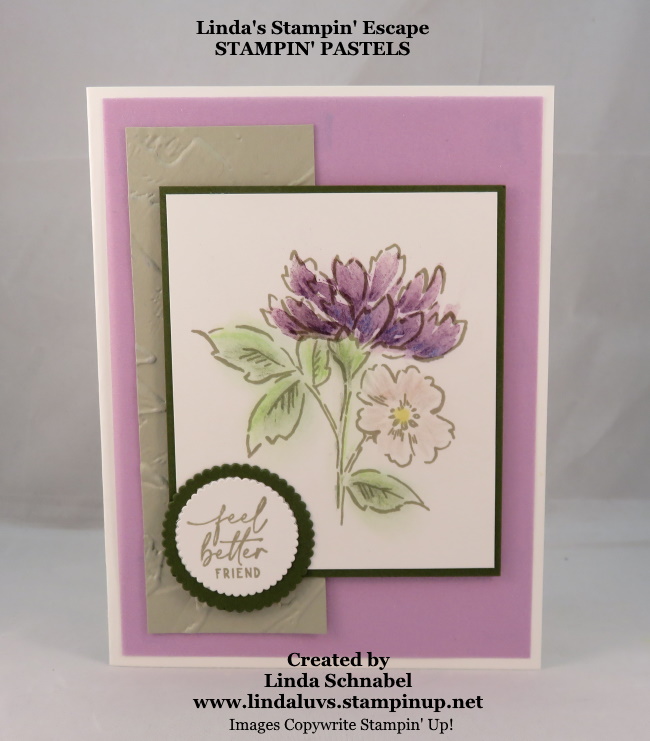
Now, the second card… is what happens when you stamp with a friend and she has colorful ideas!! Wow, and does it pop with color! After embossing the image, I used a sponge dauber to lightly apply Crushed Curry over the sunflower petals. Then I went a bit bolder, deepening the flower centers with more intense color. To really bring out the detail, I used a flat paintbrush to tap on a bit of Pecan Pie ink—and the result is absolutely gorgeous! I framed this beauty using the Textured Notes Dies (just trim your embossed panel slightly smaller than the frame), then mounted it to a Misty Moonlight card base.

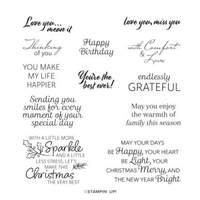
To finish it off, I used one of my go-to greetings from The Right Words stamp set—perfect sentiments for just about any occasion. I die-cut it using the Stylish Shapes Dies, which always seem to give my cards that polished look.

These two cards are just a peek at what’s possible with this Sunflower 3-D folder—and trust me, you’re going to want it in your collection. It’s a staple for any season and pairs beautifully with your favorite inks and techniques. So go ahead—treat yourself to a little creative joy!

And if you’re not already subscribed to Paper Pumpkin, now’s the perfect time to jump in. The stamps alone are worth it, and the kits offer fresh ideas every month. (Not to mention, they coordinate beautifully with products you already love.)

As always, I hope today’s projects spark a little inspiration in your heart. If you need any of the supplies mentioned—or have questions—I’m here to help. Happy stamping, friends!

🎉 Don’t forget, Stampin’ Friends — there’s still time to get in on my Tote-lly Awesome July Giveaway! 🎒 With every $50 order (before shipping & tax), your name goes into the drawing to win this adorable Strawberry Slush Craft Tote—perfect for carrying your supplies in style. Whether you’re crafting at home or heading to a class, this tote is a must-have! 🥰 Get your order in by July 31st to be entered. You’re going to love it!

From Black & White to Bold & Bright: 3 Botanical Textures Card Ideas You’ll Love

Hello Stampin’ Friends ~

Black and white is beautiful… but wait ‘til you see what happens when we add a splash of bold color! I’ve been having so much fun with the new Botanical Textures Designer Series Paper—it’s an elegant black-and-white collection that’s just begging for some colorful creativity. When I paired it with The Right Words stamp set, magic happened. Each card came out with its own little personality: striking, meaningful, and totally frame-worthy.

In today’s post, I’m sharing three finished card designs and a step-by-step video tutorial (replay of my Facebook LIVE) showing you exactly how I made them.

Watch the video and try these three ideas today! You’ll love how easy it is to turn something simple into something stunning. Be sure to comment below which card was your favorite—or share your version using these techniques!

CLICK HERE TO WATCH VIDEO

Ready to bring your black-and-white stash to life? Whether you’re a seasoned crafter or just getting started, these techniques are simple to master and endlessly customizable. How easy did you find this card to make …. just adding a POP of color with your blending brushes!

My second card just uses cardstock to add color … Strawberry Slush will always make me hungry for more stamping time!

We have another simple solution to add color to our black & white designer papers …. our fabulous Stampin’ Blends. These alcohol markers allow you to color with ease…. like Timid Tiger! Looks great without making it look like Halloween!

Whether you’re here for new ideas or just love playing with color, I hope today’s cards inspired you to look at your paper stash with fresh eyes. The Botanical Textures DSP and The Right Words stamp set are a dream duo—and with just a few simple techniques, you can turn any project into a handmade work of heart.

Don’t forget to check out the video again for all the juicy details, and leave me a comment letting me know which card you’d love to recreate.

Until next time… keep stampin’ and stay inspired!

Beautiful Gallery Suite with a NEW Technique!

Hello Stampin’ Friends ~

Today, we’re walking through the doors of the Beautiful Gallery Suite Collection—and let me just say, it’s gallery-worthy in every sense of the word. If you’ve ever wished you could bottle up the serenity of a painted landscape or the elegance of a hand-sketched bloom, this suite is your dream come true.

From the soft watercolored scenery to the striking floral motifs, every piece in this collection feels like it belongs on the wall of your favorite art museum—except we get to cut it, layer it, stamp it, and send it off to make someone’s day!

This bundle is more than just pretty paper (though the DSP is swoon-worthy). It’s a complete experience, perfect for cardmakers, scrapbookers, and tag-makers alike! You’ll find:

  • Painted landscapes and sketched floral patterns in the Designer Series Paper
  • All-occasion sentiments that are both warm and versatile
  • A beautifully detailed embossing folder to add texture and depth
  • And my personal favorite: coordinating dies that make your stamped images pop!

Whether you’re preserving a moment in a scrapbook or sending a little happy mail, this suite has everything you need to make it memorable.

In today’s video, I’ll walk you through two card designs using the Beautiful Gallery Bundle—and you’re going to love how quickly these come together. But wait… there’s a twist! I’m also showing you a fun new way to use your Stampin’ Blends Color Lifter. Hint: it’s not just for “fixing” anymore.

Think of it like adding brushstrokes to your own mini canvas. It’s a subtle but oh-so-artistic technique that gives your coloring a soft, watercolor-like effect.

Ready to get inspired?

How did you like the new technique I shared using the Stampin’ Blends Color Lifter? Isn’t that such a fun and unexpected way to soften your color application? ✨

Instead of just correcting color “oopsies,” the Color Lifter becomes a true blending tool—giving your stamped images a soft, watercolor-like wash. It adds a dreamy, almost painted look that pairs beautifully with the hand-sketched elements in this suite.

If you’ve never tried this before, I highly recommend giving it a go. It’s one of those little tricks that makes a big impact!

With the Beautiful Gallery Suite Collection, you can create a whole world of creativity from your craft space. Add some ink, your favorite cardstock, and a bit of adhesive—and you’re ready to turn paper into art.

Thank you so much for joining me today …. Remember, I go LIVE with a FREE Class on Tuesday nights on my Facebook page. Join me HERE!

Blooming Beauty: Exploring the Simply Zinnia Bundle – Day 2

Hello Stampin’ Friends,

Welcome back to our Simply Zinnia journey! Yesterday, we embarked on a delightful exploration of this charming bundle, and sharing a quick and easy way to color the flowers. Today, we’re diving deeper into its versatility and charm. If you thought yesterday’s creation was stunning, get ready to be captivated once again!

Today’s layout is similar to yesterday’s yet unveils a new dimension of beauty. The designer paper was used as my backdrop with a Lemon Lime Twist mat, setting the perfect canvas for our floral masterpiece. Your eyes are effortlessly guided by the graceful diagonal stripe, leading you to the heart of the composition—the bouquet of vibrant zinnias.

What truly sets today’s card apart is the meticulous coloring technique employed. The zinnias, oh, the zinnias! They have been meticulously colored with Berry Burst, Calypso Coral, Pumpkin Pie with the centers in Daffodil Delight and Old Olive Stampin’ Blends for the leaves, infusing them with a bold and layered allure. This technique elevates the stamped images to a whole new level, adding depth and dimension that simply mesmerizes the beholder.

Let’s delve a little deeper into the magic of Stampin’ Blends. These high-quality alcohol markers offer unparalleled control and blending capabilities, allowing you to achieve professional-grade results with ease. Whether you’re a seasoned crafter or a novice enthusiast, Stampin’ Blends empower you to effortlessly infuse your creations with rich, vibrant hues and seamless transitions.

As we admire today’s card, it’s hard not to feel a tug towards the Simply Zinnia bundle. With its coordinating dies and intricate designs, this bundle opens up a world of creative possibilities. Whether you’re crafting heartfelt greetings, elegant invitations, or stunning scrapbook layouts, the Simply Zinnia bundle is your ultimate companion in artistic expression.

The sentiment is stamped in Old Olive to harmonize with the designer paper and card base. It’s these thoughtful details that truly make a creation come to life, infusing it with warmth and personality.

To add the perfect finishing touch, the card was adorned with the subtle elegance of Iridescent Rhinestones. These shimmering gems add a touch of sparkle and sophistication, elevating your creations from beautiful to breathtaking.

I have fallen in love with the Simply Zinnia bundle… with its exquisite designs, versatile dies, and endless creative possibilities, it’s a must-have for any crafting enthusiast. So why wait? Embark on your own Simply Zinnia journey today and watch your creativity bloom!

Stay tuned for more enchanting creations in the future as I continue to explore the Simply Zinnia bundle. Until next time, happy crafting!

Easy Card Making with the Simply Zinnia Bundle: Quick Tips for Stunning Results

Hello Stampin’ Friends ~

Are you looking for a way to create beautiful, handmade cards without spending hours in the craft room? Look no further than the Simply Zinnia bundle from our Online Exclusive collection. Today, I’m excited to share with you a quick tip for coloring that will help you achieve stunning results in no time.

If you’re short on time but still want to add vibrant color to your cards, try this simple technique: ink up one of our sponge daubers with your favorite color and apply the ink in a circular motion. This method ensures smooth application and allows you to control the intensity of the color. Whether you’re adding a pop of color to flowers or creating a gradient background, this technique is sure to impress.

The background of today’s featured card was created using the Zinnia 3-D embossing folder, adding depth and dimension to the design. To further enhance the focal point, I die cut the designer paper behind the floral bouquet using the Everyday Detail dies also found in our online exclusives. This layering technique gives the card a sophisticated look, as if it took hours to create, when in reality, it was quite easy thanks to the die cuts and coloring tip.

The “Thank You” and die for our sentiment comes from our Simply Zinnia bundle. Not only does the Simply Zinnia bundle make card making quick and easy, but it also offers endless creative possibilities. I’ll be sharing more with you tomorrow! This collection is sure to inspire your creativity and help you create stunning cards for any occasion.

So why wait? Head over to my website today and explore the Simply Zinnia bundle from our Online Exclusive collection. With its easy-to-use tools and versatile designs, you’ll be crafting beautiful cards in no time.

Thanks for joining me today & Happy crafting!

Designer Paper: From Drab to FAB!!

Hello Stampin’ Friends ~

Today I am sharing the video replay of my Facebook LIVE last night. I shared how you can take your Designer paper from Drab to FAB!! Watch while I show you several card featuring different techniques used to enhance your designer paper.

Let’s begin with the video …

Here is the finished card featuring the pumpkins…. All cards featured in the video were using the Rustic Harvest Designer paper.

Now I loved this paper because of it’s versatility but when I started coloring it … well, I flipped head over heels!! Isn’t the transformation amazing! I really liked the paper before but adding that color totally transforms it to another level.

NOW … it’s time to share the finished floral card ….

WOW!! How stunning are our flowers. As I compare my two floral cards … pretty before, but simply stunning afterwards. These designer papers were created for those of us who love to explore and discover new dimensions in our paper crafting. By the way … the dimensions for this card are the same as the pumpkin card and they are shown in the video.

Thank you for hanging out with me and checking out today’s blog post.

Have an amazing day!

I have a list of supplies used for the two colored cards show here today. You can click on anyone of them for more details about the product or to begin shopping.

Cheer Up My Friend …

Hello Stampin’ Friends ~

Today I have a special card to share with you …. Did you know that July 11th is Cheer Up the Lonely Day. My card features the Hand-Penned Petals stamp set and the Soft Pastels, plus I used the Blender Pens to add the color to the petals.

Whether it’s a close friend, family member, old neighbor, new classmate, parent, child, or anybody else in your life, if you know anyone who is lonely or going through a tough time, surprise them today with a visit, a hug, or a card! A small act of kindness can make a big difference.

A close up of my card to show the Wink of Stella … because we all like a little sparkle every now and then to lift the spirits. Today’s soft colors and simple layout will be easy to recreate and will touch the heart of your recipient. We are all in this world together, yet going through things most don’t even know about, so lets all reach out today … you know they say that a card is a hug, folded in the middle ❤

Use this day to also express gratitude to anyone who’s ever reached out to you while you when struggling.  I wish you a wonderful day.

Thank you for joining me today ~

Here are the items that I used to create today’s cards ….

#nationalcheerupthelonelyday