Time to Celebrate!

Hello Stampin’ Friends ~

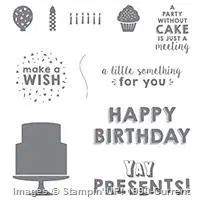
It’s time to celebrate birthdays!! Today I’m going to share a FUN card created with the “Party with Cake” and “Party Pop-Up” bundle. It is really easy to use and I have some great tips to add a pop of color without a mess.

My club members did cards similar to this one, and I’m hosting a class on February 25th to showcase all the things you can do with this fun, fun bundle. You’ll find full details in my events page.

First let me show you the card ….

000_3138

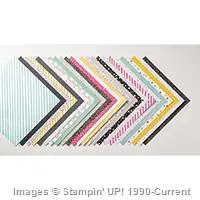
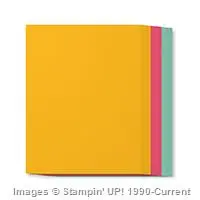
Start with the “It’s My Party” Designer Series Paper … you can make endless cards with this paper stack, combine that with the “It’s My Party” cardstock pack and your ready to go!!

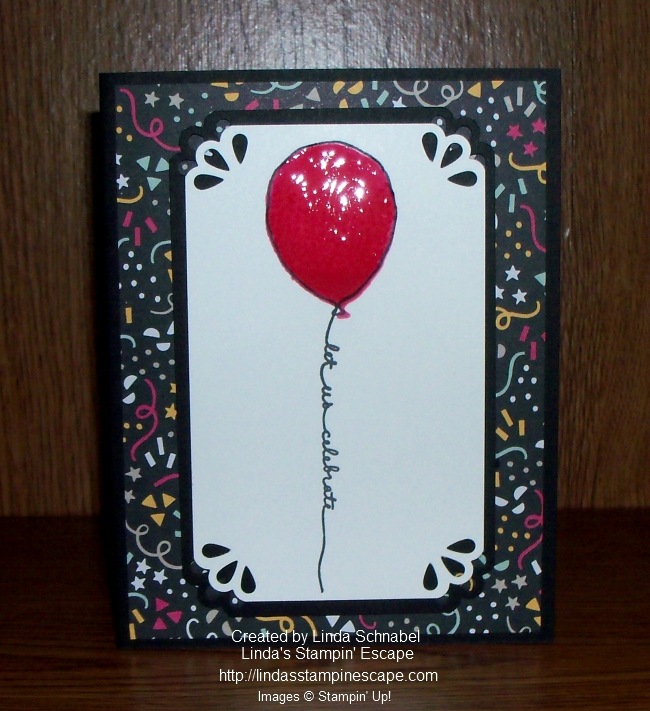
For our greeting … I omitted the “with cake” by putting a post-it note over it before inking up the stamp, then we pulled it off so only the words we wanted were inked.

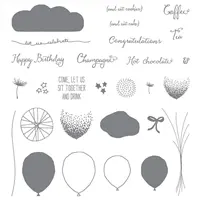
Next, I took my “Perfectly Artistic” Designer Paper (ends Monday) from our Sale-a-bration catalog to make our balloons. I love our balloon punch with 2 sizes of balloon. (Also bundles with the Balloon Celebration Stamp Set) We tied a knot in our White Bakers Twine and attached it to the balloon with a “rolled up” glue dot!

Ahhhh … Let’s get to the inside and make this card REALLY POP!

000_3141

How fun is this! And it’s really simple to do.  Fold your cardstock in half and use the crease to align your die – there are tabs on the die that you align with the crease.  I used the “Precision Base Plate” to use with my dies … then used the “Big Shot Die Brush” which helps the paper release from the dies.  I LOVE IT!!!

Here’s a great tip for coloring your die cut …

000_3128

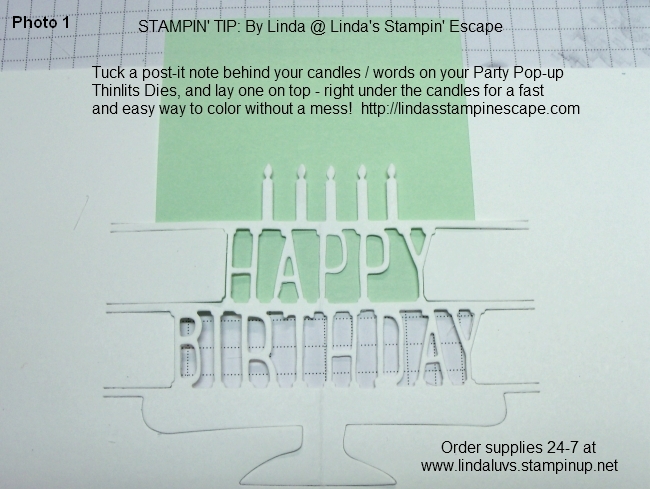
Slide a post-it note behind your cut out and one over it …

000_3131

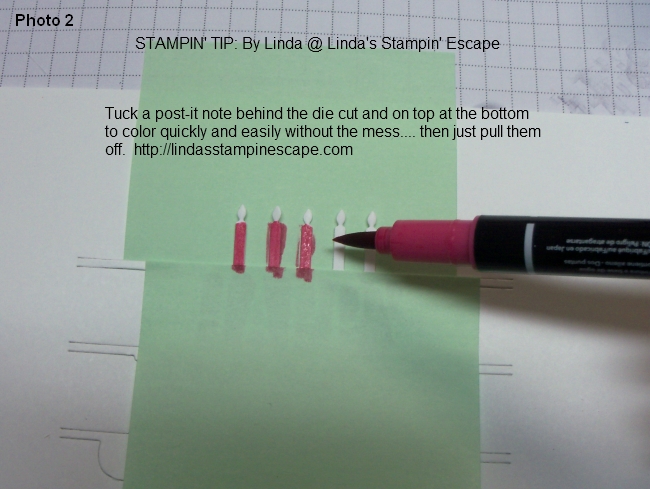
This simple technique allows you to color your pop up dies without getting ink all over everything else!

000_3142

Your birthday person who receives this card will love the surprise inside! This is just one of the two dies in this bundle. I have listed the items needed to make this card, click on any of the items to get the details .

000_3138

Thank you for checking out my blog today, hope you enjoyed the card and the stampin’ tips! I’d love to hear what you think … feel free to post your comments below.

Have a Fabulous Friday!

blog-closing-small

TODAY’S STAMPIN’ SUPPLY LIST …

Birthday Balloons …

Hello Stampin’ Friends ~

Today I want to share with you a card that I have “stepped up” from the Simply Sunday card I posted …

000_2991

On Sunday’s card I stamped a single balloon, today’s card we have multiple balloons. This is done by the “Masking Technique”.

Here are the step by step instructions …

1]   Stamp image on card stock.

2]   Stamp it again on a piece of scratch paper.

3]   Cut carefully around the scratch paper image, cutting just inside the lines; this will be your mask.

4]   Place the mask on top of the card stock image.

5]   Stamp another image over a portion of the mask to create layered, interacting images.

6]   Remove the mask to see the finished look.

7]   To stamp a partial image, use tape to cover the part of the stamp you don’t want to appear, ink the stamp, remove the tape, and stamp the image.

QUICK TIP
To ensure that the mask stays in place, stamp image on a Post-It® note.

Here is my “Stepped Up” card using the Masking Technique …

000_3025

When you stamp your secondary balloons – you go over the first, your mask will cover (protect) the first balloon. Your secondary balloons will appear as if they are behind the first one!  It’s so cool and so easy to do.

Just like the first card, I used the “Party Wishes” stamp set and the “It’s My Party” Designer Series Paper Stack. I added highlights to the balloons using the “Chalk Pen” and then covered the balloons with Crystal Effects.

I used the Bow Builder punch to get the cute little edges on my birthday banner. Just because it’s a punch to create bows … don’t let that stop you from finding other ways to use it!!

Hope you enjoyed today’s card … I thank you for checking it out.

Have a wonderful day today!

blog-closing-small

Today’s Stampin’ Supply List …

000_3025

Simply Sunday: Let Us Celebrate

Hello Stampin’ Friends ~

I hope you are having a peaceful weekend (unless your hoping for a fun packed one!).  I have had the pleasure of meeting with two of my clubs this weekend so mine was good … anytime shared with friends is a good time.

Today we are bringing it back to basics … with a focus on stamping. I am using the “Balloon Celebrations” stamp set from the Occasions Catalog. It is a two-step stamp … one in which you can use multiple stamps to layer color onto your image.

000_2991

You can see that my first stamp was the bold (solid) balloon done in Melon Mambo. Then it was stamped with the speckled (partial / detailed) stamp directly over the top – I used Melon Mambo again and stamped it twice to get a darker color. My last stamp was the line image the outside of the balloon – I chose the Black Momento pad to create more of an impact.

My greeting – the balloon string was also stamped in the Momento Ink. I punched the corners for a bit more flair and then popped it up onto the “It’s My Birthday” Designer Series paper also from the Occasions Catalog.

Only one more step to finish off my card … I added “Crystal Effects” to the balloon to make it shine! Simple, basic techniques can still make a fun, colorful card.

000_3001

The purchase of the “Balloon Celebrations” stamp set and the “It’s My Birthday” Designer Series paper Stack (48 sheets, 4 each of 12 double-sided designs) will get you a FREE Sale-a-bration Item (VIEW HERE)

Thank You for taking time out of your Sunday to stop by and visit with me. I hope you enjoyed the card and feel inspired to get back to basics and create fast and fun birthday cards!

Have an awesome day ~

blog-closing-small


TODAY’S STAMPIN’ SUPPLY LIST …