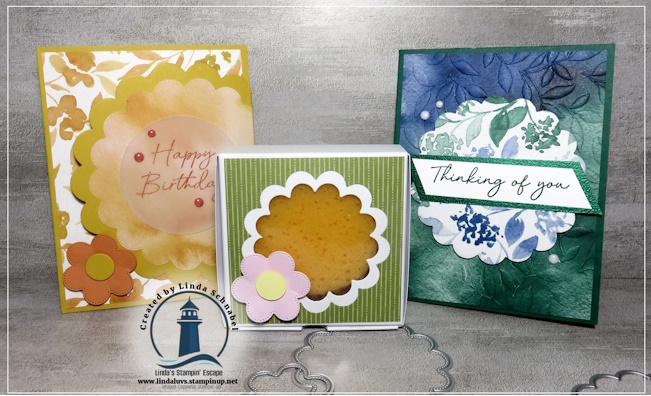
Today I have something extra special to share with you! I paired the sweet and versatile Scalloped Blooms Bundle with the gorgeous Garden Poetry Designer Series Paper to create not one, but two delightful projects. Best of all, I’ve included the video tutorial below so you can craft right along with me!
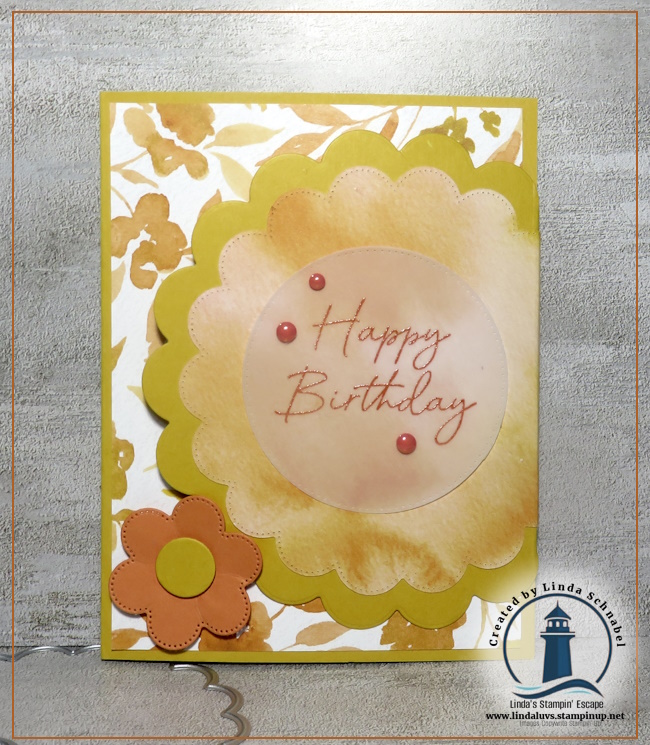
Our first project is a cheerful birthday card featuring layers of scalloped circles, soft ink blending, and warm peach and lemon tones. The Garden Poetry Designer Paper provides the perfect backdrop, adding just enough floral beauty without overwhelming the focal point. A simple flower accent and a few embellishments complete this happy design.
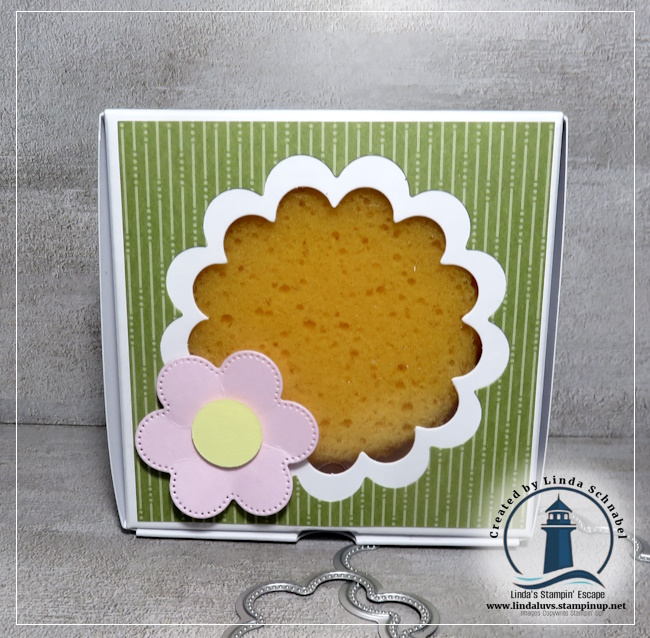
But why stop at a card? I also created an adorable 3-D treat holder featuring a scalloped window and sweet flower accent. It’s perfect for small gifts, candies, party favors, or just adding a little surprise to someone’s day. These kinds of projects are always fun to make and even more fun to give!
One of the things I love most about the Scalloped Blooms Bundle is how easily the dies and sentiments can be mixed and matched for cards, gift packaging, and so much more. And paired with the soft colors and beautiful patterns found in the Garden Poetry Designer Series Paper, the possibilities are endless.
If you’ve had your eye on the Garden Poetry Designer Series Paper, now is the time to grab it! This beautiful paper has made its way onto the Last Chance List, which means once it sells out, it will be gone for good. Last Chance products can disappear quickly, and some favorites don’t last long.
So pour yourself a cup of coffee, watch the video below, and join me as we create these two charming projects together. I hope they inspire you to pull out your supplies and enjoy a little creative escape of your own!
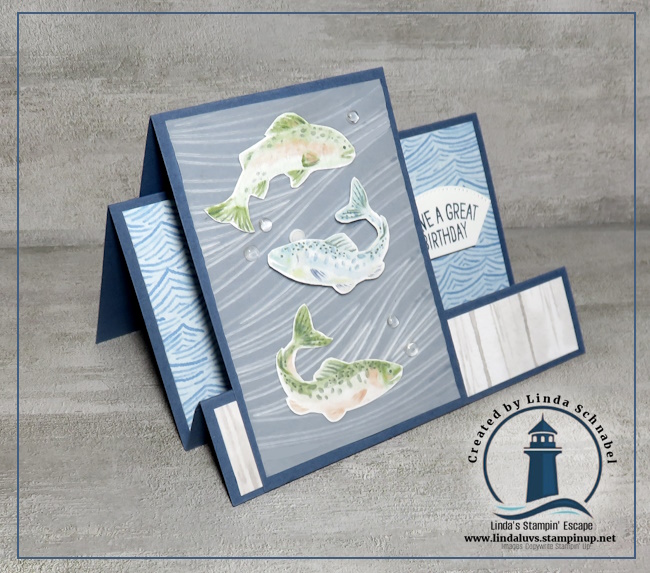
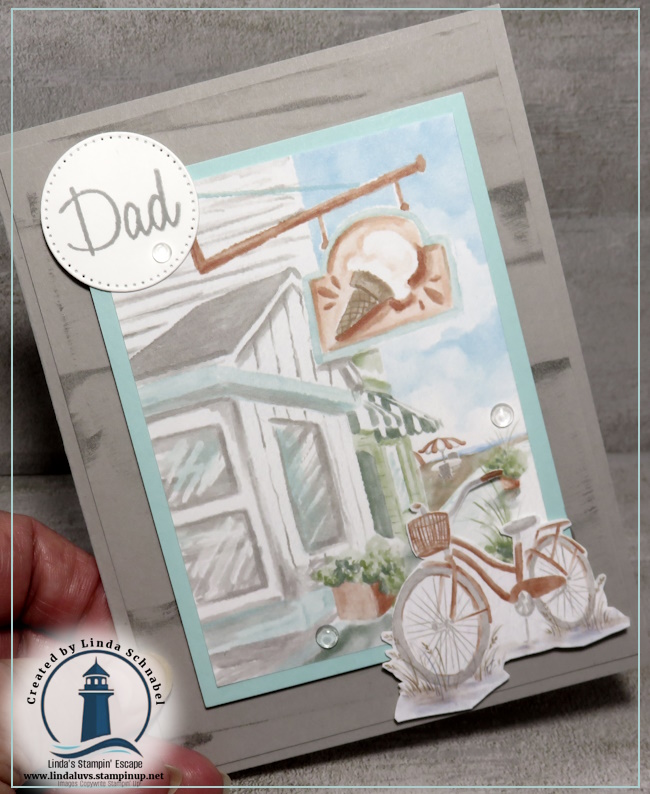
I’m so excited to share this fun fold with you today, and as promised, I’m including all the measurements and instructions so you can recreate it yourself! One of my favorite things about paper crafting is taking beautiful Designer Series Paper and turning it into something a little unexpected. Today’s card does exactly that with the gorgeous Waterside Retreat Suite Collection and a fun Horizontal Faux Step Fold.
Escape to a quiet moment on the shore with the Waterside Retreat Suite Collection. This suite captures the breezy simplicity of a lakeside getaway with serene images of lounge chairs, sailboats, books, and peaceful waters. The coordinating Designer Series Paper, detailed dies, and charming embellishments work together to create projects that feel calm, relaxing, and beautifully inviting. For today’s card, I let the Designer Series Paper take center stage and paired it with this unique fold to create a scene that practically splashes with personality!
Let’s begin with the card base. I used Misty Moonlight cardstock, cutting the base to 8½” x 5½”. Along the 8½” side, score at 3″, 6″, and 7¼”. Turn the cardstock so the smallest section is closest to you. Adhere a piece of Designer Series Paper (Wood Grain) measuring 5¼” x 1″ to that front section. Skip the center section, and then add a second piece of the water-patterned Designer Series Paper measuring 5¼” x 2¾” between the second and third score lines. Once those pieces are in place, set the base aside while we create the front step panel.
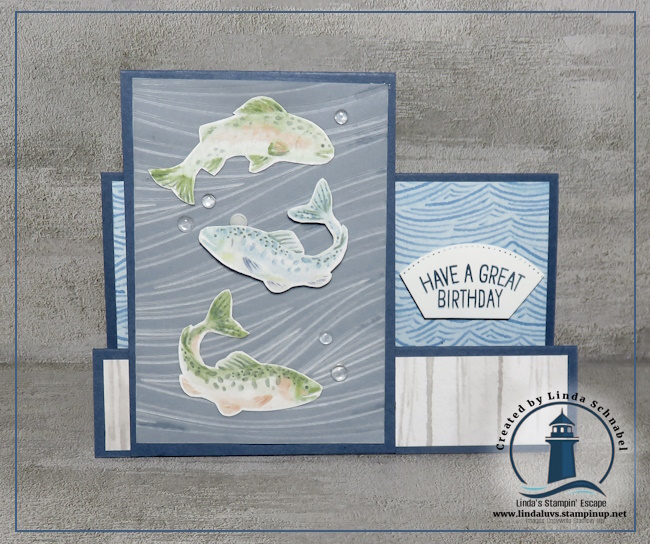
For the front panel, cut another piece of Misty Moonlight cardstock to 6″ x 3″ and score on the 6″ side at 4½”. I wanted the fish to really stand out, so instead of using another Designer Series Paper pattern, I chose a piece of vellum embossed with the Wave Embossing Folder, cut to 4″ x 2¾”, and adhered it to the front. The soft texture gives the appearance of moving water without distracting from the focal images.
The fish themselves were simply fussy-cut from one of the sheets included in the Waterside Retreat Designer Series Paper pack. I attached them with Stampin’ Dimensionals, allowing them to float above the background for added dimension. To finish the scene, I scattered several Clear Dewdrop Embellishments, which create the perfect “bubble” effect. I absolutely love how those little details bring the card to life!
Once your front panel is complete, attach it to the step section of the card. I placed mine slightly toward the left side, but centering it would work beautifully as well. That’s the fun of this fold—you can customize the placement to suit your style.
For the greeting, I stamped my sentiment in Misty Moonlight ink onto Basic White cardstock. Using a circle from the Stylish Shapes Dies, I selected one that matched the curve of the sentiment and simply trimmed away the excess to create the unique shape you see on the card. It adds just the right finishing touch without covering up too much of the beautiful paper.
To complete the card, I added a 5¼” x 3⅔” piece of Basic White cardstock to the back, giving plenty of room for a handwritten message and birthday wishes. Here’s a tip: Before attaching the back panel, write your message first, or if it’s already attached, use a felt tip pen as it will glide over the area where you attached the back of the panel.
I hope you’ll give this Horizontal Faux Step Fun Fold a try. It’s a wonderful way to showcase beautiful Designer Series Paper, and with those playful fish swimming across the front, it’s sure to bring a smile to anyone who receives it. Until next time, enjoy your creative escape and happy stamping!
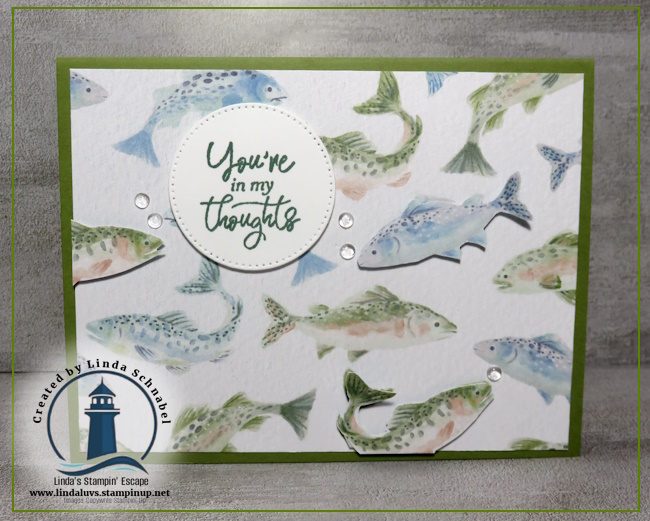
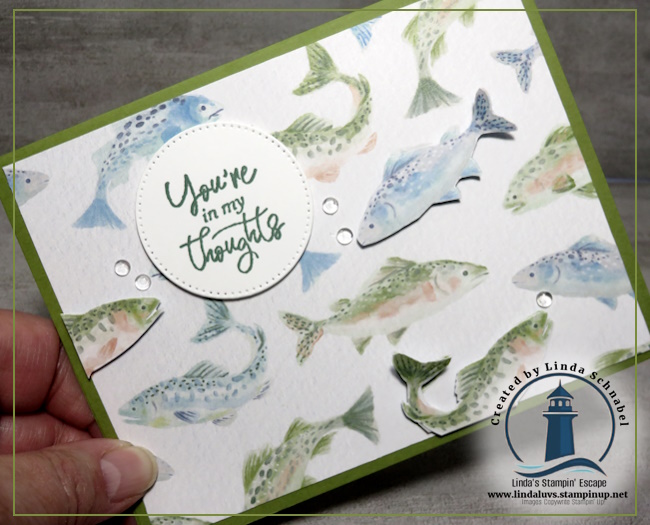
There’s something so peaceful about sitting by the water… the gentle waves, the warm breeze, and that feeling of complete relaxation. Today, I’m bringing that same calming, carefree vibe right into your craft room as we create two beautiful summertime cards using the Waterside Retreat Designer Series Paper.
This collection truly captures the essence of a lakeside escape. With soft, sun-drenched colors, charming imagery, and patterns that feel both fresh and timeless, it makes creating stunning cards incredibly easy. In fact, this is one of those papers that does most of the work for you—perfect for those days when you want to sit down, relax, and just enjoy the creative process without overthinking every detail.
For today’s cards, I focused on letting the designer paper shine while adding just a few simple layers and embellishments to bring everything together. One card features a soft, all-over pattern with fish paired with the simple sentiment. Perfect for letting someone know they’re in your thoughts. Perfect for our friends and family who love to fish … watch the video for a fun tip.
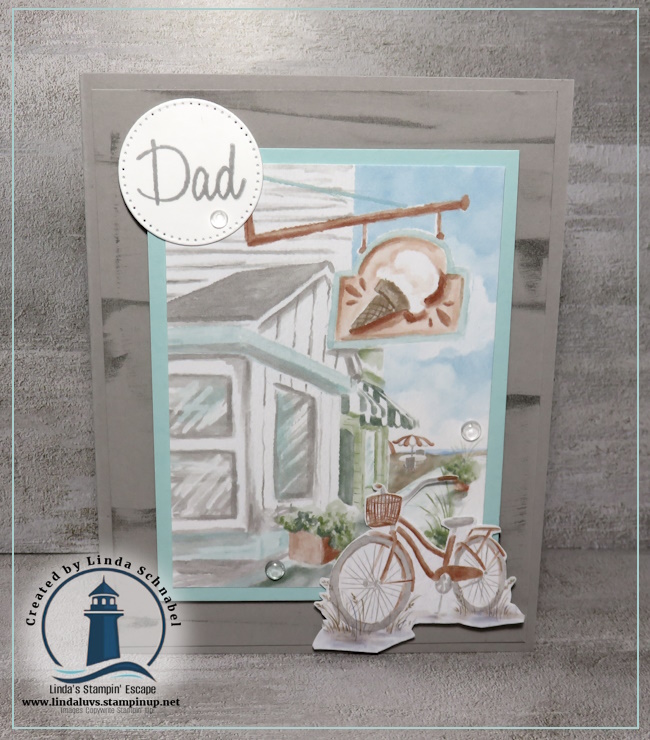
The second card takes on a slightly more structured look, making it ideal for that warm summer day feel (think birthdays, thinking of you, or just because). I love how versatile this suite is… it truly gives you options for so many occasions!
You’ll notice how easy it is to mix and match these patterns, and how a simple die cut or focal point can completely transform the look. Whether you’re creating a quick card or taking a little extra time to add details, this paper supports both styles beautifully. It’s perfect for beginners and seasoned stampers alike.
And the best part? I’m sharing it all with you in today’s video! 🎥 You can watch step-by-step as I walk you through both card designs, share a few helpful tips along the way, and hopefully inspire you to pull out your own supplies and start creating.
So pour yourself a cup of coffee ☕, or favorite beverage and settle into your favorite crafting spot, and let’s take a little creative escape together…
👉 Be sure to watch the video below and let me know in the comments—which card is your favorite?
Happy Stamping, Linda 💙 Shining the Light on Creativity
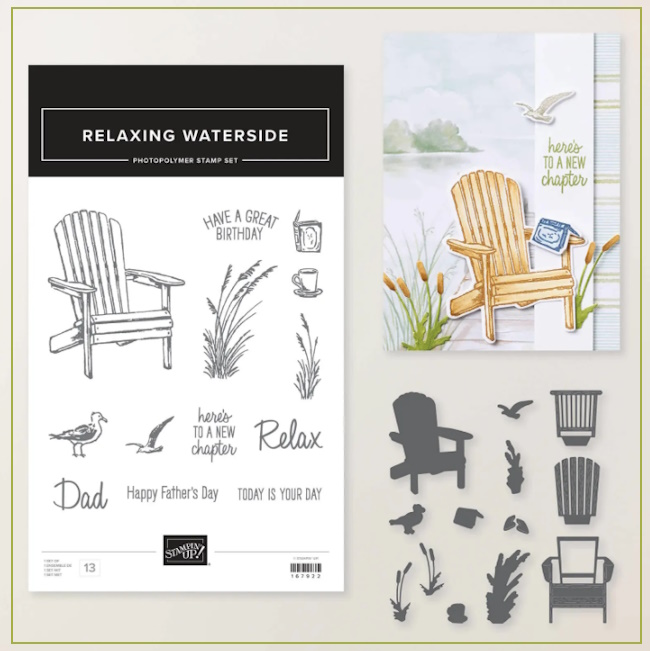
There’s something so peaceful about a quiet moment by the water… and today’s card captures that feeling beautifully using the Waterside Retreat Suite Collection featuring the Relaxing Waterside Bundle. If you’ve ever dreamed of escaping to a lakeside getaway—where the breeze is soft, the water gently rolls in, and time seems to slow down—this suite brings that experience right into your craft room.
The Waterside Retreat Suite is filled with everything you need to create calming, scenic cards with ease. From the sun-drenched Designer Series Paper to the detailed stamps and coordinating dies, each piece works together effortlessly. You’ll find images of lounge chairs, sailboats, books, and more—perfect for creating those serene, storybook moments. And let’s not forget the charming little anchor embellishments that add just the right finishing touch!
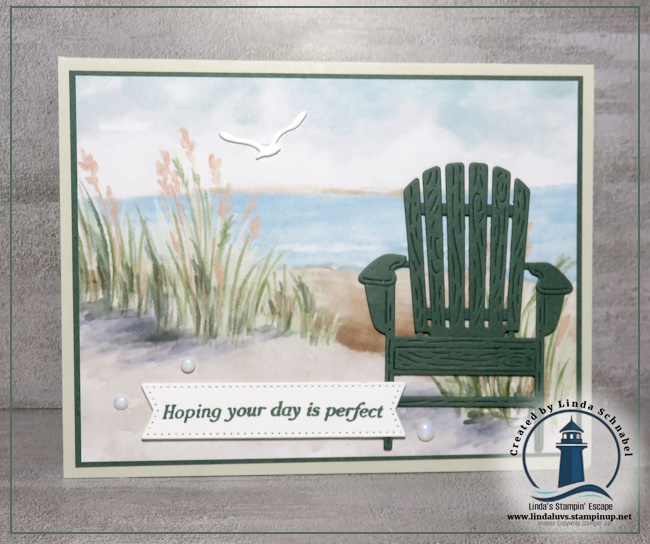
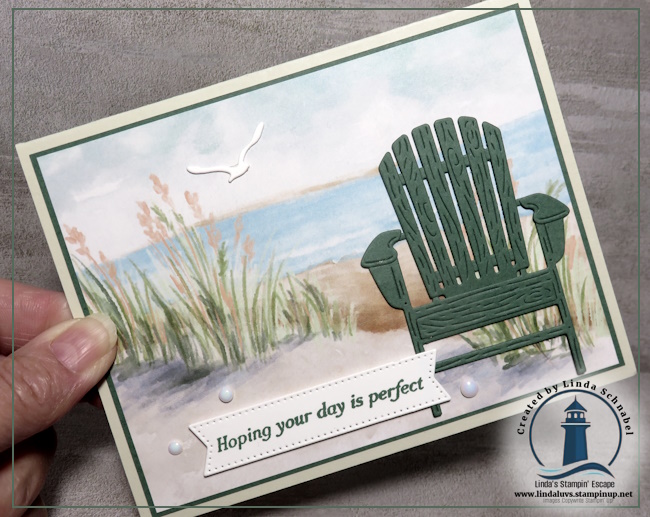
Today’s card really lets the Designer Series Paper shine. The soft shoreline scene sets the stage, creating a tranquil background that instantly draws you in. I added one of my absolute favorite dies from this suite—the Adirondack chair—and placed it front and center. Doesn’t it just invite you to sit down, relax, and take in the view? The added texture and dimension of the die really bring the whole scene to life, while still keeping the card simple and easy to recreate.
This is one of those designs that looks detailed and impressive, yet comes together quickly—perfect for when you want to create something beautiful without a lot of fuss. Whether you’re making a card for a friend, a retirement, or simply to send a little calm and encouragement, this suite makes it so easy to tell a story through your crafting.
If you’re ready to bring a little lakeside calm into your stamping, the Waterside Retreat Suite is one you’ll definitely want to add to your collection. It’s perfect for creating those peaceful, heartfelt cards that your friends and family will treasure. It’s in the NEW Catalog and will be available on Tuesday, May 5th … get ready!
Thank you so much for stopping by today… I always love sharing a little creative escape with you!
Happy Stamping, Linda 💙
🚨 FLASH SALE ALERT! 🚨
Stampin’ Friends… this is one you do NOT want to miss!
On Saturday, May 2 ONLY, celebrate National Scrapbooking Day with 20% OFF select memory keeping products 🎉
Whether you’ve been thinking about starting a scrapbook, catching up on memories, or just stocking up on your favorite supplies… THIS is your moment.
But don’t wait… ⏰ this sale lasts just 24 hours and then it’s gone!
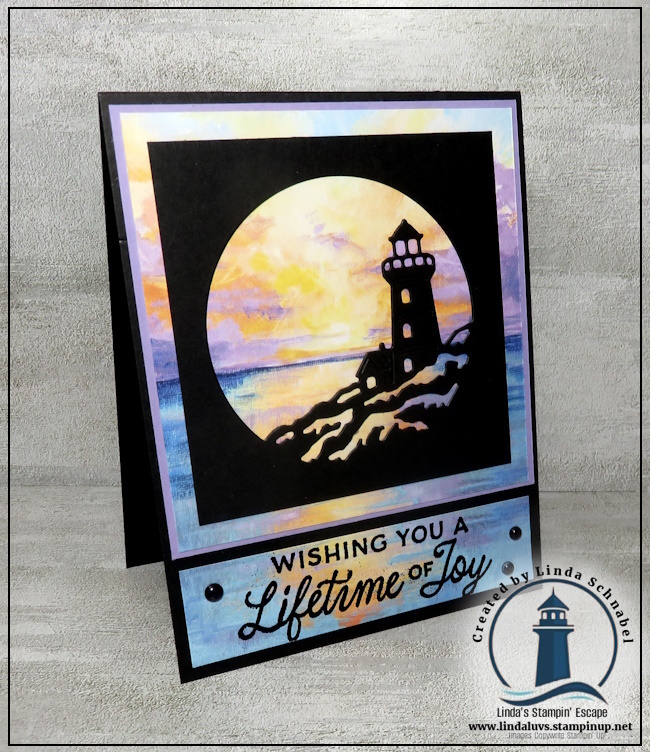
Oh my goodness… if you love the peaceful feeling of the shore, you are going to fall in love with the brand new Sunset Coast Bundle coming your way on May 5th! I am so excited to give you a little sneak peek today with two beautiful cards—including a stunning lighthouse card that I’ll walk you through step by step in my video tutorial.
✨ MEASUREMENTS:
Cardbase: 11″ x 4 1/4″ – Score at 5 1/2″
Highland Heather Mat: 4 1/8″ x 4 1/8″
Designer Paper: 4″ x 4″ and 4″ x 1″
Die Cut Lighthouse: 3 1/2″ x 3 1/2″
This bundle truly captures that magical moment when the sun meets the water… soft skies, gentle waves, and all those sweet seaside details. With coordinating stamps and dies, you can build your own oceanfront scenes with sailboats, seashells, rock formations, and of course… lighthouses. Whether you’re creating a card for a retirement, an anniversary, a birthday, or someone stepping into a brand new adventure, the sentiments are just perfect.
What makes this bundle even more special is that it’s a Two-Step Stampin’ set, which means you can layer images to create depth, texture, and those gorgeous blended looks we all love. You’re in control of the colors, the intensity, and the final effect—so each card becomes uniquely yours. It’s one of those techniques that looks impressive… but is actually so relaxing and fun once you start!
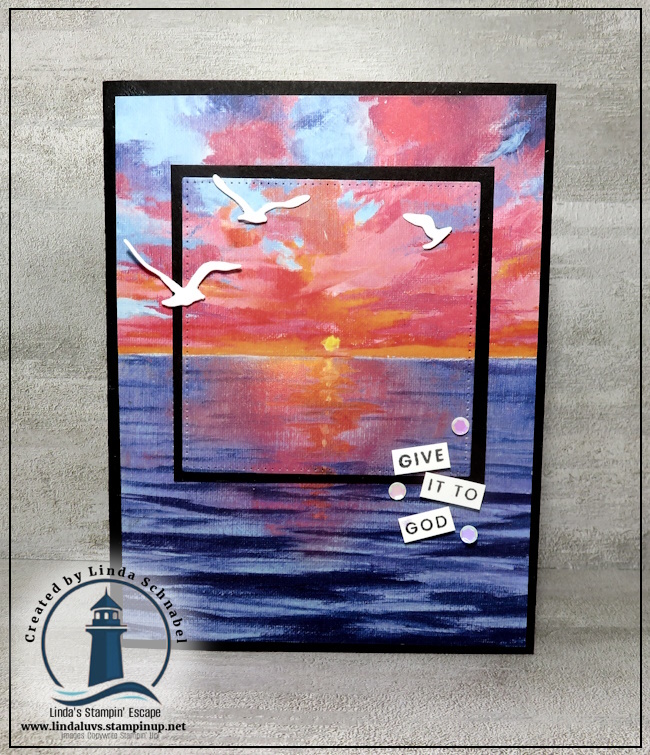
For today’s projects, I wanted to really let the bundle shine. The lighthouse card is a true standout—clean, peaceful, and full of dimension. And the second card? Just as beautiful, with those coastal elements coming together in a way that feels like a mini vacation right on your craft table. Be sure to watch the video below where I guide you through the lighthouse card step by step… I’ll share tips along the way to make it easy and enjoyable!
Now here’s the exciting part… this bundle will be available starting May 5th when the new catalog goes LIVE. And if this one is already calling your name (I know it called mine!), you’ll definitely want to be ready. New releases like this have a way of becoming fast favorites, especially when they’re this versatile and beautiful.
✨ MEASUREMENTS:
Cardbase: 8 1/2″ x 5 1/2″ Score at 4 1/4″
Designer Paper: 5 1/4″ x 4″ … use the second largest square die from Stylish Shapes Dies to die cut / highlight the sunrise
Cut a 3″ x 3″ Black mat – place behind the designer paper and then over the top of the larger piece you cut from.
Die cut seagulls and greeting and position as desired.
✨ So here’s my little nudge, friend… Take a moment to imagine the cards you could create—peaceful scenes, heartfelt messages, and projects that truly stand out. Then be ready to add the Sunset Coast Bundle to your collection as soon as it goes live.
Thank you so much for stopping by today and spending a little creative time with me. Don’t forget to check out the video, and be sure to click that FOLLOW button so you don’t miss more inspiration coming your way.
Until next time… keep shining your creativity! 💜 Linda
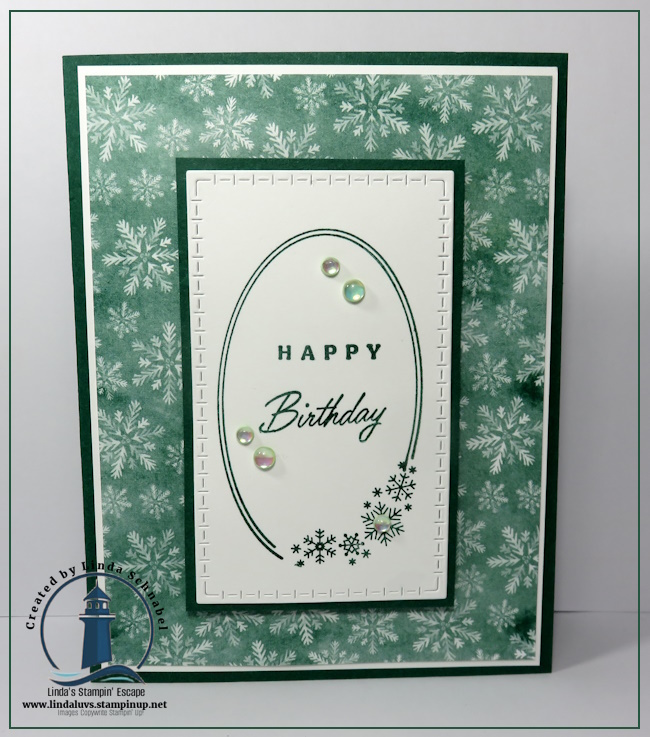
One of the easiest ways to elevate your handmade cards is by pairing beautiful designer paper with a versatile greeting stamp set. Today I’m sharing two creative cards made with the Addressed to You Stamp Set, and I think you’ll love how simple yet elegant these designs are.
The Addressed to You stamp set is perfect for creating greeting-focused cards. The sentiments are clean, stylish, and work beautifully as the focal point of a card. This makes it a wonderful set to have on hand when you want to create something special without needing lots of extra stamping.
This first card highlights a classic birthday sentiment framed with a stitched oval and layered over softly patterned snowflake designer paper from the Elegant Pine Snowflakes. A few embellishments add just the right amount of sparkle.
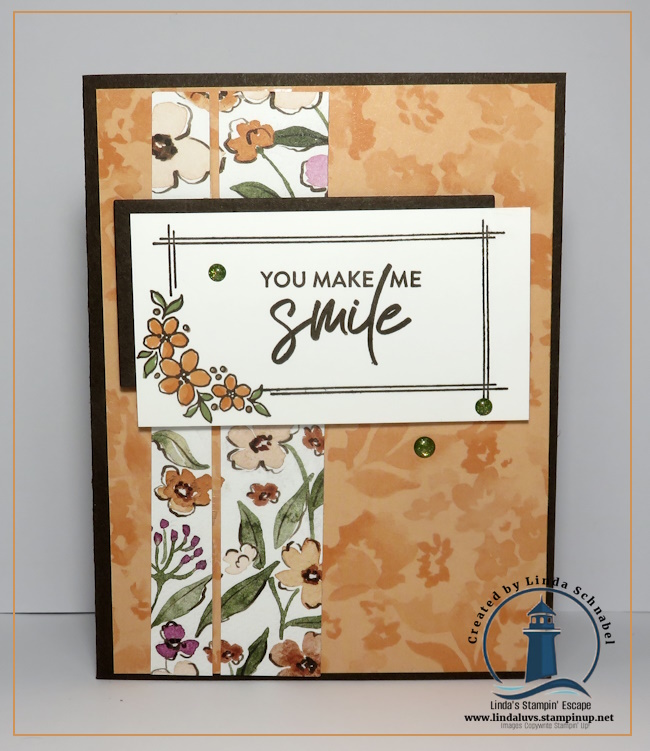
For both of today’s cards, I kept the layouts simple so the greetings and designer paper could really shine. This second card features the warm floral patterns from the Lovely Florals Designer paper paired with a cheerful “You Make Me Smile” greeting, creating a bright and uplifting design.
I’ve also included a video below where I walk you through the cards and share a closer look at the details. I hope it inspires you to pull out your greeting stamp sets and start creating!
🎥 Watch the video below to see the cards up close and get inspired to create your own.
If you’re craving a little creative time that feels easy, joyful, and totally stress-free, you’re going to love today’s Simply Sunday card. 🌸 This project highlights the Easter Time Mix & Match Ephemera Pack, and it truly is as quick as a bunny’s hop to put together. If your craft table has been calling your name—or if you just need a moment of calm—this is the perfect place to start.
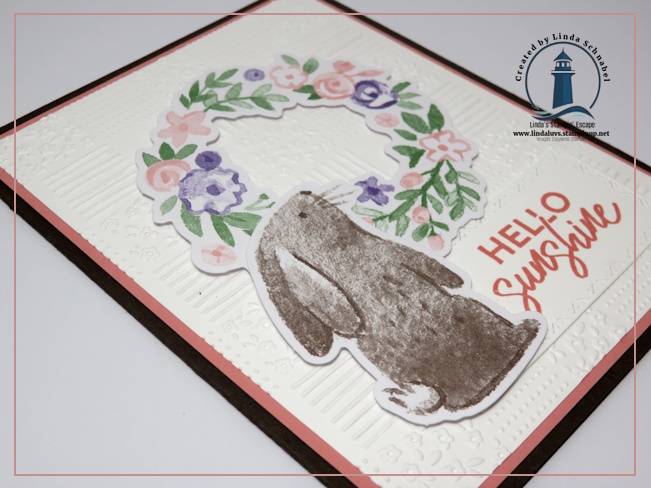
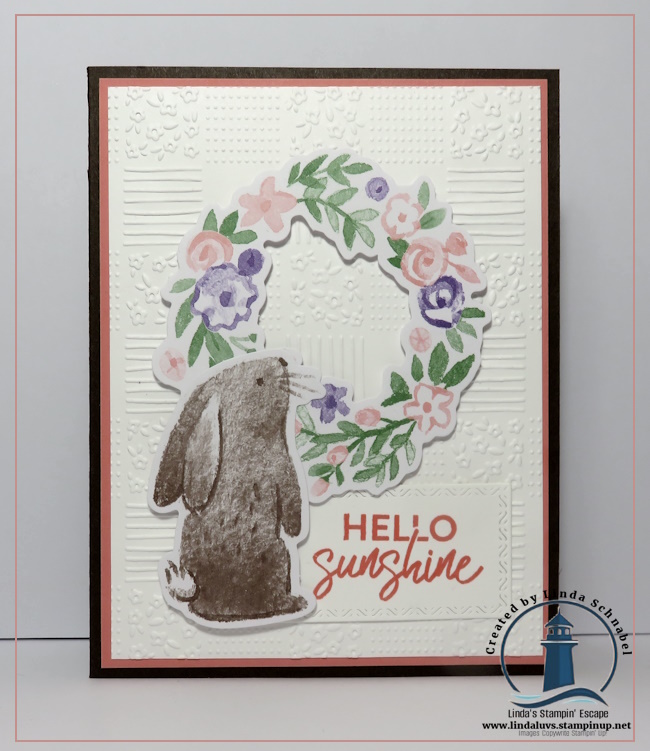
Springtime creativity comes to life with the Easter Time Mix & Match Ephemera Pack, filled with soft pastel colors and charming imagery that instantly makes you smile. Tulips, sweet bunnies, floral wreaths, classic wicker Easter baskets, and blooming water cans make mixing and matching effortless. For today’s card, I chose one of the floral wreath and an adorable bunny, letting the ephemera do all the heavy lifting while still creating a card that feels thoughtful and handcrafted.
To add texture and visual interest, I used the All in a Row Embossing Folder, which is a favorite when I want subtle structure without overwhelming the design. The beautifully embossed grid pattern includes florals, stripes, and dots with deep texture that gives the card such a lovely tactile feel. It’s one of those details that really shines when you see it in person—and makes a simple layout feel extra special. If texture is something you love in your cards, this folder is definitely one to take a closer look at.
The layers for this card are clean and classic, creating the perfect base for our spring focal point. The A2 card base is Early Espresso, measuring 8 1/2″ x 5 1/2″ and scored at 4 1/4″. I added a Flirty Flamingo mat cut to 5 1/4″ x 4″, followed by embossed Basic White at 5 1/8″ x 4 7/8″. These simple layers frame the ephemera beautifully and allow the soft spring colors to really stand out. If you enjoy designs that are easy to recreate but still have that “wow” factor, this layout is one you’ll want to save.
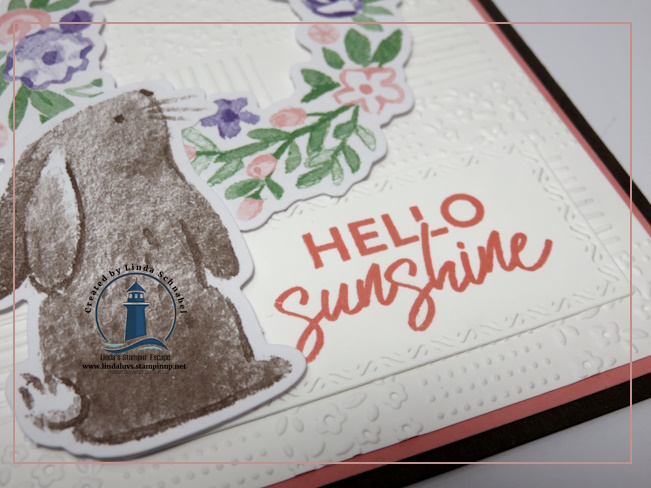
Once the wreath and bunny were in place, all that was left was the greeting. I reached for the Exploring Nature Stamp Set, which is intended as a companion to the scrapbook kit—but I absolutely love using it on cards, too. These sentiment-only stamps are all about embracing adventure, soaking in the sunshine, and celebrating the great outdoors. I framed the greeting using the Textured Notes Die, which adds just the right finishing touch without stealing attention from the main elements.
This sweet little card is wonderfully versatile—it works beautifully for Easter, spring greetings, or even a birthday. That’s one of the things I love most about Mix & Match ephemera: it makes creating fast, fun, and flexible projects so easy. If this card inspired you, I’d love for you to try something similar at your own craft table and see how quickly it comes together.
Thanks so much for stopping by for today’s Simply Sunday inspiration. 💕 Be sure to leave a comment and let me know how you would use this card—and don’t forget to check out the supplies if they’ve found their way onto your wish list.
Until next time, happy stampin’ and enjoy every little moment of spring creativity!
If you love quick & easy cards that pack a big “wow,” you’re in the right place! Today I’m sharing a North Pole Delivery Fun Fold that’s not only adorable—but it also features my favorite paper-saving trick to help you stretch every sheet.
We’ll be crafting with a trio of gorgeous Designer Papers: North Pole Delivery, Hobby Haven, and the NEW Easter Joy… and trust me, you’re going to want them all by the time we’re done. Grab a cozy seat, hit play, and let’s create something magical together!
Card Base = 11″ x 4 1/4″ Score & at 5 1/2″ then slide over and cut at 2 1/4″
Cut another 4 1/4″ x 2 1/4″ piece from left over card stock.
Inside / Designer paper = 4″ x 5 1/4″
Basic White: Cut 2 – 4″ x 2″ pieces to attach to mats
Frontc Flap / Designer paper = 4″ x 3″
Let’s take a closer look at each card … Here is our North Pole Delivery card that was featured in the video. It’s full of cheer and whimsy, this patterned paper set features dogs, bears, and more animals delivering holiday letters and packages in classic Christmas colors of reds and greens. Plus, you get two sheets of pre-cut images for easy accents!
I really love this easy fun fold and it works for any occasion … Here is the Hobby Haven! This is a fun designer paper to work with! It will bring your favorite pastimes to life … Charming illustrations inspired by baking, sewing, reading, and other simple pleasures!
My last feature “Easter Joy” …. SNEAK PEEK into the January / April Mini Catalog (Available January 6th, 2026). Hop into creativity with Easter Joy 12″ x 12″ Specialty Designer Series Paper! This delightful patterned paper brings the charm of spring to your handmade cards and paper crafting projects. Features playful bunnies, Easter eggs, blooming flowers, and festive baskets, all with a hint of metallic foil shine.
As you can see, this easy fun fold truly steals the show—it’s versatile, beginner-friendly, and works beautifully across every season and theme. From the whimsical holiday charm of North Pole Delivery, to the cozy, everyday delights found in Hobby Haven, and finally the fresh spring sparkle of the NEW Easter Joy Designer Paper, this fold lets each pattern shine in its own special way. One simple layout, endless possibilities!
If one (or all 😉) of these papers has caught your eye, now is the perfect time to add them to your craft stash and start creating cards that wow. Thank you so much for watching along with me—be sure to check the links below and let this fun fold inspire your next handmade creation.
If your feed looks anything like mine, it’s been Black Friday this, Cyber Monday that, and Christmas everywhere you turn! So today, I decided we’re taking a tiny detour from the holiday hustle. My card features the Celebratory Sips Suite, and let me tell you… this adorable POP-UP card is the perfect little getaway. No snowflakes, no sales—just a cute, clever design that will make every fellow sip enthusiast smile. Cheers to a crafty escape! 🍷✨
Let’s begin … My cardbase is Basic White and cut 11″ x 4 1/4″ then scored and folded at 5 1/2″. I like using the “tent fold” every now and then – it surprises people! As you see, my card begins with a Bloody Mary (I am from Wisconsin – lol) This simple layout has an embossed background using the Exposed Brick Embossing Folder – I just love the texture you get with this.
The back drop can be any designer paper you want to use to highlight your images, I went simple with a black and white dots, and a black mat to really draw attention to the focal point – my cocktails. The drinks were die cut with the coordinating dies, however I did fussy cut around the edges of the garnishes.
The greeting was die cut in Old Olive using the Stylish Shapes Dies. The were placed in the opposite corner on the back drop to balance the card and allow you to see the designer paper on your backdrop … subtle, and effective.
Are you ready for the POP!?
🛠️ How This Pop-Up “Box” Card Is Made
Start with a 3″ × 3″ square of cardstock. Score it every ¾” — so you’ll have three score lines, dividing the square into four equal ¾” × 3″ panels. When folded, this becomes the “box” or step mechanism that pops up.
Fold along the score lines to form the little “box.” The two end panels will act as the base tabs. Add adhesive to those end panels. These tabs will be glued over the fold line inside your card, meaning one end will glue to the “floor” of the card and the opposite end will glue to the “back wall” (or top half) of the card when closed.
With the “box” in place and secured, you now have a raised horizontal shelf inside your card — perfect for attaching your decorative elements (like the bottles, glasses, fruits from your Celebratory Sips Suite paper).
Make sure your pop-up shelf folds flat when the card closes. Once open — boom — you’ll get that little scene popping forward, giving dimension and surprise.
And there you have it — a cute & sassy card with a little pop-up sip station tucked right inside! It’s bright, it’s fun, and it’s guaranteed to bring a grin to anyone who opens it. Great birthday card for a guy or gal. I mean… who wouldn’t love a surprise cocktail bar popping out at them? 🍹✨ Creating this one reminded me that sometimes we just need a playful escape — a little creativity, a little color, and maybe a little something to sip while we craft. After all… it’s 5 o’clock somewhere, right?
Thanks for stopping in for a sip & a smile today… cheers to more creative moments ahead! 🍹
There’s something magical about crafting on a Sunday morning—especially when we blend the classic beauty of Christmas with a fresh, modern twist. Today’s project is all about celebrating the Simply Beautiful Traditions of Christmas using the gorgeous Traditions of Christmas Suite, but with a little unexpected flair… PINK! Yes, pink is everywhere this year—Halloween, fall décor, and now Christmas cards. And honestly? I’m here for it!
I began with a soft Bubble Bath card base measuring 8-1/2″ x 5-1/2″, scored at 4-1/4″. Clean, simple, perfect. For the card front, I trimmed a piece to 4″ x 5-1/4″ and ran it through the Peaceful Greenery Embossing Folder. This embossed frame is everything—delicate leaves, soft texture, and a beautiful focal point that sets the stage for the entire card.
Inside that embossed frame, I heat embossed the sentiment in gold embossing powder, using the “Just for You” from the Traditional Labels Stamp Set. Even though this suite leans into Christmas, this sentiment gives the card wonderful versatility. With just one phrase, this becomes an all-occasion card wrapped in festive elegance. Perfect for my daughters December 23rd birthday!
For the finishing touch, I die cut one of the stunning floral sprays from the Traditions of Christmas Specialty Designer Paper. The gold foiling on this collection is absolutely breathtaking, and layering that spray along the embossed frame instantly elevated the card—no stamping required!
As I look at the finished card, I’m thinking it could use just a sprinkle more sparkle… maybe a few of the Traditional Sparkling Sequins to catch the light and add that extra holiday charm.
If you’re loving today’s Simply Sunday project, imagine the endless combinations you can create with the Traditions of Christmas Suite. From quick & elegant cards like this one to rich, traditional holiday creations—it’s truly a suite that does it all, without overwhelm.
Wishing you a creative and peaceful Sunday, my friends. 💗✨
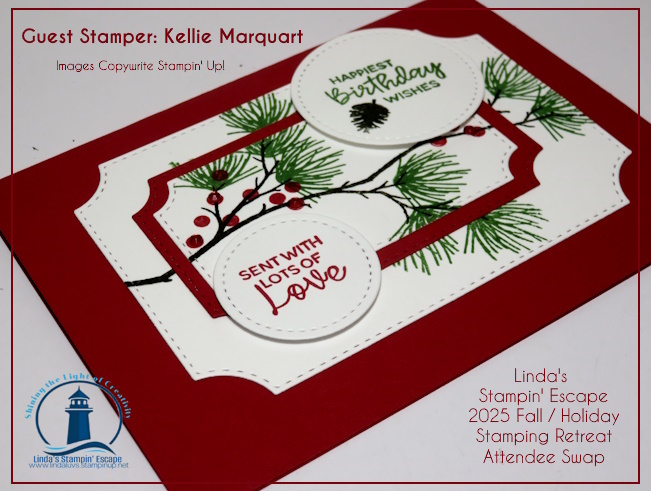
I’m so excited to share that the winning card from our Fall/Holiday Stamping Retreat Attendee Swap was created by the talented Kellie Marquart! Her beautiful card stole the show with its elegance, detail, and creativity — all featuring the Branching Out Bundle.
This bundle is a true gem for nature lovers and those who enjoy crafting projects with warmth and meaning. The Branching Out Stamp Set lets you build lifelike pine branches by layering delicate images of needles, berries, and pinecones — or use them individually for a more subtle look. Whether you’re creating a cozy Christmas card, celebrating friendship, or simply sharing love and gratitude, this set delivers timeless beauty and versatility.
Kellie’s design perfectly showcased the bundle’s potential — and what made it even more special was how she turned this Christmas-themed set into a delightful Birthday card! With natural tones, subtle textures, and a heartfelt sentiment, she proved that a little creativity can stretch your seasonal sets far beyond the holidays. Her card truly captured the spirit of the season and the joy of handmade giving.
Congratulations, Kellie, on a well-deserved win! 🌿✨ Your card was a true work of art.
If you love seeing (and creating!) beautiful cards like Kellie’s, be sure to join us for our next Stamping Retreat! You’ll enjoy creative inspiration, hands-on projects, and the chance to connect with fellow crafters who share your passion — plus, you might even be our next card swap winner! 🌟
Today we’re sharing the 3rd runner-up from our Fall Stamping Retreat Attendee Swap, and let me tell you — this one is just stunning! 🌟
This beautiful card was created by Karie Kahrs using the Traditions of Christmas Suite. At first glance, you might think, “Christmas card,” but Karie took her creativity to the next level… she turned it into a Birthday Card! How clever is that? So many of us have loved ones with birthdays close to the holidays who prefer a “real” birthday card — this is pure inspiration! 🎂✨
The base of the card is Old Olive, with coordinating mats and a banner to frame the design perfectly. Karie die-cut the floral piece from the suite and popped it up on her focal point, creating dimension and a gorgeous layered look.
Here’s where her creativity really shone: the birthday greeting was heat embossed in gold, giving it that elegant, celebratory feel. She then added a swatch of gold foil paper behind the flowers and sentiment to make everything pop. And to top it off, she added the Traditional Sparkling Sequins in Gold from the suite — just the perfect finishing touch! ✨💛
This card is a fantastic example of taking a Christmas-themed suite and using it beyond the holidays. Karie’s design proves that a little imagination and clever use of products can create something totally unique — and that’s exactly why she earned 3rd place in our Attendee Swap Contest! 🏆
We hope Karie’s card inspires you to look at your stamp sets and papers in a whole new way. Who says Christmas products are just for December? 😉
Thanks for joining me today … stop back for our 2nd runner up tomorrow!
Looking for the perfect handmade touch for Father’s Day, a graduation, or a special birthday? The Alpine Air Kit has you covered! With its elegant mountain scenes and rich, masculine color palette, this kit is ideal for creating heartfelt cards for the men and achievers in your life.
Whether you’re congratulating a grad as they begin a new adventure, sending warm wishes to Dad, or simply saying hello to someone who loves the great outdoors, these cards deliver the message beautifully.
💙 In my video, I’ll walk you through:
What’s included in the kit
The stunning watercolor mountain designs
A look at the coordinating stamp set and ink
Step-by-step assembly of each of the 3 designs
Tips for adding a personal touch to make your cards extra special
This kit includes everything you need to create nine all-occasion cards—that’s three each of three designs—making it perfect for stocking up or sharing creative time with friends. The colors—Azure Afternoon, Bubble Bath, Granny Apple Green, Misty Moonlight, Night of Navy, Pretty Peacock, and Shaded Spruce—capture the feeling of fresh mountain air and peaceful trails.
🎓 🎁 🎉 These cards are perfect for celebrating life’s milestones—from new chapters to cherished traditions.
📬 Order yours soon! With Father’s Day just around the corner, this is a great time to grab the Alpine Air Kit and have those cards ready to go. Bonus: it’s also a great kit to gift to a creative loved one!
Let nature inspire your creativity and help you send love from the heart.
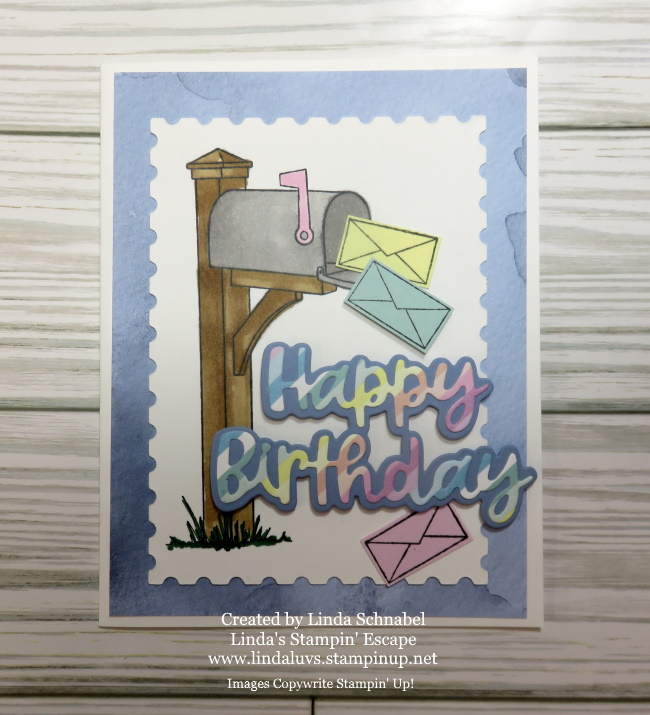
Today, I’m excited to share a perfect pairing that takes your handmade cards to new heights – the Perennial Postage Dies and Sending Love Stamp Set and Dies. These products seamlessly come together, allowing you to craft beautiful greetings that will surely warm the hearts of your loved ones.
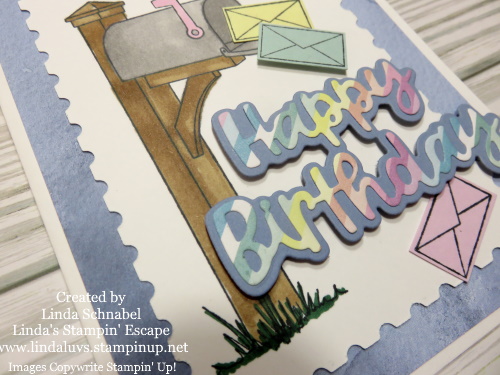
Birthdays are special occasions, and what better way to celebrate than with a personalized touch? The Wanted to Say Dies offer a versatile and elegant way to express your birthday wishes. These dies beautifully complement the Perennial Postage set, creating a harmonious blend of sophistication and sentiment.
This watercolor look of the designer paper brings a whimsical and dreamy element to your cards, creating a perfect backdrop for the Perennial Postage Dies and the Wanted to Say sentiment.
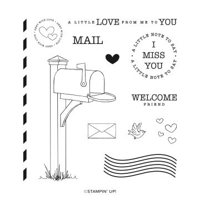
Now, let’s talk about the Sending Love stamp set and dies, which is the ideal companion for the Perennial Postage Dies. The coordinating stamps and dies, allow you to create intricate and charming mailboxes & envelopes to accompany your cards. (Today’s mailbox was stamped). The attention to detail in both sets ensures that your creations are not just cards but expressions of love and thoughtfulness.
With the Perennial Postage Dies, Sending Love stamps and dies, you have the perfect recipe for creating heartfelt and visually stunning cards. Whether it’s a birthday celebration or any other special occasion, let your creativity soar with this perfect pairing. Create Card, send, and spread love with every handmade creation!
Thank you for spending part of your Saturday with me!
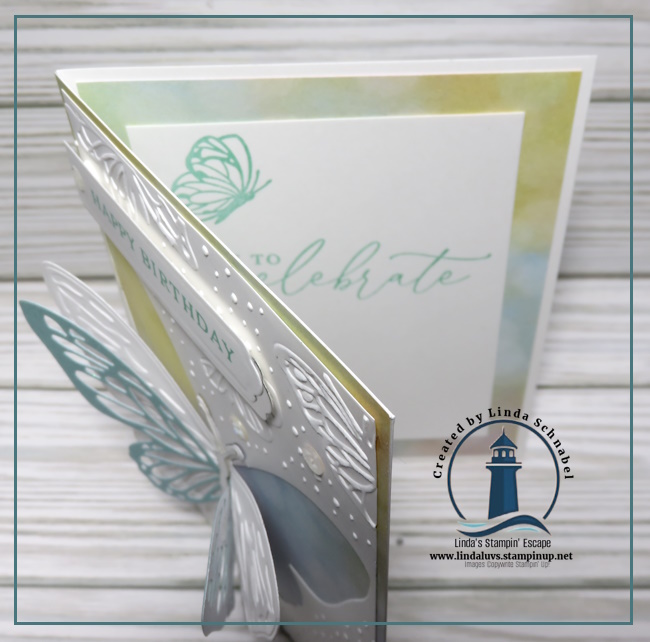
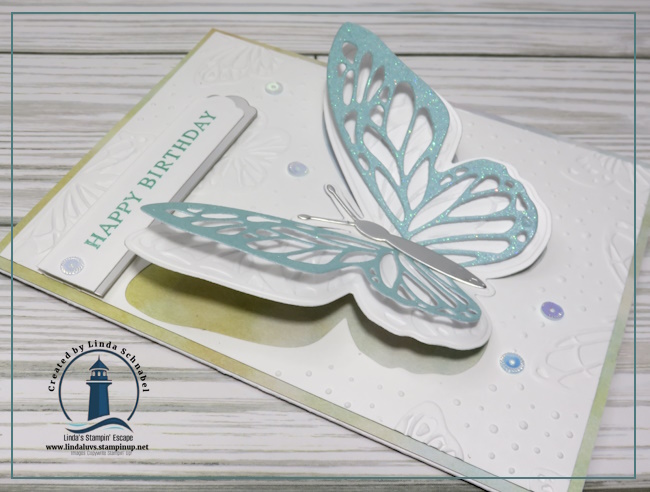
Butterflies are a timeless symbol of transformation and beauty, making them the perfect addition to any handmade card or paper craft. With the Beautiful Butterflies Bundle, you can effortlessly create stunning butterfly-themed projects with intricate details and dimension. Whether you’re stamping and die-cutting large focal-point butterflies or embossing mesmerizing patterns onto card backgrounds and gift tags, this bundle offers endless creative possibilities.
One of the standout features of this bundle is the Hybrid Embossing Folder and Dies, which allow you to emboss and cut in one simple step! It’s a game-changer for adding texture and depth to your projects. Pair it with the all-occasion sentiments and label pieces included in the bundle, and you’ll have everything you need to craft elegant, heartfelt designs for any occasion.
Want to see it in action? Watch the replay of my Facebook LIVE video, where I demonstrate how to use the Hybrid folder and dies to create stunning butterfly designs with ease. Whether you’re a seasoned stamper or just starting out, you’ll love how this bundle makes adding detailed butterfly accents so simple.
Let your creativity take flight—add the Beautiful Butterflies Bundle to your craft collection today and bring delicate, breathtaking butterfly details to all your paper crafting projects! 🦋✨
Thank you for taking time out of your day and sharing it with me! Enjoy.