Hello Stampin’ Friends ~
If you’ve been craving time to create, breathe, and truly recharge, my Spring Stamping Retreat was created with you in mind. Yesterday I shared the invitation to this all-inclusive, in-person retreat—a place where creativity flows freely, your sanity gets a much-needed refresh, and you leave feeling relaxed, inspired, and filled with memories you’ll carry long after the weekend ends. Today, I want to show you how that retreat experience comes to life at the stamp table through one of the projects you could expect to create and explore together.
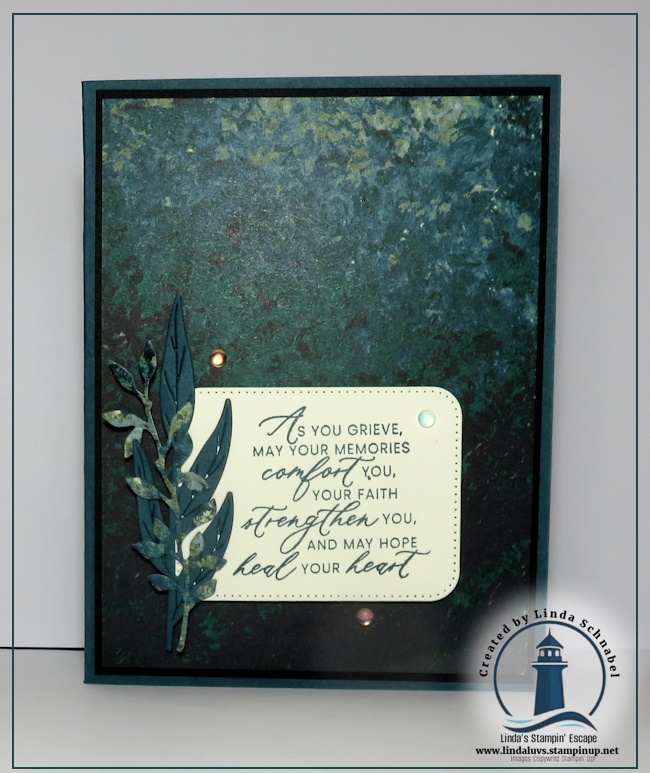
This card, created with the Nature Walk Designer Series Paper, is a perfect example of how inspiration, technique, and thoughtful design come together—something I intentionally build into every retreat experience. We begin with an A2 card base using Pretty Peacock cardstock, cut to 8 1/2″ x 5 1/2″ and scored at 4 1/4″. A layer of Basic Black cardstock, cut to 4″ x 5 1/4″, frames the designer paper and immediately draws the eye inward. The distressed pattern I chose from the Nature Walk collection reminds me of a painted canvas—rich, textured, and quietly powerful. It’s the kind of paper that works beautifully for nature-inspired designs, masculine cards, and sympathy cards like today’s project, making it an incredibly versatile addition to your crafting collection.
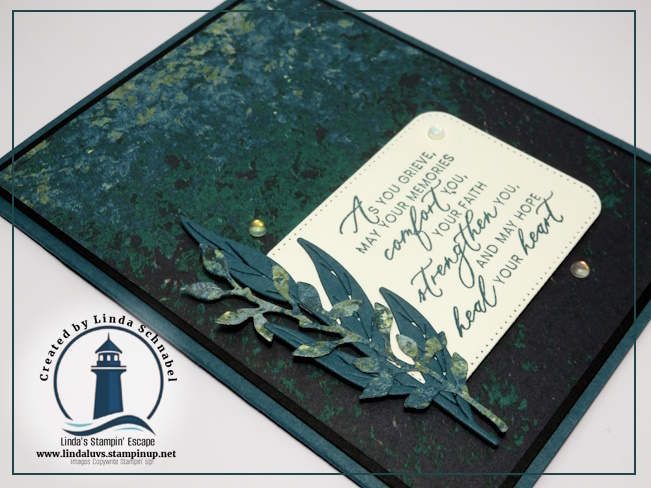
At this stage, the greeting naturally becomes the focal point of the card, allowing the sentiment to speak from the heart. I used the Prayers & Promises stamp set, stamping the greeting in Pretty Peacock ink to create harmony across the design. To soften and balance the layout, I added layered leaves cut from both Pretty Peacock cardstock and the Nature Walk Designer Series Paper. This combination adds depth and visual interest while keeping the card elegant and meaningful—exactly the kind of thoughtful design approach we focus on during retreat classes as we explore new fun folds and techniques together.

And let’s talk embellishments for a moment—because sometimes it’s the smallest details that bring everything to life. The Holographic Resin Dots were the perfect finishing touch. I love how they subtly catch the light and reflect the colors of the card, almost like magic. These little accents add just enough sparkle without overpowering the sentiment, a design tip I love sharing during retreat sessions when we talk about balance and intention in cardmaking.
This is what my stamping retreats are really about—you. They’re about creating together, learning together, and giving ourselves permission to pause and enjoy something that fills our hearts. If this card inspires you, imagine an entire weekend built around that feeling. I would love nothing more than to share that experience with you at my Spring Stamping Retreat. Reach out to save your spot, and be sure to take a closer look at the Nature Walk Designer Series Paper and Prayers & Promises stamp set—products chosen with you in mind and perfect for creating cards that matter. 💙
Thank you for being the heart of this stamping community—your creativity, your friendship, and your love for cardmaking continue to inspire me! Till next time ~