Split Card Technique 2

Hello Stampin’ Friends ~

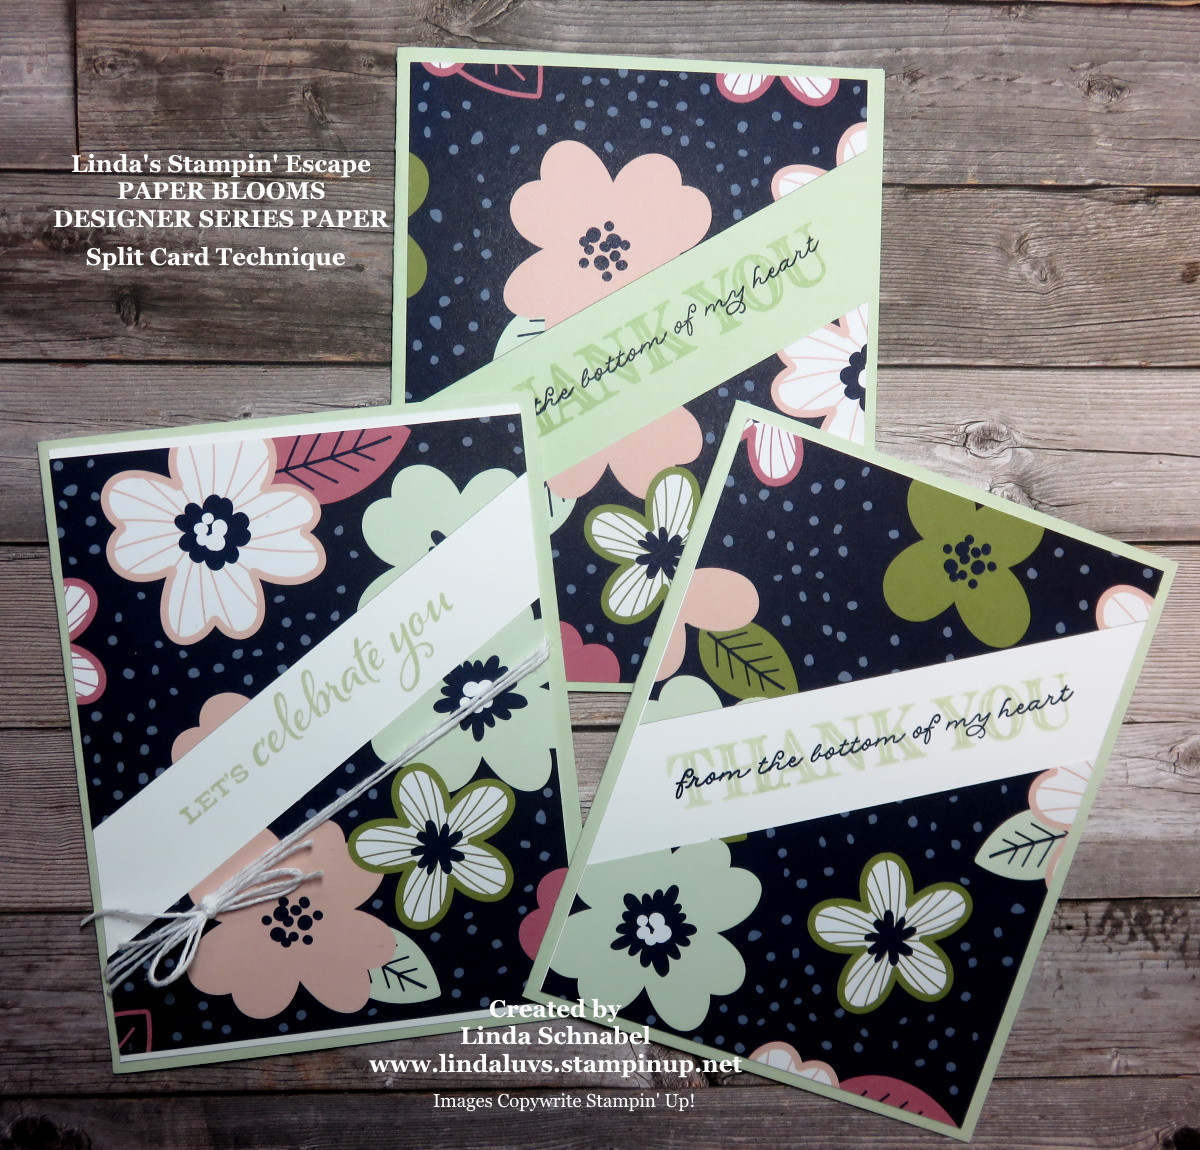
Today I’m going to share more of the cards that I made using the Split Card Technique. This technique is quick -n- easy on only uses a 4″ x 4″ piece of designer paper … NO Waste! I am also keeping the video on my blog so you can watch it again. Did you know that if you use your mouse to “hover” over my little picture – you can subscribe to my YouTube Channel right away … How cool is that!

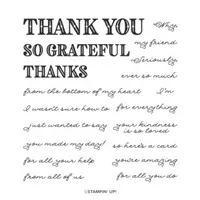
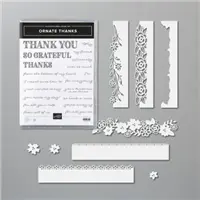
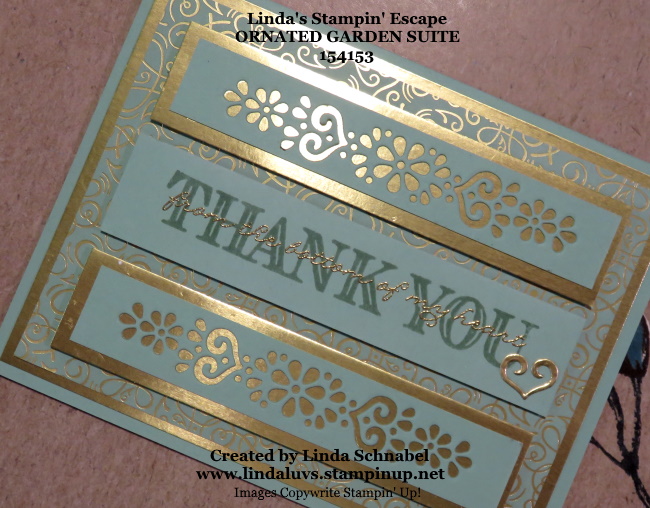
OK … Lets start with the first card (remember to watch the video to learn how/where to cut) … this is the most simple of the three cards. I just cut my Paper Blooms designer paper and attached it directly to the card. Then using the “Ornate Thanks” stamp set, I stamped the Thank You in Soft Sea Foam and then the coordinating sentiment is stamped in Night of Navy … both colors are in our designer paper (No Guessing) so easy!

Our next card adds in a piece of Basic White cardstock … it’s cut 4″ x 5-1/4″ and I layered my Paper Blooms Designer paper and attached it to the top and the bottom, leaving only the center exposed. I stamped my greeting exactly the same on this one as I did the last … just to show the difference. It does lighten up the card a little and makes the greeting pop more.

What is fun about these cards is that each one is slightly different … the Paper Blooms has a scattered pattern of flowers, you will find other papers that will allow them all to look a like.

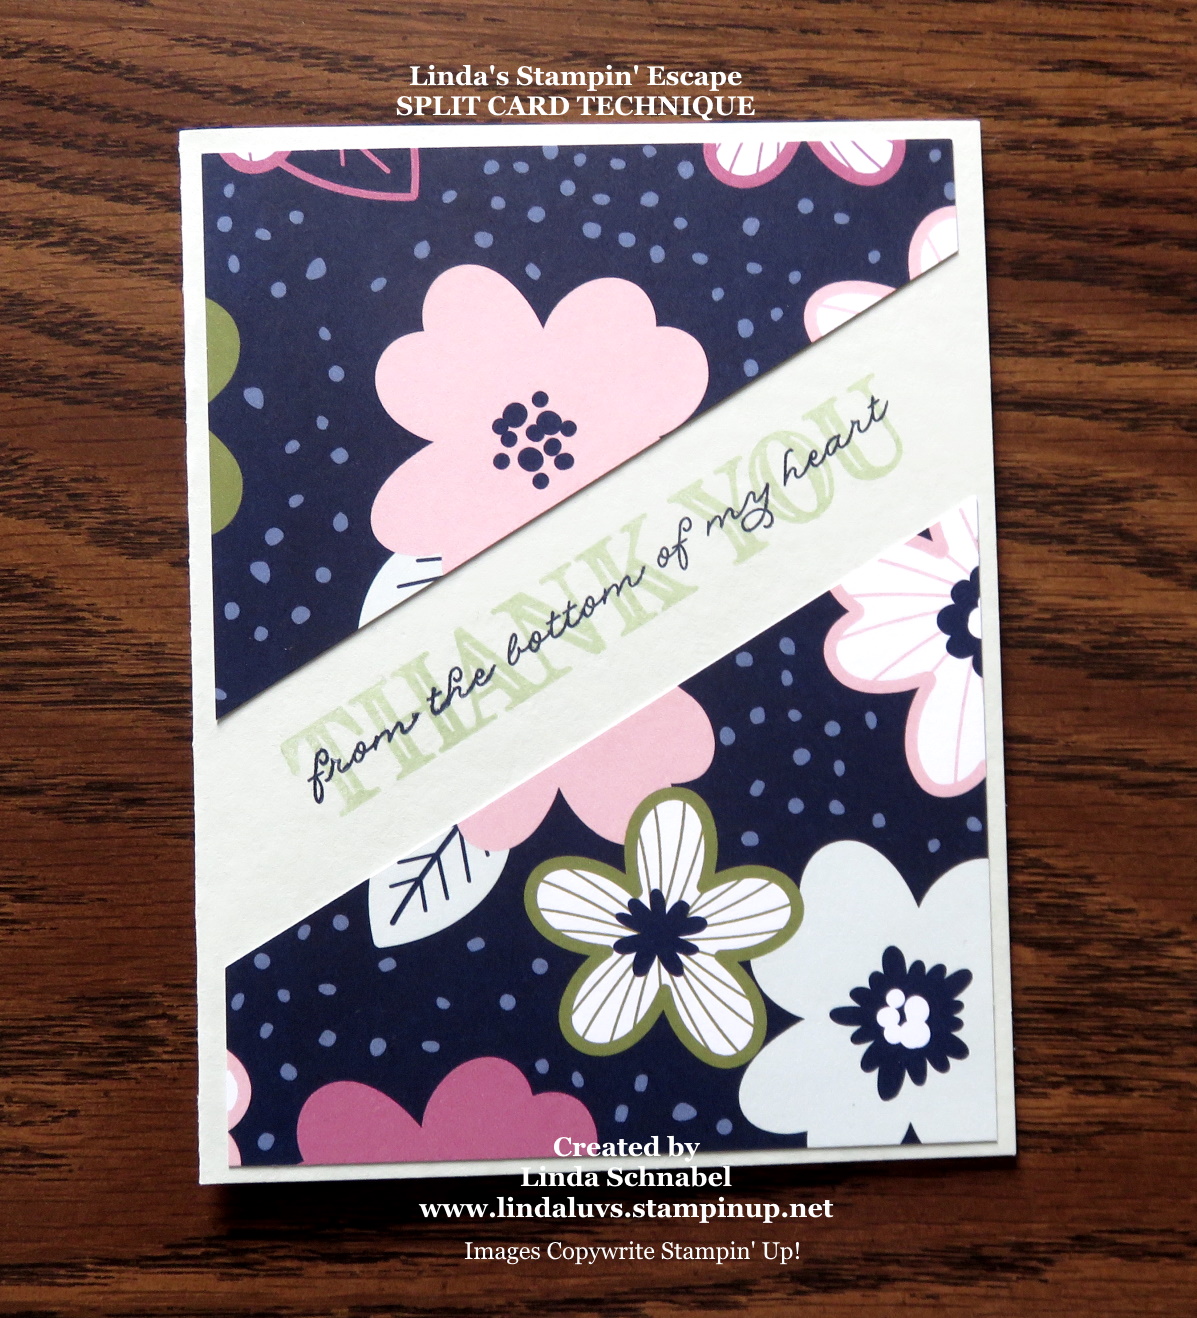
On our last card …. I am using the Basic White cardstock again, but this time I’ve let some of it exposed on the top and the bottom of the card. It creates a nice balance. To add some texture to the card, I wrapped some white Bakers Twine around it and tied a double bow. My greeting is stamped in Soft Sea Foam and comes from the Celebrate Sunflowers stamp set.

The video will show you two ways to cut your 12 x 12 designer paper and then give you samples so you can get a better picture of what I want to show you. Sit back … relax … enjoy …

I hope you enjoyed getting a close up look at these cards and another look at the video. I love to hear when you are excited about a new technique, thank you!

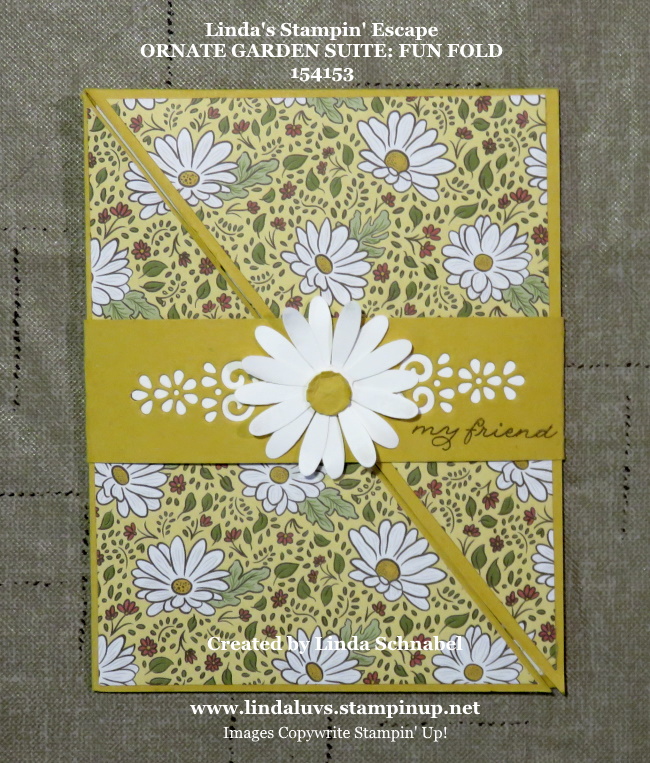
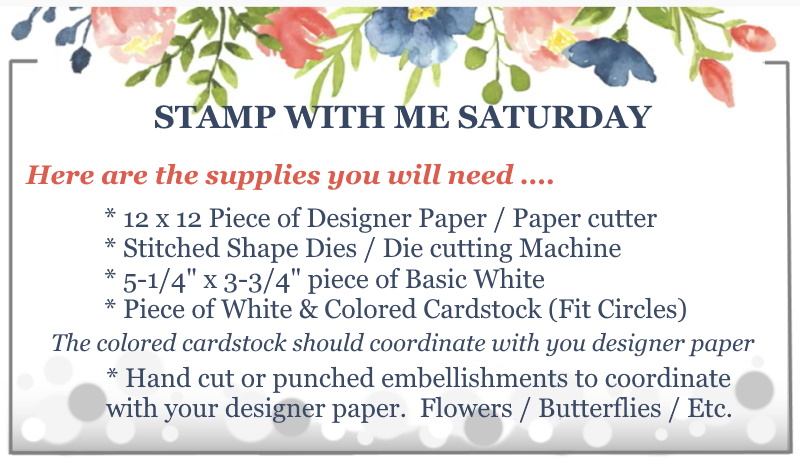
NOW … I’d like to invite YOU to join me for a fun Stamp Class … It’s STAMP WITH ME Saturday!! Tomorrow at 10: 30 am, meet me on my Linda’s Stamp’ Escape Facebook page; I’ll be LIVE and looking to stamp with you!! I’m going through step by step how to make another FUN FOLD Card and it “features” designer paper! There is NO Cost, I just want to gather with you and stamp!

HERE IS WHAT YOU WILL NEED …

Thank you for joining me on my blog today …

Have an awesome day!!

TODAY’S STAMPIN’ SUPPLY LIST … If you liked the products used in today’s projects, I have links for you below. Just click on the item you would like more information on, or to begin your shopping. It will take you directly to my website. Thank you ♥ 

Finally Friday “My Friend” …

Hello Stampin’ Friends ~

I hope you have been enjoying the card parade from the Ornate Garden Suite … today is the last day from this group I will be posting.

Before I share the last of the cards, let’s go back and take a look at the other cards that I shared this week ….

Monday: Thanks … (View Post Here)

Tuesday: Triangle Fun Fold Floral …. (View Post Here)

Wednesday: Going Gold … (View Post Here)

Thursday: A Z-Fold with layers …. (View Post Here)

It’s kind of fun to see all the cards on one page, however … I’m not going to wait you wait any further! I wanted to share another of the “foil” specialty designs included in the Ornate Garden Designer Specialty Paper …

I was not sure what color I wanted to use with the Gold, so I googled “what compliments “metallic gold” … and of course they said black, also a coral, however I went with the Navy, Night of Navy in Stampin’ Up! colors. I think it adds a warm richness to the card.

I also wanted to share with you some of the other “layering” dies that coordinate with the pretty little pattern I like to use. I cut out the center of the largest die cut (the one that surrounds the design) but you would not have to. I thought it lightened up the layering a bit, and highlighted the Navy.

Here is a close up ….

Once die cut and attached to the card, I added some Night of Navy Rhinestones from the Holiday Rhinestone Basic Jewels collection. One of the Rhinestones also anchors my greeting, which was embossed in gold on Vellum cardstock and punched out with the new Lovely Labels Pick a Punch (two designs on one punch!).

I hope you have enjoyed my parade of cards this week, I will be back tomorrow with another new stamp set to share with you.

Have a wonderful day ~

TODAY’S STAMPIN’ SUPPLY LIST … If you liked the products used in today’s projects, I have links for you below. Just click on the item you would like more information on, or to begin your shopping. It will take you directly to my website. Thank you ♥ 

Ornate Garden Suite … remember that I will send you a PDF file of all the Instructions (step by step) with photos how to make all the cards shown this week, and 2 BONUS Cards!! You will also get the “Bonus Cards” sent to you as a “Thank You”…

How do you take advantage of this great offer? Just purchase $50 or more of the Ornate Garden suite from me (either from my on-line store or I can help you place your order). And I will send them to you! Oh yes, you will also qualify for my Virtual Rewards points.

Ornate Thank You …

Hello Stampin’ Friends ~

Sorry I’m posting late today but you know what they say … good things come to those who wait. I think this one is my favorite so far, done in Mint Macaroon and Gold, it shines a light on true gratitude sent from the heart.

I used the pretty little die that I used on my belly band on yesterdays card (see it here). to create a cute pattern and highlight the gold in the in the designer paper.

I wanted to tone down the stark “Thank You” because the card is on the soft side of design so I stamped Mint Macaron onto Mint Macaron …. once dried I embossed the “from the bottom of my heart” in gold on top of the Thank you.

Did you catch the little heart on the card? Look at the pattern of the die cuts …. yep, it’s from there! The gold die cut piece will be on one of the two “bonus” cards that you will get when you purchase $50 worth of products from the Ornate Garden Suite.

My Special: I will send everyone who purchases a minimum of $50 in Ornate Garden products from me; A PDF file of full instructions & color photos for all 5 cards shared this week on my blog plus 2 bonus cards!!! You will be able to recreate my cards with ease as all measurements and step by step instructions will be sent via email and in full color.

Thank you for checking back and stopping in to see me today. I will continue with out Ornate Garden Cards tomorrow …

Ornate Garden Fun Fold

Hello Stampin’ Friends ~

Today is the second day of the week and the second day of my Ornate Garden parade of cards. I have a Fun Fold for you today, the Triangle Fold …

From the outside it doesn’t look a whole lot different than any normal card, but this cute little belly band hides the secret! As you can see, I’m sharing another pattern from the Ornate Garden Specialty Designer paper and another one of the dies included in the suite / bundle.

As you slide the belly band off ….

The fun emerges … the left side folds out as does the top exposing your sentiments to friends and family. It’s always fun to get a card that is just a little different from the norm.

I decided to do a matching die cut on the inside of my card as well as the belly band. It really ties the card together and just adds a little texture to the inside of the card.

I used the Medium Daisy punch for another layer of fun to this card, and I think it highlights the die cut nicely and still leaves a little room for a greeting.

My Special: I will send everyone who purchases a minimum of $50 in Ornate Garden products from me; A PDF file of full instructions & color photos for all 5 cards shared this week on my blog plus 2 bonus cards!!! You will be able to recreate my cards with ease as all measurements and step by step instructions will be sent via email and in full color.

Thanks for joining me this Tuesday, and I’ll see you tomorrow with another Ornate Garden card.

Ornate Garden: You’re Amazing

Hello Stampin’ Friends,

Happy Monday to you! We are beginning a new week, a new month and I’ve got a new line up of cards to share with you! Starting today and going through the week, I will be sharing beautiful card creations from the Ornate Garden suite … and I will have a special promotion to go along with it.

Today’s card highlights three (3) of the items included in the suite; the Ornate Garden Specialty Designer paper, the Ornate Thanks stamp set and the Ornate Layers die set. This suite offers so many amazing options ….

The lovely flowers in the Ornate Garden Suite Collection are a modern take on classic Victorian florals. The gold foil accented paper, gems, and shimmery ribbon will add sparkle and elegance to your projects. You’ll love what you can do with this versatile collection. Share your gratitude with the included sentiments or pair with any sentiments for all-occasion projects.

I used the bright floral pattern as my background and the beautiful ornate die to highlight my greeting. The sentiments in the Ornate Thanks stamp set are perfect for sharing your gratitude to your friends and loved ones.

Here is a close up of the die …

The detail in these dies is amazing and I had no trouble cutting them out. I know many of my stampin’ friends like to add a sheet of wax paper for easy release. So if you want to create intricate layers and accents for handmade cards and other paper crafts using the Ornate Layers Dies.

To complete my card I added a piece of Whisper White on the inside and Whisper White Crinkled Seam Binding Ribbon in a pretty little bow.

I will send everyone who purchases a minimum of $50 in Ornate Garden products from me; A PDF file of full instructions & color photos for all 5 cards shared this week on my blog plus 2 bonus cards!!! You will be able to recreate my cards with ease as all measurements and step by step instructions will be sent via email and in full color.

Thank you for stopping in today. Please let me know if you have any questions on my Ornate Garden offer … or anything else.

Have an amazing day!!

TODAY’S STAMPIN’ SUPPLY LIST … If you liked the products used in today’s projects, I have links for you below. Just click on the item you would like more information on, or to begin your shopping. It will take you directly to my website. Thank you ♥