A Spooktacular Halloween Fun Fold Card! 🎃✨

Hello Stampin’ Friends ~

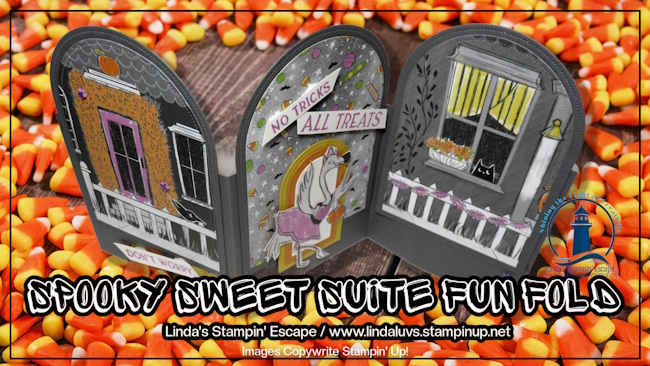
Halloween crafting just got even sweeter on Day 3 of Halloween Week with the Halloween Sweet Suite! This collection is packed with playful images, charming characters, and patterned papers that make it a breeze to create cards and treat holders that will delight kids and grown-ups alike. For today’s project, I couldn’t resist diving right into the designer paper—the star of the show! Not only does it feature adorable characters like hippos, bears, and crows dressed for Halloween, but it also makes creating a polished project so quick and easy. Today, I’m sharing a Happy Halloween Fun Fold Card that is as fun to make as it is to give.

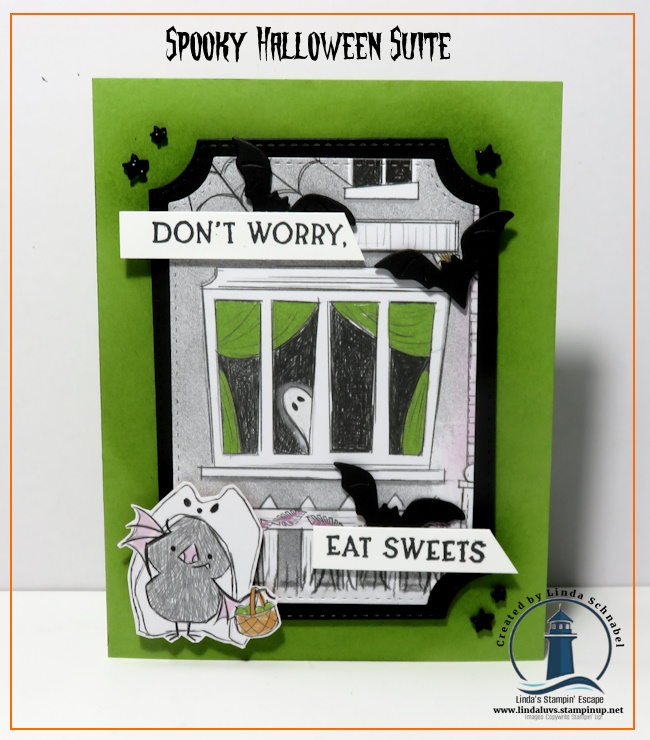
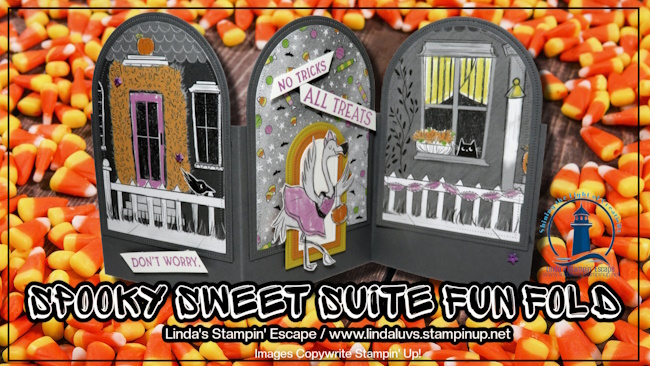
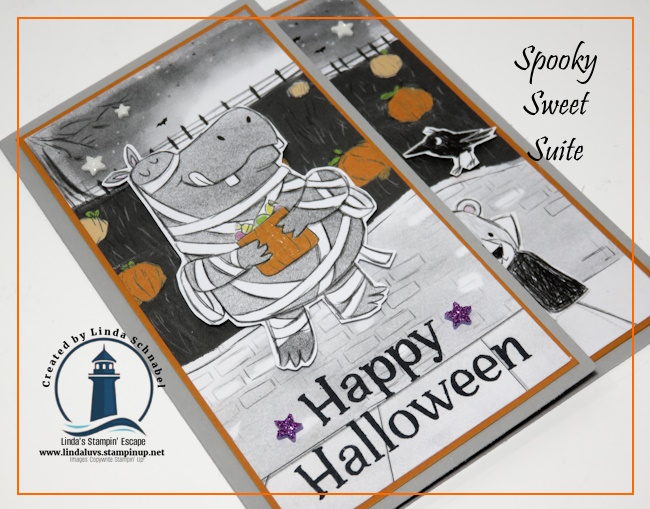
Let’s start with our card base: a piece of Smoky Slate cardstock cut 7 1/4″ x 5 1/2″ and scored at 3″. This simple fold is what makes our card interactive and exciting! For the front, I chose a piece of designer paper cut to 5 1/8″ x 4″—but here’s the trick: I cut it at 2 5/8″ so one piece fits on the front flap and the other slips inside. This way, the design continues seamlessly across the card, creating the look of one solid picture. How cool is that? To make the front pop, I matted the designer paper with Pumpkin Pie cardstock (5 1/4″ x 2 3/4″), stamped Happy Halloween in bold Memento Black ink, and fussy cut the cutest little hippo from the paper to give her a starring role on the front. Of course, she had to be popped up for a little extra dimension!

Now for the inside—because every fun fold should have a surprise! I started with a layer of Pumpkin Pie cardstock (5 1/4″ x 4″), then added the second piece of that cut designer paper, perfectly lined up to continue the image. To the left, I placed a strip of Basic White cardstock (5 1/8″ x 2 3/8″) so there’s space to write a special Halloween message. But the real magic? The little Vampire Bear, fussy cut and ready to stroll right out from the front flap! I tucked him so he overlaps both the designer paper and the white panel, and gave him a little crow buddy for company. To finish it off, I scattered white foam stars across the night sky and added Petunia Pop stars near the greeting for a playful sparkle.

Isn’t this card just the cutest? The Halloween Sweet Suite makes creating this fun fold so easy because the designer paper practically does all the work for you. With whimsical images, bold colors, and festive patterns, it’s the perfect collection for quick cards, treat bags, and more.

Give this fun fold a try—you’ll be amazed at how fast it comes together and how much joy it brings when that little vampire bear comes strolling out to say Happy Halloween! 🧛‍♂️🦇

Thanks for strolling in for a visit today!

Sweet & Spooky Fun with the Spooky Sweet Suite 🎃👻

Hello Stampin’ Friends ~

If you’re looking for Halloween projects that are just as fun as they are easy to create, you’re going to love today’s pair! It’s Day 2 of my Halloween week, and I had so much fun crafting a playful card and a coordinating treat bag topper—both made with the Spooky Sweet Suite. This suite has everything you need to bring a little magic (and mischief!) to your projects: whimsical ghosts, playful bats, bold sentiments, and patterned paper that makes every creation come alive. Whether you’re making cards for friends or treats for little ghouls and goblins, these products are perfect for adding charm without too much fright. 🕸️✨

When I sat down to design the card, I started flipping through the designer paper, and that adorable little ghost peeking out the window immediately caught my eye. I just knew it had to be the star of my project! I die-cut it with the new Branching Out Die, adding a sleek black mat behind it for contrast. Since the curtains in the window were green, I chose Granny Apple Green as my card base—it pulls everything together so beautifully. With my blending brush and coordinating ink, I softened the background to really make the die cuts pop.

But it still needed just a little something more … and then I spotted the cutest little bat dressed as a ghost, ready for trick-or-treating. 🦇👻 How perfect is that?! The playful idea of a ghost in the window watching a bat dressed as a ghost made me smile, so I added it to the scene. To tie it together, I die-cut a few more bats from the bundle and let them flutter around my sentiment, “Don’t worry, eat sweets.” A sprinkle of Shimmer Star Foam Stickers finished the look with just the right amount of sparkle.

This sweet card takes the spookiness down a notch so even the youngest trick-or-treaters will adore it. And speaking of sweet … I couldn’t resist making a matching treat bag topper! Using the Branching Out Dies again, scored & folded in half and paired with the candy-patterned paper from the suite—because what’s Halloween without candy, right? 🍬 I fussy cut another one of those darling bat-ghosts, added a touch of ribbon behind it to make it pop, and finished it with the same sentiment and foam stars—this time in white for a softer contrast. Even the candy is bats & ghosts! 🦇👻

How cute are these two projects together?! I had an absolute blast creating them, and it was the perfect chance to play with the new Branching Out Dies, which really highlighted my Spooky Sweet Suite! Whether you make the card, the treat bag, or both, you’ll have Halloween projects that are fun, festive, and sure to bring smiles to everyone who sees them.

Thanks for stopping by … Happy Saturday!

🎃 Halloween Season is Coming — Are You Ready👻

Hello Stampin’ Friends ~

Halloween is creeping closer, and now is the perfect time to get your hands on the Spooky Sweet Suite Collection! Whether you’re a seasoned crafter or just getting started, this suite makes it frightfully fun to create handmade treats, cards, and party favors that your ghouls and goblins will love.

🕸️I’m so excited to announce that this Friday, I will host Halloween Week here on the blog! Each day I’ll be sharing cards, projects, and more to spark your creativity and inspire you to head into your craft room for some spooky fun. 👻From playful ghosts to charming treat holders, you’ll find plenty of ideas to bring a little extra magic to your Halloween crafting. 🎃Here are a few fun ideas to get you started …

🎃 First up: I shared how to dress up a simple jar by using the tag elements from the patterned paper. A little ribbon, a sparkle or two, and voilà — a spooky-sweet gift that’s both cute and quick!

🍫 Next up: We wrapped a classic Hershey bar to look like a mini mummy! Using torn strips of designer paper, we gave it some fun texture, then added a die-cut straight from the paper pack — no stamping required! These treats are perfect for school parties, coworkers, or BOO’ing your neighbors!

💡 Want to see how it’s done step-by-step? You can catch the full video replay CLICK HERE and enjoy the magic along with me!

The Spooky Sweet Suite Collection has everything you need to bring your Halloween crafting to life — from costumed critter stamps 🐶🐱 and coordinating dies (yes, there’s a haunted house!) to not-so-spooky patterned paper, treat bags, glittering star embellishments, and shimmery ribbon. It’s designed to mix, match, and make your projects as boo-tiful as they are fun.

🛒 Ready to add this suite to your spooky stash? Trust me, you don’t want to miss it! Head to my online store to grab your bundle or click the links below and start crafting those hauntingly cute treats today.

💀 Until next time… stay sweet and spooky, my friends!
Happy Haunting & Happy Stamping!
— Linda 💜🦇

Spooky, Sweet & Oh-So-Fun! Fun Fold Tutorial

Hello Stampin’ Friends ~

Halloween is creeping closer, and I’ve got a real treat for you today! A Fun Fold Card 🎃 We’re diving into the Spooky Sweet Suite Collection—a must-have for creating Halloween magic that’s more sweet than scary. From adorable costumed critters to a charming haunted house die, this suite has everything you need to whip up cards, tags, scrapbook pages, and treat bags that will delight ghosts and goblins of all ages!

Inside this suite, you’ll find:

  • Stamps featuring a costumed dog and cat (seriously, how cute are they?)
  • Dies that make creating your haunted house a breeze
  • Patterned paper with whimsical, not-too-spooky designs
  • Treat bags, ribbon, and shiny stickers—because it’s all in the details!

And today… we’re taking it up a notch with a spook-tacular Fun Fold card! Fun Folds always bring that extra “wow” factor, and when paired with the Spooky Sweet Suite, you’ll have a card that stands out in any Halloween lineup.

Let’s begin with the base: Cut to 10-1/2″ x 3-1/2″ and score at 3-1/2″ and 7″. Next you’ll cut 3 arches in the same color cardstock as your base. The size depends on what type of effect you want, and how much of the base you want to leave exposed.

Next, you’ll cut 3 pieces of the patterned paper … use the die that is one size smaller than the background. I used the house fronts to draw attention and then the candy background because that panel will be the core of the card.

Before you put those Arches dies away …. cut out three (one of each size) in the colors of candy corn. I’ll be using this as the focal point and highlight our little die cut flamingo. The flamingo was fussy cut from one of the patterned designer paper sheets. Then all you need is to stamp the greetings in Petunia Pop ink and cut and attach them to your card. I added some of those cute little purple glitter stars that come in this suite.

This card may look like a challenge but it is really simple to create!! Don’t wait too long to grab your supplies—especially the Everyday Arches Dies. They are the perfect match for this project and are currently on the Last Chance List (translation: once they’re gone, they’re gone!).

Whether you’re crafting cards to send a boo-tiful hello, making tags for treat bags, or decorating your scrapbook with a little Halloween charm, this suite is packed with possibilities. So grab your suite, pick your favorite patterned paper, and let’s get spooky!

Thanks for joining me for a spooky sweet card you’ll enjoy making and your recipients will be enchanted by!

STAMPIN’ TIP: When attaching your arches to the base, make sure you stay within a 5-1/2″ length so it fits in your envelope. I use a piece of colored cardstock that measures 5-1/2″ x 4-1/4″ as my guide! Easy.

🎃 Spooky Season is Coming — Are You Ready to Craft Up Some Fun? 👻

Hello Stampin’ Friends ~

Halloween is creeping closer, and now is the perfect time to get your hands on the Spooky Sweet Suite Collection! Whether you’re a seasoned crafter or just getting started, this suite makes it frightfully fun to create handmade treats, cards, and party favors that your ghouls and goblins will love.

🕸️ This past Wednesday during our Facebook Party LIVE, I showcased two super fun Halloween treat ideas using this adorable suite!

🎃 First up: I shared how to dress up a simple jar by using the tag elements from the patterned paper. A little ribbon, a sparkle or two, and voilà — a spooky-sweet gift that’s both cute and quick!

🍫 Next up: We wrapped a classic Hershey bar to look like a mini mummy! Using torn strips of designer paper, we gave it some fun texture, then added a die-cut straight from the paper pack — no stamping required! These treats are perfect for school parties, coworkers, or BOO’ing your neighbors!

💡 Want to see how it’s done step-by-step? You can catch the full video replay CLICK HERE and enjoy the magic along with me!

The Spooky Sweet Suite Collection has everything you need to bring your Halloween crafting to life — from costumed critter stamps 🐶🐱 and coordinating dies (yes, there’s a haunted house!) to not-so-spooky patterned paper, treat bags, glittering star embellishments, and shimmery ribbon. It’s designed to mix, match, and make your projects as boo-tiful as they are fun.

🛒 Ready to add this suite to your spooky stash? Trust me, you don’t want to miss it! Head to my online store to grab your bundle or click the links below and start crafting those hauntingly cute treats today.

💀 Until next time… stay sweet and spooky, my friends!
Happy Haunting & Happy Stamping!
— Linda 💜🦇