Today I’m sharing different ways to use your embossing folders. There are so many possibilities when it comes to using embossing folders. They are a special crafting tool that can’t be forgotten!
Concept artist Leana used the Elegant Eucalyptus Embossing Folder on white cardstock and colored in the raised embossed image with Stampin’ Blends. This technique gave her card a unique center piece!
Concept artist Christa used the Merry Melody Embossing Folder on gold foil. She then cut it into strips and made it an eye-catching accent on her card front!
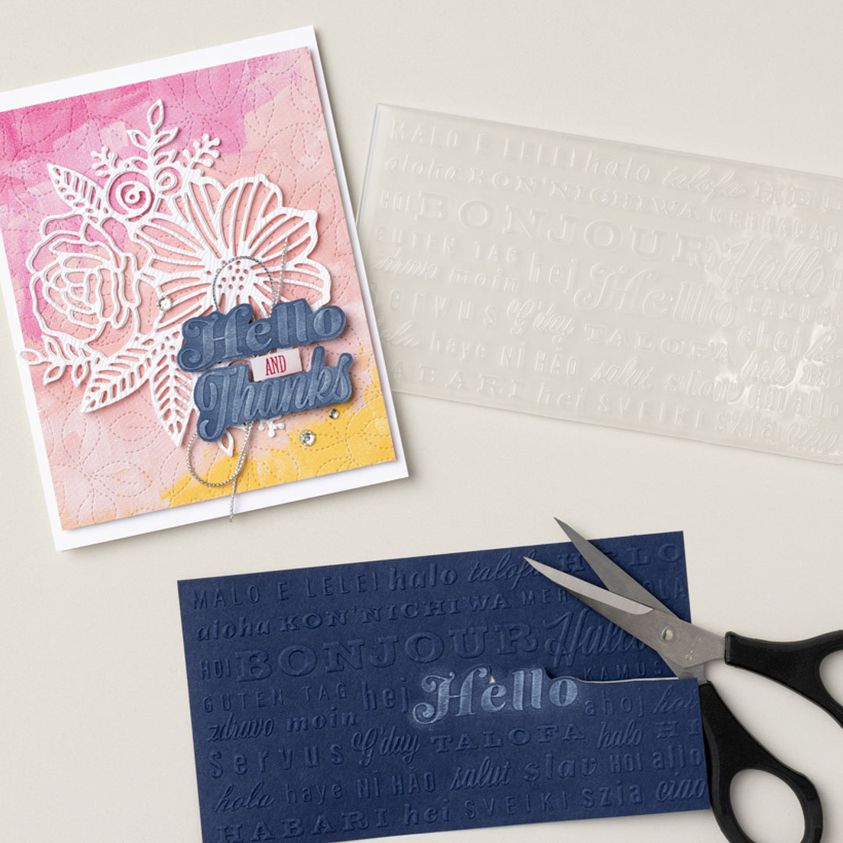
Did you ever think of using an embossing folder as a sentiment for your card? Our concept artist Rebecca used the Thanks & Hello Embossing Folder and a sponge dauber to highlight the embossed words. She then chose her favorite part of the folder, fussy cut her sentiment, and made it the center of her card.
Most people think embossing folders are only good for card backgrounds, but they hold so much more potential! How will you transform an embossing folder into something new? Share in a comment below!
Thanks for taking time out of your day to stop by! Enjoy your day ~
I am so full of gratitude for the amazing weekend we had for our Annual Spring Stamping Retreat! The weather was windy and rainy but it always seemed to clear when we had to go outside … a true sign if you ask me!
I have a peek into our stamping retreat for you … I will share a bit more in the coming days as well. I will begin with the door tags … Each guest has a name tag on their door so they know which room the will be staying in and they are free to take it home with them. They can easily pop the name off and turn it into a card!
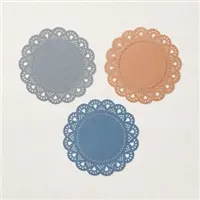
This was created using the Heart and Home Suite of products … The “theme” for our retreat. The Heart and Home designer paper, Flowers Of Home Dies, Heart & Home Doilies in Basic Grey, the White 3/4″ Frayed Ribbon which comes from the Artfully Composed suite (pg.32 in Mini), the 1/8″ Cotton Ribbon in Petal Pink which is layered over and the Petal Pink cardstock embossed with the Thanks & Hello Embossing Folders all layered onto a Basic Grey base. I printed each guest’s name onto Basic White Cardtock (from my computer) and punched it out using the Tailored Tag Punch (retiring today).
The cup is a food safe cup that has retired from the Stampin’ Up! catalog … I decorated it with the Heart and Home Designer Series paper … to do this, I took apart one of the cups, and traced the outside onto designer paper and cut it out to make my wrap!! They were so cute!
The cover was created using Evening Evergreen cardstock, die cut with the Layering Circle Dies and embossed with the NEW 3-D Fern Embossing Folder. My “greeting” to my guests comes from the NEW Nature’s Prints Stamp set from our Sun Prints Suite … pg. 90 & 91. WOW!!
As my guests come into the dining room, over the fireplace …. they find what I call my Mantle Gifts! Each retreat I decorate the mantle with a hand crafted gift that they get to take home at the end of the retreat. These are actual “pocket cards” and a seed packet was tucked inside to they have a “living” remembrance of our retreat. Each seed packet is adorned with a flower … which is actual chocolate! We all know how good chocolate and stamping go together!
Here is a closer look ….
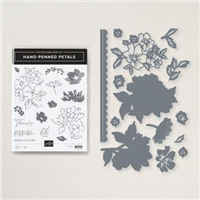
The card was created from one sheet of Very Vanilla … I created my own pattern for this. From the left over piece of vanilla, I stamped and punched (Label Me Lovely Punch) my greeting which come from one of my favorite sentiment stamp sets: Peaceful Moments. The pretty die cut flowers come from the Hand-Penned Petals bundle.
The “sentiments” on my gifts are carefully picked to show my thoughts and gratitude to my guests for choosing to spend their time with me at my Annual Retreats … I want to create an atmosphere of fun, relaxation and camaraderie. (noun: camaraderie: mutual trust and friendship among people who spend a lot of time together.)
I hope you enjoyed my PEEK into my Annual Spring Stamping Retreat … can’t wait to share even more with you!
Oh yes … I was AWOL the past 2 days, I was doing some personal training for my stamping business! It’s amazing how much free training there is out there, but a box of goodies came so I just had to play!! So I made 2 quick cards that I would like to share with you today.”
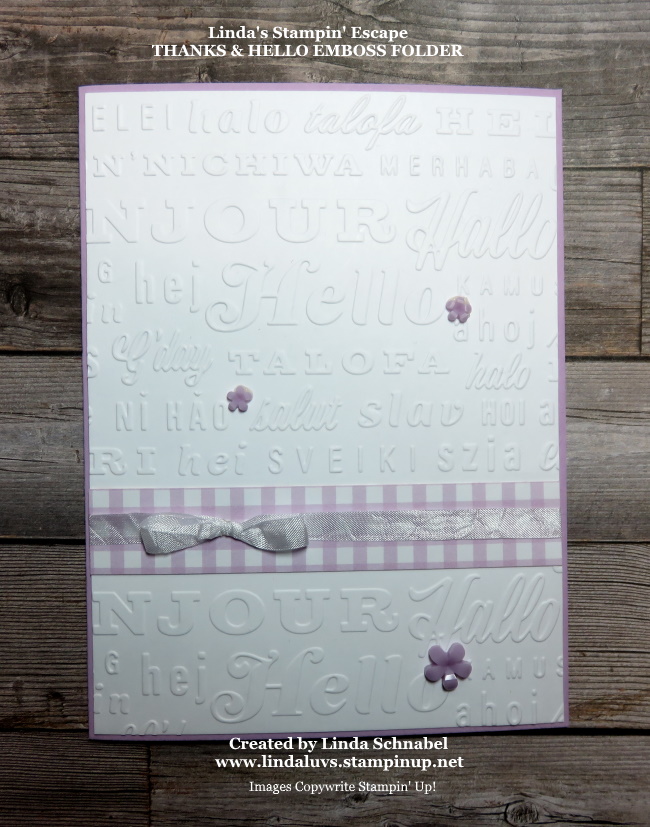
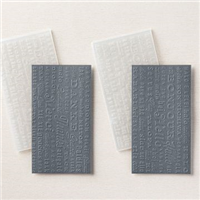
I was intrigued by the new “Thanks & Hello” Embossing Folder so I added it to my order this past week and wanted to try that first. As promised I will be using some more of the designer papers. My first card was actually embossed twice ….
The folder is “not” full size so I had to run it through the emboss machine twice, but with the guide line on the folder, it makes it easy to align and get it through straight. It embosses to clean and clear … I love it!! Using the “Hello” folder really makes for a quick card.
I added a strip of the Pansy Petals Designer paper and added a bow using the White Seam Binding Ribbon … then I had to add a little pop of color to all the white, so I used the Fresh Flower Flourishes that coordinate with the Fresh Freesia designer paper and card base.
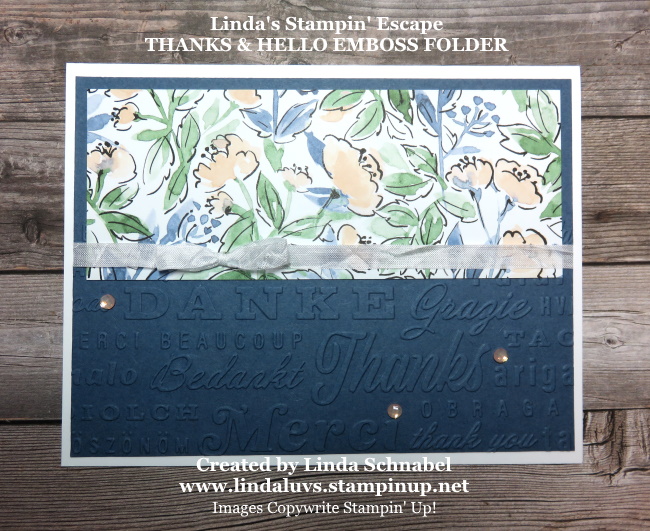
Simple … yes, but oh so cute! Well … I couldn’t stop there because there are 2 embossing folders in the package!! So I decided to see how it would look on colored cardstock, and what better color to use than the beautiful Misty Moonlight.
I teamed my Misty Moonlight with the Hand-Penned Designer Series paper and decided to emboss this “landscape” position verses the “portrait” that we used above ….
The folders create such a deep textured embossed imagery that there is no need for greetings … in fact, the embossing says it all, and in many different languages. I also added the same ribbon but used the Elegant Faceted Gems for a little bling, bling!
I thought you would like to see how the same supplies look with the two different layouts …
So … What do you think? Nice right!? These little beauties are only $8.00 which makes them a great stocking stuffer … yes, I know Christmas is a few months off, but I also know that many of you are looking for ideas for your crafters.
Thank you for stopping by, have yourself a wonderful day.
TODAY’S STAMPIN’ SUPPLY LIST … If you liked the products used in todays projects, I have links for you below. Just click on the item you would like more information on, or to begin your shopping. It will take you directly to my website. Thank you ♥