Today I’m excited to share two fun technique cards that are highlighting the “retiring” Brilliant wings dies. These dies come in handy so many times for a quick card … and if you join me tonight on my Facebook LIVE, I’ll show you another 2 ways (or more) to use these!!
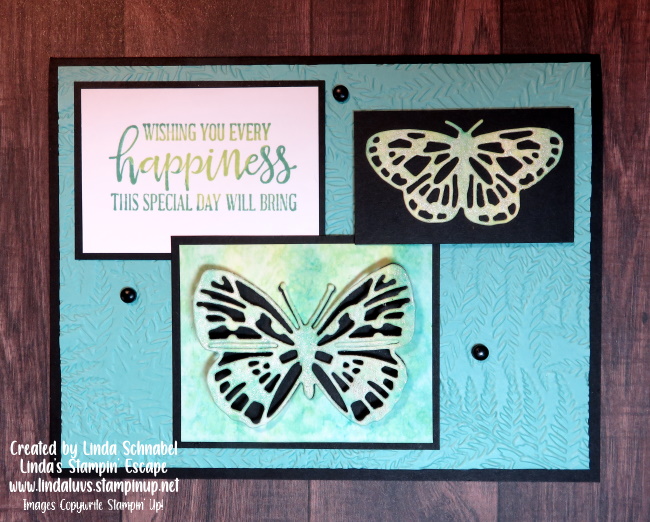
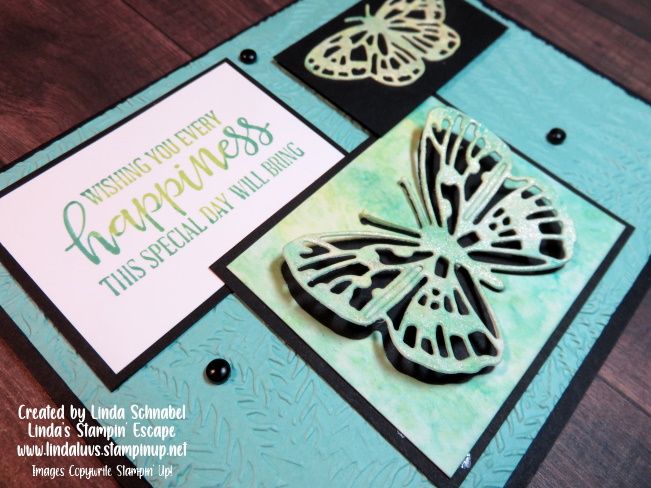
The first card show a fun way to use watercolor backgrounds … On the small butterfly, I just cut it out of the watercolor background created in the video. The larger butterfly was die cut, and the background was trimmed to accent the butterfly and give it a 3-D look. I popped up the butterfly by cutting a small piece out of the Stampin’ Dimensonals.
My greeting comes from the Peaceful Moments stamp set and is stamped with the Rock -n- Roll technique. I inked up the stamp with Parakeet Party first, and then rolled the stamp in the Bermuda Bay. I choose that color because the Parakeet Party and Bermuda Bay used in the watercolor background change color a little when blended together.
The greeting has a Basic Black mat as do the butterflies and were mounted onto my Coastal Cabana front that I embossed with the 3-D Fern embossing folder. I added Wink of Stella to my butterflies before mounting onto the black mat. To complete my card I added the Mat Black Dots to create additional depth and texture and to draw your eye around the entire card.
CLICK HERE if you would like to watch the Watercolor Background video again.
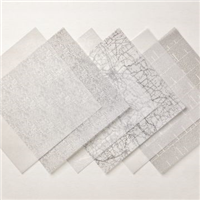
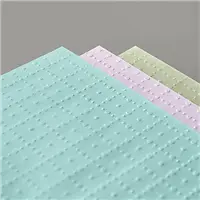
My second card I used the “Masking Paper” to create the card front. I cut out butterflies from Brilliant Wings out of the Masking paper and then adhered it directly onto the Linen paper (retiring).
Then with alcohol in my Spritzer and about 5 drops of Bermuda Bay ink … I spritzed the color onto the Linen paper. The alcohol helps to dry the ink faster, and what it leaves behind when you remove the “butterfly masks” is a soft beautiful “dyed” Linen paper.
I invited you to join me tonight on my Linda’s Stampin’ Escape Facebook page and watch me LIVE at 6:30 pm to see how I use these amazing butterfly dies, and I’ll also be highlighting some amazing designer paper!!
Thank You for hanging out with me today! Enjoy your day ~
Here is a list of ingredients that I used to create today’s card. NOTE: All orders of $50 will receive a FREE qualifying Sale-a-bration item of your choice.
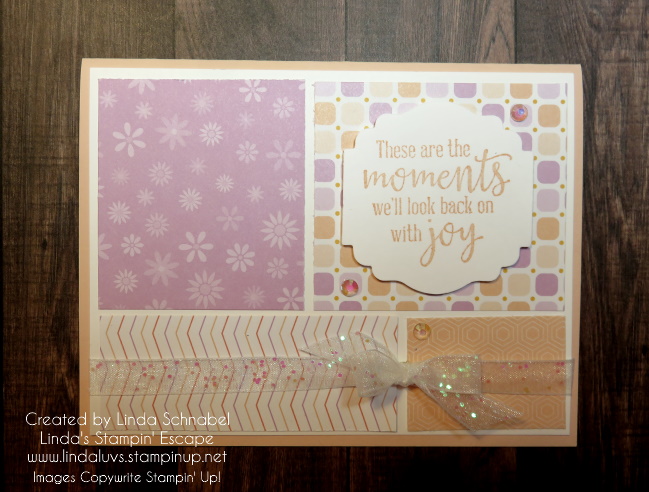
Are you ready for some more fun cards? I’m getting punchy with the Fun Cut pattern and Dandy Designs paper I shared with you yesterday. I thought I’d share some cute cards you can recreate right away by using punches you have in your stamp room. I also added the Organdy Glitter ribbon and Iridescent Rhinestones.
Let’s take a look! Today I’m using the paper with with the Fresh Freesia and the Petal Pink. We’ll start out with the Heart Punch Pack. I punched the solid heart from the designer paper and the Scalloped Heart in Basic White cardstock.
So you’ll see the same layouts as yesterday, just my new colors and I’m highlighting the Peaceful Moments stamp set … I’m using this for my greetings on all 4 of the cards. Here you will also see the Stitched with Whimsy dies which adds texture and this cute pattern of stitching which really frames your greeting. Both the greeting and the hearts are popped up with Stampin’ Dimensionals.
My second card features the Label Me Lovely punch …
This sweet and simple card also showcase a bit of bling with the Iridescent Rhinestones and White Organdy Glitter Ribbon … WOW these go together really nicely! I tied my bow “first” and then attached it to the ribbon with a Mini Glue Dot.
The third card … there she is, our Medium Daisy Punch!
Once you get your Dandy Designs paper cut and laid out onto your card mat, you can really whip out a whole stack of cards. I just added a simple banner with my Daisy and then added a few Iridescent Rhinestones.
For my last card I kept it really simple, and sorry, but on punch …
Again I brought in the Stitched Whimsy Dies, Organdy Glitter Ribbon and Iridescent Rhinestones. This pattern, a great sentiment set and a few items you have in your stamp room will create wonderful cards to share and bring joy to a friend or family member.
I want to thank you for joining me today. Have an awesome Thursday …
With the holidays upon us, are you ready for the Good Feelings and Peaceful Moments? Well … I’m combining these two stamp sets to create a fun and happy Birthday Card! I made this card for my Demonstrator Design Team this month.
The Tahitian Tide Designer Paper makes this card bright and fun! Check it out. I’ll be sharing instructions and the dimensions with you as well …
To create this card I am listing the measurements and instructions, plus the supplies needed … they are listed below and linked to my store so you can learn more about the product.
Measurements:
Card Base: Thick Basic White: 8-1/2” x 5-1/2”; score at 4-1/4”
Layer #1: Tahitian Tide Designer Paper Cut with Largest Scallop Die
Layer #2: Vellum Cardstock Die cut with second largest Scallop Die
Layer #3: Scrap for Greeting and Daisy (punch twice)
Instructions:
Cut and fold card base as listed above..
On Layer #2 (Card Front) Tahitian Tide paper: Using Scallop Contour Dies cut with largest scallop die and attach directly to card front.
Using Layer #2: Die cut vellum using second largest scallop die.
Ink greeting with White Craft ink and sprinkle with White Embossing Powder – Heat set with Heat Tool. (Option: Use Embossing Buddy prior to stamping to help prevent powder from sticking onto vellum cardstock).
Attach Layer #2 Card front to Layer # 1 Card Base using Multipurpose Liquid Glue. (STAMP TIP: I lightly added glue behind the embossed words to hid it and keep it from showing through vellum)
Punch 2 Daisies out with Medium Daisy punch and adhere with Liquid Glue – making sure the petals are off set from each other. Attach with a Dimensional.
Stamp Happy Birthday greeting on piece of scrap and cut ends at an angle.
This sweet and fun card is sure to bring a smile to anyone’s face … young or old. And if you’re like me, you sure don’t mind a little sunshine when there is blizzard warnings lurking about!
Thanks for the visit today … I hope you feel inspired to create a little sunshine today!
Here is my supply list for you …. If you don’t have some of the supplies, you can click on them for more information or to add it to your shopping cart. Thank you.
Today I’m excited to share one more way to use the watercolor backgrounds … I’ll show you how to make Watercolor Wonder Butterflies. Who said these beautiful backgrounds can only be used as backgrounds? Today I’m going to pull them up center stage on our card ….
I’m using the Brilliant Wings Dies to create these fun looks … On the small butterfly, I just cut it out of the watercolor background created in the video. The larger butterfly was die cut, and the background was trimmed to accent the butterfly and give it a 3-D look. I popped up the butterfly by cutting a small piece out of the Stampin’ Dimensonals.
My greeting comes from the Peaceful Moments stamp set and is stamped with the Rock -n- Roll technique. I inked up the stamp with Parakeet Party first, and then rolled the stamp in the Bermuda Bay. I choose that color because the Parakeet Party and Bermuda Bay used in the watercolor background change color a little when blended together.
The greeting has a Basic Black mat as do the butterflies and were mounted onto my Coastal Cabana front that I embossed with the 3-D Fern embossing folder. I added Wink of Stella to my butterflies before mounting onto the black mat. To complete my card I added the Mat Black Dots to create additional depth and texture and to draw your eye around the entire card.
Funny, but I always think of my Mom when I use or stamp with butterflies … she loved them and had them all over her house ❤
Thank You for hanging out with me today … CLICK HERE if you would like to watch the Watercolor Background video again.
Have a great day ~
Here is a list of ingredients that I used to create today’s card. NOTE: All orders of $50 will receive a FREE qualifying Sale-a-bration item of your choice.
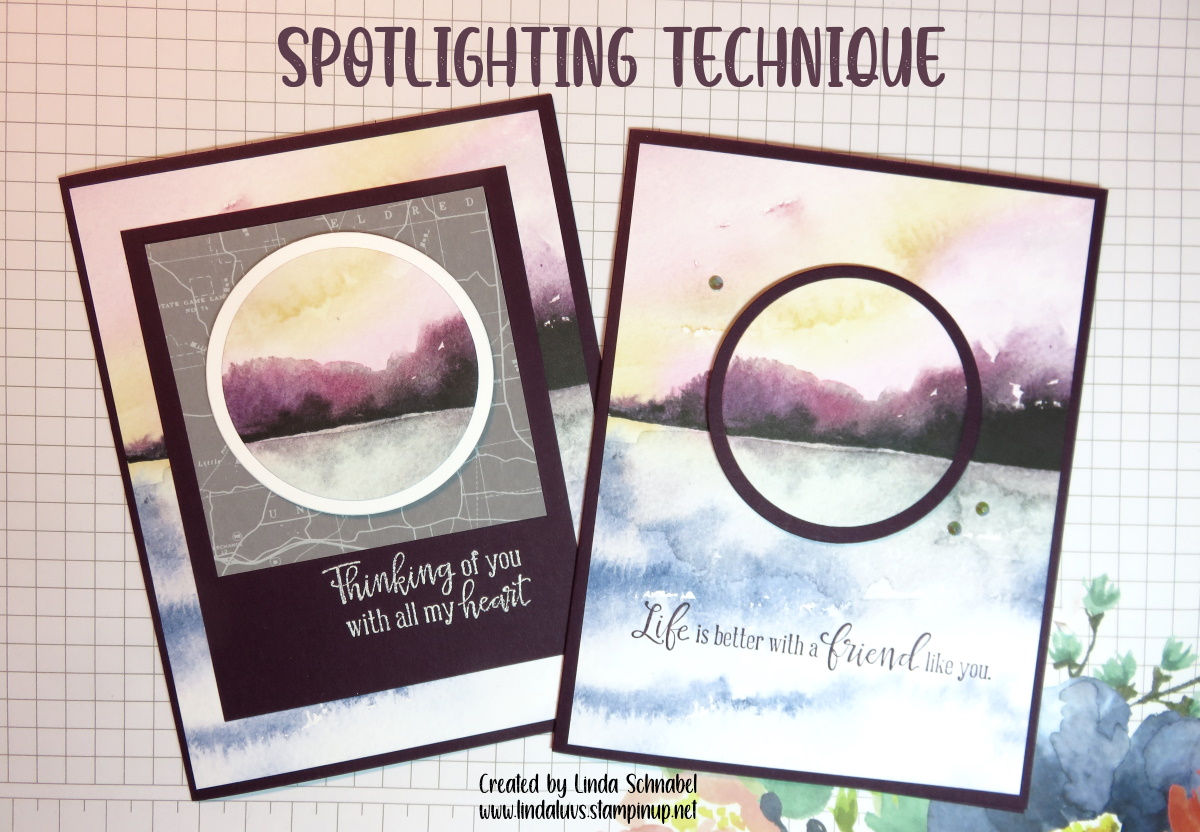
Today I’m going to share a twist to the SPOTLIGHT Technique with the New Horizons Designer paper. You can catch a replay of last nights Facebook LIVE where I showed “how” I cut and then let my guests choose which one they wanted to see put together. The great thing is … today you will see both cards finished off and ready to send!
Let’s begin with the video …
Now that you’ve seen the video, let’s take a closer look at those cards. I’ll start with the initial and simple SPOTLIGHT card. Here we just cut out a piece of our designer paper, and then the coordinating Blackberry Bliss cardstock as a mat.
The greeting comes from the Peaceful Moments stamp set … I think this is a must in your collection, so many amazing greeting for so many occasions. I put the link for you below.
Now we are going to “step it up” a bit or adding a twist to the SPOTLIGHT Technique by adding another layer (or two) ….
On the video I showed “how” I put this together but what I didn’t say is that the reason I used the Basic White as a mat, was to highlight the white that I used when heat embossing the greeting. Besides … it really does make the “SPOTLIGHT” pop!!
Did you notice the addition to the vellum? It’s the Layering Designs Vellum and can be found in the Annual Catalog. I think it really adds to the card … especially if you are sending this card “across the miles”!!
I love highlighting techniques that were used many years ago and we tend to forget … obviously they were popular for a reason. I love the SPOTLIGHT Technique and with the New Horizons paper.
Thank you for stopping by today, I hope it’s a good one.
Here is a list of the ingredients used for today’s cards … excluding the New Horizons paper as it has already retired.
I am so full of gratitude for the amazing weekend we had for our Annual Spring Stamping Retreat! The weather was windy and rainy but it always seemed to clear when we had to go outside … a true sign if you ask me!
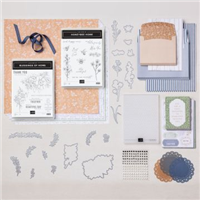
I have a peek into our stamping retreat for you … I will share a bit more in the coming days as well. I will begin with the door tags … Each guest has a name tag on their door so they know which room the will be staying in and they are free to take it home with them. They can easily pop the name off and turn it into a card!
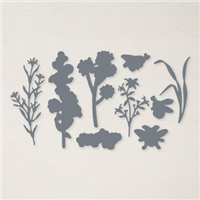
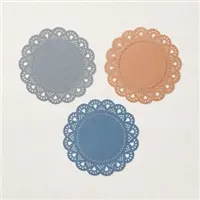
This was created using the Heart and Home Suite of products … The “theme” for our retreat. The Heart and Home designer paper, Flowers Of Home Dies, Heart & Home Doilies in Basic Grey, the White 3/4″ Frayed Ribbon which comes from the Artfully Composed suite (pg.32 in Mini), the 1/8″ Cotton Ribbon in Petal Pink which is layered over and the Petal Pink cardstock embossed with the Thanks & Hello Embossing Folders all layered onto a Basic Grey base. I printed each guest’s name onto Basic White Cardtock (from my computer) and punched it out using the Tailored Tag Punch (retiring today).
The cup is a food safe cup that has retired from the Stampin’ Up! catalog … I decorated it with the Heart and Home Designer Series paper … to do this, I took apart one of the cups, and traced the outside onto designer paper and cut it out to make my wrap!! They were so cute!
The cover was created using Evening Evergreen cardstock, die cut with the Layering Circle Dies and embossed with the NEW 3-D Fern Embossing Folder. My “greeting” to my guests comes from the NEW Nature’s Prints Stamp set from our Sun Prints Suite … pg. 90 & 91. WOW!!
As my guests come into the dining room, over the fireplace …. they find what I call my Mantle Gifts! Each retreat I decorate the mantle with a hand crafted gift that they get to take home at the end of the retreat. These are actual “pocket cards” and a seed packet was tucked inside to they have a “living” remembrance of our retreat. Each seed packet is adorned with a flower … which is actual chocolate! We all know how good chocolate and stamping go together!
Here is a closer look ….
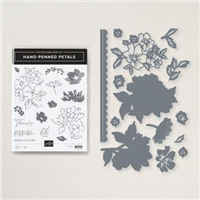
The card was created from one sheet of Very Vanilla … I created my own pattern for this. From the left over piece of vanilla, I stamped and punched (Label Me Lovely Punch) my greeting which come from one of my favorite sentiment stamp sets: Peaceful Moments. The pretty die cut flowers come from the Hand-Penned Petals bundle.
The “sentiments” on my gifts are carefully picked to show my thoughts and gratitude to my guests for choosing to spend their time with me at my Annual Retreats … I want to create an atmosphere of fun, relaxation and camaraderie. (noun: camaraderie: mutual trust and friendship among people who spend a lot of time together.)
I hope you enjoyed my PEEK into my Annual Spring Stamping Retreat … can’t wait to share even more with you!
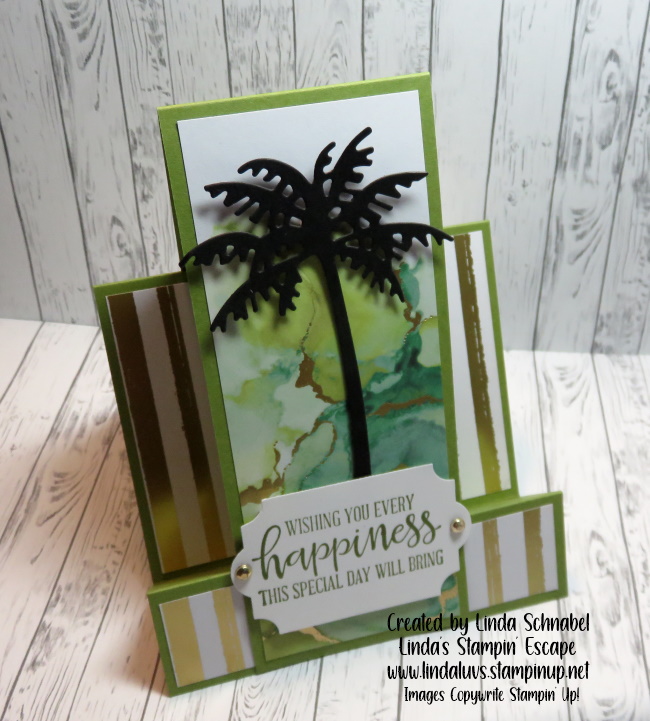
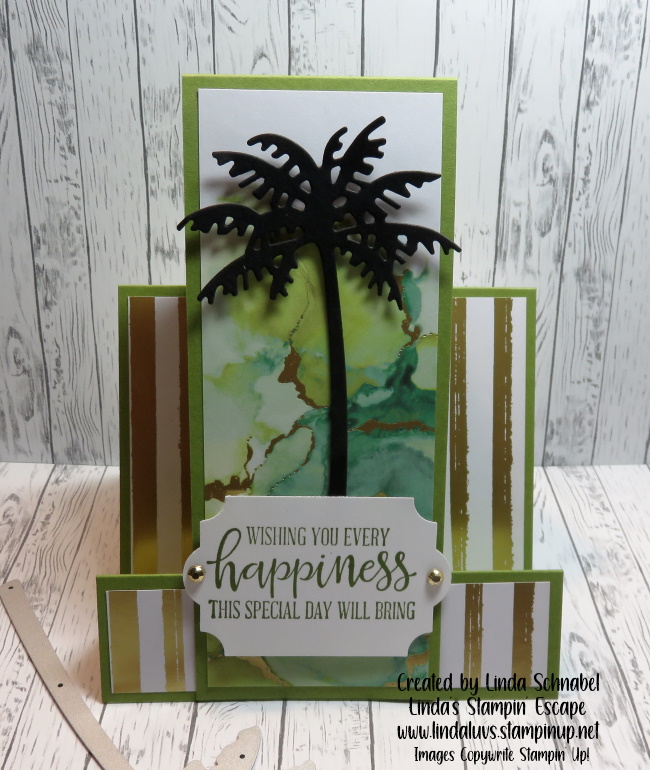
I am excited to share the “FAUX” Step Card that I shared with my Stamp Club in February. I have my Facebook LIVE video to share with you so you can see how easy it is to create this FUN FOLD card. I’m also sharing the dimensions with you.
Let’s take a look at the video now …
Dimensions:
Card Base: Old Olive: 9” x 4-1/4” then Score at 1-1/4”, 2-1/2” and 5-3/4”
Cardstock #2: Old Olive Center Step: 8-1/2” x 2-1/4” then Score and fold at 5-1/2”
Cardstock #3: Basic White 3″ x 4″ for inside of card / Scrap of white for greeting
Designer Paper #1: Expressions in Ink for Center Step 2″ x 5-1/4″ and Striped paper 4″ x 4″ cut off 1″ from bottom so it aligns during assembly
I find it easiest to lay the card base out flat when attaching the designer paper, as shown in the video. Then use your favorite adhesive to attach the center flap … you’ll want to make sure to center and align the front flap to the bottom, then attach to the back.
.
Ahhh … Don’t you just love making quick & easy cards that look like you spent all day cutting and creating!! lol No one has to know that … right! Just image all the different designer papers or dies that you can use with this Fun Fold Faux Step Card.
Have fun creating and thank you for hanging out with me today.
TODAY’S STAMPIN’ SUPPLY LIST … If you liked the products used in today’s projects, I have links for you below. Just click on the item you would like more information on, or to begin your shopping. It will take you directly to my website. Thank you ❤
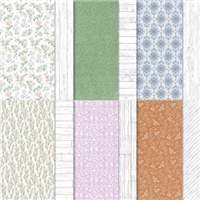
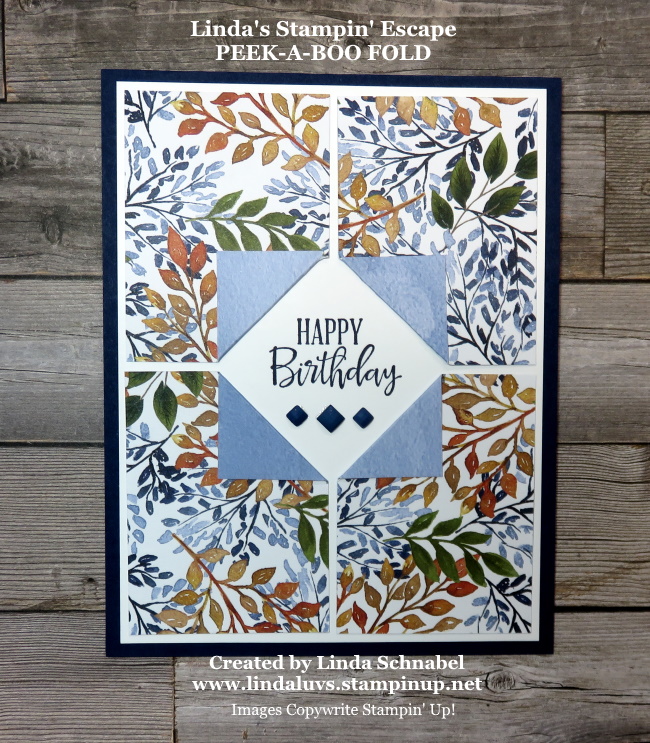
Who said fun folds can’t be easy … Today’s fun fold is not a card fun fold but a Designer Series paper fun fold. You can do this technique with any of our designer papers and it is so beautiful when using the Beauty of the Earth Designer Series paper from Stampin’ Up!
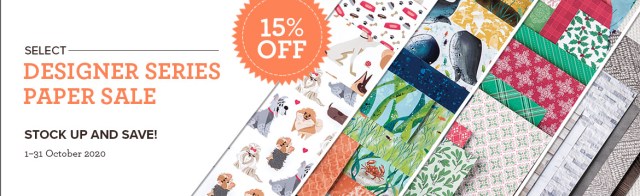
The Beauty of the Earth is part of the Designer Series paper sale in which you can save 15% off select paper packs. This sale ends August 2nd … so only 2 days left to get in on this deal!
Today’s card showcases the “Peek-a-boo” Fun Fold …
You begin with an easy layout but the fun part is adding the 4 fold backs on the designer paper. The four designer paper pieces all measure 1-7/8″ x 2-1/2″.
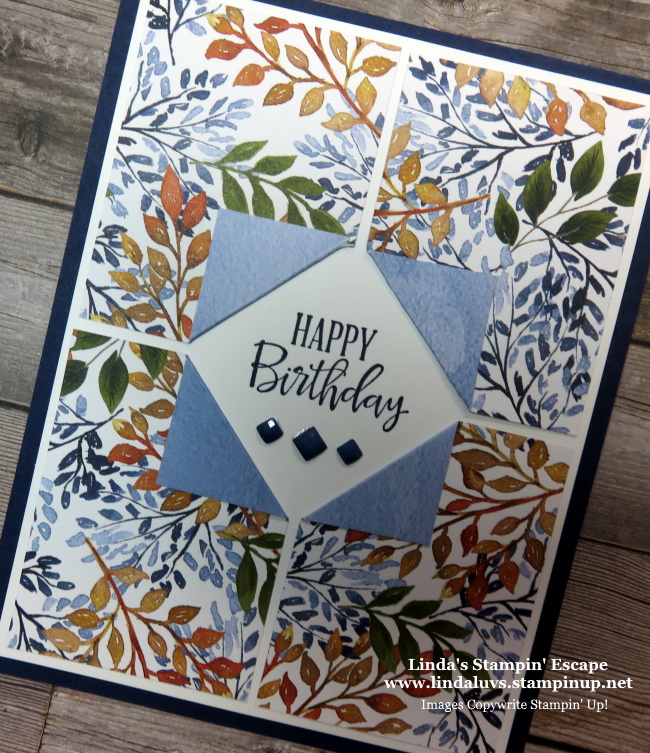
Each piece of designer paper will be measured to 1″ from the “corner” that will be folded back, on each side of corner. (See Photo) I put a little “tick” mark at the 1″ point and then score from 1″ tick mark to the other 1″ tick mark. You won’t see the pencil marks because you are folding the corner back, but you can erase it if it bothers you.
Once you have all 4 of your designer paper pieces scored … secure the flap down, and then secure your pieces onto your mat. I used Basic White for my mat and it measures 4″ x 5-1/4″. The white allows me to stamp my greeting in the center and easily seen.
The “Happy Birthday” comes from the Peaceful Moments Stamp set … I actually just used this on my Starburst cards I shared the other day! I wanted to add some texture so I used the new In Color Square Gems in Misty Moonlight.
I think the Beauty of the Earth has so many fun patterns that can be used for this technique, and it’s gender neutral!! Yes, this little beauty would work wonderfully for a man or a women. The colors are stunning and the “gems” are not girly at all with the square, or should I say diamond shape!
Here are the Measurements for today’s card:
Card Base Night of Navy: 4 1/4″ X 11″ folded in half Basic White: 4″ X 5 1/4″ Beauty of the Earth Designer Series paper: (4) 1 7/8″ x 2 1/2″. Score at 1″ and fold as shown above.
Thank you for joining me this Sunday. I hope the rest of your weekend is fun and relaxing. I am off with my daughter to see how much of Door County we can explore in one day!!
TODAY’S STAMPIN’ SUPPLY LIST … If you liked the products used in todays projects, I have links for you below. Just click on the item you would like more information on, or to begin your shopping. It will take you directly to my website. Thank you ♥
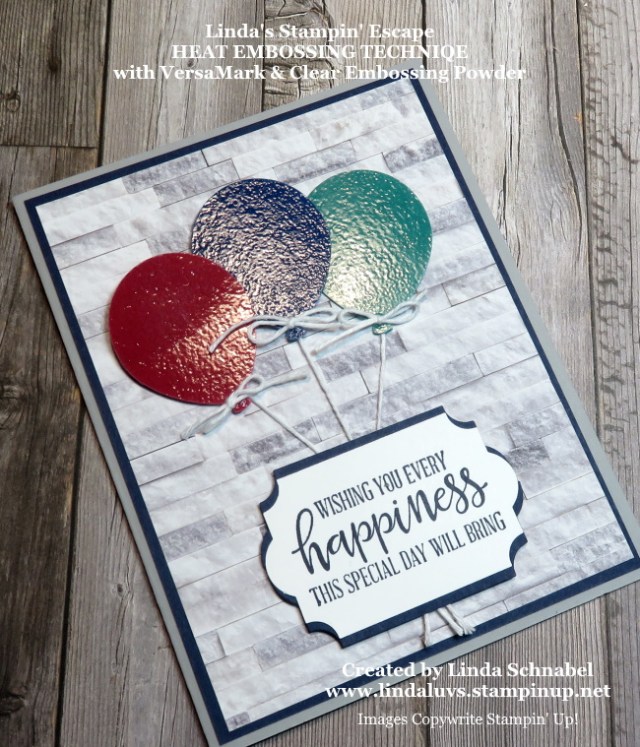
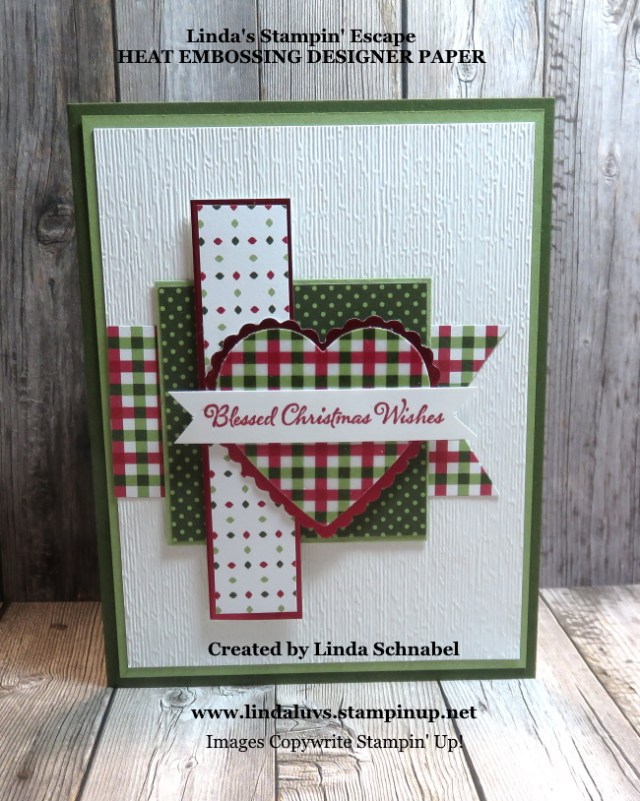
Today I’ll be sharing my short video on the Magic of Heat Embossing … this simple technique probably dates back many years. I’ve been stamping and a demonstrator (Yes, I was not a cardmaker before I signed up!!) for 20 years, and heat embossing is what caught my attention!
I will be showing you how amazing a VersaMark pad and Clear embossing power is in transforming your projects. Grab your favorite beverage and sit back for a short video as I show you three (3) different items to emboss …
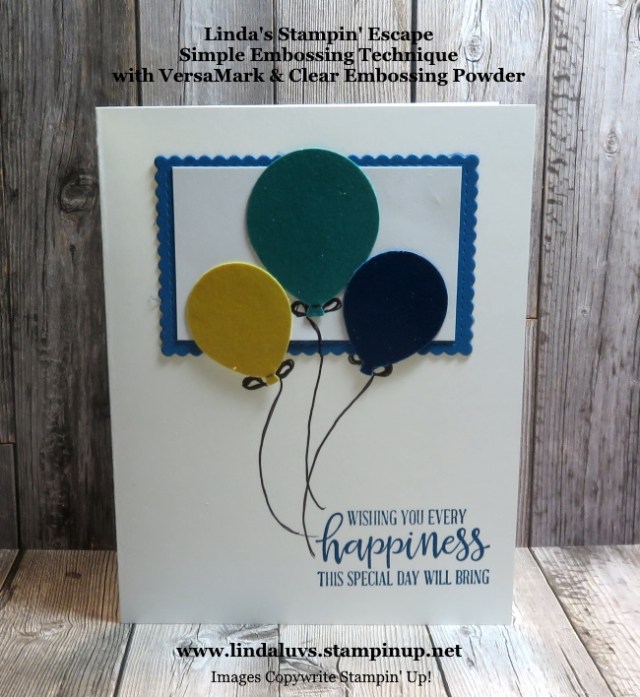
I must admit … not my best presentation but I hope you saw the magic in the technique. Here’s the the first card that I made on the video …
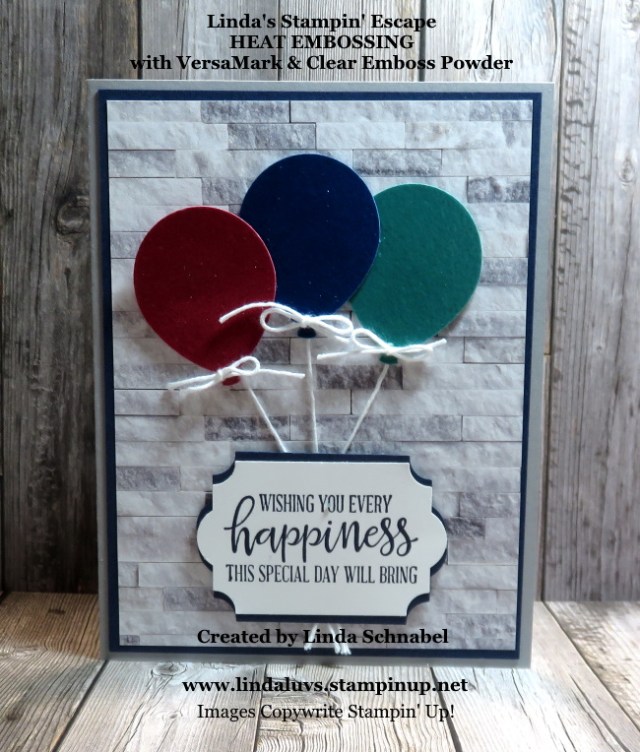
but I’ll also be sharing the two cards that I promised. Lets begin with the balloons ….
The balloons were created as shown in the video. In the video I said I prefer the “strings” on my balloons versed the hand drawn strings so I found some Bakers Twine and added them to my balloons.
Since we I shared the upcoming Designer Paper Sale with you, I thought I would use one of them for a background. I’m using the “In Good Taste” Designer Series paper on this card …
In fact, I have been using the “In Good Taste” Designer Series paper as my backgrounds for all my photo shoots for posting my cards right here!! All of those beautiful wood patterns, brick and tiles all come from this package, including this rustic wood which is probably my favorite!
Let’s move on to the Heartfelt Hugs designer series paper we embossed …
I love the look of the Heartwarming Hugs Designer paper, and embossing it created a stunning new look. When I punched it out with the heart (Heartwarming Hugs paper … get it! lol) I knew exactly where I was going with this card. Create layers of this designer paper to highlight the heart.
In the video you can see how lovely the designer paper is embossed so I decided to mat the heart with the new Red Foil from the Mini Catalog. The shine on both of these creates an amazing focal point to the card …
The only thing I would add to this card is “Red Rhinestones” … might add a little balance on the right side. BUT … I still love the way this card turned out.
Hope you enjoyed the video and the final cards created with this simple and fun technique … there truly is magic in heat embossing!
Here is a list of the Designer Papers on Sale starting tomorrow …
Thank you for joining me today, I’ll be back tomorrow to share the “Sunflower” card with you!! Till then …
Have an amazing day ~
TODAY’S STAMPIN’ SUPPLY LIST … If you liked the products used in todays projects, I have links for you below. Just click on the item you would like more information on, or to begin your shopping. It will take you directly to my website. Thank you ♥
I am back!! Yes, it’s been interesting to say the least to not have internet service for almost two weeks. So, today … I have 3 card shares for you!! Have some catchin’ up to do and you will enjoy the ease and beauty of these cards.
I’ve been working closely with my Hostesses as several of the bundles have gone from back orders to “Not Orderable”. The poppies is one of these bundles so let me start with Friday’s card. This card was a Make & Take for Kathy’s Stampin’ Party … it does not use any dies!!
Let’s begin with our background … A 4″ x 5-1/4″ piece of Whisper White which is stamped with the poppy field image using Poppy Parade ink pad on the bottom of the cardstock. We did the same to the inside of our card. Our greeting stamped in Momento Ink comes from the Peaceful Moments Stamp Set … and our butterflies come from the “Enjoy Life” stamp set.
Our focal point is created using a 1-1/4″ x 4″ piece of Peaceful Poppies Designer Series paper, this is backed with our Basic Black cardstock cut to 1-1/2″ x 4-1/4″ and then popped up using the Stampin’ Dimensionals.
Here is a list of items used to create this card … and the two additional cards to follow … The two stamp sets and Designer paper are enough to qualify your for a FREE Sale-a-Bration item!!
When I do a home Stampin’ Party, I always make sure that I have enough Make & Takes for everyone, so I cut extra. Now … what do you think I do with those extra pre-card card packs? Well … this weekend I redesigned them!!
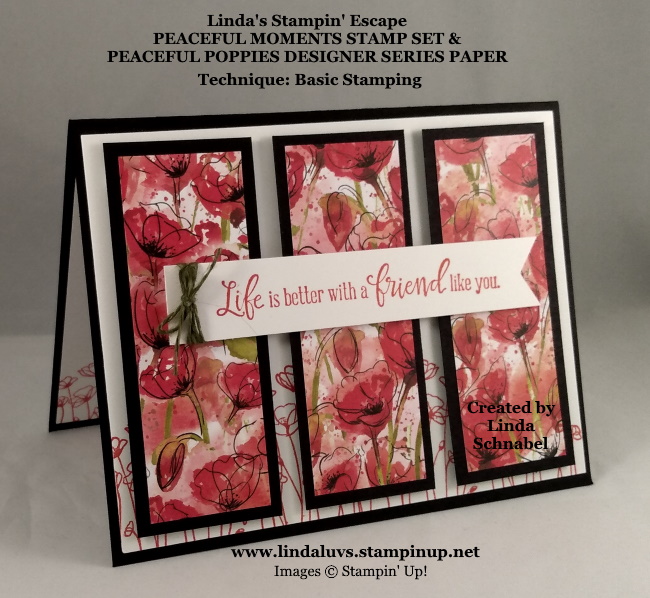
My second card is using the left overs from the Make & Take at Kathie’s party, so I’m using the same colors and cut pieces. I wanted to change up the orientation of the card so I took the extra pieces of designer paper (and the mat) and cut them down a bit to fit them on horizontally …
As you can see from the photo … we stamped the base and the inside the same as we did on our first card, yet the new layout with the three blocks of designer paper really changes the card.
The greeting comes from the Peaceful Moments stamp set and was punched with the Triple Banner punch and finished off with some Bakers Twine from the Magnolia Lane Ribbon Combo pack. Looks so good on this card.
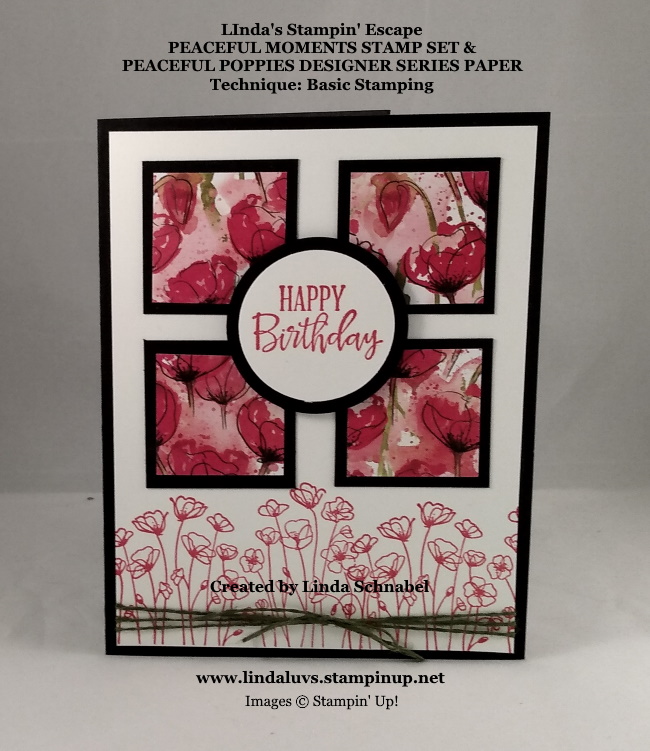
My final card took the remaining Peaceful Poppies Designer Series paper pieces and cut them down into squares (1-1/4″ x 1-1/4″) and did the same to our black mats….
Again … the base is stamped the same as the other two cards. This card uses the Bakers Twine from the Magnolia Lane Combo pack to wrap up the bottom and add texture to the card. The “Happy Birthday” comes from the Peaceful Moments stamp set and was punched out with Circle punches.
It’s amazing what you can do with just a little change up to your original pattern. It’s fun to sit down and challenge yourself to change it up.
I want to Thank you for stopping back and spending some time with me today. Hope your doing well, and that you are having a good day. Linda
Hope you enjoyed yesterdays Sneak Peek into the second release Sale-a-bration items because I loved playing with them so much … I made another one for you! Today’s card features the Foils Specialty Designer Series Paper and So Very Vellum Specialty Designer Series Paper again.
I’m using the same floral pattern with the Pool Party vellum today …
Just as I did on yesterday’s card I used Tombo Multipurpose Liquid Glue to adhere it … notice you see no adhesive lines. I cut another of the flowers out of the patterned paper and instead of leaving it plain as I did yesterday, sponged Pineapple in the the center and then Pool Party on the petals using the Sponge Daubers.
You will notice a little Pool Party on the leaves as well but I then went over them with Garden Green sponge dauber. I wanted to make the inner curve of the petal really show depth so I came in with the Dark Pool Party Stampin’ Blend. I also used the Stampin’ Blend on the little buds.
My greeting comes from the Peaceful Moments stamp set. It is part of the Peaceful Moments bundle with the poppy dies. I stamped it in the coordinating Pool Party and the Whisper White was cut with the Stitched Rectangle Dies … I like the way it sets off and frames the greeting.
The Flowering Foils (got that wrong on my picture!) and So Very Vellum will be available in only a few days, so I could not pass up sharing today’s card. I love the play on play color by sponging my flower today and using the Pool Party Vellum for my background.
Thanks so much for joining me today for another of the Flowering Foil / So Very Vellum sneak peek. Please let me know if you have any questions about any of the products that I used today.