
Hi Stampin’ Friends,
Hope you are enjoying the weekend. A bit cold here, but the sun is shining and that is good.
I took the day off yesterday to get some well needed house cleaning done … it was a good day! I found 2 gift certificates and $10. I think that will work well for Christmas shopping and a treat for myself.
Today I wanted to share with you some projects that I had done with my clubs and on retreat. First I’ll start with the card …
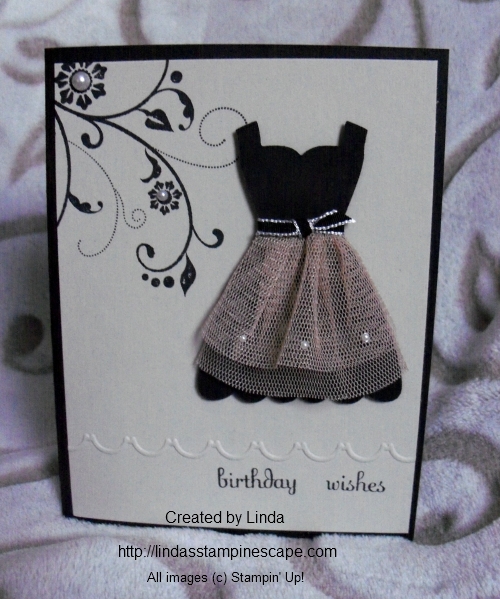
I cased this card and feel it is the perfect card for a Sweet 16, special birthday or your BFF. I used the “Dress Up” Framelit Die and “Fabulous Phrases” stamp set. What I love about Fabulous Phrases is … you can create your own greeting by lining them up on your clear block.
I will admit, I had some help with the “Clear Mount Perfectly Placed Guides” … these are clear guides you can stick onto your clear blocks to help you line up your images. Click on the link to see what they look like.
I used the “tulle” from last year’s Holiday Catalog … but you can use anything you have around the house or pick up at the fabric store.
Next, I took the card idea and turned it into a scrapbook page for my scrapbook club members. I loved that little dress so much I couldn’t help but share this idea. As you can see I used the “Flowering Flourishes” stamp set on both the card and the scrapbook page. It adds a touch of beauty and fills up some of that blank space.
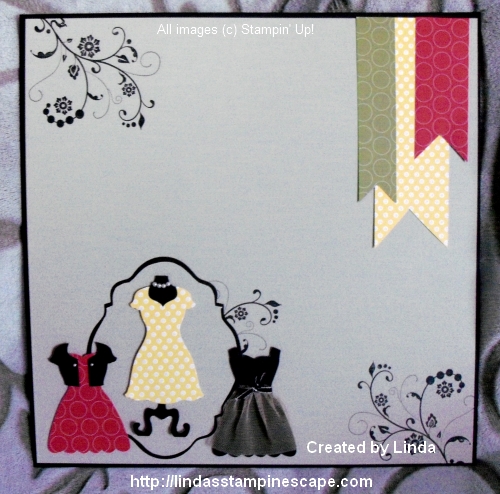
We used the “Polka Dot Parade” for the dresses and banners, and on the next project. I chose the Bold Brights collection, I love that you have so many color choices in these packages. It allowed my club members to choose the colors that suited their page.
I created a “mirror” by using the “Apothecary Accents” Framelit Dies. At the time I created this, we did not have the “Silver Foil” that you can now find in the Holiday Catalog … that would really make it look like a mirror (how cute!!).
Last but definitely not least, I’m sharing a quick and easy 3-D project that we made at our Spring Retreat. I saw this done before but with too many steps involved, so my version is super simple.
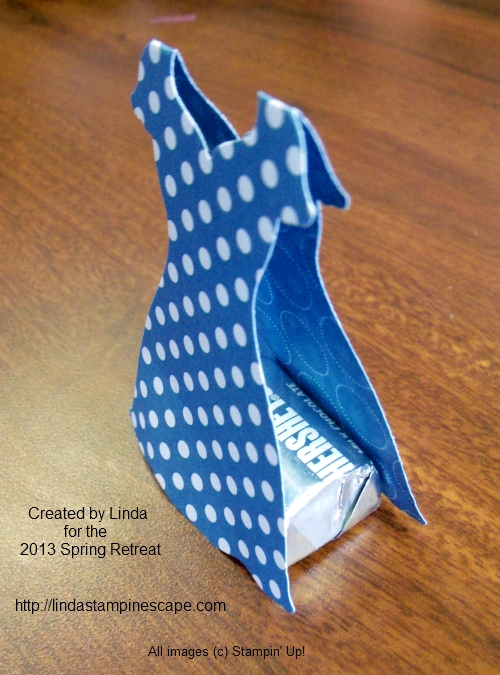
All you need to do is fold your Designer Series paper in half. Now, when placing your die… bring the shoulders of the dress above the fold (this will prevent it from cutting) and will give you that “tent” effect. Now just simple use glue dots to attach the dress to the candy.
If you are making these for a birthday party or bridal shower … you want quick and simple! Your guests are going to love them.
I think I may have to try a “Holiday” theme, maybe with a bit of red and white!
Thanks so much for stopping by.
Enjoy your day.

Here is a list of supplies used for today’s card …
|
ITEM |
PRICE |
DESCRIPTION |
|
$24.95 |
Dress Up (Framelit) Die |
|
|
$24.95 |
Flowering Flourishes – WOOD |
|
|
$17.95 |
Flowering Flourishes – CLEAR |
|
|
$37.95 |
Fabulous Phrases – WOOD |
|
|
$26.95 |
Fabulous Phrases – CLEAR |
|
|
$10.95 |
Polka Dot Parade Designer Series Paper |
|
|
$24.95 |
Apothecary Accents Framelits |
|
|
$4.95 |
Pearls (Basic) Jewels |
|
|
$5.95 |
Clear Mount / Guides |

