Today I’d like to share some cards with you that shows how easy cards are to create when working with our beautiful designer series papers ….
Here are the fun designer papers from the “True Gentleman” Designer paper. There a 12 different patterns in our packages so it’s so easy to find the perfect ones to go together for your card.
This one was so much fun to play with … the “Coffee Break” Designer Series paper. Great for your coffee lovers!
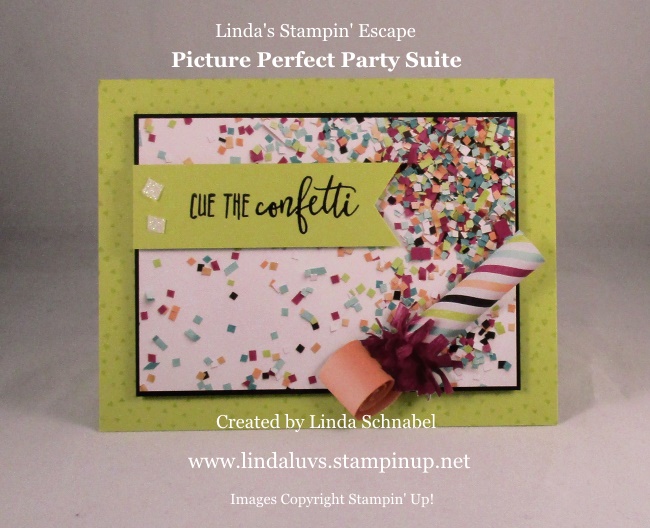
The “Picture Perfect Party” Designer papers is one of my favorite paper stacks because it not only has great patterns to use but many are “picture” perfect … like the cute little party favor that I cut out from another pattern sheet and added as an embellishment!! This one is very versatile!
See what I mean … so versatile and each one looks so different! Oh yes … and SIMPLE & FUN to make!! Another one of my favorites is the Wood Textures Paper stack. It’s so popular … it will be in the upcoming catalog!! I am thrilled 🙂
Today I will close with cards from our newest designer paper …
Enjoy your weekend and I invite you to stop back tomorrow to see how my cute little card layout will look so different depending on the designer papers you use!!
Thanks for taking time out of your holiday weekend and Sunday to spend a part of it with me.
Looks like summer is upon us!! I actually had my air conditioner on yesterday and will put the second one in upstairs today!! I believe in being comfortable when I’m at home and I don’t like to sweat … so, if this is going to be my cleaning weekend, I’m putting in the air!! AND … the sooner I get done with my cleaning – I can get to my stamping and play with all the new stuff I have (yes, I’ve still got a BIG Wish List when the catalog comes out next week)!
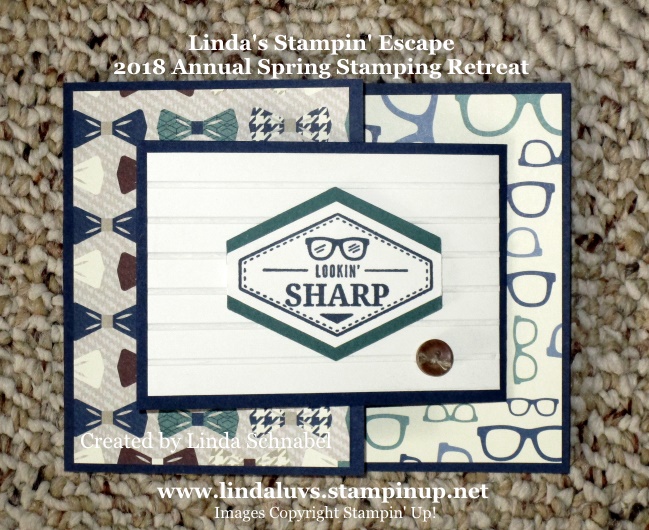
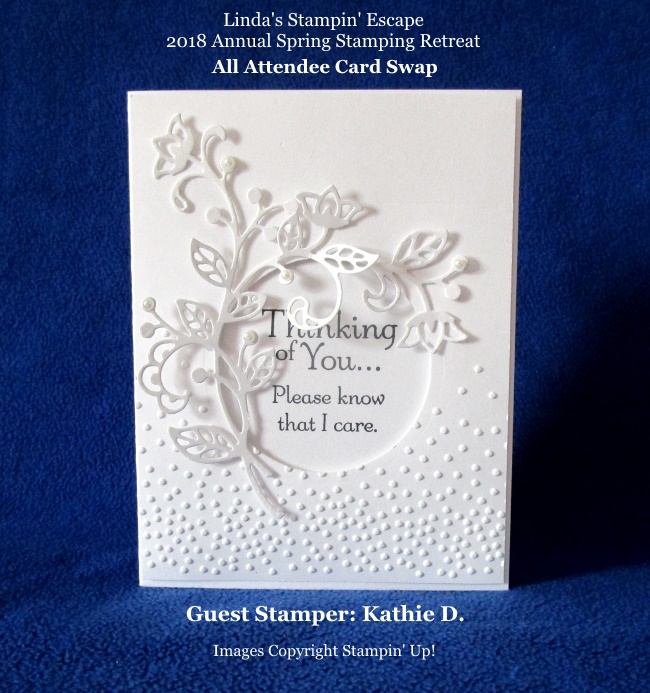
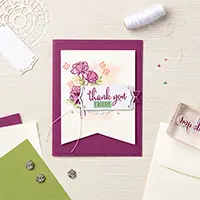
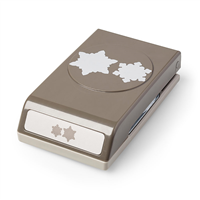
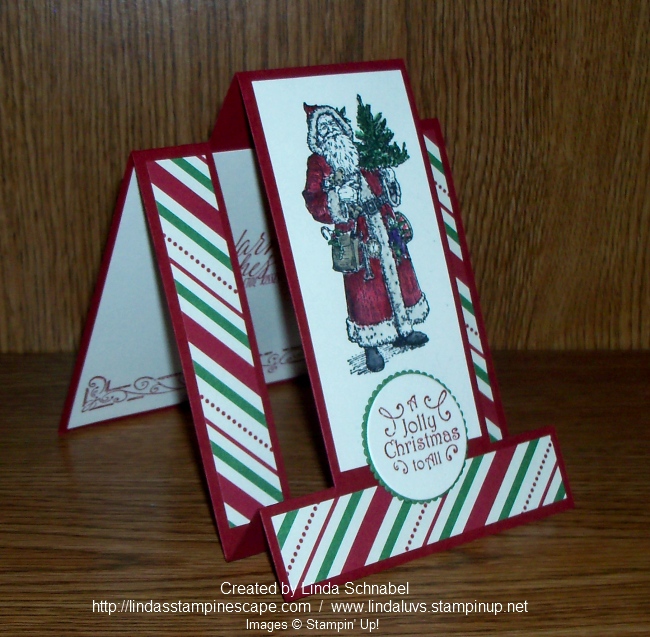
Well on with the good stuff … Yesterday I told you I had something good planned and I do, today I’m sharing the WINNING Card from the All Attendee Card Swap at our Annual Spring Retreat! Our winner is chosen by votes collected by the attendee’s themselves. Here is Kathie’s winning card …
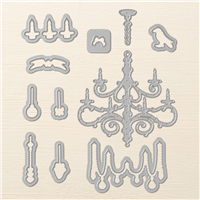
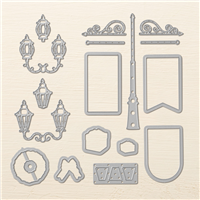
Kathie’s stunning card was created with the Flourish Thinlits Dies and the Softly Falling Embossing Folder … got to love that BigShot!! Kathie gently brought the floral piece around the opening / greeting. Not sure if Kathie used the punch or circle framelits create the circle but it adds a beautiful layer of dimension.
The floral piece was also embellished with our pearls and it adds a little more dimension and elegance. Our them was “Cards to show we Care” and this one is beautiful!! This layout would work well for any occasion from Wedding, to announce a new baby to Sympathy.
Thank you for joining me today, I hope you enjoyed Kathie’s card as much as we all did at the Stampin’ Retreat…. it is stunning!
Have yourself a fabulous day today … and enjoy the holiday weekend.
Because perfectly coordinated products have always been one of Stampin’ Up!’s key strengths— they have designed June’s Paper Pumpkin kit as a stepping stone to coordinate with a spectacular product suite in the annual catalog. Wooh!
The uniquely designed June kit and coordinating suite give you the opportunity to expand your creative experience … from crafting with a single kit to creating with a full range of products offered by Stampin’ Up! . . . Wow! Sounds like a match made in heaven!!
Now is the perfect time to try out Paper Pumpkin and see what the FUN is all about, or re-start your subscription! We’ve missed you and the kits keep getting better and better!!
Thanks much for checking out my blog post today! Stop back tomorrow … I’ve got something good planned!!
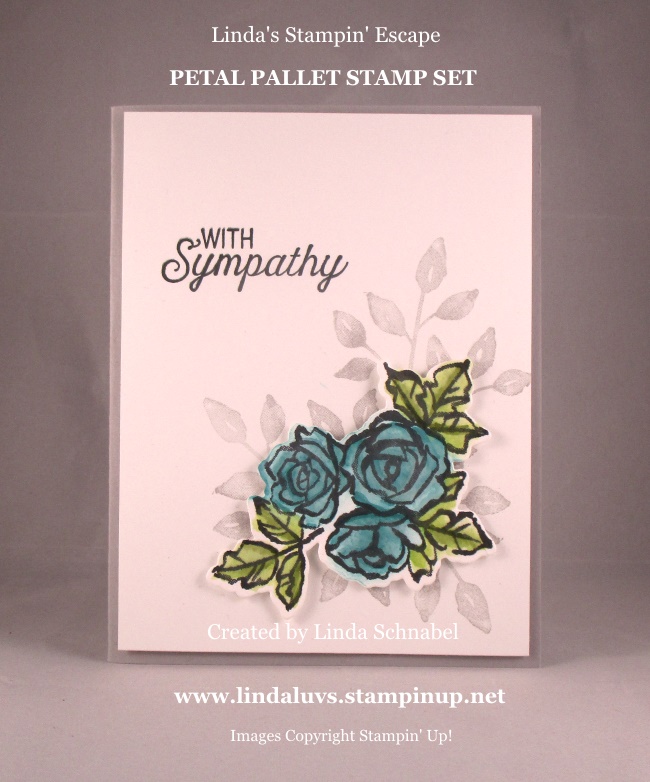
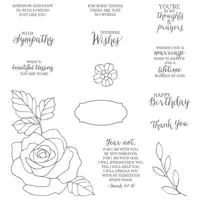
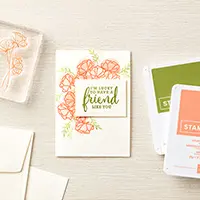
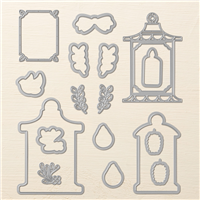
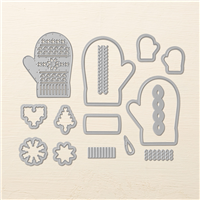
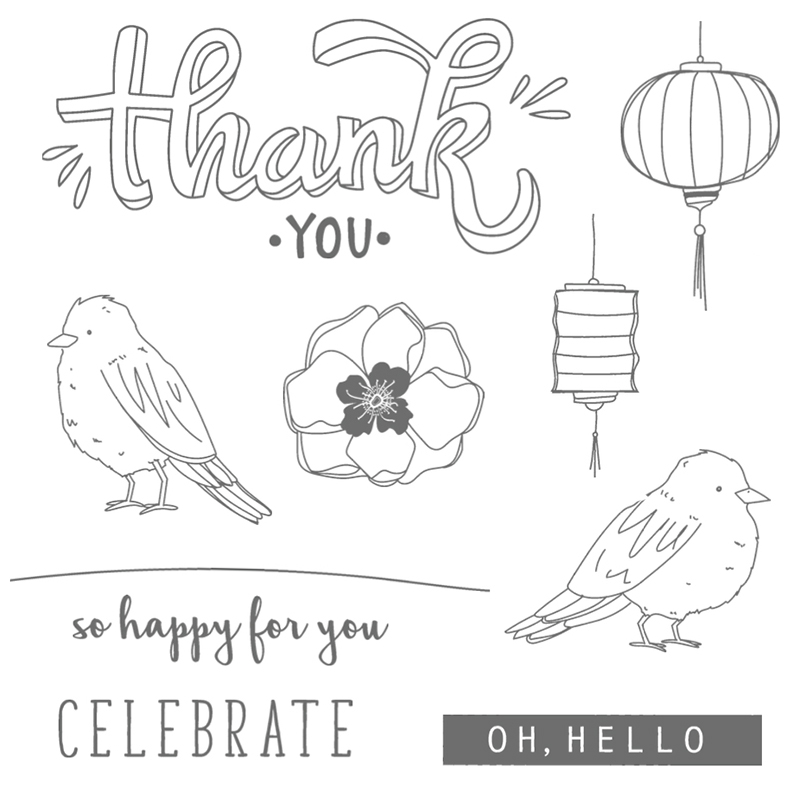
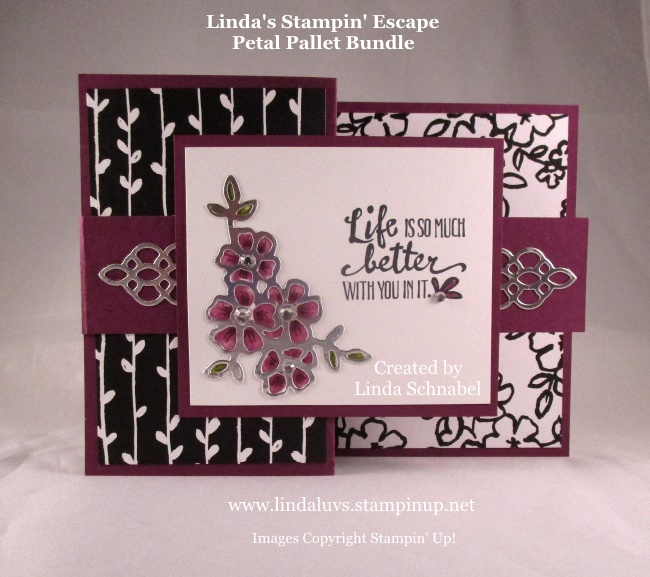
Today I’m sharing a card from a very versatile stamp set, the Petal Pallet. I’ve shown you many styles from this stamp set … for example just this past May 14th with the “Life is so much Better” card.
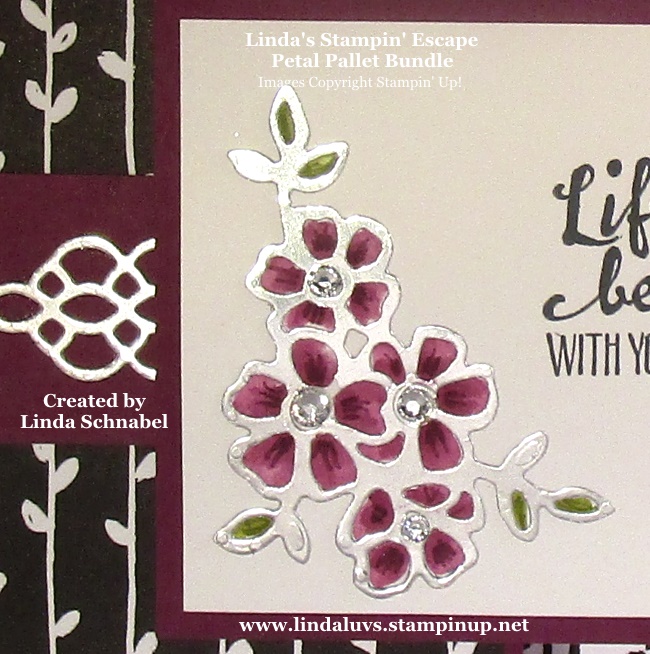
This beautiful card is quite easy to create. I choose Smoky Slate because I wanted the card to be a little softer than stark black. I stamped several of the leaf images into the corner, and the floral piece was stamped in Black Momento ink on a separate piece of paper …
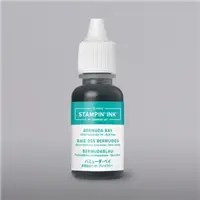
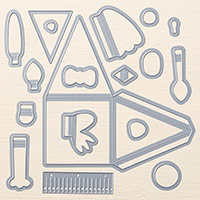
The floral image was cut out using the coordinating dies. (Remember, this bundle will retire at the end of this month). I then used the Aqua painter to watercolor my flowers in Bermuda Bay and Old Olive.
The floral piece was attached with Stampin’ Dimensionals and the greeting from the stamp set “Rose Wonder” was stamped on the front. The front was also attached to the Smoky Slate base with the dimensionals.
This beautiful card could easily be made into a Birthday card … or Get Well … your choice. I hope you enjoyed and that it inspired you to create a few of your own.
Enjoy your day and thank you for checking in with me today!
With all the excitement over the New Catalog release, the new In-Colors and the Color Re-Vamp I thought I would share some fun tips that Stampin’ Up! has shared with us … I’ll also share a tip or two of my own.
First up are these cute cards featuring the 2018–20 In Colors! Including Blueberry Bushel, Call Me Clover, Grapefruit Grove, Lovely Lipstick, and Pineapple Punch, these colors are a bouquet of hues that lend well to any project.
I love the new In-Colors … they are so bright and fun!! Looks like “primary” colors and the rest of our color line fill in all the gaps with beautiful hues of everything in between!!
Next up is a video explaining our NEW Ink Pads …
My hands are not what they used to be so opening with a full hand is not as easy for me … However, I have found if I put my thumb and pointer finger in the groove, I just give a little twist – just like opening a compact (and most of us know how to do that). I myself find that a bit easier.
I’ll see if I can create a short video on how I open the new ink case if you think that will help.
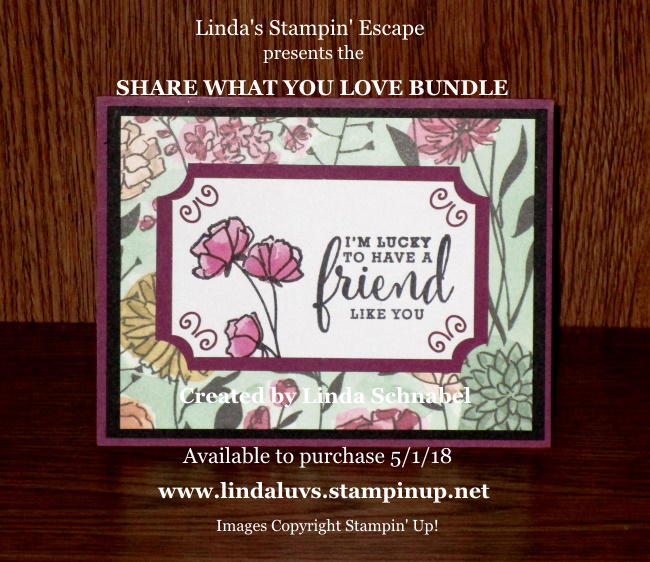
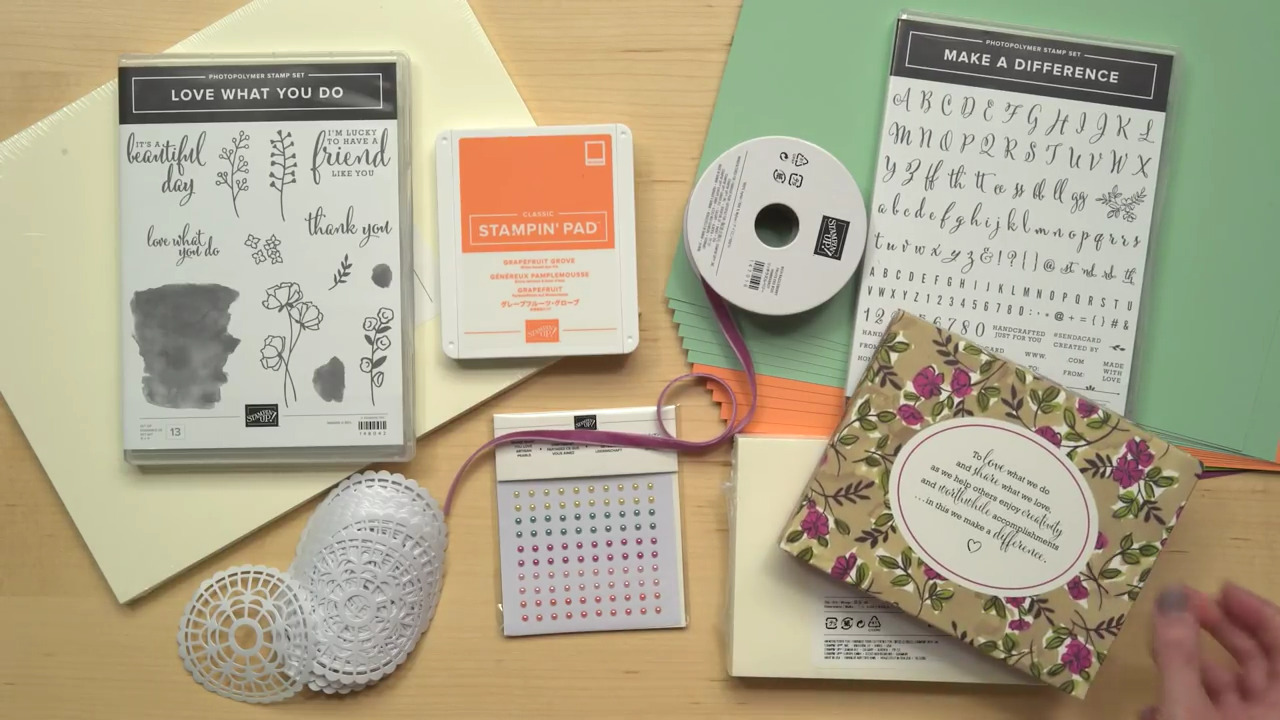
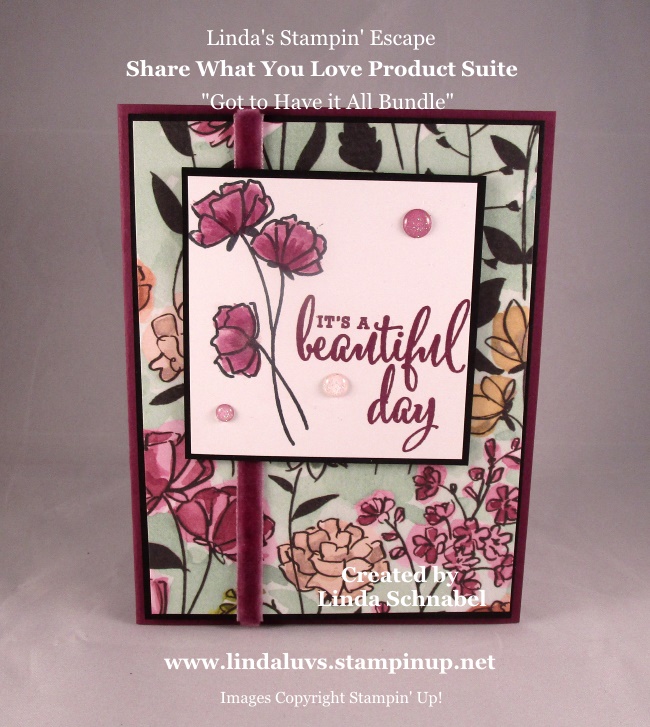
I can’t believe it is Monday already (again!) time goes by way too quickly!! Today I’m going to share several cards from my “Share What You Love” collection of cards. I thought I would be nice to see the many styles you can create with this product suite …
I’m going to share the video with you again because it explains all of the contents from each of the 3 different bundles, with the 4 bundles consisting of the New In-Colors!!
Isn’t that an amazing product suite … I love it! This pretty card was created by Stampin’ Up! and shown in the video. It is what you can create with the first bundle. I think the first bundle is great for someone who is just starting out … they will need the ink pads and the block as well as the paper.
This is the Level 1 Bundle! Great if you are a new stamper.
Level 2 bundle. This is a step up for a more experienced stamper. The block is gone (you’ll already have one) but you’ll get an additional stamp set and more … I love the box that contains the embellishments!!!
This card is from the level 2 bundle which was also created by Stampin’ Up! and showcases the pretty lazer cut tags from the pretty accessories box and the Pearlized Doilies. This bundle also comes with another stamp set. I love it because you can create your own words with it …
Level 3 …Got to Have it All Bundle!!!
This bundle is where you get the beautiful Designer Paper, a brand new “Got to Have” embossing folder and another stamp set! Here is another pic of my first card creation …
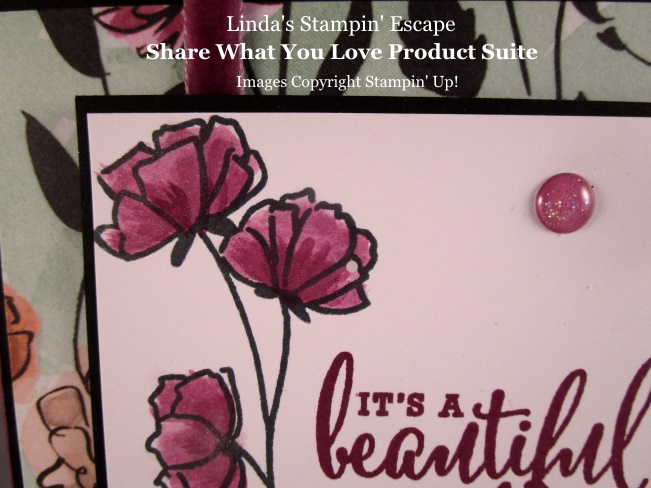
This card shows another one of the Designer papers … this one has the shimmer or Pearlized look on the flowers. It also shows the 3rd stamp set that is included in the “Got to Have It All” bundle. You can’t see it well on this photo but I added Wink of Stella on the flowers!!
These two are my favorites … the Grapefruit Grove card above and the Mint Macaron below. The Mint Macaron card highlights the embossing Folder, two beautiful designer paper patterns (One we cut the flowers out to create a bouquet on our card) the doily and the lazer cut tag!
I must tell you that the beautiful box has the same lovely pattern as one of the designer papers. The paper actually has the pearlized or shimmery flowers … it is stunning!!
In this photo I am showcasing the New In-Colors (Bundle 4) and the embossing folder and the many verses in the stamp set. I really love this product suite. I find it very versatile and I know I’ll be sharing more …
I hope you enjoyed taking a look back at all of the different styles (Oh there is so much more you can do as well).
Thank you for stopping in today, and please let me know if you have any questions with this beautiful product suite and the fun, fun bundles.
Oh my goodness … I’m slackin’ a bit today!! I have to work which is unusual for me on a Sunday but I wanted to let my staff have a “sleep in” day after their prom.
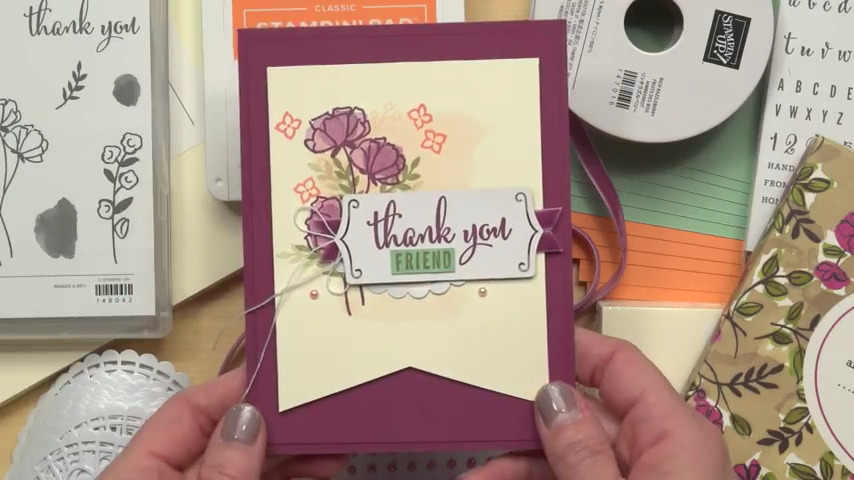
Today I have I have a beautiful card to share with you that is very easy to make yet quite elegant. We made this card for our May Stampin’ Club meeting …
I used one of the designer papers from the Share What You Love … Got to Have it All bundle. It is so pretty! We then stamped our greeting and the flowers to wrap around the greeting.
The flowers coordinate with the designer paper, so I decided we should watercolor our flowers as well. We used the Aqua Painters and a drop or two from the ink refills… then colored them in. We used the coordinating marker to draw the lines in …
Those that know me well and have attended my classes, clubs and / or retreats know that I love “sparkly” things, and the Glitter Dots are one of my favorite. I was sad to see these on the “RETIRED” list but happy to see they are back … just in pretty new colors!! Wooo Hooo!!
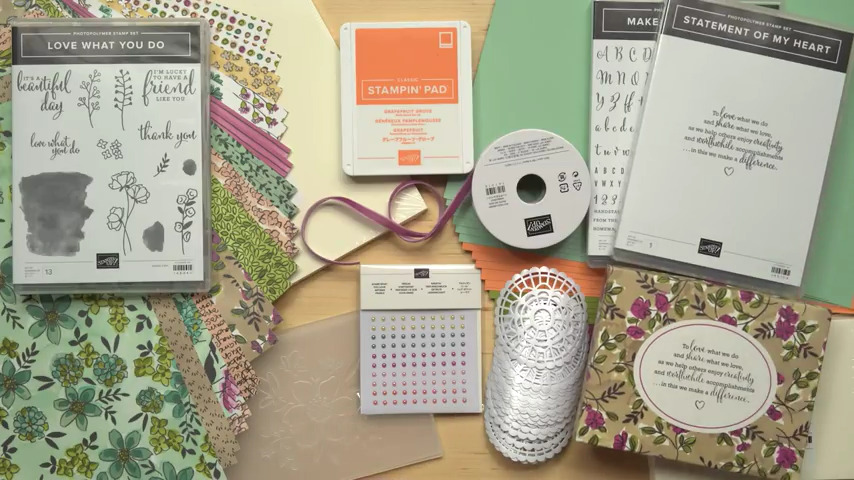
Here is the Level 3, or should I say “Got to have it All” bundle!! This awesome bundle is what I used to create my card.
The bundles (there are 4 of them; listed below) are available to you as a special pre-order … in this kit your FREE gifts include the “Share What You Love” Embellishment Kit, Very Vanilla Medium Envelopes and the “Statement of My Heart” stamp set!!
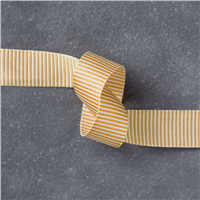
I can’t forget to mention the ribbon … the beautiful velvet ribbon!! I coordinates so beautifully and gives the card an added dimension, texture and warmth.
I’m visualizing a Happy Saturday! I don’t normally work on Saturday or Sunday (which I am tomorrow) but I’m working so my staff can have off for their prom. So I’m thinking it’s going to be a good day!
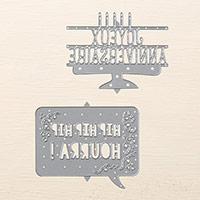
Father’s Day is right around the corner, and whether your favorite guys are sports fans or outdoorsmen or techie nerds, they’ll never tire of getting a handwritten “I love you” in big, swirly letters on their special day, especially inside a card made by you. Watch the Manly Moments unboxing video now and get a jump on Father’s Day by creating your cards today!
Here is a cute little saying I found this morning … with my cup of coffee of course! I thought it was too cute not to share. So enjoy your day and let me know if you “make” something!! I love to share it on my blog.
Thank you for stopping in today. Check back with me tomorrow for my Simply Sunday series.
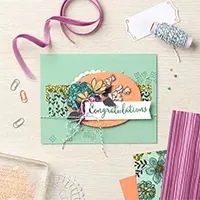
Today I have I have a beautiful card to share with you that we made at our Annual Spring Stamping Retreat. The card was cased from fellow demonstrator and Artisan member; Kim McGillis. I could not resist her beautiful card and the dimension on this card … it was almost like getting a bouquet of flowers!
We used the “Got to Have it All” bundle from the Share What You Love product suite. This is still available on a pre-order for you before the end of May. What is different from waiting until the catalog comes out June 1st? FREEBIES … Stampin’ Up! has added extra product for you in each of the bundles … the bigger the bundle, the more free product!!
Here is the “Got to have it All” bundle!! This awesome bundle is what was used to create today’s card…
In this kit your FREE gifts include the “Share What You Love” Embellishment Kit, Very Vanilla Medium Envelopes and the “Statement of My Heart” stamp set!!
As I stated earlier, this card was cased by fellow demonstrator Kim McGillis. Each of our cards turned out slightly different because each guest got a 6 x 6 piece of the beautiful designer paper (shown in the lower left-hand side of the picture) and they cut out the flowers they wanted to add to their card.
The big flower you see centered in the doily has a shimmer to it. This is not only a beautiful designer paper, it is a specialty paper … there are several of the sheets that have the shimmer on them. What I love is the shimmer coordinates with the new Pearlized Doilies – they coordinate … oh heck, they just look beautiful together!!
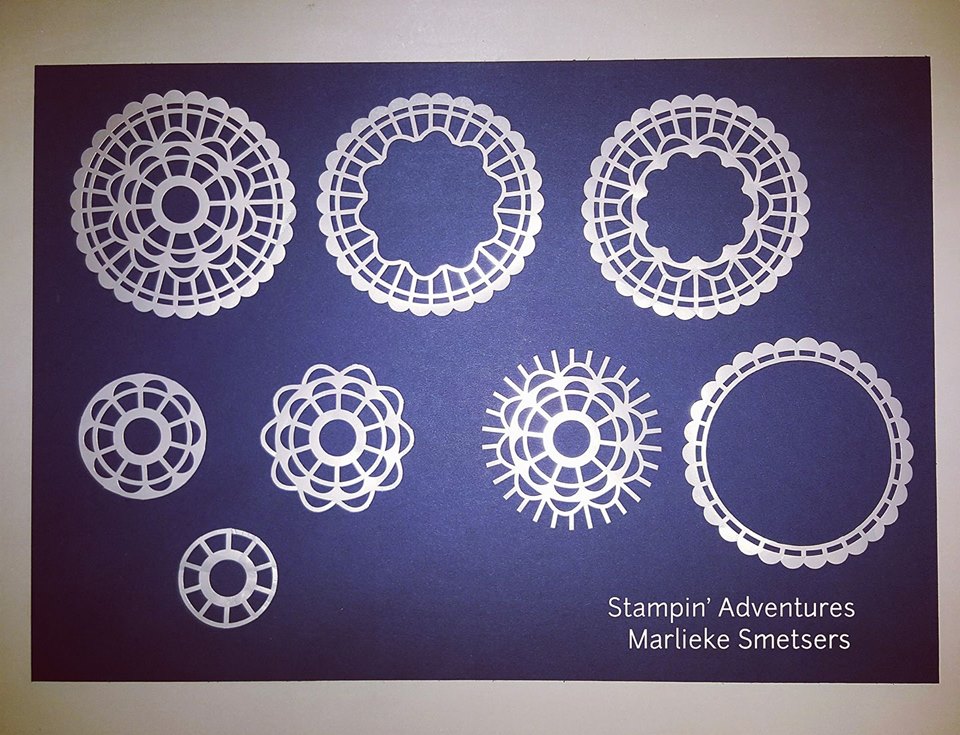
I have surprise to share with you!! This comes from fellow demonstrator Marlieke Smetsers!! Oh my gosh, this is so clever … look at all the different patterns Marlieke created using the Pearlized Doilies!! You could use them to highlight a greeting … as snowflakes … to embellish a part of your card, the possibilities are endless.
Today I’d like to “THANK” Kim and Marlieke … my fellow demonstrators for “Sharing What They Love”. We have a large community of sharing and caring demonstrators, it is a wonderful group to be a part of! I’d love to have you join my group and the Stampin’ Up! family … because that is what we all are.
Today I have a great video to share with you, in fact, it might “move” you!! Make the most adorable sliding barn door card with the Barn Door Bundle!
I want to remind you that “ALL” bundles retire on the 31st of May. Even if the stamps set and dies carry over into the NEW Catalog … they will no longer be bundled. (There will be new bundles) So if you are lovin’ any of the bundles from the Annual or Occasions catalog, you’ll want to get them before they are gone.
Sit back and check out how fun this bundle will be to create some great cards and projects!
Hope you enjoyed the video today!
Thanks for checking in on me and I wish you a beautiful day ~
With the Annual Catalog and the Occasions Catalogs retiring products going away in only a few weeks, wanted to remind you of all the goodies that are on the Clearance Rack as well. Great products at a Great Discount!!
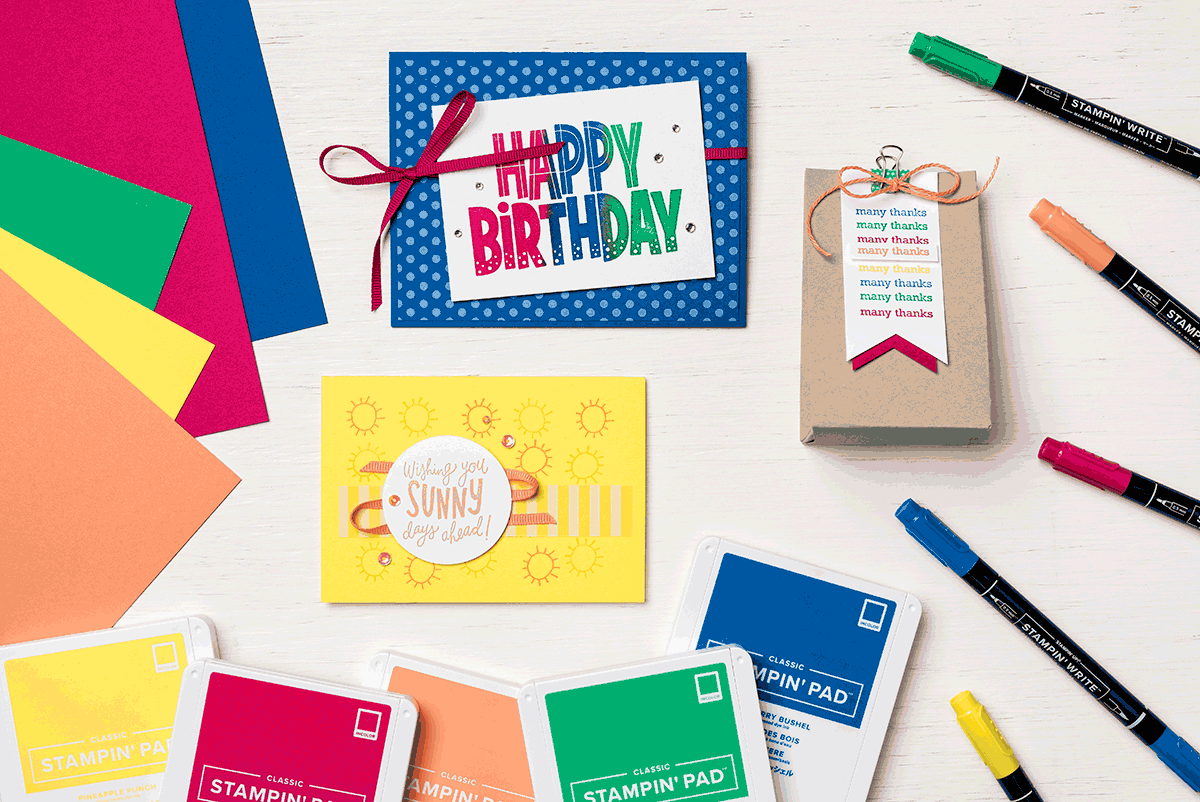
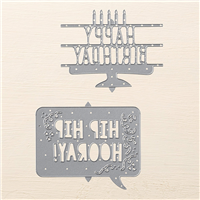
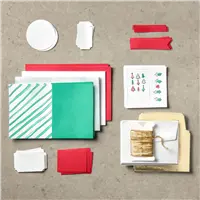
Are you looking for a fun and unique card kit? The Color Me Happy Card Kit is easy and cute. This kit includes 16 adorable cards.
Today I’d like to share the Color Me Happy Card Kit / bundle (Save 10%) This bundle is retiring May 31st so it’s just one of many I will be sharing in the upcoming weeks.
Color Me Happy Project Kit
Color everyone happy when they get one of these cards! Kit includes enough supplies for 16 cards, 4 each of 4 designs. Ink and adhesive sold separately.
Kit includes:
• 16 card bases, 4 each of 4 designs
• 16 envelopes with printed design inside, 4 each of 4 designs
• Gold foil accents
• Die-cut cardstock background and accents
• Printed and gold foil die-cut accents
• White Baker’s Twine
• Mini Pool Party tassels
• Circle and star sequins
• Gold foil tape
Color Me Happy Stamp Set
You’ll be colored happy every time you create with this stamp set. The line-art images are perfect for coloring techniques.
* Quantity: 10 rubber stamps
* Suggested clear blocks (not included): b, c, g, h, i
This is a great kit you can create fun quick cards with … Make it a family project and used the Watercolor Pencils!
I hope you got to enjoy a wonderful weekend and got spoiled a little! I also hope you got a chance to check out my post yesterday to see the new In-colors. I love these cards and the simplicity yet they were so pretty!
Today I have one of the cards that I created for the Spring Stamping Retreat. Our retreat highlighted “caring” cards … cards that we create to make someone feel better, to cheer, encourage or relay our sympathies. This was one of those cards …
I began with the Petal Pallet bundle and designer series paper. I knew I wanted to use the beautiful floral die in the bundle. I also want a little bit different of a fold … just for fun! Petal Pallet will be in the upcoming catalog but it will no longer be a bundle (Save 10%) after May 31st.
We used the Multipurpose adhesive sheets with the Silver Foil sheets and then cut them out with the BigShot! Turns them into stickers … and then we just pressed them onto our card. This made it super simple to watercolor the flowers using ink and Aqua Painters. Then we drew the little lines into the flower petals with the coordinating marker.
I’ve used the Petal Pallet bundle quite a few times already, it is a very versatile stamp set and I love the coordinating dies. It has great verses / greetings as well … and I will admit, that will sway me towards a stamp set. Sometimes I will choose a stamp set just because of the beautiful verses.
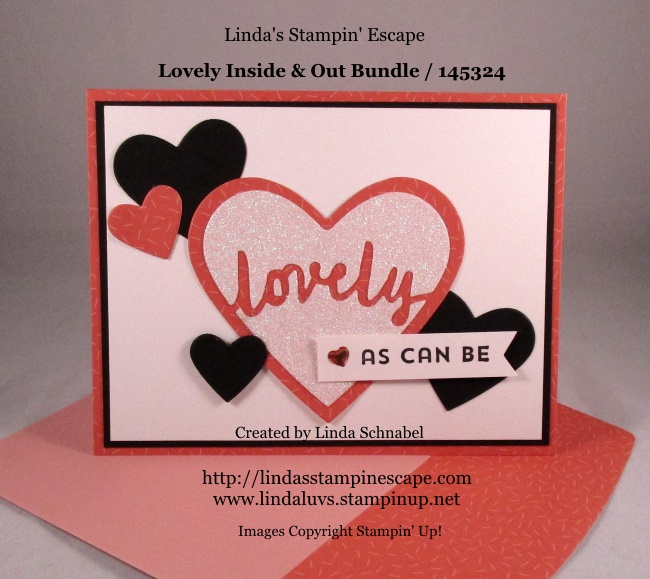
Today I have I have a beautiful card to share with you that is simple in it’s own right yet quite elegant. My card was inspired by fellow demonstrator Rebecca Urban … Her card was so beautiful I didn’t change much.
I decided to use the new Grapefruit Grove for my pop of color. I cased Rebecca’s the layout only changing the placement of the mat on the doily … mine is placed behind the doily, whereas Rebecca had her color on the front, directly behind the greeting. Both of us used the “Share What You Love” Designer paper … just different patterns.
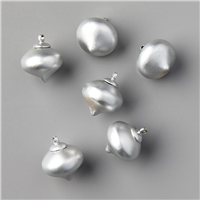
I switched mine up a bit by adding the new “Polka Dot Tulle” ribbon … not available until June 1st but it’s so cute I couldn’t resist!! And I just had to add the Metal Edged Pearl in the center of my flower, I believe the pearl brings out the pearlescent finish of the doily and designer paper.
Here is the Level 3, or should I say “Got to have it All” bundle!! This awesome bundle is what I used to create my card.
It is all available to you as a special pre-order … in this kit your FREE gifts include the “Share What You Love” Embellishment Kit, Very Vanilla Medium Envelopes and the “Statement of My Heart” stamp set!!