Wednesday Wow … Two Cute Cards!!

Hello Stampin’ Friends ~

I have two super cute cards to share with you today … Both from suites that I purchased from the Mini Catalog (retiring soon) because I just had to have them. With all my grands and greats they are just what my stampin’ stash needed … something for kids! Please not these cards were created by my stampin’ sisters from the Design Team I am on.

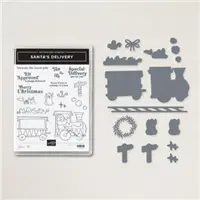
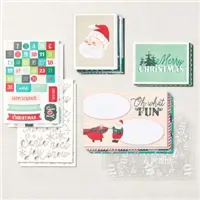
First up the amazing Santa’s Express ….

The adorable back ground comes from the Santa Express Designer paper … as does Santa! He was cut out using the coordinating dies. He is popped up on a layer Petal Pink and Evening Evergreen die cut from the Layering Circle dies.

The greeting comes from the Jingle Jingle Jingle stamp set (also in the mini pg.26) Stamp “tis the season to” with Evening Evergreen ink on Basic White layer masking off the word “be” with a post it note. Stamp the outline of “Believe” with Poppy Parade and the inside with Petal Pink.

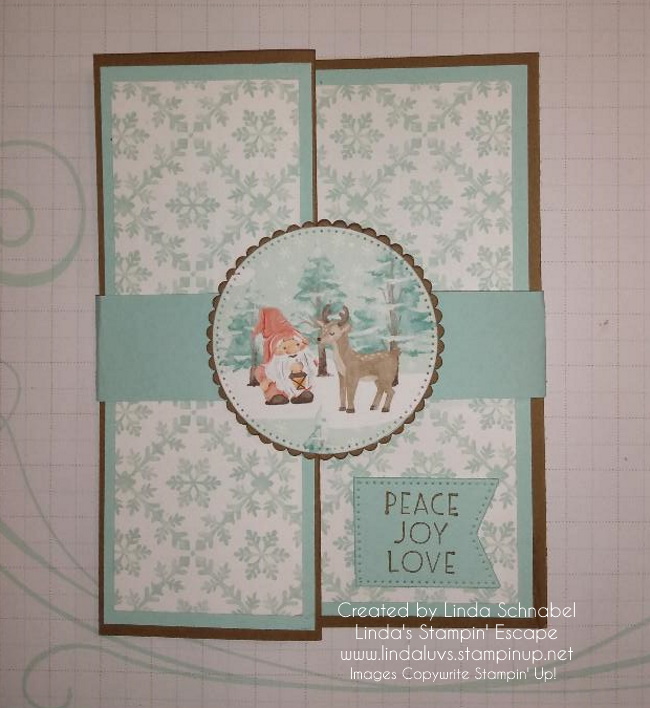
Now this next card is for my Gnomies ….

Our second cute card was created with the Kindest Gnomes and Christmas to Remember stamp sets. The multi pattern designer paper makes for a fun background and comes from the Storybook Gnomes Designer paper.

Cut the largest circle from the Stylish Shapes Dies in Basic White cardstock and stamp the sentiment in Poppy Parade ink. The gnome is stamped in Memento ink and is colored using Stampin’ Blends then cut out.

Thanks for stopping by and checking out these little cuties … Don’t forget to LIKE my blog is you liked these cards as much as I did.

Have a great day ~

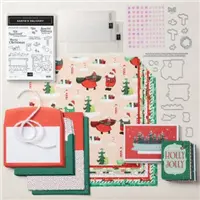
Here are the main supplies used to create these cards …. If the designer papers do not show, it’s because they have SOLD OUT already.

Twelve Days of Christmas: Day 1 / Kindest Gnomes

Hello Stampin’ Friends ~

I am going to start out with a BANG!!! I am sharing several cards featuring the Kindest Gnomes Bundle. I love this entire suite!! Gnomes are so “hot” right now and if you’re like me and you’ve hopped on their bandwagon, you will enjoy this parade of cards.

I did “NOT” create these cards, they were done by our Global Artisan Team members, so I will “recognize” them by including their names along with their creations.

Created by our global Artisan Design Team member Berdien Weideveld ….

Created by our global Artisan Design Team member Martin Stone ….

Created by our global Artisan Design Team member Karine Lison ….

Created by our global Artisan Design Team member Vicki Boucher ….

Created by our global Artisan Design Team member Tami Hewlett ….

The Gnome Dies (item number 159625) WILL carry over and be available during the January–April 2023 Mini Catalog sales period. The dies will officially be retiring on 1 May 2023, unless they sell out before then; they will not be restocked. However, all the other products in the Storybook Gnomes suite will retire this December and are on the Last Chance List.

I hope you enjoyed the first product share of my Twelve Days of Christmas series… Kindest Gnomes.

Thanks for spending your time with me today!

As promised, Here is the Last Chance List …. CLICK HERE TO DOWNLOAD

One Fun Fold: Done 3 Different Ways!

Hello Stampin’ Friends ~

Today I’m going to share the replay of last nights Facebook LIVE along with both of the cards I made, and another way to use the Basic Z-Fold Fun Fold!! Let’s begin with the finished cards!

My first card was a “Full Front” so it looks like a regular card, but when you open it, you have that fun Z-Fold card ….

This card features items from the Sweetest Christmas Suite from the Mini Catalog. There is so much fun in this bundle, from the back ground die to the Red Glitter paper used, to the cute Candy Cane designer paper that are easily cut out with the coordinating dies. And who doesn’t love that cute sentiment that come from the bundled stamp set.

My next Z-Fold Fun card features the Santa Express Suite and a partial front…. If you’re looking at easy Christmas cards this year, but still want a Fun Fold … this is it!

The Z-Fold is super easy and when you add in the ease of the Santa Express Cards. They are so cute … just attach them to the front of your card and the fun coordinating designer paper brings it all together stress free!

OK … time to grab a cup of coffee (or whatever) and join me for my replay of last nights LIVE! You will get the dimensions you need during my demonstration … Enjoy!

Don’t you just love that these cards are so easy to create! You get a Fun Fold along with different ways to enhance that fun fold!!

Now … let’s check out one more way to play with your Fun Fold. I had a lot of fun with this one … you’ll see more layers and some embossing! We’re doing a Belly Band and playing the Gnomes!!

Belly Bands are simple … I use and 11″ x 1″ strip of paper, wrap it around and, trim off excess, then adhere it together (I don’t score … I fold) I used Soft Suede and Pool Party Cardstocks along with the Storybook Gnomes Designer paper.

To create my banner I used the Stylish Shapes dies, both the banner and the square! I used both so that I could create a banner to the size I needed …

Pretty cool tip right! I like that is still adds the texture and creates a second banner!

Now, let’s slide off our Belly Band and look at the inside of our card…

I used the Charming Landscapes Embossing folder from the Santa Express Suite to create some texture and interest but still leave room for you to write your sentiment. Again, a simple but oh so cute card (because who doesn’t love gnomes) and Fun Folds!!

Thank you for hanging out with me today, and I hope I inspired you to try out this easy Fun Fold and enhance it any of the 3 ways you’ve seen today.

Have an awesome day!!

Here is a full list of items used to create all the cards shown … from the entire suite to bundles and individual items. Shop your way! 🙂