Oh Happy Day Card with Playing in the Rain by Stampin’ Up!

Hello Stampin’ Friends,

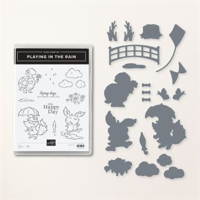
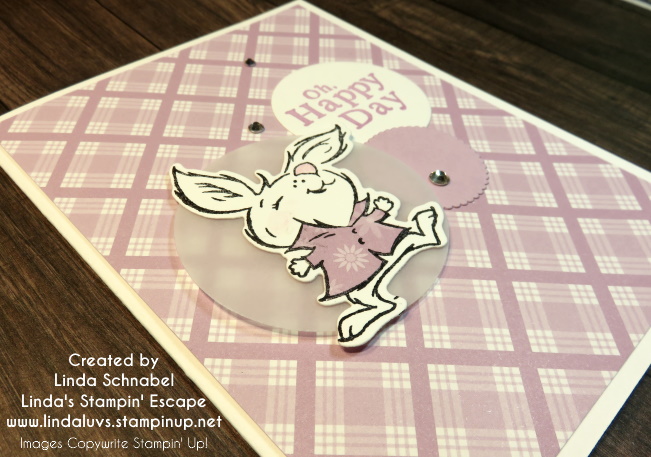
A little late out of the gate today but you’ll see it’s worth the wait. My Oh Happy Day card using Playing in the Rain is sure to bring a smile to anyone who receives it! It is a monochromatic card (basically one color: Fresh Freesia) and a fun stampin’ tip you can use over and over again.

Let’s take a look at today’s card ….

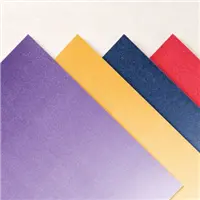
I teamed up the bunny from Playing in the Rain with the Fresh Freesia from the Dandy Designs out of the Sale-a-bration catalog. This is one of the items you can get FREE with a qualifying purchase of $100. There are 48 – 12″ x 12″ sheets in this package.

Need patterned paper that can be used for any season or occasion? The Dandy Designs Designer Series Paper is the one for you! It includes versatile patterns such as plaids, polka dots, and stripes. Make this paper the background for a card or scrapbook page. Or cut it into strips or accent pieces. However you use this paper, it will make any creation look dandy!

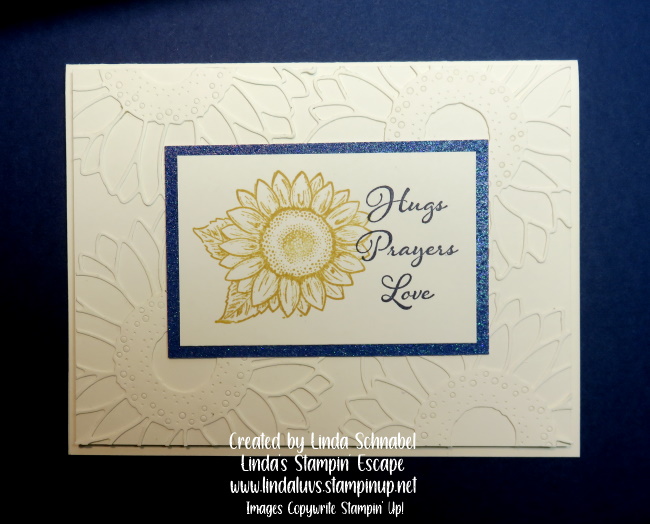
If you look closely, you will see two different patterns. I stamped the bunny image on the floral pattern and then cut out the shirt and dressed my bunny in his new outfit!! You can tell by his reaction that he loves his new shirt …. LOL

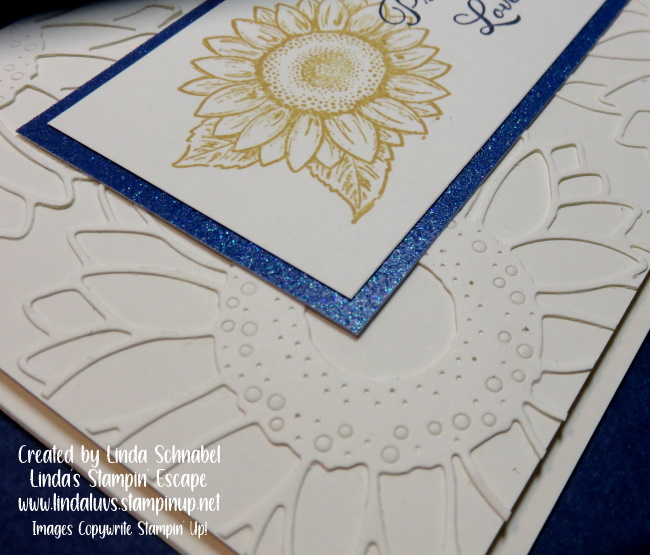
This technique is fun to use and can be done on almost anything! This angle shows you the layers of circles that I cut out using the Layering Circle dies, and I used the vellum cardstock to highlight the bunny… he is attached directly to the vellum and then popped up with Stampin’ Dimensionals.

I stamped the greeting with Fresh Freesia, but it with the Layering Circle dies and tucked it in with the other circles. I finished off the card by embellishing it with the Basic Rhinestones.

Thank you for hanging out with me today. How are you liking the Playing in the Rain so far? I shared 3 different designs this week, and will share more soon.

Tomorrow I have a whole new stamp set that has been just waiting for me to pull it off the shelf!

See you then ~

Here is a list of ingredients used in today’s card. You can click on any one for more information about the product, or to begin shopping at my OnLine store. Thank you for your support.

Celebrating Sunflowers

Hello Stampin’ Friends ~

I’m excited to share today’s cards with you… Yes, I have 2 for you today!! It is a fun and creative way to use your Sunflower Dies without all the waste … and it looks so cool!! With prices rising all around use, it’s nice to be cost effective … you know, save some money by not wasting our cardstock!

I also will share the replay of a Facebook LIVE I had done several months ago ….

As promised … I’m going to give you the measurements for the cards

Measurements:  

  • Cardbase: 8-1/2″ x 5-1/2″ … Score & Fold at 4-1/4″
  • Ombre Glimmer paper: 5-1/4″ x 4″
  • Cardstock for Sunflower Die Cut: 5-1/8″ x 3-7/8″
  • Very Vanilla Inside Cardstock: 5-1/4″ x 4″ plus scrap to punch greeting

This card is so cute and easy to make … After you die cut the sunflower out, you can place your flower back into the cut out area to create a unique look … I like mine embossed!!

Don’t be afraid to mix and match colors … it can really highlight the ombre paper underneath. Have some fun with it and add a patterned designer paper!!

I hope you caught my little tip for finding the perfect size greeting for the punch design you want to use … I do this all the time. Don’t forget to head over to my YouTube channel … there is a video that highlights the card you saw yesterday! CLICK HERE … and please subscribe!

Have a wonderful day and thank you for stopping by.

TODAY’S STAMPIN’ SUPPLY LIST … If you liked the products used in today’s projects, I have links for you below. Just click on the item you would like more information on, or to begin your shopping. It will take you directly to my website. Thank you ❤

Hugs, Prayers, & Love for Ukraine

Hello Stampin’ Friends ~

Yesterday I shared the replay (video) of my Facebook LIVE and I told my viewers that I would show them what I created with all the left over vanilla sunflowers that I die cut … and I’m sharing that with everyone here today.

I attached the die cut flowers directly to a piece of Vanilla cardstock using the gluing technique I shared in the video and then trimmed the excess off … it creates a beautiful textured background …

Measurements:  

  • Very Vanilla Cardbase: 8-1/2″ x 5-1/2″ … Score & Fold at 4-1/4″
  • Very Vanilla Card front: 5-1/4″ x 4″ … Glue die cut sunflowers
  • Ombre Specialty paper and Very Vanilla Cardstock: Stamp Greeting and for die cutting the sunflowers

I stamped the sunflower in Bumblebee ink and the greeting “Hugs, Prayers, Love” in Night of Navy … this greeting comes from the Positive Thoughts Stamp set. These are pretty close to the colors of Ukraine and I wanted to send my prayers out in my own way. I matted the greeting with the Ombre Specialty paper in Night of Navy.

The entire cardfront was “popped up” using our Stampin’ Dimensionals and gives the card a nice finished look. I tried Night of Navy as a card base but I thought it took away from the greeting and I really wanted that to be a major focal point.

Thank you for joining me today.

TODAY’S STAMPIN’ SUPPLY LIST … If you liked the products used in today’s projects, I have links for you below. Just click on the item you would like more information on, or to begin your shopping. It will take you directly to my website. Thank you ❤

Celebrating Sunflowers & Savings

Hello Stampin’ Friends ~

I’m excited to share today’s cards with you… Yes, I have 2 for you today!! It is a fun and creative way to use your Sunflower Dies without all the waste … and it looks so cool!! With prices rising all around use, it’s nice to be cost effective … you know, save some money by not wasting our cardstock! OH … and by the way, you can save 20% on this bundle right now.

I also will share the video created from last nights Facebook LIVE ….

As promised … I’m going to give you the measurements for the cards

Measurements:  

  • Cardbase: 8-1/2″ x 5-1/2″ … Score & Fold at 4-1/4″
  • Ombre Glimmer paper: 5-1/4″ x 4″
  • Cardstock for Sunflower Die Cut: 5-1/8″ x 3-7/8″
  • Very Vanilla Inside Cardstock: 5-1/4″ x 4″ plus scrap to punch greeting

This card is so cute and easy to make … After you die cut the sunflower out, you can place your flower back into the cut out area to create a unique look … I like mine embossed!!

Don’t be afraid to mix and match colors … it can really highlight the ombre paper underneath. Have some fun with it and add a patterned designer paper!!

I hope you caught my little tip for finding the perfect size greeting for the punch design you want to use … I do this all the time. Don’t forget to head over to my YouTube channel … there is a video that highlights the card you saw yesterday! CLICK HERE … and please subscribe!

Have a wonderful day and thank you for stopping by.

TODAY’S STAMPIN’ SUPPLY LIST … If you liked the products used in today’s projects, I have links for you below. Just click on the item you would like more information on, or to begin your shopping. It will take you directly to my website. Thank you ❤

Simply Sunday: I Made a Wish

Hello Stampin’ Friends ~

I am so excited to share another card I created using the Dandelion Wishes stamp set! Not only am I sharing the card but a great stampin’ tip that I used in creating this card. Again, today’s card is not included in the card class, so if you are coming … you’ll have additional ideas!

As of last night, there are only 3 spots left. If you would like to join us … give me a call at the number listed above.  If there is more interest, I will open another date!

Today’s layout is simple to recreate, fun and colorful.  My color pallet consists of the new Soft Sea Foam and Shaded Spruce teamed up with the Pacific Point.  Not sure I would have put these colors together by myself, but when you put them all together … it looks nice.  And it is the basis of the designer paper.

The designer paper I used is the 6 x 6 Garden Impressions Designer Paper stack … there are so many cute designs in this stack. It’s fun and colorful!!  Today’s pattern seemed to match with the Dandelion Wishes.

The greeting and images were both stamped in the Shaded spruce, in fact … they were both put on the same clear block!!

Putting multiple stamps on one block makes stamping easy! If you are doing several cards … you may want to consider purchasing the Stamparatus (Click Here to View)

The Soft Sea Foam is so “soft” and pretty and really seams to works well with this stamp set and the patterned paper I found in the Garden Impressions pack. All the layering on this quick -n- easy card takes it a step up.

Hope you enjoyed today’s Simply Sunday share.  I appreciate you taking the time out of your weekend to check in with me.

Thank you, and I’ll see you tomorrow with another Dandelion Wishes card!!

Have a great day ~


TODAY’S STAMPIN’ SUPPLY LIST …