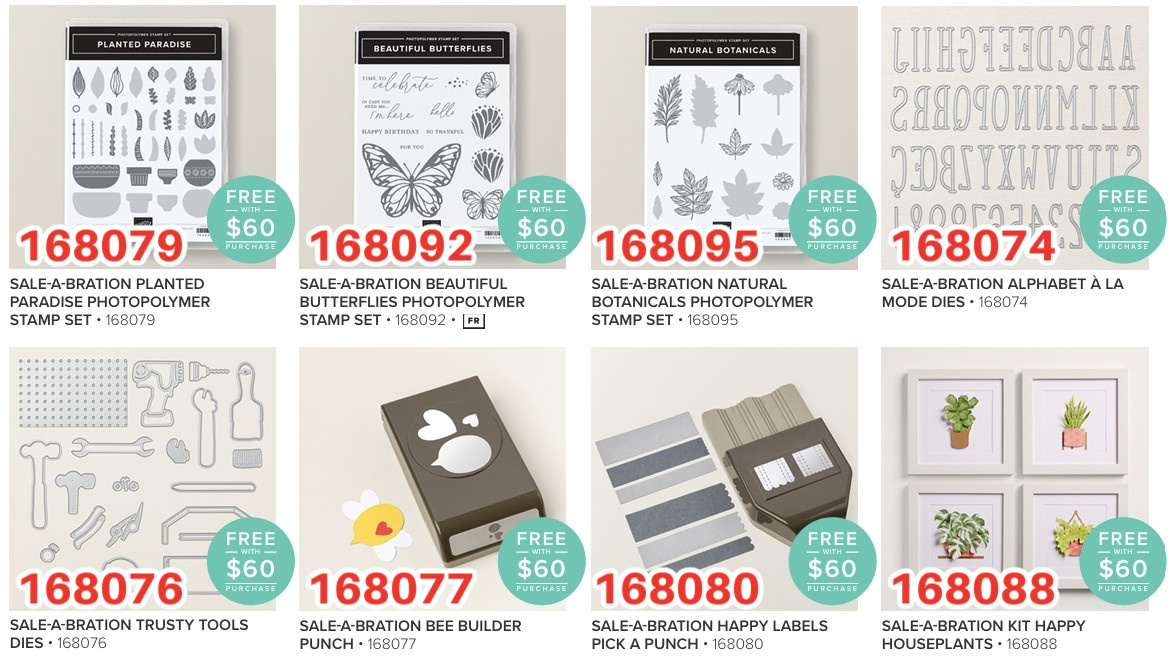
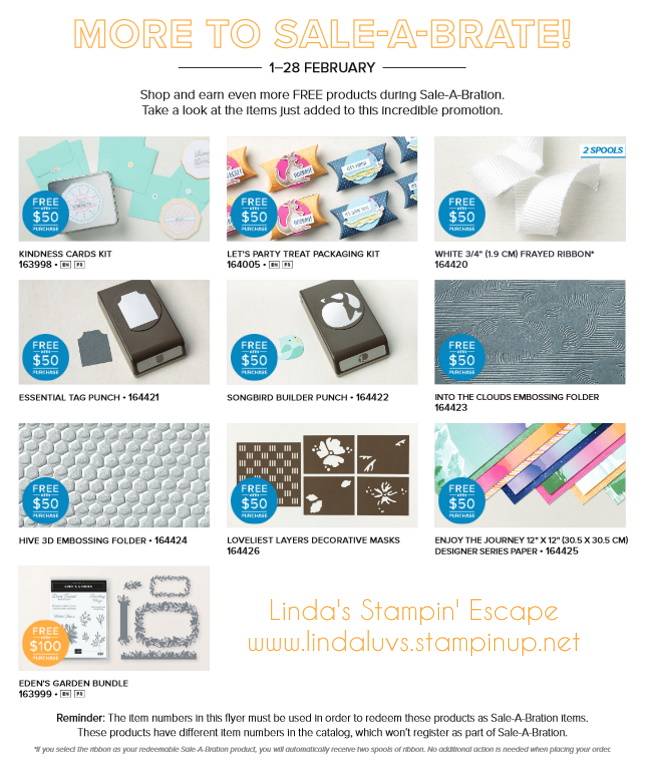
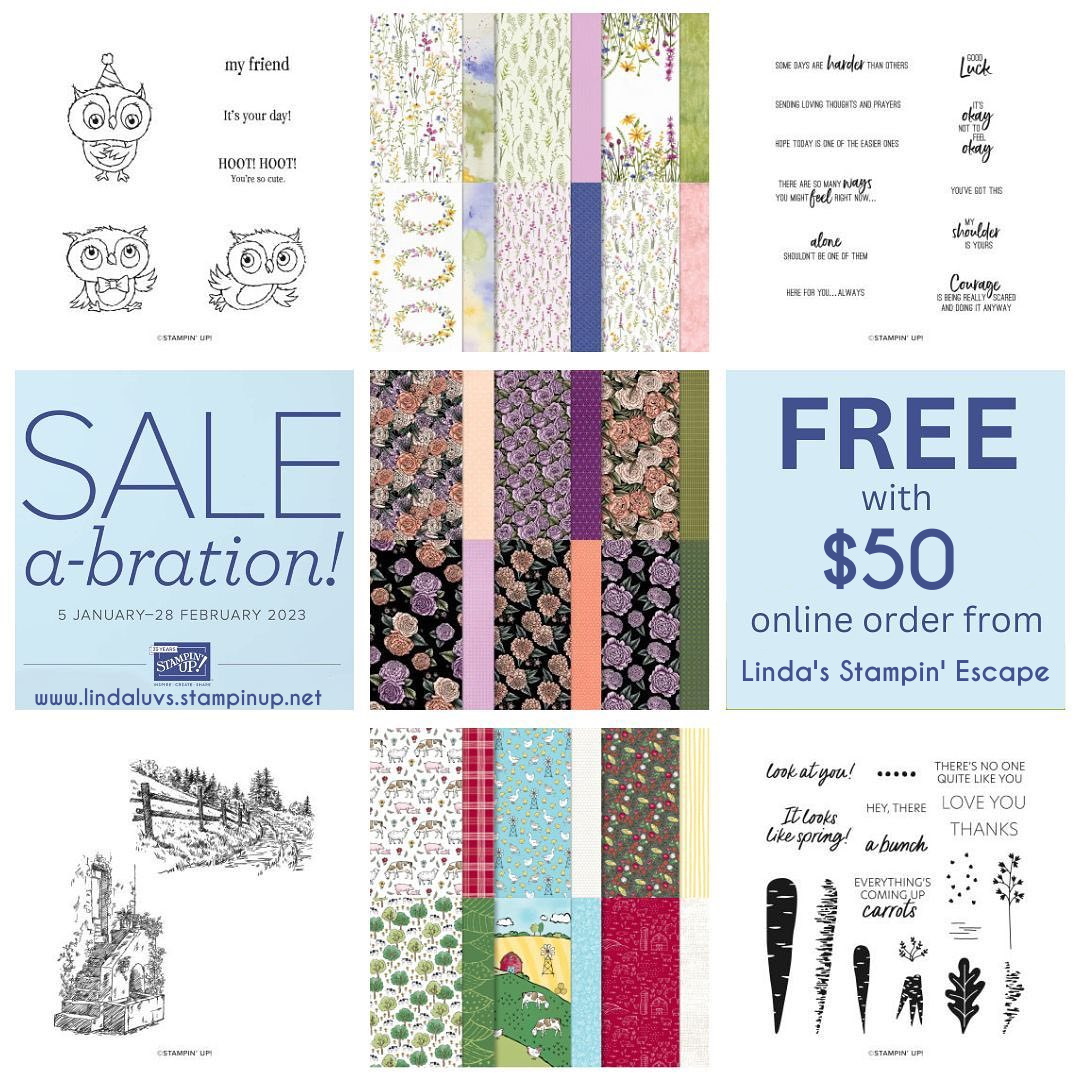
Ready for more? Stampin’ Up! has just added even more products for you to shop, earn, and redeem during Sale-A-Bration! I don’t want you to miss out on these fantastic deals, so be sure to check out the newly added items and get your favorites while supplies last.
As an exciting bonus, Stampin’ Up! has included two exclusive kits in this latest release! The Happy Houseplants and the Hooray for Honeycomb. These all-inclusive kits make crafting effortless and fun—but once they sell out, they’re gone for good! Don’t wait—shop now and make the most of Sale-A-Bration before it’s too late!
Important Reminder: To redeem these products as Sale-A-Bration rewards, you must use the special item numbers listed for Sale-A-Bration. These items have different numbers in the catalog, and using the wrong number will not register them as free rewards—so double-check before you finalize your order!
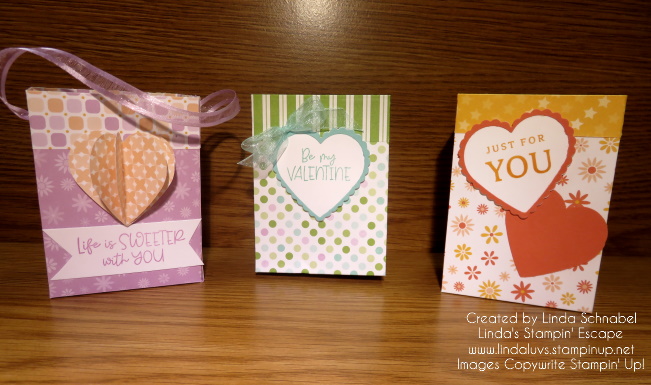
Yesterday, I shared my video and one of the three beautiful cards I created using the Heart Shaped Bundle. Today, I am excited to share the other two designs with you and highlight just how versatile and stunning this bundle is. This item is an absolute must-have, and during Sale-a-bration, you can earn it for FREE! However … I just heard it’s been marked “Low Inventory”.
The Heart Shaped Stamp Set is a heartfelt and creative tool that lets you send messages of love and gratitude in style. This set features sentiments like “My Thoughts of You,” “Thank You,” and “Hello,” making it perfect for Valentine’s Day, friendships, thank-you notes, or any occasion where a little extra love is needed. The floral heart stamp is beautifully detailed and can stand alone as a focal point or complement your sentiments perfectly. Coordinating dies make it easy to highlight the stamped images, add dimension, and create stunning focal points by layering the delicate heart for an eye-catching finish.
Today’s card is layers of the beautiful Floral Delight Designer Series paper which is covered with cheerful flowers in yellow and a nice textured piece with a checked pattern across them both to give the card a warm and welcoming feel.
The floral heart image was stamped using a Old Olive ink and the die cut heart was done in the same color. I chose the “My Heart Loves Your Heart” sentiment, stamping it in Old Olive making everything coordinate, and tie it all together.
The flower was die cut from the same checkered strip of designer paper to make it pop against the green. To elevate that warm and welcoming fell, I added a few of the new Antique Pearls. This card is perfect for sending heartfelt thoughts to a loved one, especially when paired with a handwritten note inside.
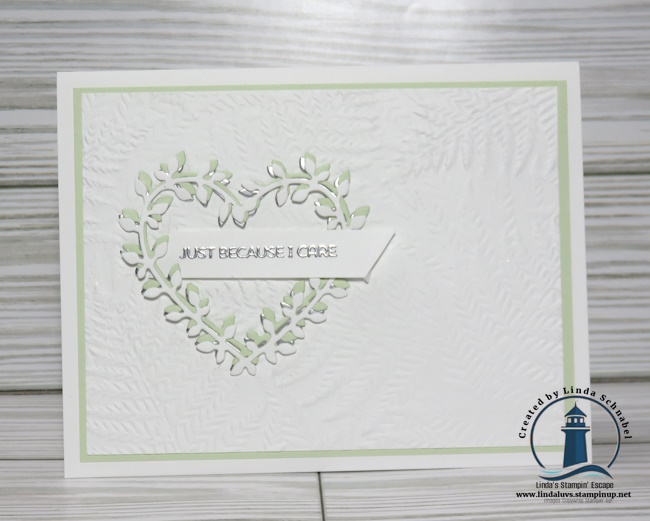
For the last card, I wanted to highlight the coordinating dies to add texture and dimension. I started with the Basic White color for the card base. The intricate heart shape was die-cut in three different colors; Basic White, Silver Foil and Soft Sea Foam, and layered creating a stunning 3D effect.
The background was embossed with the Fern 3-D Embossing Folder to create a soft texture. The “Just Because I Care” sentiment fit was tucked inside the heart, and I heat-embossed it in Silver for a touch of shine. The layered hearts and embossed sentiment creates a simply elegant card brimming with texture.
This beautiful card could easily be sent as a Wedding, Anniversary, Birthday … any occasion really, just by swapping out the sentiment.
The Heart Shaped Bundle is one of the most versatile tools you can add to your crafting collection. Whether you’re making Valentine’s Day cards, thank-you notes, or just sending a simple hello, this bundle has everything you need to create heartfelt, handmade projects. The mix of detailed florals and timeless sentiments ensures you’ll use it over and over again. And the best part? You can earn this bundle for FREE during Sale-a-bration with a qualifying purchase! Don’t miss your chance to own this beautiful set and start creating your own masterpieces. But remember … it’s Low Inventory right now!
Thank you for stopping by today. I hope you feel inspired to create something special with the Heart Shaped Bundle.
Let’s dive into a fun and colorful pairing that I couldn’t wait to share! Meet the Everyday Arches Bundle, a must-have from Stampin’ Up!’s ONLINE Exclusives. This versatile bundle includes stamps and dies designed to help you craft cards that spread encouragement, friendship, and heartfelt thanks. With a variety of sentiments and die sizes, this bundle works for a range of paper crafting projects!
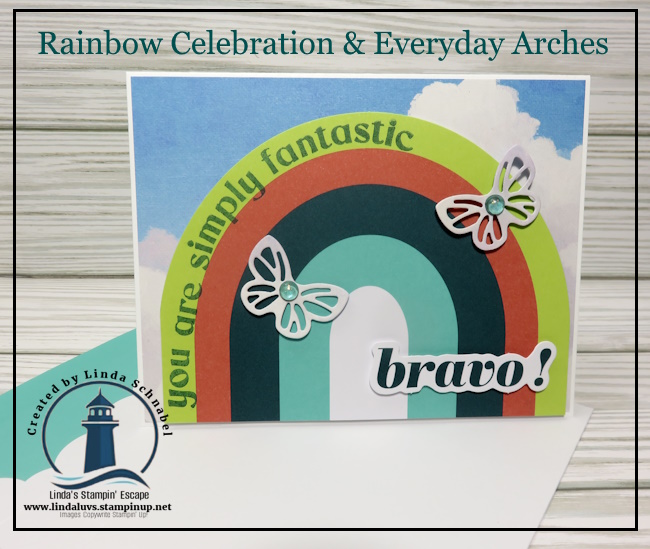
When I first saw the Rainbow Celebration Sale-a-Bration kit, (FREE with qualifying purchase) my creative gears started turning. Could the cheerful rainbows and bold colors from Rainbow Celebration combine beautifully with the graceful arches and sentiments of the Everyday Arches bundle? The answer was a resounding “YES!”
I’m thrilled to share the results of this mash-up! The Rainbows added vibrant pops of color, while the arches brought structure and a touch of elegance. Together, they created cards that are uplifting, modern, and packed with personality.
I’d love to hear what you think of this creative combination! Are you inspired to mix and match your favorite crafting supplies in new ways? Let me know in the comments or share your creations in our crafting community.
You can shop my online store HERE includes the January host code.
Today, I’m sharing the replay of my recent Facebook LIVE where we dove into the delightful Rainbow Celebration Kit from the Sale-A-Bration catalog. If you missed it, don’t worry—you can catch all the tips, tricks, and crafting fun in the video below! 👇
This exclusive kit is all about bright, happy rainbows and cheerful sentiments that bring smiles to any occasion. Whether you’re celebrating a birthday, congratulating someone special, or just spreading joy, these cards are sure to shine.
The best part? You can earn this kit for FREE when you spend $60 or more during Sale-A-Bration. Just add it to your cart at checkout and get ready to craft up a rainbow of happiness!
What’s Inside the Kit:
Predesigned Projects: No guesswork needed—just follow along and let the kit guide you to beautiful results.
Step-by-Step Instructions: Perfect for crafters of all experience levels.
Precut Pieces: Skip the prep and dive straight into the fun!
6 Gorgeous Cards: Includes 2 each of 3 unique designs with coordinating envelopes.
Adhesive Included: Everything you need is right in the box!
Finished Card Size: 5″ x 4-1/4″ Color Palette: Calypso Coral, Lemon Lime Twist, Melon Mambo, Pretty Peacock, Summer Splash
The Rainbow Celebration Kit isn’t just about making cards—it’s about spreading joy with every creation. The bold colors and vibrant rainbows are a reminder of life’s happy moments, and the included supplies make it quick and easy to create something truly special.
🎥 Catch all the action in the replay video below! Watch as I walk you through the kit, share crafting tips, and show you how to assemble these cheerful cards. You’ll see just how effortless (and fun!) it is to turn these supplies into something amazing.
Ready to Get Your Kit?
Don’t wait—Sale-A-Bration won’t last forever! Spend $60 or more today to add the Rainbow Celebration Kit to your crafting collection for FREE. You can begin shopping Tues. January 7th when the catalogs go LIVE!
Happy crafting, and may your day be as bright as a rainbow! 🌈✨
Join me TODAY as we kick off Linda’s Stampin’ Escape Sale-a-bration Party — On my Facebook page! It’s 7 full days of FUN, GAMES, PRIZES, SPECIALS, and Live Demonstrations! 🎁✨
Discover amazing Stampin’ Up! products, get inspired with creative ideas, and enjoy the chance to win fabulous prizes every day! 🏆 Don’t miss out on exclusive specials and a week full of crafting excitement!
Invite your friends, grab your favorite drink, and let’s craft, laugh, and celebrate! 🎨💌
Get ready to fall head over heels for the upcoming Sale-a-bration catalog! One of my favorite new releases is the Heart Shaped Bundle, a versatile set that makes it easy to craft stunning cards filled with love, gratitude, and warm wishes. Whether you’re creating for Valentine’s Day, a thoughtful thank-you, or just to say hello, this bundle has you covered.
The Heart Shaped Stamp Set features beautiful floral heart designs paired with heartfelt sentiments like “My Heart Loves Your Heart,”“Thank You,” and “My Thoughts of You.” You can customize your cards by layering delicate floral details or die-cutting the coordinating label piece to spotlight your favorite sentiments.
Today, I’m excited to share a beautiful card created with this bundle! It features the large floral die cut hearts and “Just Because I Care” sentiment, framed with die-cut details that add the perfect touch of elegance.
Measurements:
Cardstock: Berry Burst 8 ½” x 5 ½” Scored and folded at 4 ¼”
Cardstock 2: Basic Black 5 1/4″ x 4″ plus 3″ x 3″ for die cut heart
Cardstock 3: Daffodil Delight 3” x 3” for die cut heart
Cardstock 4: Granny Apple Green 3” x 3” for die cut heart
Cardstock 4: Basic White 5 ¼” x 4” (inside) and scrap to stamp flowers & greeting
Attach designer paper to black mat and attach that to card front
Using heart die, die cut the Daffodil Delight, Granny Apple Green (remover centers).
Die cut black heart but keep center in the die cut heart.
Attach Daffodil and Granny Apple Green hearts to card front with Liquid glue as shown on picture, then using Stampin’ Dimensionals; attach full black heart to center of card.
Stamp trio of flowers and greeting with Berry Burst ink and then die cut with coordinating dies.
To finish, embellish with the Antique Pearls.
I hope you’re as excited as I am to dive into the Sale-a-bration catalog and start creating with the Heart Shaped Bundle. Stay tuned for more ideas and inspiration as we countdown to launch! ❤️
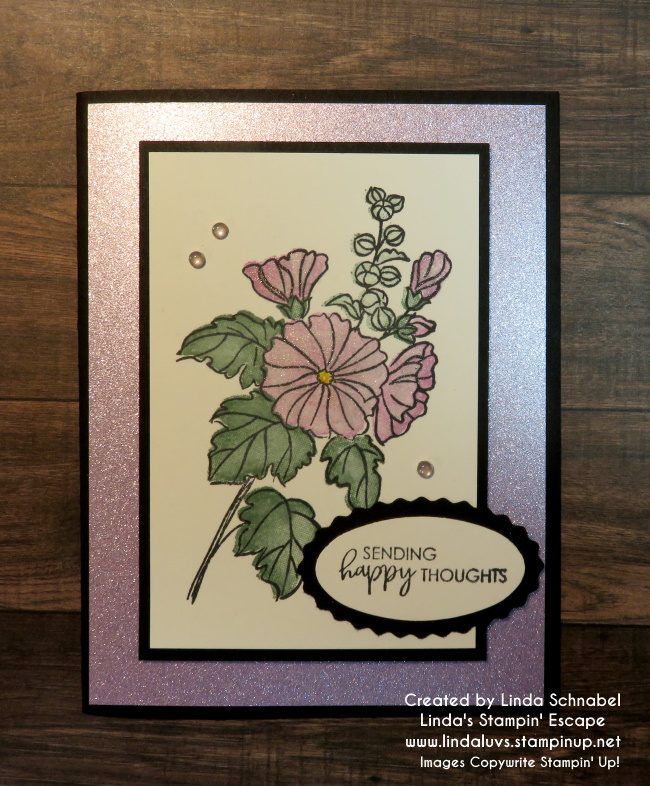
Today, I’m excited to introduce a delightful combination that takes your card-making experience to the next level – the Gold Foiled Flowers Cards paired with the Heartfelt Hexagon bundle. This stunning ensemble not only adds a touch of sophistication to your creations but also makes crafting quick and easy, allowing you to express heartfelt sentiments effortlessly.
The Gold Foiled Flowers Cards bring a touch of elegance and sophistication to your crafting projects. The intricate gold foil detailing on the flowers adds a dash of glamour, making each card a work of art. Whether you’re celebrating a special occasion or simply sending a heartfelt message, these cards set the stage for a memorable experience.
My first card comes directly from the package, except for the added sentiment from the Heartfelt Hexagon Bundle …
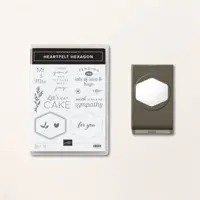
At the heart of this creative endeavor is the Heartfelt Hexagon bundle, a dynamic duo comprising a stamp set and punch. This bundle seamlessly complements the Gold Foiled Flowers Cards, allowing you to create intricate hexagonal designs with ease.
Now I’d like to show you how to maximize your investment by cutting the card apart and creating two for the price of one! This card highlights the “gold” by adding a Gold Foil mat (currently on low inventory status) behind the card front.
The combination of Gold Foiled Flowers Cards and the Heartfelt Hexagon bundle offers a crafting experience that is both enjoyable and user-friendly. Whether you’re a seasoned crafter or a beginner, the simplicity of these tools ensures a seamless creative journey.
I’m using the backside of the card and adding a pop of color. How easy was that!!
The Gold Foiled Flowers Cards paired with the Heartfelt Hexagon bundle is a match made in crafting heaven. Elevate your card-making experience, embrace the benefits of precision and versatility, and let your creativity flow effortlessly. The joy of crafting is in your hands – create, share, and make every moment memorable.
My last card was created for those of you who love to color, and when you color on these Gold Foiled Flowers Cards … magic happens.
But the magic doesn’t stop there – when you include the dazzling Iridescent Foil Gems with these two, you not only add a sparkling finishing touch but also qualify for the FREE Heartfelt Hellos stamp set from our Sale-a-bration catalog. This promotion is a celebration of creativity, rewarding your artistic endeavors with a complimentary stamp set that perfectly complements the elegance of Gold Foiled Flowers and the precision of the Heartfelt Hexagon bundle. Dive into a world of limitless possibilities and let your crafting journey unfold with this captivating ensemble.
Thanks for hanging out with me. I’ve added the links below so you can start creating magic yourself. Have a great day ~
Today, I’m excited to introduce a delightful combination that takes your card-making experience to the next level – the Gold Foiled Flowers Cards paired with the Heartfelt Hexagon bundle. This stunning ensemble not only adds a touch of sophistication to your creations but also makes crafting quick and easy, allowing you to express heartfelt sentiments effortlessly.
Grab a cup of coffee or tea and join me for the replay of my Facebook LIVE … then I’ll share the cards so you can get a better look at their simply stunning beauty.
The Gold Foiled Flowers Cards bring a touch of elegance and sophistication to your crafting projects. The intricate gold foil detailing on the flowers adds a dash of glamour, making each card a work of art. Whether you’re celebrating a special occasion or simply sending a heartfelt message, these cards set the stage for a memorable experience.
My first card comes directly from the package, except for the added sentiment from the Heartfelt Hexagon Bundle …
At the heart of this creative endeavor is the Heartfelt Hexagon bundle, a dynamic duo comprising a stamp set and punch. This bundle seamlessly complements the Gold Foiled Flowers Cards, allowing you to create intricate hexagonal designs with ease.
Now I’d like to show you how to maximize your investment by cutting the card apart and creating two for the price of one! This card highlights the “gold” by adding a Gold Foil mat (currently on low inventory status) behind the card front.
The combination of Gold Foiled Flowers Cards and the Heartfelt Hexagon bundle offers a crafting experience that is both enjoyable and user-friendly. Whether you’re a seasoned crafter or a beginner, the simplicity of these tools ensures a seamless creative journey.
I’m using the backside of the card and adding a pop of color. How easy was that!!
The Gold Foiled Flowers Cards paired with the Heartfelt Hexagon bundle is a match made in crafting heaven. Elevate your card-making experience, embrace the benefits of precision and versatility, and let your creativity flow effortlessly. The joy of crafting is in your hands – create, share, and make every moment memorable.
My last card was created for those of you who love to color, and when you color on these Gold Foiled Flowers Cards … magic happens.
But the magic doesn’t stop there – when you include the dazzling Iridescent Foil Gems with these two, you not only add a sparkling finishing touch but also qualify for the FREE Heartfelt Hellos stamp set from our Sale-a-bration catalog. This promotion is a celebration of creativity, rewarding your artistic endeavors with a complimentary stamp set that perfectly complements the elegance of Gold Foiled Flowers and the precision of the Heartfelt Hexagon bundle. Dive into a world of limitless possibilities and let your crafting journey unfold with this captivating ensemble.
Thanks for hanging out with me. I’ve added the links below so you can start creating magic yourself. Have a great day ~
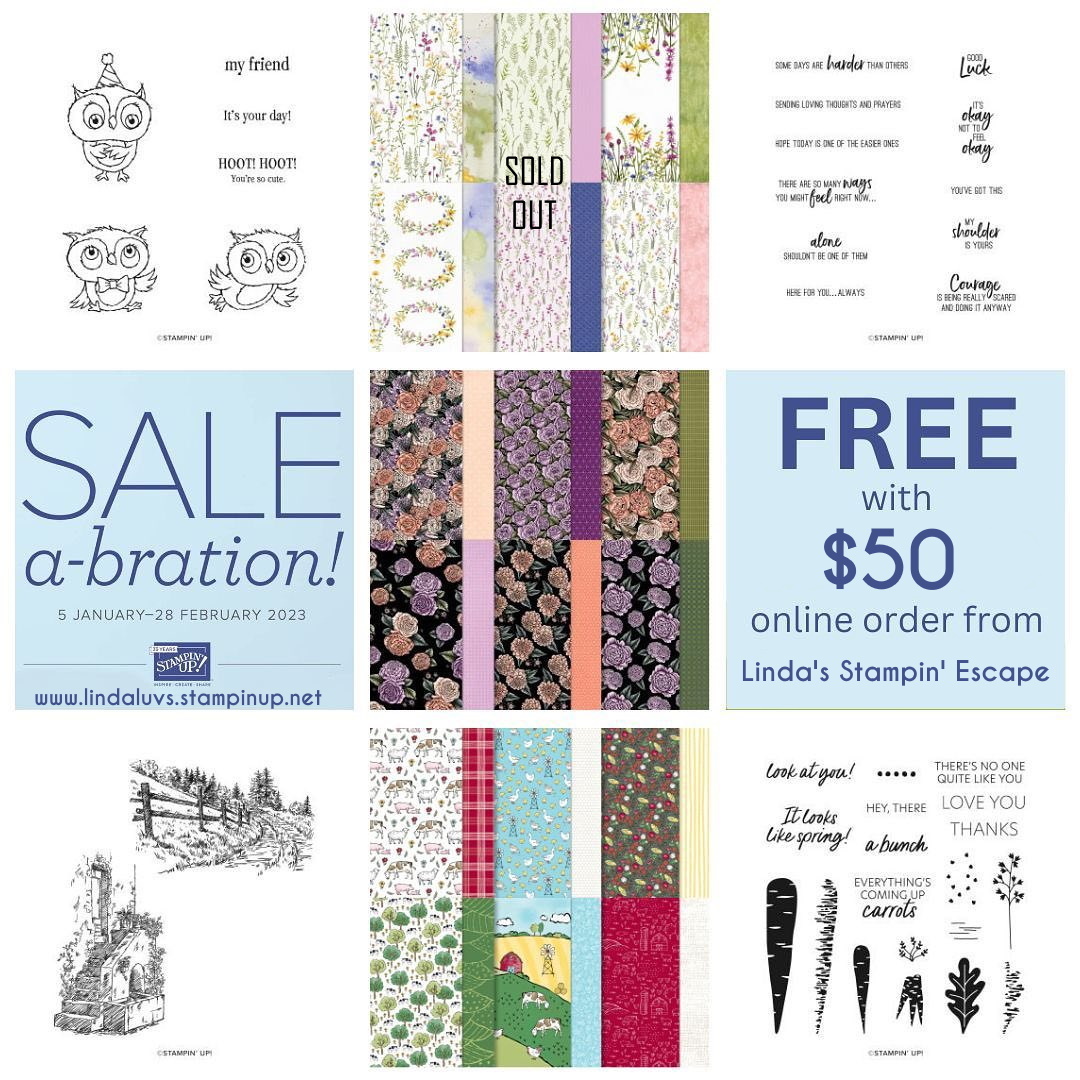
With Sale-a-bration ending Tuesday, February 28th, I’d like to reflect on just some of the creations I have shared with you. There are two levels of FREEbies you can earn and there are NO LIMITS to how many Sale-a-bration items you can earn … WoooHooo!
I’m happy to share that Stampin’ Up! did an amazing job of securing the Sale-a-bration items, we have only run out of the Dainty Designs Designer paper so far …. So I won’t tease you with those samples.
Let’s take a look at some of the cards created with a few of the Sale-a-bration items …. These items are FREE with a $50 purchase (before Ship/Handling).
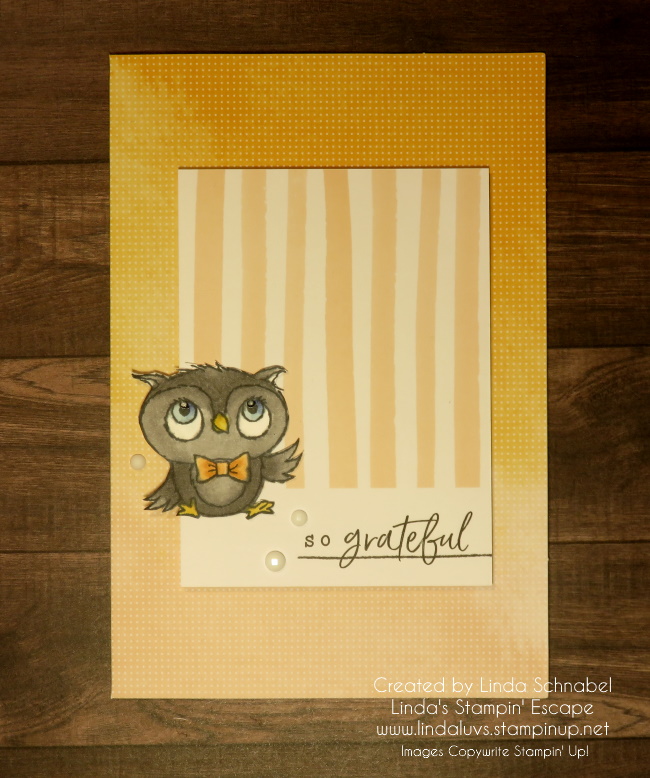
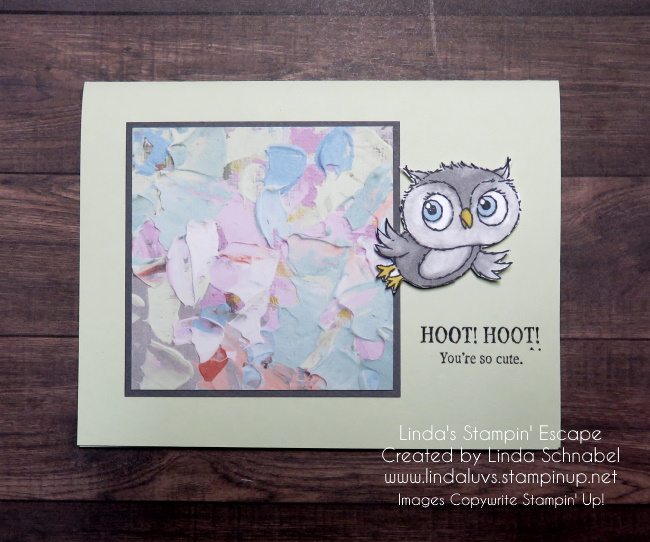
Owl YOUR Ready? Here’s the Adorable Owls Stamp Set …
Favored Flowers 12 x 12 Designer Series Paper ….
Thanks a Bunch Stamp Set …
Oh Wait …. they added MORE!!
Still in the $50 range … The White Frayed Ribbon (2 Spools) …
Enjoy the Journey Designer Series Paper ….
Now let’s take a look at some LEVEL 2 / $100 items. This year I feel the choices were AMAZING!!
Beautifully Happy Stamp Set
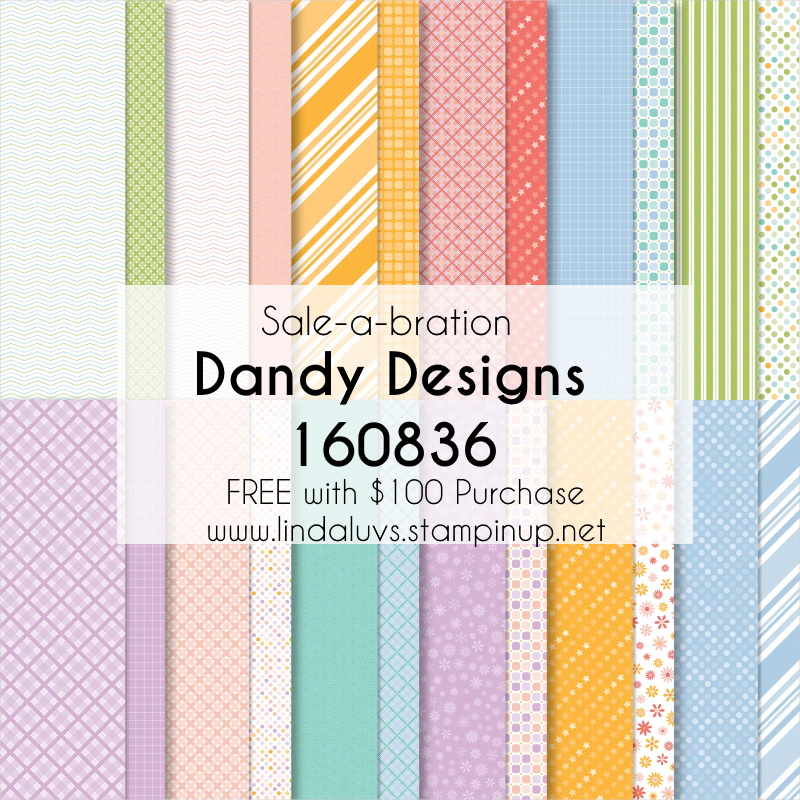
The Dandy Designs 12 x 12 Designer Paper / 48 Sheets!
Here is a quick video to show you more of my samples using Dandy Designs. I just fell in love with this paper. It’s just so versatile and can be used for ANY occasion!
There are so many exclusive and fun items you can earn for FREE with a qualifying purchase but the clock is ticking …. time is running out, Sale-a-bration end at midnight on Tuesday!
As mentioned before, there will not be another Sale-a-bration this year … this is it.
Thank you for checking out my blog today. If you need any help or have any questions, just comment below and I will get in touch with you. There are links to the catalogs on the right column of this blog.
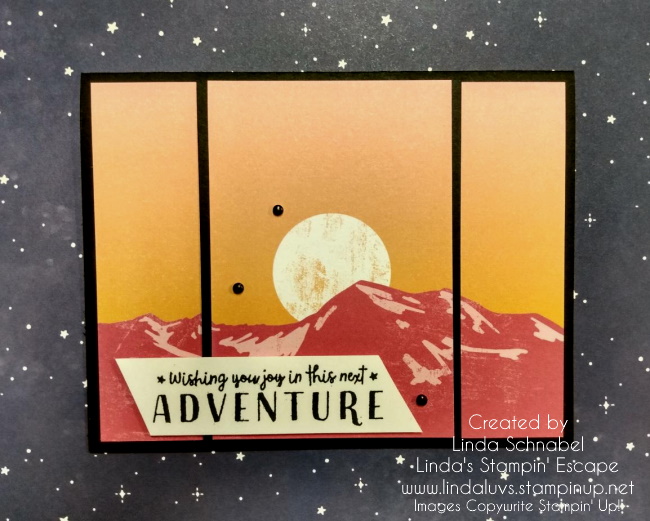
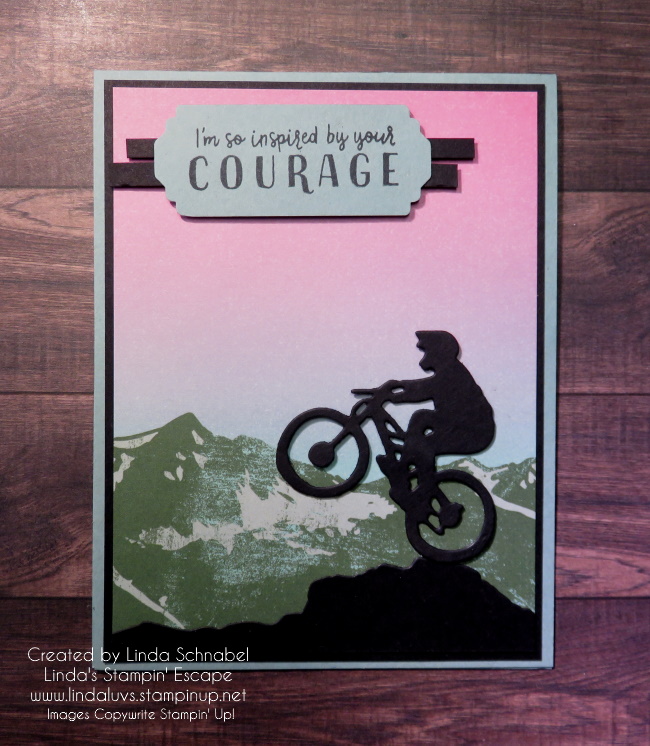
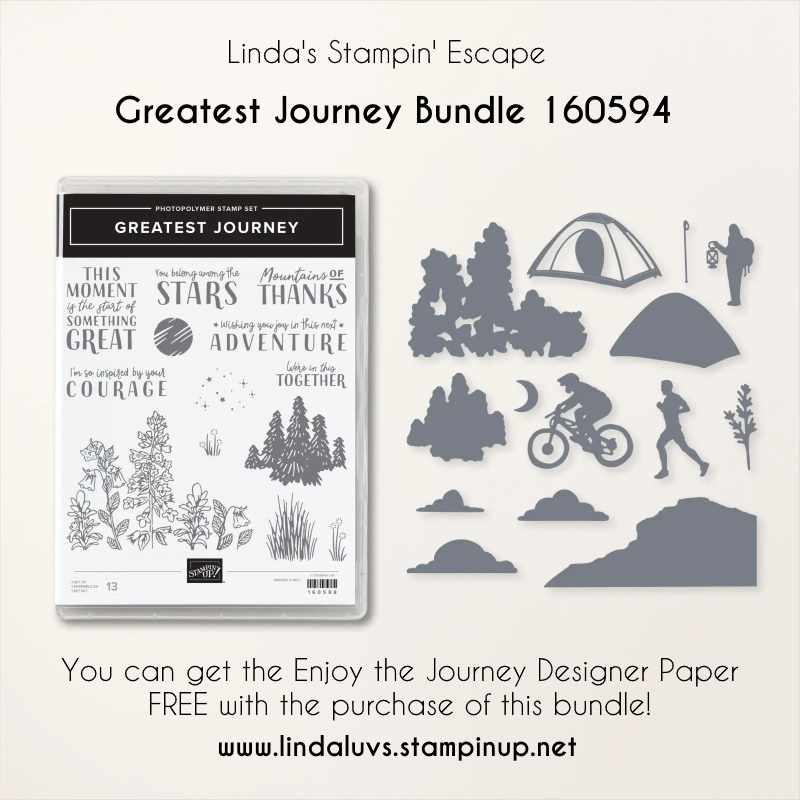
Today I’d like to share a card of inspiration. My card today was inspired by the amazing courage of my neice … Samantha Rose. I’m using the Greatest Journey Bundle … this was on my Wish List from the moment I saw it, and for very personal reasons. I love the sentiments and they are inspirational, yet there is one that is “inspiring” and that is the one I’m using today. I’m also using the dies, specifically the “rider on the bike”.
She was just a little girl, a baby when they discovered that Sammy had CF / Cystic Fibrosis. It affects their lungs and we were told to prepare that she would not have a long life expectancy (things are better now for children) and her health was critical so many times … but this girl persevered.
Approximately 14 years ago she went through her first “double” lung transplant, and has since has another. She is so grateful for her new chance at life (and her donors) that she is not wasting a second … she experiences all she can in life. She has journaled her experiences and connected with others suffering from CF. She has joined in to raise awareness as well …
She continues to amaze all of us .. family and friends, she is a true inspiration. But I have to share the pictures of HOW she celebrates her life that inspired my card today ….
She’s on that bike …
So my card today has the biker in the mountains ….
And I am truly inspired by her courage, the way she chooses to live her life and honor those who gave that second chance to her.
And if she’s nice biking in those mountains, she’s climbing them! Yep … this photo still makes me hold my breath!! Oh Lord, look how high she is!! I could go on for hours about how proud I am of her and the way she honors the life she was given… she is an inspiration. Love this girl …
And flowery foo foo cards are just not her style (that doesn’t mean she doesn’t like flowers) but I just felt this was so fitting for Sammy. The designer paper is so pretty and coordinates perfectly with this bundle, so with some paper and a couple die cuts the card was ready for the sentiment … Inspired by your courage!
Oh yes, and my oldest grandson, well a picture is worth a thousand words! And video’s … oh my, they can be hard to watch LOL.
More power to those who follow their dreams and inspire others by living their best life. I’ll stick to my passion of card making and sharing that!!
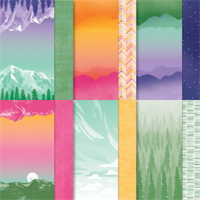
I hope today’s card inspired you. Just so you know, there’s also a tent and a hiker in that bundle, and I have something floating around my mind for one of the designs in that Enjoy your Journey designer paper. Can’t wait to share that one with you!
I think you will agree that this bundle and coordinating designer paper will be an adventure to stamp with as well. Thank you for sharing your time with me today. Have a beautiful day ~
Here is a list of ingredients that I used on today’s card …. Click on the image for more information or to begin shopping. Thank you. ❤
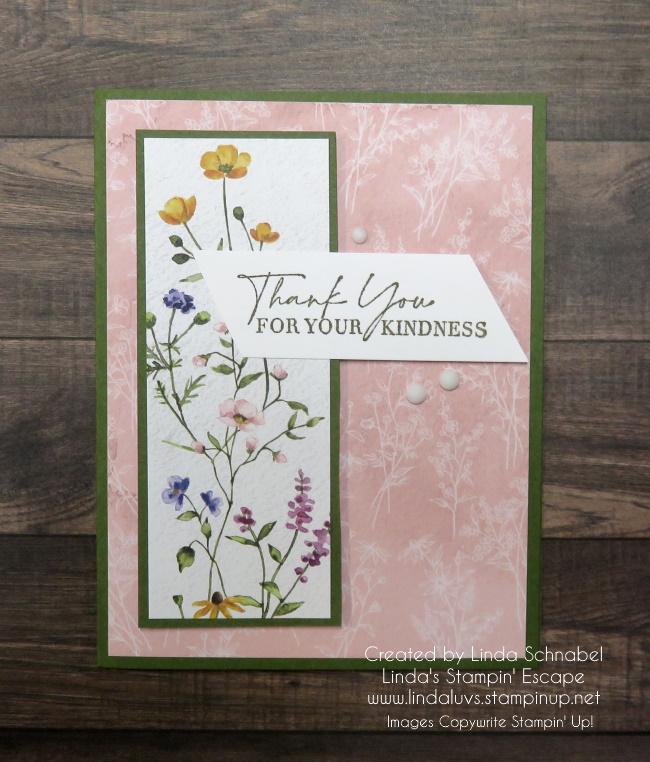
Today I’d like to share a beautiful card created with the Favored Flowers Designer Series paper that comes from our Sale-a-bration catalog so you can earn it for FREE!
Starting with a Fresh Freesia card base and adhere the Petal Pink designer paper to the bottom part of the card base. Stamp the Fresh Freesia cardstock with the flower stamp randomly using the Fresh Freesia ink pad. Rub the edges of the cardstock with the Fresh Freesia ink pad. Adhere the layer to the card.
Adhere the flowered designer paper to the Basic Black cardstock, the place a piece of White Twine on top of the Designer Paper and adhere the ends to the back of the Basic Black cardstock. Tie a smaller piece of Twine in a knot, then make a bow. Adhere this layer to the card.
Stamp the greeting on a scrap Petal Pink cardstock using its matching ink pad. Cut out the greeting using the label die. Add it to the card using Dimensionals.
What a lovely way to say thank you! Do you have this designer paper yet? There’s still time, but it will be gone in two weeks … Sale-a-bration ends February 28th!
Thank you for joining me today. Happy Galentines Day!!
It’s Sale-A-Bration, and it’s one of our biggest promotions of the year, and it’s only happening once this year! It’s overflowing with opportunities for YOU, and filled with fun for everyone! Grab your Sale-A-Bration brochure and check out the great products for FREE when you shop, host, or join …Time is Flying By and this amazing promotion ends soon.
They say a picture is worth a thousand words to let me paint one for you …
You can shop from either the Annual Catalog or the NEW Jan-April Mini Catalog … yes, I said through April! Sale-a-bration ends in 29 days … wow, time sure flies by and you won’t want to miss out on your favorites.
Here are some of the FREE items you can choose from ….
Here are the product that are FREE with a $100 purchase ….
OH WAIT … There is MORE!! That’s right, Stampin’ Up! has added more FREE Products to choose from, some of your favorites from the catalog.
You could also HOST a virtual or in home stampin’ party with me and we will have fun checking out some of the NEW products, stamping some cute cards and earning you some great products!
If you’ve ever attended one of my Launch Parties or Kick-Off parties you know how much fun they are, and I can create a Private Virtual Party for you and your friends.
However my friend, if you are like me and want it all … consider joining my team, and I will show you how to Save money … or Make money, the choice is yours. I hear to guide you, and not only do you have me but you’ll get to know the rest of my team, and 40,000 other of our closest Stampin’ Up! sisters and brothers worldwide. We love to share! And that’s not it ….
In addition to the already excellent value of the Starter Kit, if a customer decides to sign up as a Stampin’ Up! demonstrator during Sale-A-Bration, they can choose from three incredible options:
Option 1: The exclusive Boho Blue Mini Machine ($63 value) + your choice of $175* of Stampin’ Up! products for only $129.
Option 2: The original white Mini Machine ($63 value) + your choice of $175* of Stampin’ Up! products for only $129.
Option 3: Your choice of $175 of Stampin’ Up! products for only $99.
Ummm … yea, that is a REALLY good deal. WOW … That is over 56% Savings!! JOIN HERE or contact me with any questions / concerns.
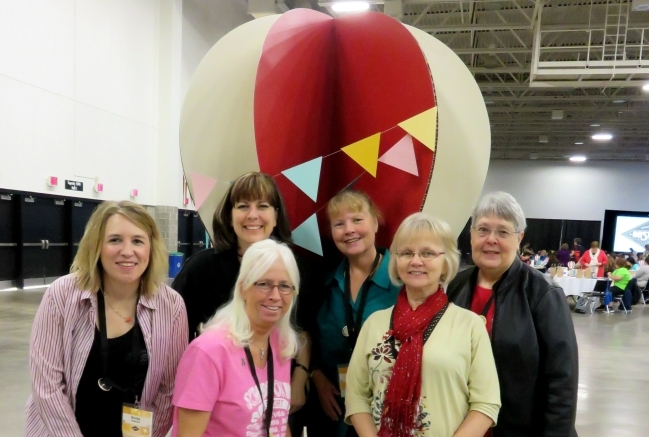
Here’s part of my amazing team and we’d love to have you join us for our next stamping get together. We’re at a Stampin’ Up! event celebrating our achievements and just having FUN!!
I hope you consider joining me and my team, or having a party for your friends … just know that I am here to help you, even if you would like help placing your order.
Thank you so much for taking the time to check out my blog post today. Enjoy your day.
Today I’d like to share a simple card created with the Amazing Silhouettes stamp set from our Annual Stampin’ Up! Catalog. Get back to nature with the nature-inspired images in the Amazing Silhouettes Stamp Set. Create beautiful silhouettes in one simple step. Use one color to make a bold impression or multiple colors for an ombre look.
My card base is Mossy Meadow and the beautiful designer paper is Sale-a-brations very own Dainty Flowers … the paper you can get for FREE with a $50 purchase. Because the Dainty Flowers paper has shades of Mossy Meadow and Old Olive, I used the Old Olive ink for my stamped silhouette and my greeting…. both on Basic White cardstock.
I wrapped bakers twine around my stamped image to create some texture and add a touch of nature to the card. This entire piece was popped up with Stampin’ Dimensionals.
The greeting is a bit more than what I usually use for a Simply Sunday card but I couldn’t resist. Meet the Charming Sentiments Stamp Set, which includes various sentiments in different stylistic fonts designed to be used for all occasions. With this set, say thank you and congratulations, wish happy birthday and good luck, and show people you care. Grab some ink, pair with the images of your choice, and create your personalized handmade cards.
Love this sentiment set, and it gets better because it has coordinating dies!! That’s right … you can stamp your sentiments directly or die cut them and add them anywhere on your card! I also cut out a mat using the greeting die for some additional layering and to enhance the sentiment.
A great sentiment stamp set (with dies) is a must have for any stamp room, and a good investment as you can use it with any other stamp set, or just to add it to some of our stunning designer paper that doesn’t need anything else!
A simple card today that could be used for a man or a women, perfect isn’t it? I thank you for taking time out of your Sunday for the visit.
Have a great day ~
Here is a list of ingredients used in today’s card. You can click on any one for more information about the product, or to begin shopping at my OnLine store. Thank you for your support.
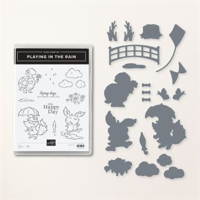
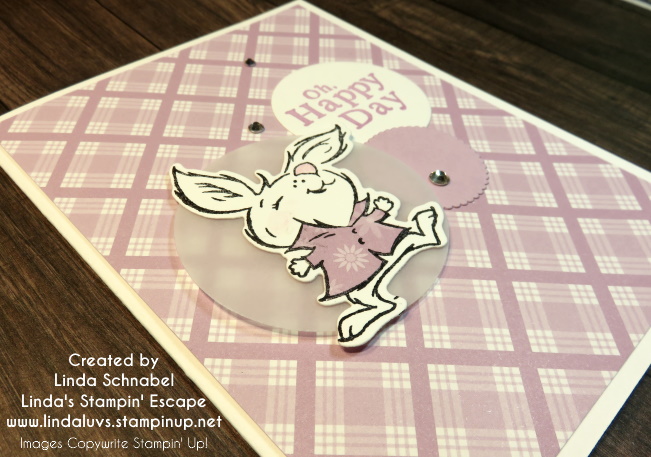
A little late out of the gate today but you’ll see it’s worth the wait. My Oh Happy Day card using Playing in the Rain is sure to bring a smile to anyone who receives it! It is a monochromatic card (basically one color: Fresh Freesia) and a fun stampin’ tip you can use over and over again.
Let’s take a look at today’s card ….
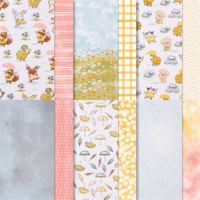
I teamed up the bunny from Playing in the Rain with the Fresh Freesia from the Dandy Designs out of the Sale-a-bration catalog. This is one of the items you can get FREE with a qualifying purchase of $100. There are 48 – 12″ x 12″ sheets in this package.
Need patterned paper that can be used for any season or occasion? The Dandy Designs Designer Series Paper is the one for you! It includes versatile patterns such as plaids, polka dots, and stripes. Make this paper the background for a card or scrapbook page. Or cut it into strips or accent pieces. However you use this paper, it will make any creation look dandy!
If you look closely, you will see two different patterns. I stamped the bunny image on the floral pattern and then cut out the shirt and dressed my bunny in his new outfit!! You can tell by his reaction that he loves his new shirt …. LOL
This technique is fun to use and can be done on almost anything! This angle shows you the layers of circles that I cut out using the Layering Circle dies, and I used the vellum cardstock to highlight the bunny… he is attached directly to the vellum and then popped up with Stampin’ Dimensionals.
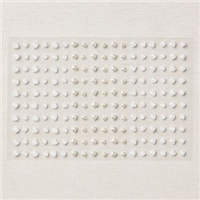
I stamped the greeting with Fresh Freesia, but it with the Layering Circle dies and tucked it in with the other circles. I finished off the card by embellishing it with the Basic Rhinestones.
Thank you for hanging out with me today. How are you liking the Playing in the Rain so far? I shared 3 different designs this week, and will share more soon.
Tomorrow I have a whole new stamp set that has been just waiting for me to pull it off the shelf!
See you then ~
Here is a list of ingredients used in today’s card. You can click on any one for more information about the product, or to begin shopping at my OnLine store. Thank you for your support.
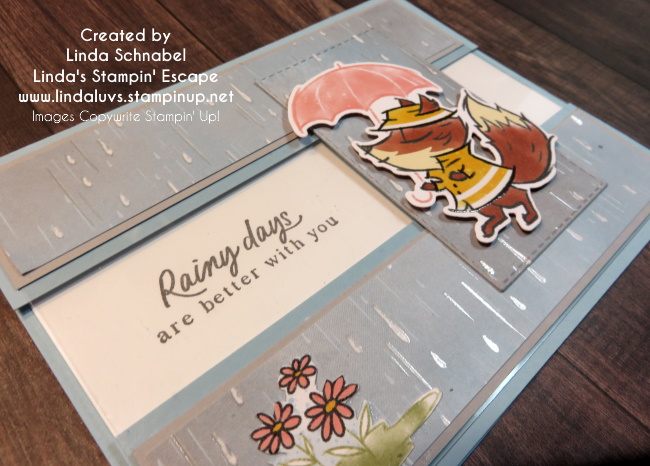
Today I want to share another card from the Playing in the Rain using the same Window Card layout as I did yesterday. The only thing I changed was moving my “bridge” to the other side of the card, and of course my designer paper pattern and critter!
I wanted to share one of the two “rain” patterns that are included in the Rain or Shine Specialty designer series paper. This paper is a bit on the stormy side, however life can still be beautiful if we have a positive attitude. They say, it’s not what happens in life, but how we react to it …
And this happy fox doesn’t seem to let that stormy weather bother him at all. I fussy cut the flowers out again because I wanted a touch of pink in the card to coordinate with the umbrella and to create a better flow on my card. I changed the greeting as well … and I agree, rainy days are always better when your with people you care about.
Measurements:
Card base = 8-1/2″ x 5-1/2″ Score at 4-1/4″ then Cut at 5-3/4″ … cut 1-1/2″ from the piece you cut off.
Window Sheet & Basic White Inside: 5-1/4″ x 4″
Mat: 5-1/4″ x 1-1/4″
Designer Paper: 5-1/8″ x 1-1/8″
I wanted to show the “embossing” on the Rain or Shine Specialty Designer paper and how much dimension and texture you create with the layers of this card …
And by the way … got the greeting down on the first try! lol I have just begun to play with this cute bundle … Don’t worry, I’ll be sharing them with you!
Thanks so much for stopping back today. Hope you have a wonderful weekend.
Here is the list of supplies that I used for today’s card ….