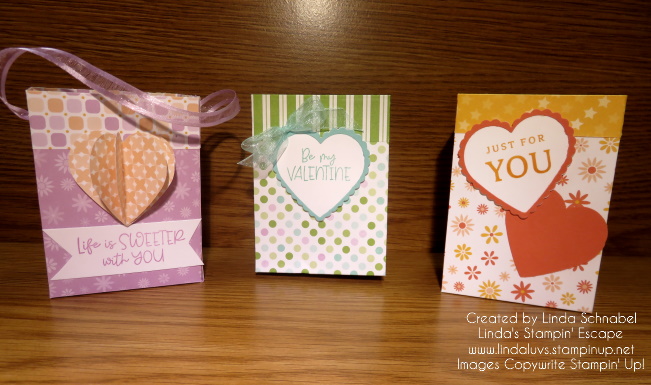
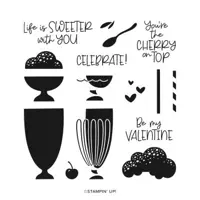
Happy Wednesday! Today I will be sharing the replay of my Facebook LIVE presentation from last night: Punchin’ with Heart: Creating Cute Valentine Treat Boxes I’m going to show you how quick & easy it is to make these cute boxes along with some fun tips for your Heart Punches. Did I mention cards too!!
Grab a beverage, sit back, relax and join me for my replay and the things that happen when your LIVE!
Hope you enjoyed and caught those tips! Here are the dimensions for the boxes. Start with a 12″ x 12″ – cut in half so you have a 12″ x 6″ sheet to start with.
Score at 2″ – 5″ – 7″ and 10″ at 11″ cut off end.
Turn paper 90 degrees and score at 1″
Turn 180 degrees and score at 1″
Burnish all score lines and cut and trim as shown in the video
Here is the card I created in the video too …
Thank you for hanging out with me today. I hope you enjoyed these cute boxes and were inspired to create some yourself.
Here is a list of ingredients used in today’s card. You can click on any one for more information about the product, or to begin shopping at my OnLine store. Thank you for your support.
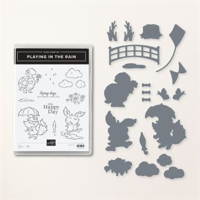
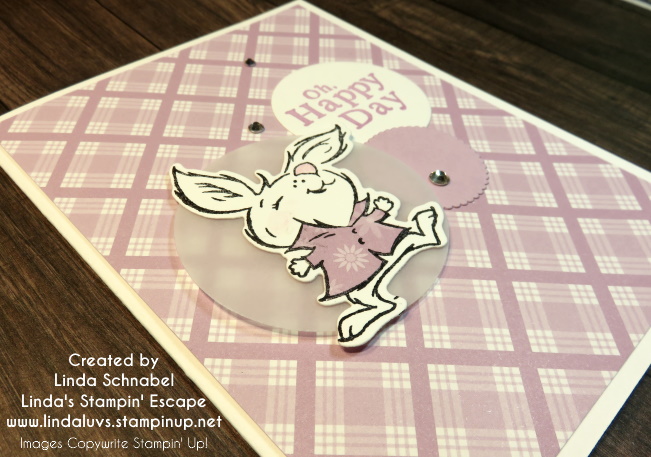
A little late out of the gate today but you’ll see it’s worth the wait. My Oh Happy Day card using Playing in the Rain is sure to bring a smile to anyone who receives it! It is a monochromatic card (basically one color: Fresh Freesia) and a fun stampin’ tip you can use over and over again.
Let’s take a look at today’s card ….
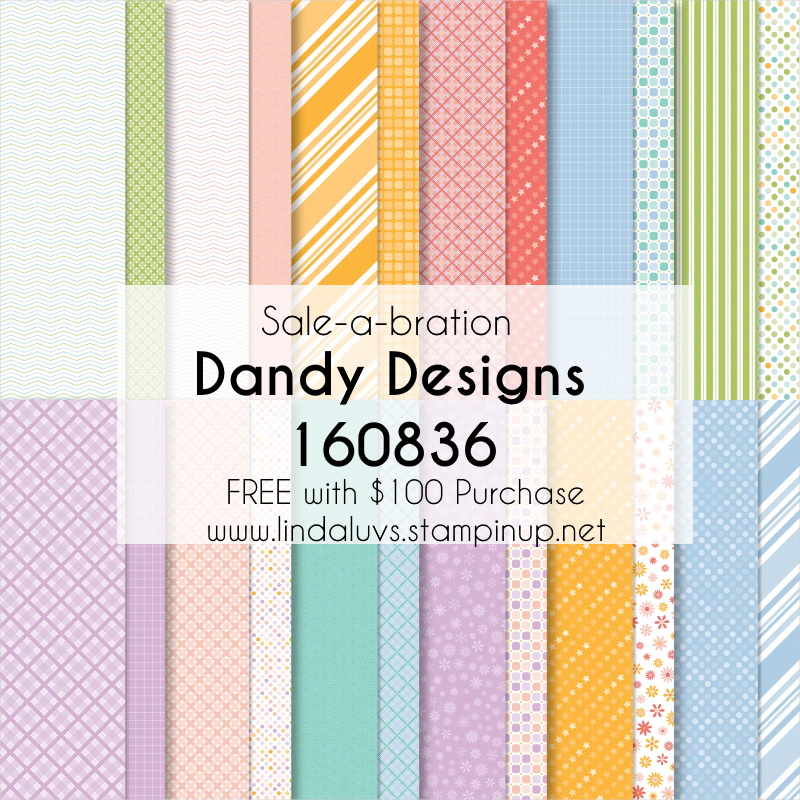
I teamed up the bunny from Playing in the Rain with the Fresh Freesia from the Dandy Designs out of the Sale-a-bration catalog. This is one of the items you can get FREE with a qualifying purchase of $100. There are 48 – 12″ x 12″ sheets in this package.
Need patterned paper that can be used for any season or occasion? The Dandy Designs Designer Series Paper is the one for you! It includes versatile patterns such as plaids, polka dots, and stripes. Make this paper the background for a card or scrapbook page. Or cut it into strips or accent pieces. However you use this paper, it will make any creation look dandy!
If you look closely, you will see two different patterns. I stamped the bunny image on the floral pattern and then cut out the shirt and dressed my bunny in his new outfit!! You can tell by his reaction that he loves his new shirt …. LOL
This technique is fun to use and can be done on almost anything! This angle shows you the layers of circles that I cut out using the Layering Circle dies, and I used the vellum cardstock to highlight the bunny… he is attached directly to the vellum and then popped up with Stampin’ Dimensionals.
I stamped the greeting with Fresh Freesia, but it with the Layering Circle dies and tucked it in with the other circles. I finished off the card by embellishing it with the Basic Rhinestones.
Thank you for hanging out with me today. How are you liking the Playing in the Rain so far? I shared 3 different designs this week, and will share more soon.
Tomorrow I have a whole new stamp set that has been just waiting for me to pull it off the shelf!
See you then ~
Here is a list of ingredients used in today’s card. You can click on any one for more information about the product, or to begin shopping at my OnLine store. Thank you for your support.
Are you ready for some more fun cards? I’m getting punchy with the Fun Cut pattern and Dandy Designs paper I shared with you yesterday. I thought I’d share some cute cards you can recreate right away by using punches you have in your stamp room. I also added the Organdy Glitter ribbon and Iridescent Rhinestones.
Let’s take a look! Today I’m using the paper with with the Fresh Freesia and the Petal Pink. We’ll start out with the Heart Punch Pack. I punched the solid heart from the designer paper and the Scalloped Heart in Basic White cardstock.
So you’ll see the same layouts as yesterday, just my new colors and I’m highlighting the Peaceful Moments stamp set … I’m using this for my greetings on all 4 of the cards. Here you will also see the Stitched with Whimsy dies which adds texture and this cute pattern of stitching which really frames your greeting. Both the greeting and the hearts are popped up with Stampin’ Dimensionals.
My second card features the Label Me Lovely punch …
This sweet and simple card also showcase a bit of bling with the Iridescent Rhinestones and White Organdy Glitter Ribbon … WOW these go together really nicely! I tied my bow “first” and then attached it to the ribbon with a Mini Glue Dot.
The third card … there she is, our Medium Daisy Punch!
Once you get your Dandy Designs paper cut and laid out onto your card mat, you can really whip out a whole stack of cards. I just added a simple banner with my Daisy and then added a few Iridescent Rhinestones.
For my last card I kept it really simple, and sorry, but on punch …
Again I brought in the Stitched Whimsy Dies, Organdy Glitter Ribbon and Iridescent Rhinestones. This pattern, a great sentiment set and a few items you have in your stamp room will create wonderful cards to share and bring joy to a friend or family member.
I want to thank you for joining me today. Have an awesome Thursday …
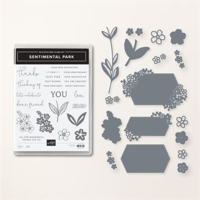
I’m thrilled to share the cards and the cutting pattern from my Facebook LIVE last night. I will share the replay with you which walks you through the cutting pattern, how to assemble and then finished cards created with the Sentimental Park Bundle. Plus you’ll learn a really cool way to use your Sentimental Park label dies.
Let’s watch the video first ….
Pretty cool right? A special Thanks to LeAnne Greff for sharing her Designer Paper pattern with all of us. The Dandy Designs makes picking patterns pretty easy too, and the Sentimental Park bundle … is it on your Wish List now? I love sentiment stamp sets and the fact that we can create so many with this set is amazing, and I love dies that are not like all the rest.
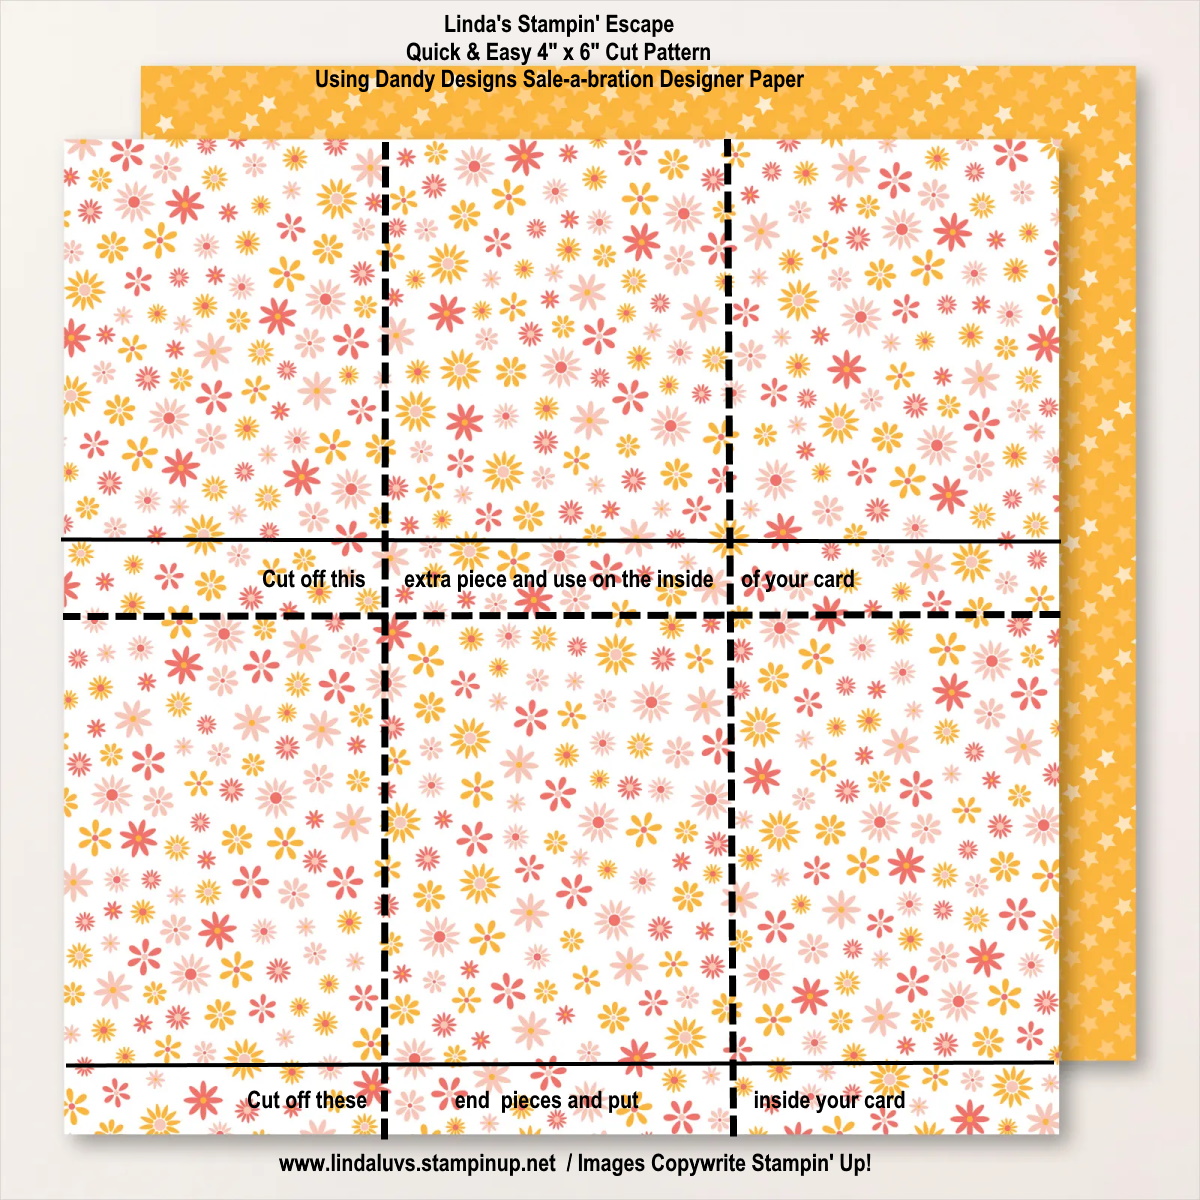
Here is a “cheat sheet” so you can remember the cutting dimensions. Feel free to click on the image and download it so you can keep it in your files.
Between the video and the pattern, I hope you feel inspired enough to make some of these up yourself. I will share the rest of my color pallets with you the next few days but let’s get a better look at the ones I did last night …
On this card I only used 2 of the 4 patterns that I cut. I used the smaller of the two label dies with the flowers (it’s so cute) then I added the Fresh Freesia Opaque Adhesive Backed Gems and a swatch of the Fresh Freesia ribbon.
Next up is the cute flowers, you can use them separately, or layer them as I did …
I used the second smallest circle from the Stylish Shapes dies for my greeting on this card. Can you see the embossing on the flowers in the center… too cute.
Another card for you …..
This is the largest of the dies with the floral pieces on it. I also used the Opaque Adhesive-backed Gems on this card … they were right, but I used my Stampin’ Blends to color them so they popped on the die cut. I also added Wink of Stella to the flowers.
Now we’re going to use this die to cut a piece of Fresh Freesia ….
This one is special because we can tuck the solid die cut label and tuck it into the floral one … I flipped when I figured this out. Image this in whites, it would make a perfect wedding card. Add Gold and turn it into an anniversary card. The possibilities are endless … see why I fell in love with this amazing bundle!?
Love this cute cutting pattern, and trust me, you can use this pattern with any of your favorite designer papers. So I hope you go into your stamp room today and try it out. And if you fell in love with the Sentimental Park bundle, I have the link for you below … just click on it and you can have it in your stampin’ stash soon.
Thank you so much for hanging out with me today.
Have a beautiful day ~
The supplies I used to create today’s card is listed here ….
Today I’m thrilled to share this beauty I created with scraps left over from tonight’s Facebook LIVE. It’s so cute! I’m using the Dandy Designs Designer paper from the Sale-a-bration catalog. I’ve got a really cute project planned for tonight’s LIVE so I hope you join me at 6:30 HERE.
So my scraps are 1″ wide and then I cut them down to 3-1/2″ in length so they would fit when I laid them out on my card. The colors are so bright and cheery and well … that Daisy returns (I think I am waiting impatiently for Spring!) or I just want to cheer up a friend and everything just goes together so nicely.
My greeting comes from the NEW Sentimental Park stamp set from the Jan-April Mini Catalog and is stamped in Coastal Cabana. I die cut my greeting with the largest of the banners from the Stylish Shapes dies, this is a great set of dies to have because there are the banners, circles and squares.
Thanks so much for joining me today, I hope you consider joining me tonight for my Facebook LIVE to see what I’m doing with the rest of that designer paper!!
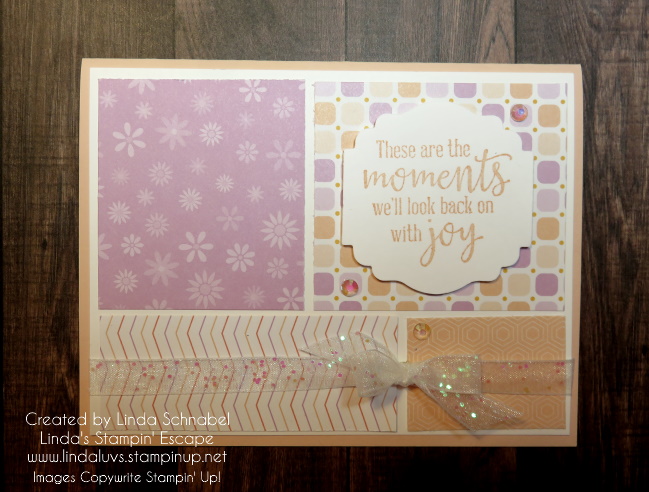
Today I have one more card from my quick & easy cut patterns I shared yesterday. It comes from the 4″ x 6″ pattern cut down to 5-1/4″ …. using the Dandy Designs as well and mounting it onto a Coastal Cabana cardbase.
The greeting comes from the Charming Sentiments stamp set and stamped with Coastal Cabana ink … I just cut the points off the square to create a look similar to the squares on the designer paper.
I punched 6 daisies out and layered them to create 3 flowers and added Coastal Cabana to the centers. These add so much dimension and texture to your card and they are cute!
Once those daisies are popped up with dimensionals, I added a little Wink of Stella to the centers to add a little sparkle. Not much else to say … this card is that simple, but will bring a smile to who ever receives it.
I think we all like making quick & cute cards ….
Thank you for stopping by today. Have a wonderful week.
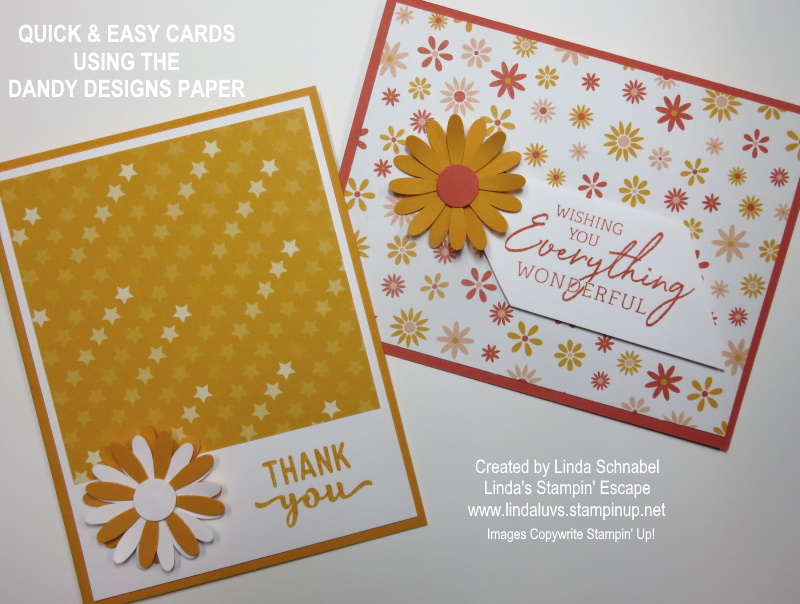
Today I’ll share a few Quick & Easy cards that I created with the Dandy Designs Designer paper in the Sale-a-bration Catalog. The idea behind these creations is to “cut” your designer paper and use it! lol
We begin by cutting 4″ strips from our 12 x 12 Designer paper … then cut it in half (6″). From there we trim it down to 5-1/4″. This gives us a nice border around our card base, and that little left over piece can be used to decorate the inside of your card.
All of my cards have been embellished with the Medium Daisy Punch ….
With this quick & easy cut pattern, you can create 6 cards per sheet ….
This is just a representation of the cut pattern and NOT “exact” measurements.
Next up we have a 4″ x 4″ cut pattern with results in 9 cards per sheet. There are more ways to use both of these cut patterns. I’m just sharing the most popular / simple card designs. Also note that the peek of paper behind the designs cut is the reverse side of the these designer paper sheets.
This is just a representation of the cut pattern and NOT “exact” measurements.
On this card we are creating a card with the 4″ x 4″ square with a twist … We cut the square piece of designer paper diagonally … from corner to corner. Then you attach to card at opposite ends to create the “Split Card Technique”. How cool is that!
You can use this fun and easy technique with any designer paper but with 48 sheets in the Dandy Designs package you will have an endless supply of fun, and so many card possibilities. Dandy Designs is one of the choices in FREE merchandise during Sale-a-bration.
My last card also uses the 4″ x 4″ piece, however we trimmed it down a 1/4″ off the top and side so we could have a nice border around it …..
These quick & easy cards were all created during my LIVE presentation yesterday for my Catalog Launch party. I go LIVE on Tuesday Nights at 6:30 with New Products, Fun Folds or Techniques … always a fun time and great projects! Hope to see you there.
Thank you for stopping by this Sunday. Have a wonderful day ~
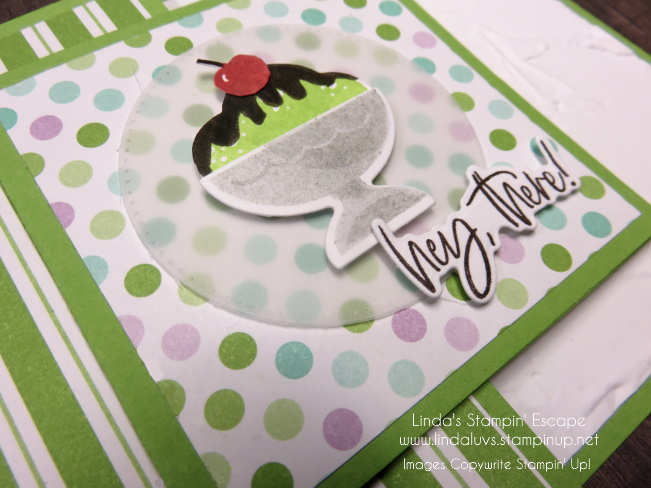
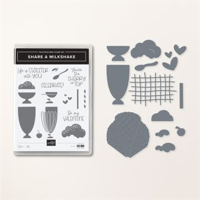
Today I’d like to share the card that I demonstrated on during my Facebook LIVE last night: My Share a Milkshake Fun Fold Card. Sorry I couldn’t get the video to download, but you can view it HERE on my Facebook page. It will be much easier and quicker to understand how the card is created, plus I shared some tips as well.
So you know I’m highlighting the Share a Milkshake, the Designer Paper comes from our Sale-a-bration catalog!! The Dandy Designs has 48 – 12″ x 12″ sheets in the yummiest colors: Balmy Blue, Calypso Coral, Fresh Freesia, Granny Apple Green (what I used for my card base) Mango Melody and Petal Pink.
Let me show you the “closed” view … If you watched my LIVE last night, you will see a few changes!
Boy … that mint ice cream with hot fudge really does look delicious! And, I added the cherry on top and a greeting which I stamped in hot fudge, OH … I mean Early Espresso. The greeting comes from the Charming Sentiments bundle.
The vellum cardstock was cut with the Stylish Shapes Dies, a great staple to have in your stash because it has circles … squares … and banners for your greetings. I popped up the greeting and the ice cream with the small stamping dimensionals.
Ok … now lets get to the FUN in this fun fold. The card base is 8-1/4″ x 4-1/4″ then scored at 2-3/4″. The “z” part of our Fun Fold that gets attached to the front measures 9″ x 3″ and scored at 3″ and 6″. The striped designer paper measures 4″ x 2-1/2″. The two pieces for the “z” measure 2-3/4″ x 2-3/4″.
Now … isn’t that fun!? The front flap opens to the left but the “Z” folds over the top of that! You really need to head over to my Facebook page and check out the video HERE. The “sweet” sentiment on the inside comes from the Share a Milkshake bundle… Don’t you think those two fonts look nice together? Almost like they were made to be paired up … like the cherry on top!!
Thank you for stopping by and sharing a your time with me … Hope you enjoyed the Ice Cream!
Have a great day ~
Here is a list of the supplies used for this card …