Hello Stampin’ Friends ~
I am tickled pink to share today’s card with you. With Valentines Day approaching quicker than we’d like to think and I cannot get enough of these little owls from the Adorable Owls so they are highlighting my card again today. The Adorable Owls will be FREE during Sale-a-bration with a qualifying order.
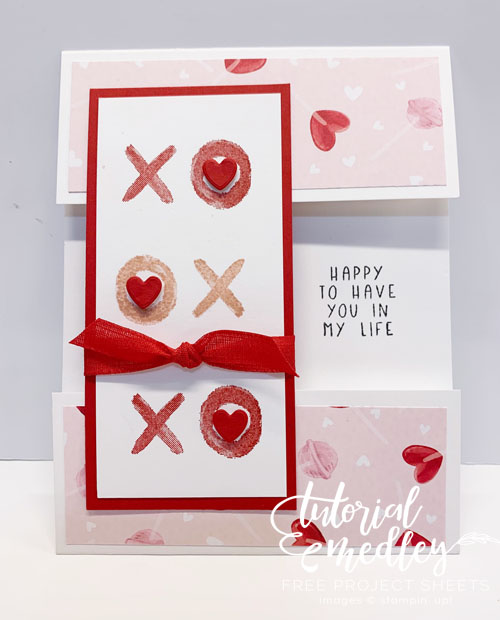
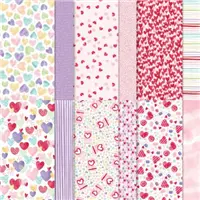
First let me start with the Sweet Talk Designer Paper … it’s on the Clearance Rack and is as adorable as these owls!

The sheet I chose has the two patterns you see … one on the front and one on the back, and then I used the Black Glitter Washi Tape from the Holiday catalog that retires on the 4th of this month. I used Real Red for my card base to coordinate with the Sweet Talk Designer paper. Let’s take a look …. Now let’s talk about our Adorable Owls!!
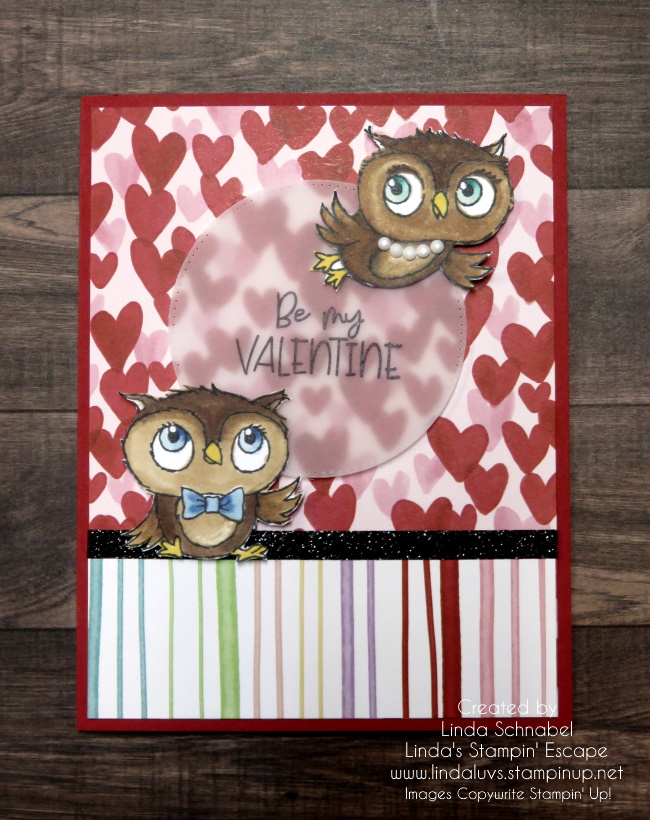
I stamp them with Momento Ink on Basic White Cardstock, and then color them with our Stampin’ Blends Alcohol markers. Yesterday I used the Smoky Slate Combo pack to color and today chose the Natural Tones Stampin’ Blends.
I used 200 from the Deep Tones, and 500 from the Medium Tones Combo. The Natural Tones come in combo packs of two, but they are two different tones. I begin coloring with the 500 Medium tone and then color in my darker 200 marker, then I go back over with the lighter color. I also use the color lifter if I think it’s too dark or go outside of the lines, so the areas that look “highlighted” are actually done with the color lifter.
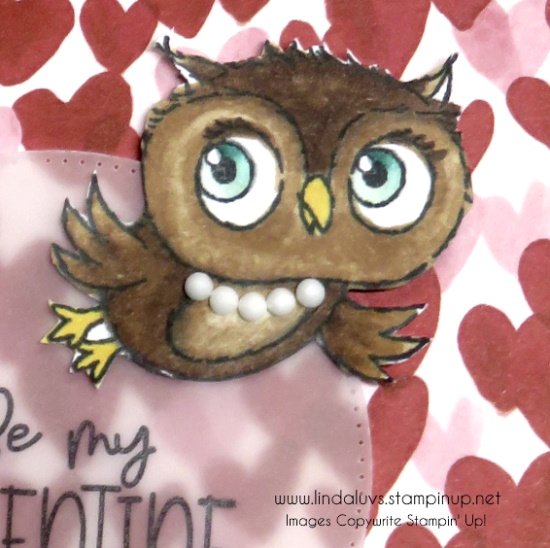
I decked out my gent with a nice blue bow tie to match his eyes – I used Light Balmy Blue and Light Night of Navy for both. My lady has Dark Pool Party and Dark Bermuda Bay eyes and she is adorned with a necklace created with the NEW Opaque Adhesive Backed Gems.
My greeting comes from the NEW Share a Milkshake bundle and stamped with StazOn ink (doesn’t smear on vellum) and then die cut using the 2nd largest circle from Stylish Shapes. This card uses the Sweet Talk from the Clearance Rack for a sweet Valentines Day and the Adorable Owls… they sure named them correctly!

Thank you so much for stopping by for a visit.
Have a wonderful week ~

Here is a list of supplies used to create this card …. The Share a Milkshake and Opaque Gems will be available January 5th, and the Washi Tape retires after the 4th. The Adorable Owls will be FREE during Sale-a-bration with a qualifying order.


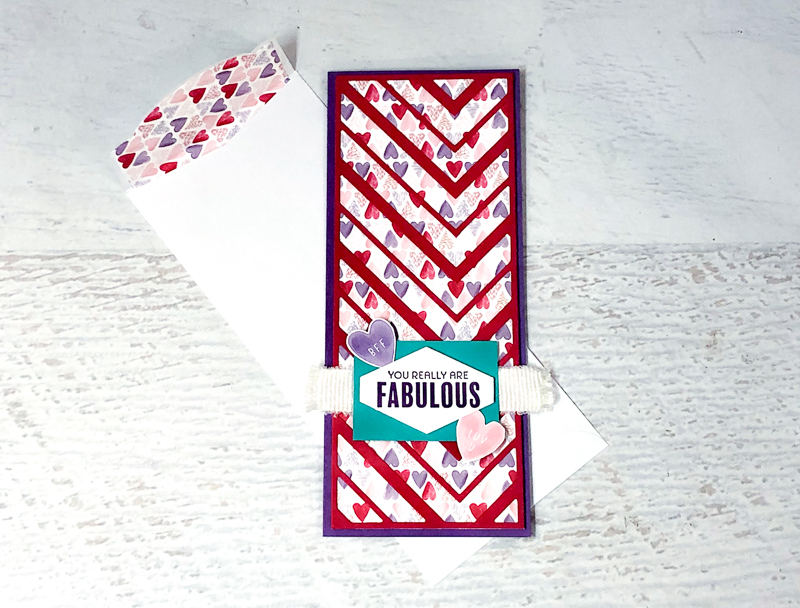
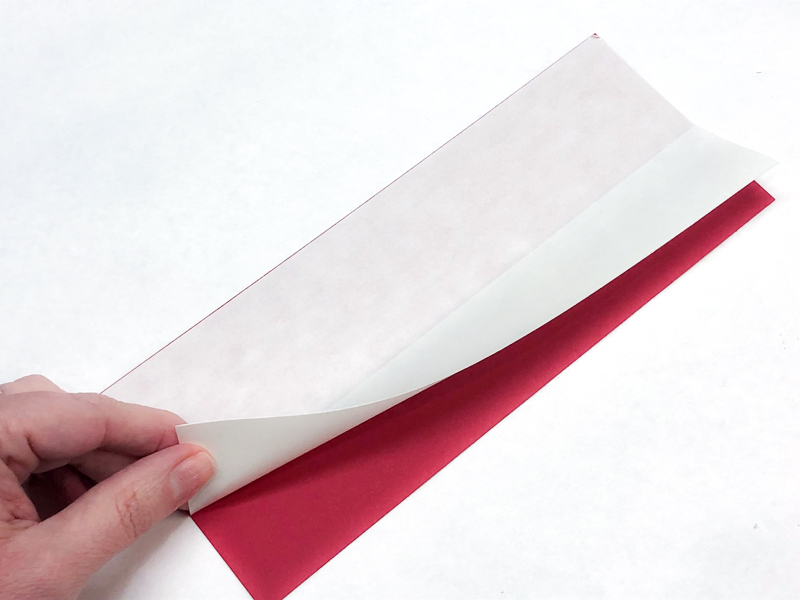 1. Add Adhesive Sheet Cut Real Red cardstock and Adhesive Sheet to 3-1/2″ x 8-1/2″. Peel backing off of Adhesive Sheet, line up, and adhere to back of cardstock.
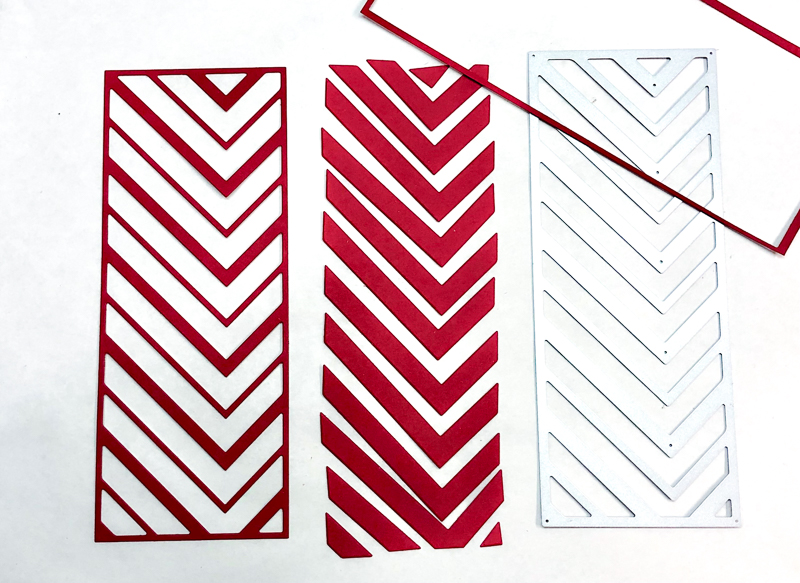 2. Slim Die Cut Center die cut on cardstock and run through Stampin’ Cut & Emboss. Pop the die cut pieces from the die. Set aside the negative pieces to use on the inside of the card and on other projects.
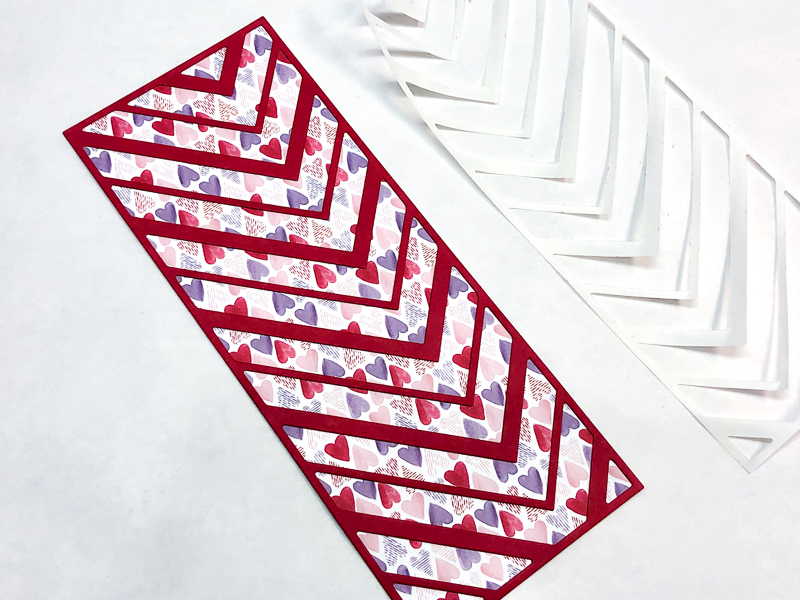 3. Adhere Die Cut Cut Sweet Talk Paper to 3-1/4″ x 8-1/4″. Peel adhesive backing off of slim die cut and carefully line up on the Sweet Talk paper and adhere. Start with lining up the bottom corners and then the top corners.
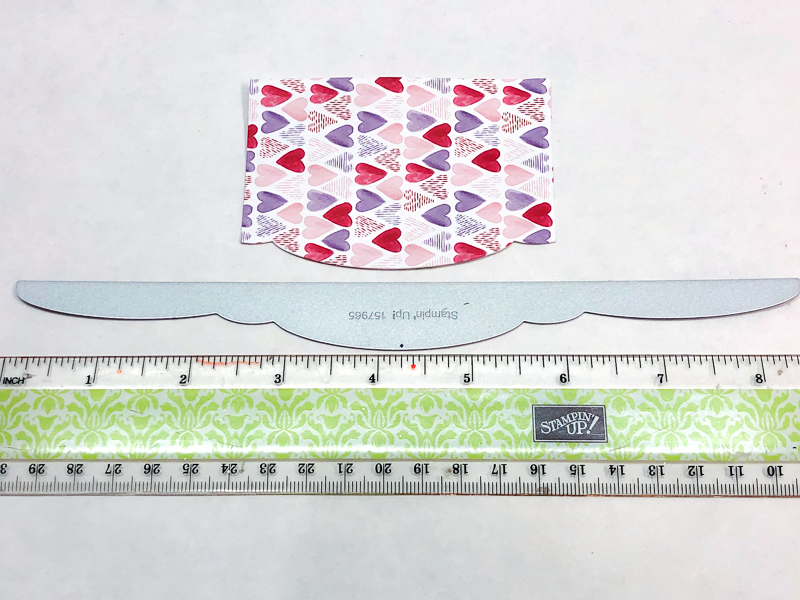 4. Die Cut Scallop Edge Pick a gray or white Slimline Envelope (#157981). Cut Sweet Talk paper to 3-1/2″ x 3″. Mark the center of the 3-1/2″ side and the center of the scalloped die (matches envelope flap) from the Slim Card Dies. Line up centers and die cut.
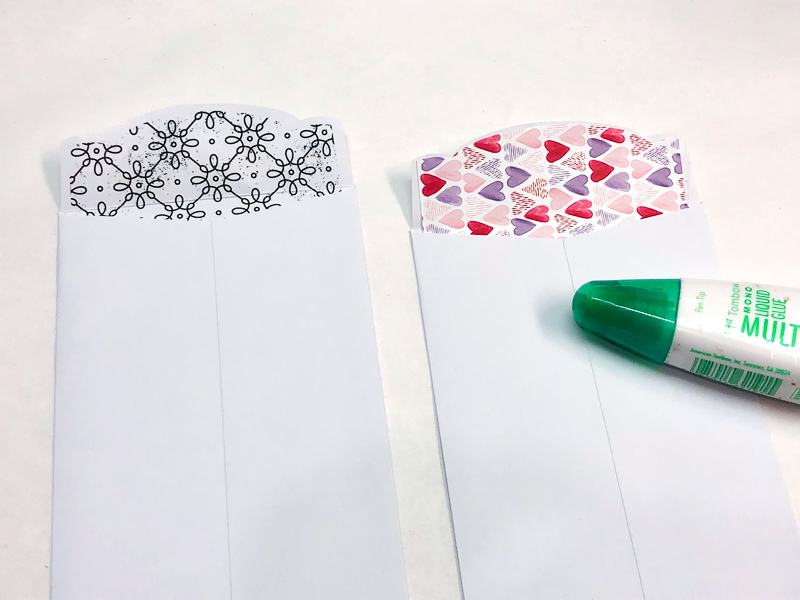 5. Customize Envelope Flap Use Multipurpose Liquid Glue to adhere the die cut paper inside the envelope flap so it matches the card. You’ll Use Multipurpose Liquid Glue or Stampin’ SEAL+ to adhere you envelope flap closed when ready to mail. Note: This end-opening envelope may require additional postage. Check before mailing.
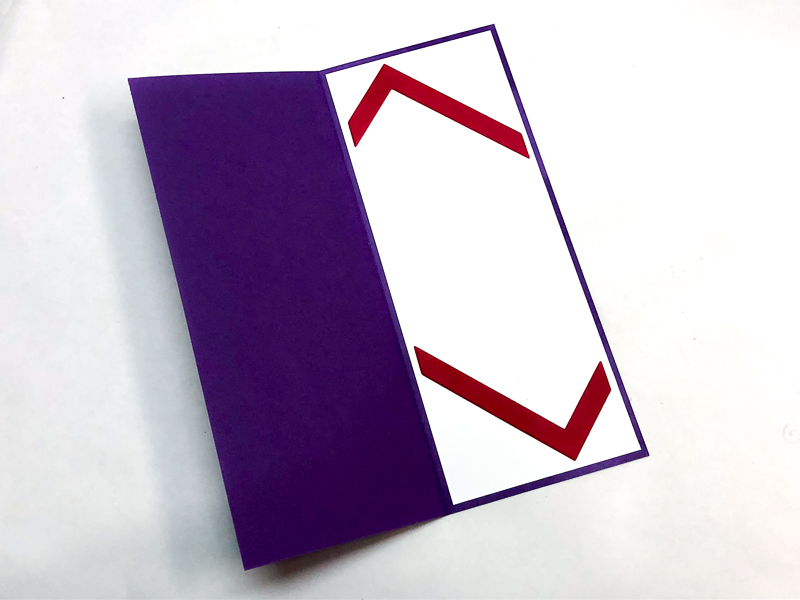 6. Cut Card Base Cut Gorgeous Grape cardstock to 7″ x 8-1/2″. Score at 3-1/2″ along the 7″ side to make the slimline card base. Adhere 3-1/4″ x 8-1/4″ Basic White cardstock inside card. Add two of the negative die cut strips inside the card as accents.
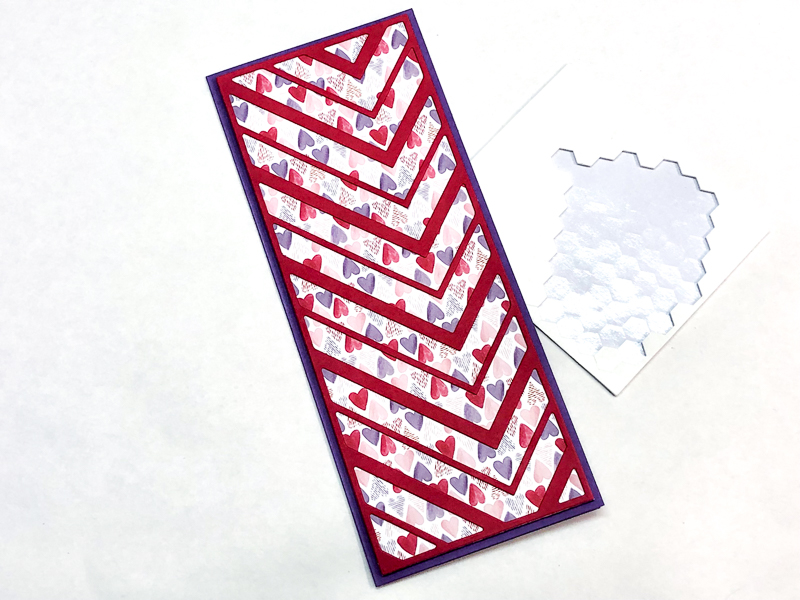 7. Layer Card Front Adhere the layered slim die cut and Sweet Talk to card front. Use Stampin’ Dimensionals if you want extra dimension.
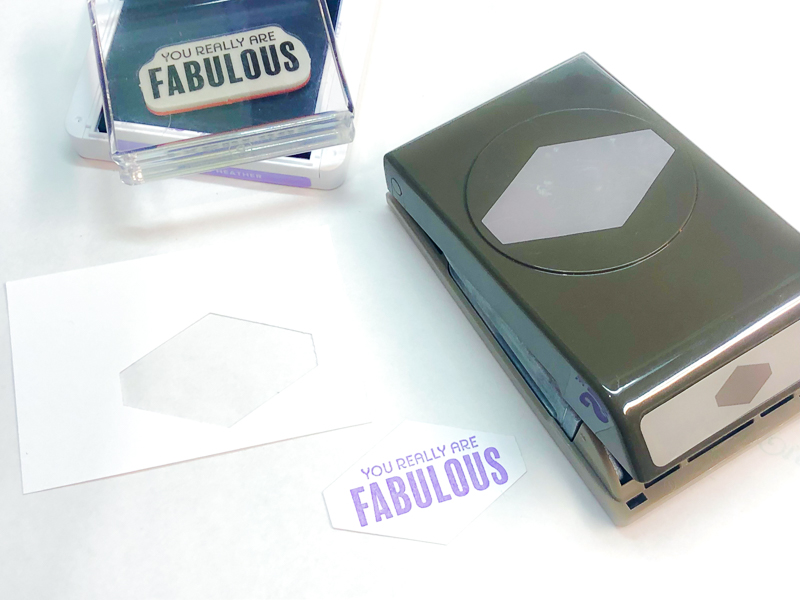 8. Stamp & Punch Greeting Stamp greeting with Gorgeous Grape ink on Basic White cardstock. Punch with Tailored Tag Punch (#145667).
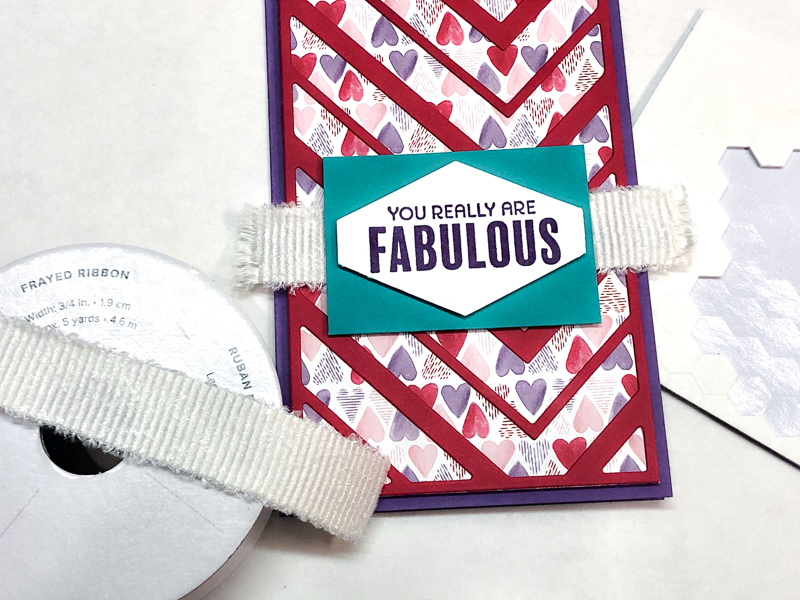 9. Add Greeting & Ribbon Cut a 4-1/2″ piece of White 3/4″ Frayed Ribbon (#158138). Pull threads on each end to fray the ribbon. Adhere to card with Multipurpose Liquid Glue or Glue Dots. Layer punched greeting onto 2-1/2″ x 1-3/4″ Bermuda Bay cardstock with Stampin’ Dimensional. Adhere over ribbon with Stampin’ Dimensionals.
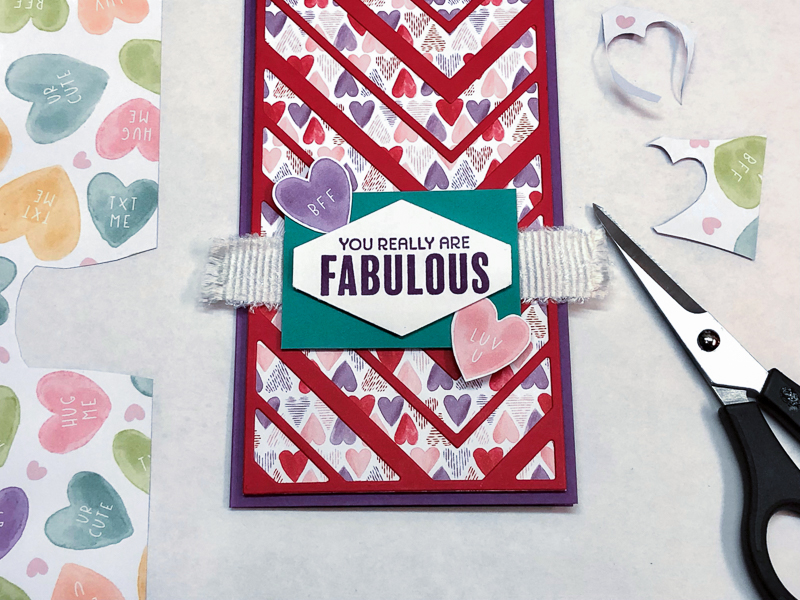 10. Hand-cut Hearts Hand-cut two hearts from the Sweet Talk Designer Series Paper with Paper Snips. Adhere to greeting background with Glue Dots.