Let’s Party …

Hello Stampin’ Friends ~

Today I’d like to share a cute card with you and some upcoming stamping events. Let me begin with the “Thoughtful Branches” class … this is my second as the first filled up before I even got to send an e-mail invite! I announced the new date at the “Hostess Appreciation Party” and now ONLY 2 SPOTS are left!

ThoughtfulBranches_2nd CLASS

You will enjoy this class … you will learn “hand-on” different uses of your dies and how nice it coordinates with your stamp set. There will also be fun techniques and tips shared at this class. RSVP by 8/27.

If you are looking forward to getting your hands on the fabulous items in the NEW Holiday Catalog, then join me for a fun filled evening creating 10 cards for only $20 / envelopes included. This class will be much more than Christmas so RSVP and join me for a great evening…

Holiday Launch Party

This cute little card was created by the Stampin’ Up! staff and comes directly out of the catalog (one of the best places to find inspiration) It is also the card that made me want to have this stamp set and framelits in my own stampin’ collection.

holiday16_p14e-62

I hope you can join us, and I thank you for taking time to check it all out.

Have a fabulous day!

blog-closing-small


I’m back with tips & a beautiful fall card!

Hello Stampin’ Friends ~

Thank you for your patience! I had several unexpected visitors yesterday … pleasant visitors. First my granddaughter brought over my great-grandson to visit, then my oldest daughter came over with my grandson … don’t get to see them much so it was pure pleasure!

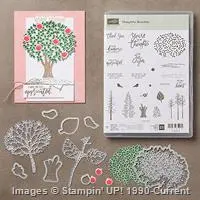
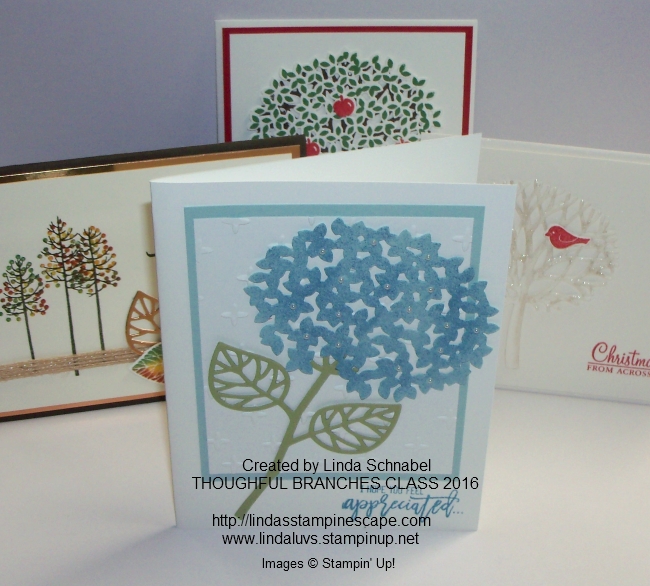
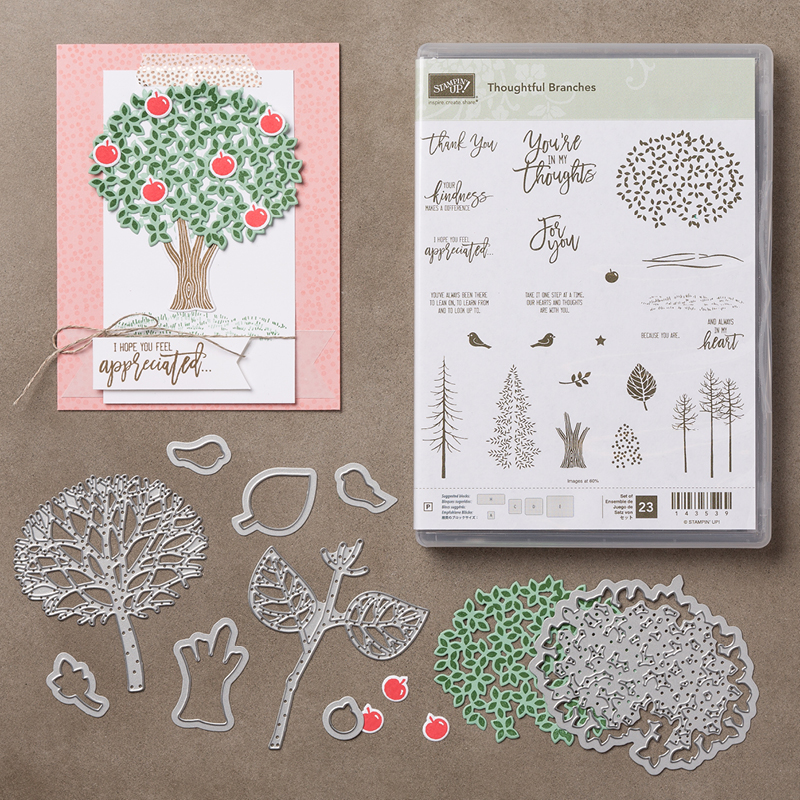
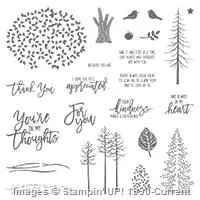
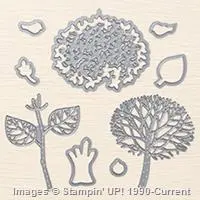
Onto my tips for stamping with the “Thoughtful Branches” stamp set!

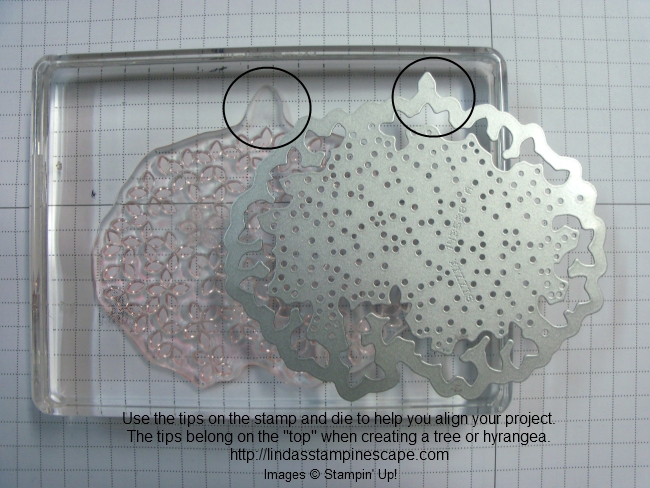
First, I want to show you the “tips” or “tabs” or “notches” that are on your stamps and die …

000_3590

These are here to help you position your images. They should be used at the “top” when stamping and cutting. You will also notice an indent in the bottom image / die – this also helps in the alignment, especially when you place the die over your stamped image.

Next, when I stamp large images, I like to flip my block over and ink from the top. This gives you much more control when inking, especially with the new ink pads and you can see if the entire image is inked up.

000_3592

I like to tell my stampers … “Show it who the boss is!”

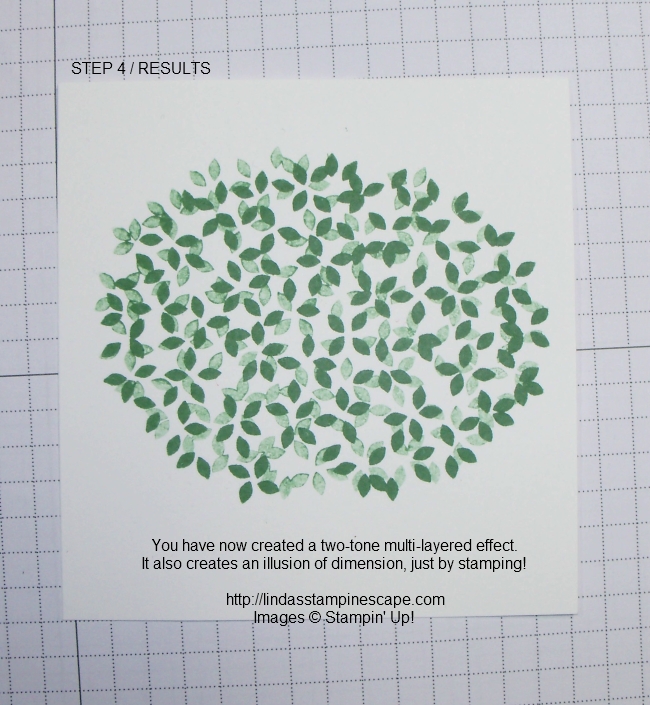
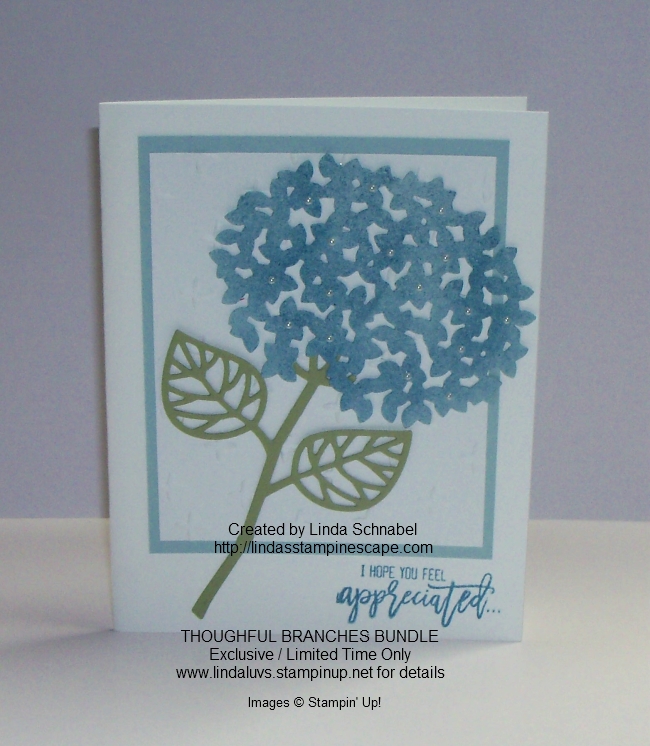
Now we are going to create a two-tone image. Stamp your image with the “tip / tab” to the top of your cardstock. Then pick it up and turn it slightly to the right (without re-inking) and stamp again.

000_3593

000_3594

This created a beautiful two-tone effect, and by moving the stamp to the right, it creates a wonderful layering effect that gives your card the illusion of dimension, just by stamping.

000_3595

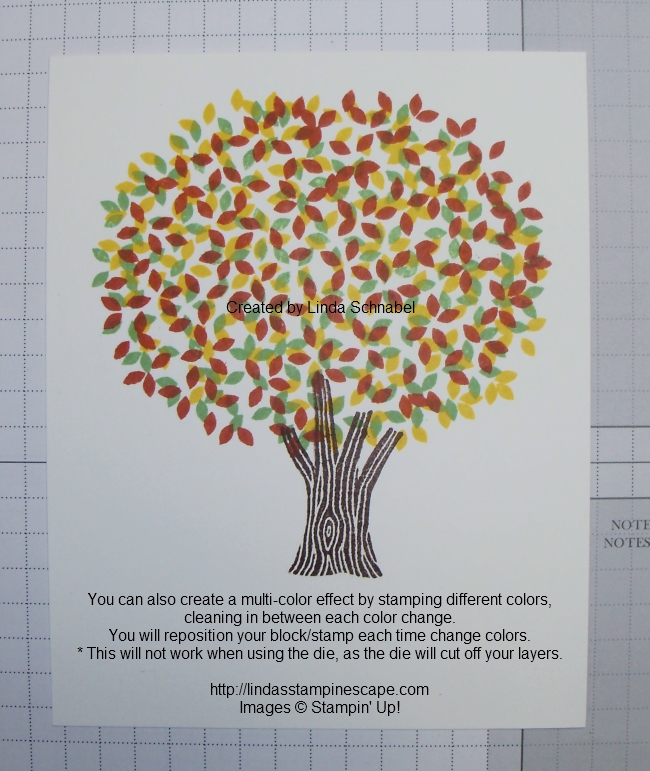
You can also create multiple colors …

Once your first color is stamped, clean, ink with new color and slightly turn your block/stamp to the right, then stamp image, and repeat with a different color. Each time you stamp a new color … you will move the block/stamp to the right each time. For example (if using the numbers on a clock) Your first color would be at 12 o’clock … the tab to the top, the second color somewhere between the 1 and 2, and the third color at 3.

000_3596

Once you begin using the stamp, you will see how easy it is to arrange your stamp to create this multi-color effect.

Now … just add some cardstock and a bit of ribbon (SNEAK PEEK from the Holiday Catalog) and you have created a beautiful card!

000_3597

I hope you enjoyed this tutorial and if you have any questions on this technique please leave me a message below or you can reach me by e-mail … just click the link at the top right of this page.

Thank you so much for stopping back again.

Have a beautiful weekend!

blog-closing-small

STAMPIN’ SUPPLY LIST …


Blue Hydrangea …

Hello Stampin’ Friends ~

As promised, I am going to share another card I created to display at my THOUGHTFUL BRANCHES class. You will also get a peek at the 3 cards that we made …

000_3576

During class our stampers learned several tips on how to use the stamp set and coordinating dies … I will share that with you tomorrow so be sure to stop back. Today I’m showing you how simple it is to create a beautiful Hydrangea card.

We begin by simply sponging some Marina Mist onto Soft Sky … it gives beautiful multi-color blue hues for your flower. Once dry, and it doesn’t take long at all, we placed our framelit over the sponged area and cut out our flower … SIMPLE!

000_3583

We embellished the flower with the smallest of pearls from the Basic Pearls sheet. I love the Pearls and the Rhinestones … they are simple to use, and very inexpensive to add a touch of bling / beauty to any card.

The background was done in Whisper White and embossed with the “Sparkle” embossing folder. There are so many folders you could use! Another would be the “Petal Burst” … experiment and have fun.

000_3579

We attached our flower by “rolling” the glue dots … they hold beautifully and when rolled, they give a little lift to the flower and adds a bit more dimension to the card.

The greeting comes from the THOUGHTFUL BRANCHES stamp set. I can’t say it enough, if you love “Lovely As a Tree” … you will definitely want to add this bundle to your collection! Just click on the link below to purchase and I will send you a “Thank You” gift in the mail.

144328G

Please let me know if you have any questions on this beautiful “Limited Time” bundle, or anything else. I’m here to help.

Thank you for stopping back today, I hope yours is a good one.

blog-closing-small

TO PURCHASE ITEMS USED ON TODAY’S CARD … Just click on any of the images.

Thank YOU!


Much Appreciation …

Hello Stampin’ Friends ~

I recently held a class on the beautiful “Thoughtful Branches” bundle. This is an exclusive, “limited time only” stamp set and framelit dies. I’ll share more about the class tomorrow.  Today, I wanted to share another card created with this bundle …

Appreciation_Gallery_DBWS_Aug2016_NA_SP_EU(4)

The neutral colors with the pop of red really make this card stand out. I love the subtle waterwash of blue behind the trees.

If “Lovely as a Tree” is your “go to” set – your favorite stamp set, then you will definitely want to order the “Thoughtful Branches” bundle.  It is so versatile and the possibilities are endless.

I can’t wait to share even more cards with you, as this stamp set is simply amazing. In our class we made a summer, a fall and a Christmas card!

Thanks for stopping by today …

Have a wonderful day.

blog-closing-small

If you would like to purchase this exclusive stamp set and die, click on your choice …