Time to get Festive …

 Hello Stampin’ Friends ~

I hope you had a wonderful weekend … the weather sure was nice!

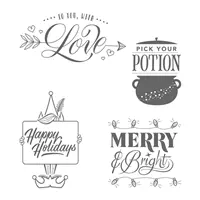
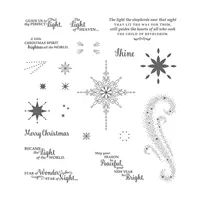
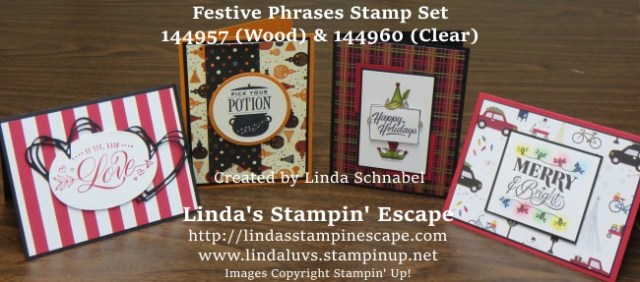
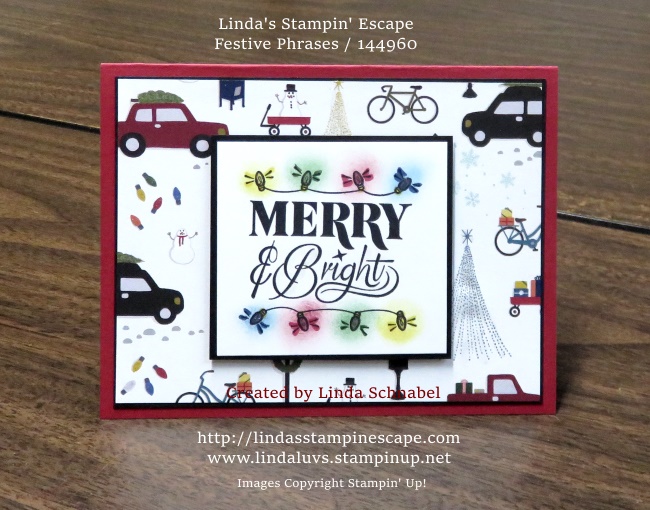
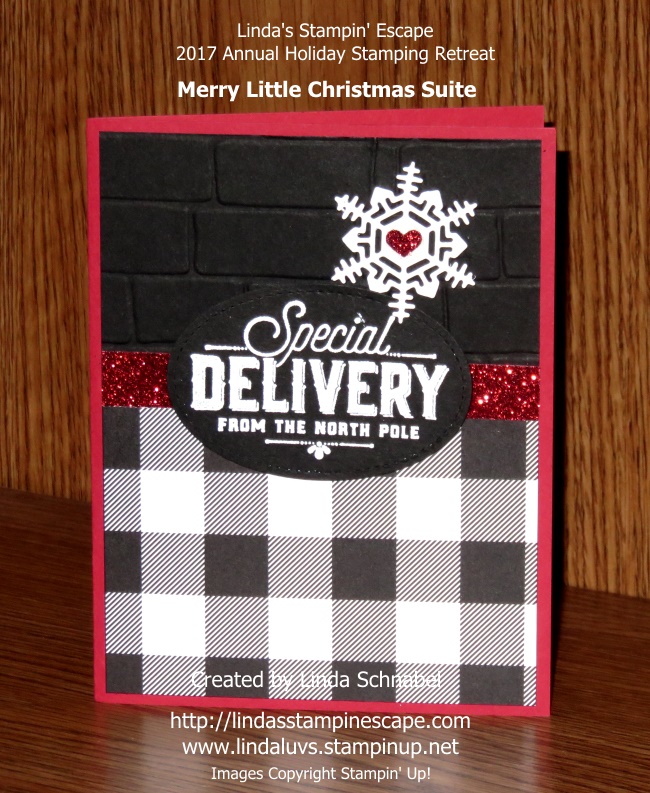
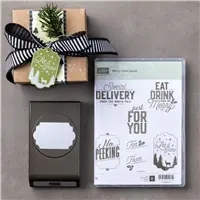
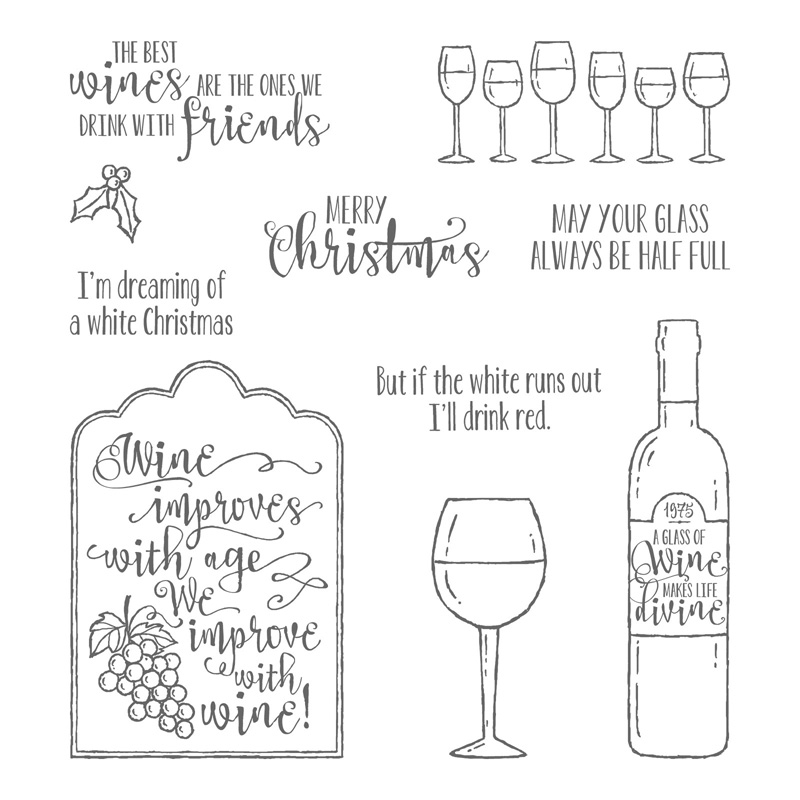
Today I have a quick -n- easy card made with one of the cutest stamp sets in the Holiday Catalog!! It’s the Festive Phrases stamp set found on page 45.

*This is a last-chance item and is available while supplies last. After January 2, 2018, it will no longer be available.  The wood mount stamp set is On Sale right now!

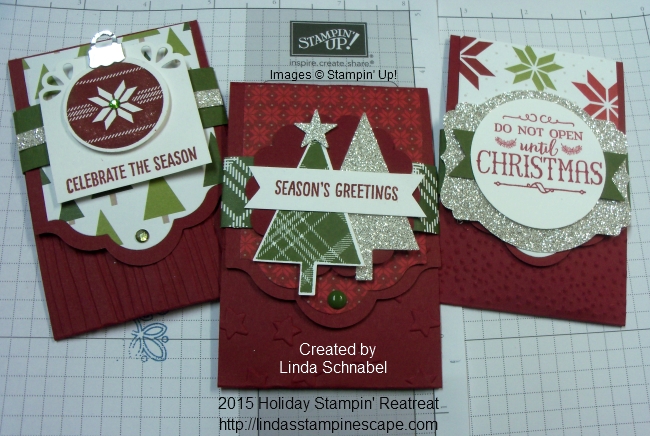
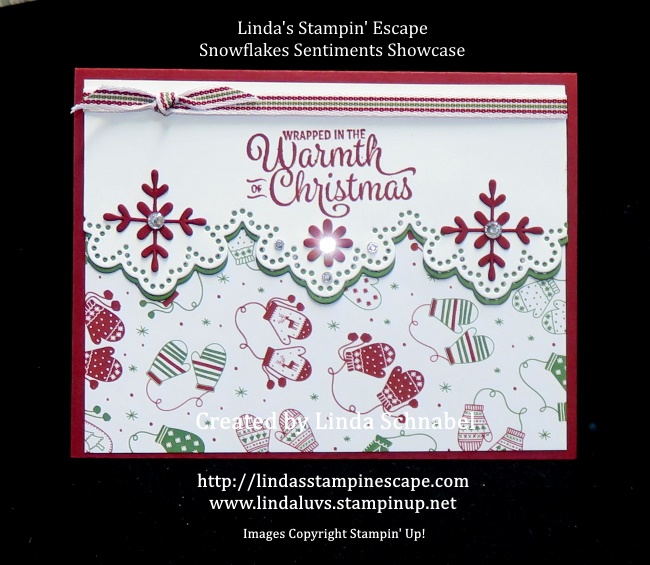
Here is a cute Christmas card …

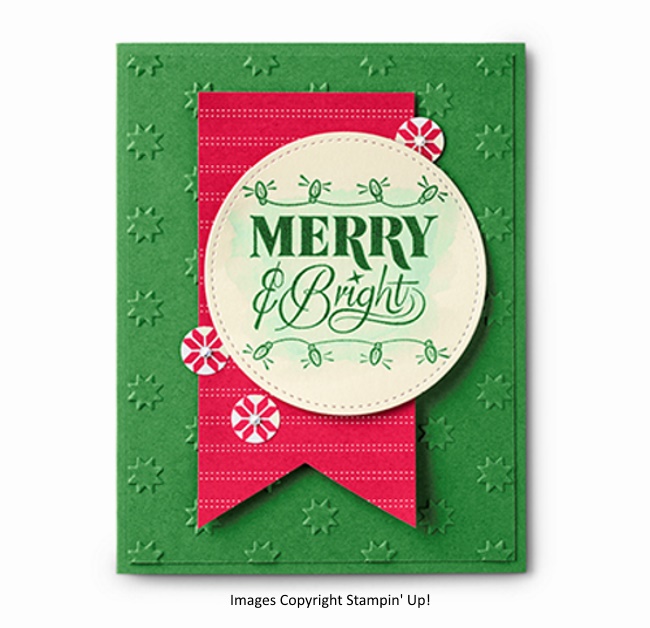
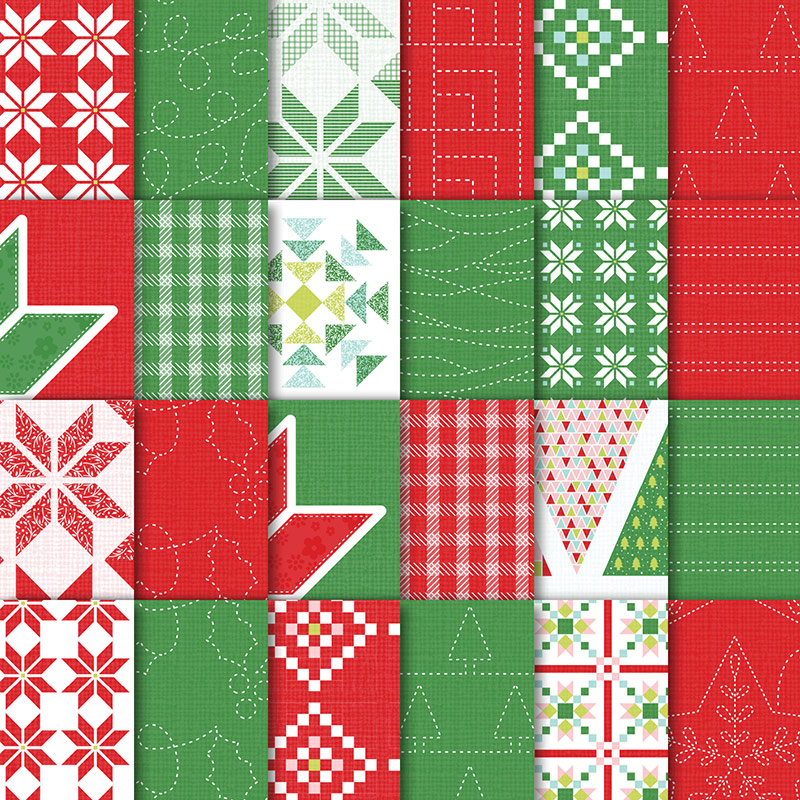
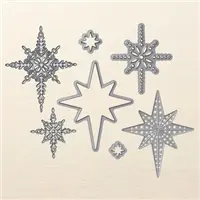
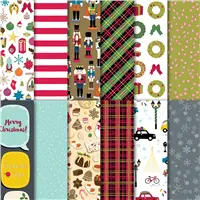
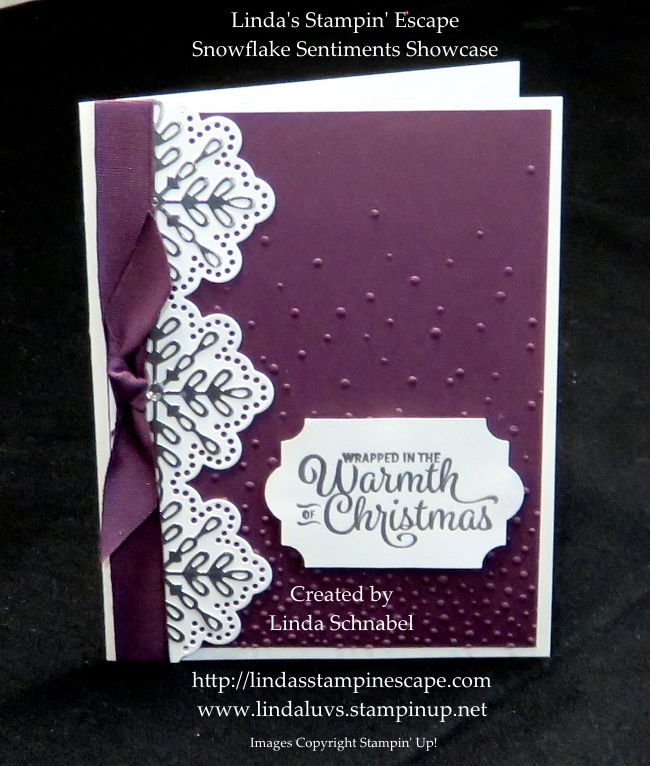
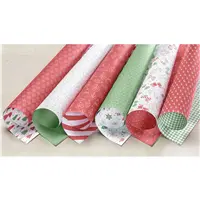
The “Oh My Star’s” embossing folder was used to created a textured background. The pop of color comes from the 6 x 6 Quilted Christmas Designer Series Paper Stack.

*This is a last-chance item and is available while supplies last. After January 2, 2018, it will no longer be available.

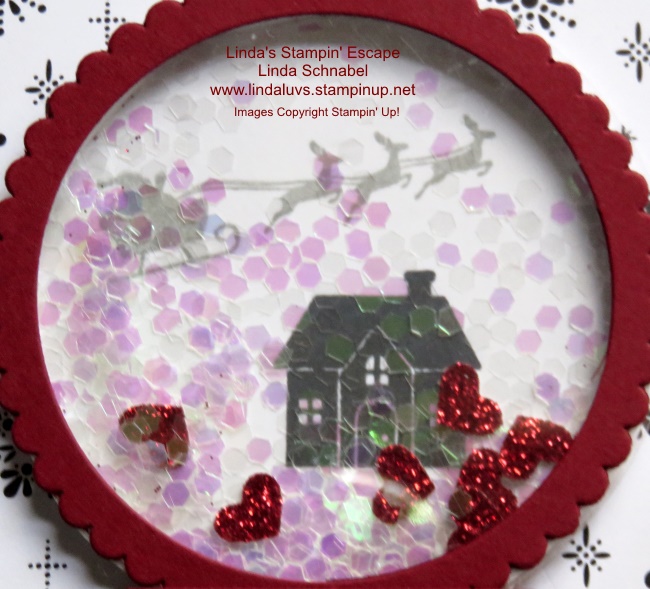
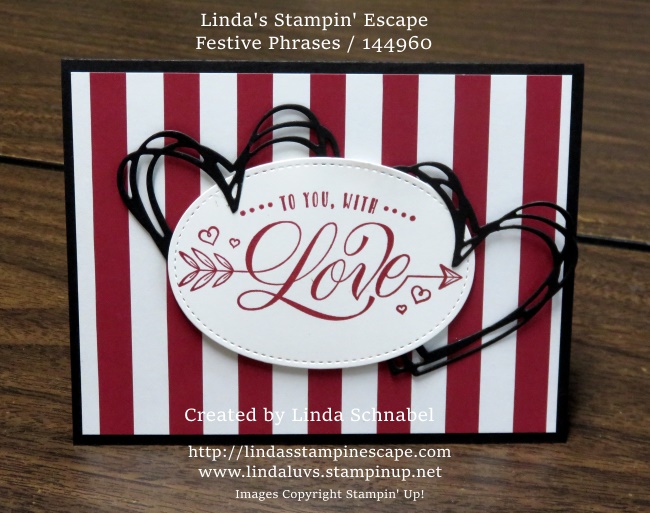
Here is a Valentine project created using the Festive Phrases stamp set, and it can be found in the Holiday catalog along side of the stamp set!

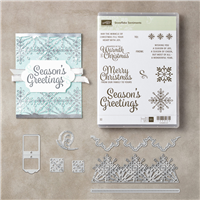
So … you can see why I fell in love with this stamp set! The versatility is just one reason.  Here are all of the cards that I have shared on previous blog posts …

*This is a last-chance item and is available while supplies last. After January 2, 2018, it will no longer be available.

Thank you for hanging out with me today and checking back in on me. I took this weekend off from blogging to spend time with my family.

Have a wonderful week, and I’ll be back tomorrow with my Two for Tuesday blog post.

STAMPIN’ SUPPLY LIST ….


Just for Fun: Coffee & Pie

Hello Stampin’ Friends ~

Today I want to share a card that we made at our Coffee Café class this past fall.  We had fun using many of the items for the product suite!

The intent of the photo was for my Linda’s Stampin’ Escape Facebook page. I came up with the idea after I had posted a picture of a cool dessert and it got more views and comments than my cards … hummm!??

So I thought ….  

I thought maybe if I added a tasty treat with my card, it might get a bit more attention! lol

We used the Coffee Break Designer Series paper for our background and to create our focal point – which is the coffee pot & cup highlighted with the use of the Circle Framelits Dies.

The greeting was created by using the technique “Direct to Rubber” or coloring directly onto the stamp just the words you want to use. The little heart from the Corrugated Elements ties these both together.

It was a fun class and a fun card to make, and I hope you enjoyed the card as much as I enjoyed the dessert that goes with it!

Thank you so much for checking out my blog today.

Hope your day is a good one ~

Today’s Stampin’ Supply List …

Two for Tuesday: Star of Light / Guest Stampers!

Hello Stampin’ Friends ~

Yesterday I shared my card from the Brightly Lit Christmas bundle, and said my greeting came from the Star of Light Stamp set … Today, I have 2 beautiful cards to share with you from our Holiday Stamping Retreat!

Both of these cards were created using the Star of Light Stamp Set and the Starlight thinlets, and were done by two of our retreat attendees!!

Our first card was created by our first guest stamper: Peggy…

I love the simplicity of this card, the Night of Navy and Whisper White, highlighted with the Silver Glimmer paper really does create the “Star of Wonder”.

In addition to the stamp set and dies, Peggy used the Gently Falling Embossing Folder to add some texture to the card … it’s just so pretty.

My second guest stamper is Kathie …

Kathie’s card was created in what we call the “Z-Fold” card. This gives your card a real wow factor but it’s Kathie’s placement of her stamping and die cuts that bring out the real beauty of the card.

Kathie also used the Night of Navy and Whisper White, highlighted with the Silver Glimmer paper.

Both of these cards are totally different and showcase the elegance and beauty of this Stamp Set: Star of Light. Don’t forget the Starlight Framelit Dies … Simply beautiful!!

I thank you for joining me today and hope these beautiful cards have inspired your holiday card making.

Have a bright, beautiful day ~

TODAY’S STAMPING SUPPLY LIST:


Happy Thanksgiving …

Hello Stampin’ Friends ~

Today I’d like to Thank You for your loyalty, your business and most of all … your friendship.  Happy Thanksgiving to you …


Don’t let these savings pass you by …


Click Here to start!

Thank you so much for stopping by and checking out my blog today.

Have a Safe and Happy Thanksgiving ~

Two for Tuesday: Silent Night & Simple Stockings

Hello Stampin’ Friends ~

Today I’ve got double the fun for you! I’m going to share a beautiful card that one of my Holiday Retreat Attendee’s made for the card swap, and I have a super simple way to deck out your Holiday Paper Pumpkin Stocking.

I am thrilled to share a pretty card from my Guest Stamper: Jennifer F. What I love about this card is that Jen took a staple from her stamp collection and created this a fresh new holiday look …

Lovely as a Tree just received a lovely update … I love how it is framed with the use of the Circle Framelits Dies and the Softly Falling Textured Embossing Folder.

The “two” on this Tuesday is an Alternative Project to the November 2017 Paper Pumpkin kit. These little stockings are so easy to work with and a Gift Card tucks nicely inside … so hang them on the tree or use them on the gift.

I teamed up my Paper Pumpkin with the fun and amazing Stitched Felt Embellishments from the Quilted Christmas Product Suite. Just a quick dab on All Purpose Glue and your stockings are ready to hang… and I added some pretty ribbon so you can do that!

I see some of you took part in our 24-hour Sale (THANK YOU!!) There are plenty of items on the shopping list, so just click the link below.  Don’t forget the Clearance Rack too.

Don’t forget our FaceBook Live event … join me and the rest of the Paper Pumpkin family …

IMG_3292

Today … November 21st at 6:00pm (MT) or 7 o’clock central time go to the Stampin’ Up! Facebook Paper Pumpkin page to view this fun event LIVE!!  Here is the link to the page: https://www.facebook.com/paperpumpkinbystampinup/?hc_location=ufi

HOLIDAY SHOPPING STARTS HERE …

Click Here to start!

Thank you for hanging out with me today.

Happy Tuesday!

Projects & Stamp Sale & Tips … Oh My!! It’s all here!

Hello Stampin’ Friends ~

Today I’ve got a cute project to share and some stampin’ tips that can be used on any projects!!

Stampin’ Up! has produced yet ANOTHER fabulous Paper Pumpkin kit! This November’s kit is filled with adorable mini Christmas stockings. And they are super fast and easy to assemble for gifting as is.

I didn’t change much on this little stocking at all … Basically I extended the Cherry Cobble part of the tag so it shows at the top and bottom, wrapped the leaves around the tag, and ….

… used my new Stampin’ Blends to color the clothes pins that were included in the kit! That’s right, you can color any of our wood elements, rhinestones, pearls, accents or enamel shapes with the Stampin’ Blends.

Next… I jazzed up the stocking a bit by using the Gold Star Sequins from my October Paper Pumpkin kit, just add a touch of Multipurpose Liquid glue.

I choose the stars because of the gold tree and the star at the top… it just ties it all together.

Ready for one more awesome idea? Oh yea … Here it is ~

IMG_3299

You can use the Stampin’ Blends on the stocking to die it to match the October card … how awesome is that!! I love this, and you can make it any color.

If you can’t get enough … join me and the rest of the Paper Pumpkin family on a FACEBOOK LIVE event  …

IMG_3292

Tomorrow … November 21st at 6:00pm (MT) or 7 o’clock central time go to the Stampin’ Up! Facebook Paper Pumpkin page to view this fun event LIVE!!  Here is the link to the page: https://www.facebook.com/paperpumpkinbystampinup/?hc_location=ufi

STARTS TODAY …

Click Here to start!

Thank you so much for stopping by and checking out my blog today.

I hope your week starts out simply wonderful … Happy Monday!

To You, With Love …

Hello Stampin’ Friends ~

Thank you so much for such a warm welcome back! The visits to my blog yesterday were almost double of what they have been … that is so sweet. I’d like to welcome my new readers and thank all of you who stop in daily, and those of you who share this blog with your friends. Please … feel free to share, that is what our stamping is all about.

Some of you who know me from my classes, clubs and retreats know that my family has been going through a hard time right now. My dear sister and my sister-in-law are fighting against cancer, my Mom was taken to the hospital shortly after we returned from retreat for what we thought was pneumonia, only to learn she has a mass on her lung …. we are still waiting to see if that is cancerous or not. My 26 year old nephew is also fighting something in his lungs. The doctors do not know what it is, but he is going in for a biopsy today. And my niece has Cystic Fibrosis – had her 2nd lung transplant this year … just found out she has an infection in her lung … but NO Rejection – so that is good.  We are all praying hard and are keeping a positive attitude! No negative feelings allowed 🙂 So don’t be surprised if I skip a day or two, but my stamping keeps me in a happy place, it is something that my sister and I do together!

I do have a card to share with you today. I couldn’t miss sharing the only stamp left in the Festive Phrases stamp set, so here it is … To You, With Love.

IMG_3250

As with the last two cards from Festive Phrases that I shared with you, this card also used the Christmas Around the World Designer Series Paper. Don’t you just love all the different patterns, and many can be used for other holidays or everyday for that matter. The cute hearts are die cut from the Sunshine Wishes Thinlets Dies.

I kept the layouts for each of these cards simple, because when it comes to making many cards for an event or occasion, simple is best but by no means does it mean not as cute …. because these are cute!

IMG_3251

So here is a look at all of the 4 cards I created with just one stamp set, 2 different designer papers and only a few other embellishments!

If you would like this stamp set just click the shop now button,

th8EDAACKW

Thank you for stopping by my blog today. I hope you enjoyed the cards created with the Festive Phrases stamp set. I’m sure I’ll be playing with these again!

Have a happy day ~

blog-closing-small

Sorry I cannot post my supply list … this stupid WordPress won’t let me! I’ll keep working on it but I’ve already been trying for 45 minutes with no luck.

IMG_3250

Simply Sunday: Merry & Bright

Hello Stampin’ Friends ~

Hope you’ve been having a nice weekend.  I am back with a cute -n- easy card created with the same stamp set as our cute little elf … Festive Phrases.  This is truly a fun and versatile stamp set.

I also stayed with the same designer series paper … “Christmas Around the World”.  So many patterns that are perfect for that old fashioned Christmas.

The pattern I used also has the little Christmas lights and a few trees – which I highlighted with the Wink of Stella … I wish the photo would have picked that up.  I also added the Wink of Stella to the bulbs on the greeting and around the “Bright”. It really adds a special touch of sparkle!

The little glow around the lights was created with the same color inks I colored the bulbs and sponge daubers … you need a light touch so it doesn’t get too dark 🙂  My colors are: Garden Green, Real Red, Daffodil Delight and Dapper Denim.

Thank you so very much for sharing a part of your day with me.

Today’s Stampin’ Supply List …


Happy Holidays & Stampin’ Blends!

Hello Stampin’ Friends ~

Today I want to share with you a card that I created using a really fun stamp set and the just released Stampin’ Blends!! Pairing these two together was double the fun!!

I began by stamping the cute little elf onto Whisper White … I’ve been waiting to use this one!! Then I colored my elf with the Old Olive, Daffodil Delight and Cherry Cobbler Stampin’ Blends pairs.

I used the technique of laying the light colored alcohol ink (Stampin’ Blends) and then the darker color. I then go back and use the lighter color to blend the two colors seamlessly … oh it’s fun. Don’t you love the way his hair is highlighted … wooo hooo!

I chose the “Christmas Around the World” Designer Series paper because it has that old fashioned “retro” look just like our little elf!! Then just a block of cardstock on two corners to draw your eye to the focal point.

The elf itself was double stamped … then the greeting was cut out and popped up to give more dimension. He is just toooo stinkin’ cute! A simple layout but oh so effective to send a Happy Holidays!

Thanks so much for stopping in to check out today’s project, I hope you enjoyed it.

Have a great day … we are one day closer to the weekend!!

TODAYS STAMPIN’ SUPPLY LIST …


Snow Globe – Shaker Card

Hello Stampin’ Friends ~

Happy Monday! I hope you had a wonderful weekend … Sunday turned out to be a beautiful fall day.

Today I want to share with you another retreat card … a shaker card! Our afternoon session include 3 cards that we created using the “Hearts Come Home” bundle. My mission was to show them how quick and easy you can create a shaker card.

Our background comes from the Merry Music Designer Specialty Paper. Using the Layering Circles Framelits dies, we cut 1 white and 1 window sheet from the same size circle. Then we took the scallop circle and the circle one size smaller that our precut circles, and layered them together before cutting to create our frame.

On the white circle, we stamped our house in Black and then our Santa in Smoky Slate. Our next step was to attach the foam adhesive strips to the outer edge of the white circle. Once applied, you can fill this with whatever you’d like … we used a large glitter and Red Glimmer hearts.

Once you have filled your “well” … remove the top layer off the adhesive strip and drop the window sheet over the top – press to seal. Next, we glued the frame onto the window sheet.

To create a snowglobe … I used the Everyday Label punch!! This is the punch that we used on the Merry Little Christmas Suite cards. Our  greeting was heat embossed in white and then the punch was aligned (1/2 way into the cardstock) to create the base… then punch!

Use the adhesive strip to mount the base onto the front of the card so it’s the same height as the globe.

Everybody loves getting Shake Cards, and now you know how to make a Snowglobe Shaker …. quick -n- easy!

Thank you for sharing a part of your day with me and visiting my blog.

Have yourself a great day!

TODAY’S STAMPIN’ SUPPLY LIST  … Click on the link for more information for to begin your shopping.


Simply Sunday: Special Delivery

Hello Stampin Friends ~

Today I have another card I’d like to share from our Annual Holiday Retreat, and it comes from the Merry Little Christmas Suite like yesterday’s card. We will also be using the Merry Little Labels and Merry Little Christmas Designer Series paper.

It’s fun to see how different your cards can look even when you are using some of the same supplies! The greeting I chose was the “Special Delivery” … I did this in the “Chalkboard” technique … I thought it looked a little Old World Style …

I’m also introducing a touch of Real Red in honor the big man’s suit, and a little sparkle for the holiday. I also embossed with the “Brick” embossing folder … not just to add a touch of texture but to reference the chimneys that Old Saint Nick climbs down each Christmas eve.

I borrowed the snowflake from the Seasonal Layers Thinlets, because I know, many of my stampin’ friends / customers have the Colorful Seasons Bundle so it’s a great way to show how to blend bundles and use your stamping supplies to their full potential.

I hope you have enjoyed today’s card and the reasoning behind some of the choices I made to create this card … the holiday’s are so fun and the perfect time to unleash your creativity!

Thank you for checking in with me today.

I hope you are having a good one ~

Today’s Stampin’ Supply List ….

A Glass Half Full …

Hello Stampin’ Friends ~

Today I have a special card share with you. This stamp set was created by one of our fellow demonstrators … Linda Bauwin.

When Linda reached her million sales achievement in March of 2016 and as part of her million sales celebration, she collaborated with one of the Stampin’ Up! designers on the creation of the Half Full Stamp set.


Here are some beautiful projects created with the Half Full stamp set …

On the 2017 incentive trip to Thailand Linda demonstrated her stamp set and showed a really creative technique where she mixed the Stampin’ Ink Refill with the Fine-Tip Glue Pen to create a beautiful glossy look that you can see on the Merry Christmas card above.

Hope you enjoyed today’s projects (Courtesy of Stampin’ Up!) Makes me thirsty for a good glass of wine … would you like to join me?

Enjoy your weekend! I’m spending mine with a group of wonderful ladies at our “Hearts Come Home” Holiday Stamping Retreat.  I’ll share more about that in the upcoming week.

Thanks for stopping by ~

*Information taken from Success Weekly posted by Stampin’ Up!

Getting Ready for Christmas!?

Hello Stampin’ Friends ~

Back again today with some more shares of past Holiday retreat stamping. Below I have just a few of our “Gift Tags” that we made last year. We also decorated a cute tin to hold all of their tags!

These were made with the Stocking Stamp set and dies which have been added to our Annual catalog!! I love that, it gives me a chance to show you even more things to do with the items you’ve already purchased.

Our next grouping of stamped goodies comes from our 2015 Holiday Retreat!! Oh what fun these were … might have even been the hit of the retreat … GIFT CARD ENVELOPES!!

I found a great pattern so these were super simple to create, and we just jazzed up the outsides so they would also be a hit from anyone who received them. Just adorable!

You never know what we’ll be making at our retreats, always something new and fun… you’ll have to join us sometime.  I have a new attendee this year, everyone else has been there before … some, several times (One hasn’t missed one yet!) We also have someone from as far away as Oklahoma!!

We have a blast at our stamping retreats, and I can’t wait to get this Holiday Retreat started! This time next week, we’ll be stamping away!

Thanks for joining me here today on my blog. I hope you have a wonderful weekend!

Fresh Fig Christmas

Hello Stampin’ Friends ~

Today I’m going to share the last of my cards from the Snowflake Sentiments Showcase, and it will be a vertical card verses the horizontal layout I have been using.

My color pallet is very simple for this card with Fresh Fig and Whisper White with a touch of Silver … oh so classy! You can see how sweetly the silver snowflakes fit into the die cut edgelit.

The snowflakes were embellished with a pretty bow made from the Fresh Fig 1/2″ Finely Woven Ribbon. Just the sound of Fig reminds me of Christmas, and our greeting “Wrapped in the Warmth of Christmas” brings back memories of Figgy Pudding (well … at least in the movies!) lol

The greeting was heat embossed with Silver emboss powder to coordinate with our Silver Foil paper. To add a touch of texture, I used the “Softly Falling” embossing folder.

Wow … that’s it.  A simply elegant style card created with the warm color of fig and a touch of silver glam!

Thank you for taking time out of your day to visit my blog. It’s greatly appreciated. I have listed the ingredients to the card below.

Have a special day ~

Today’s Stampin’ Supply List …

The Warmth of Mittens …

Hello Stampin’ Friends ~

I hope you had a wonderful weekend. I spent mine in my Stampin’ Studio with a club on Saturday and then a whole lot of stampin’ and creative juices flowing to complete my Holiday Retreat. I’m so excited!

The last couple days I have shared creations from the Snowflake Sentiments bundle … an elegant one, a quick -n- simple one, so today I thought we should have some fun!! I’m going to warm your hearts with some cute little mittens!

I love this fun card because it also look nostalgic … the beautiful edge framelit reminds me of a doily! The little holes are part of the framelit. I layered it with Garden Green to pull that color out of the mitten pattern from the “Be Merry” Designer Series Paper.

I love how the snowflakes cut out and fit right into the shape of the edgelit die … there is also a snowflake stamp that fits in there as well. Just had to add a little sparkle to my snowflakes so I brought out the Rhinestones and topped off the card with the “Quilted Christmas” 1/4″ ribbon.

I hope you enjoyed that touch of home with this fun and nostalgic card … stop back tomorrow to see what I’ll come up with! It will be the last of my Snowflake Sentiments showcase.

I know it’s Monday … but have a great day!

Today’s Stampin’ Supply List ….