Happy Harvest Blessings

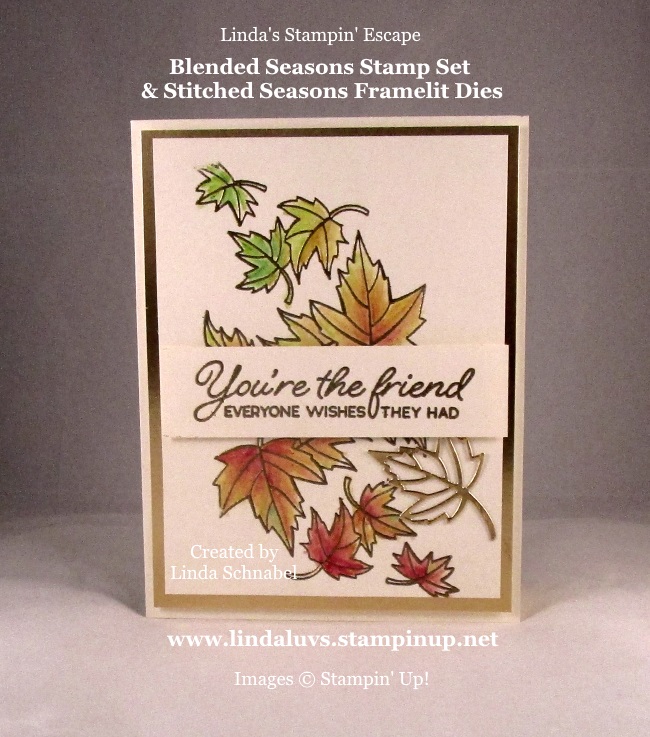
Hello Stampin’ Friends,

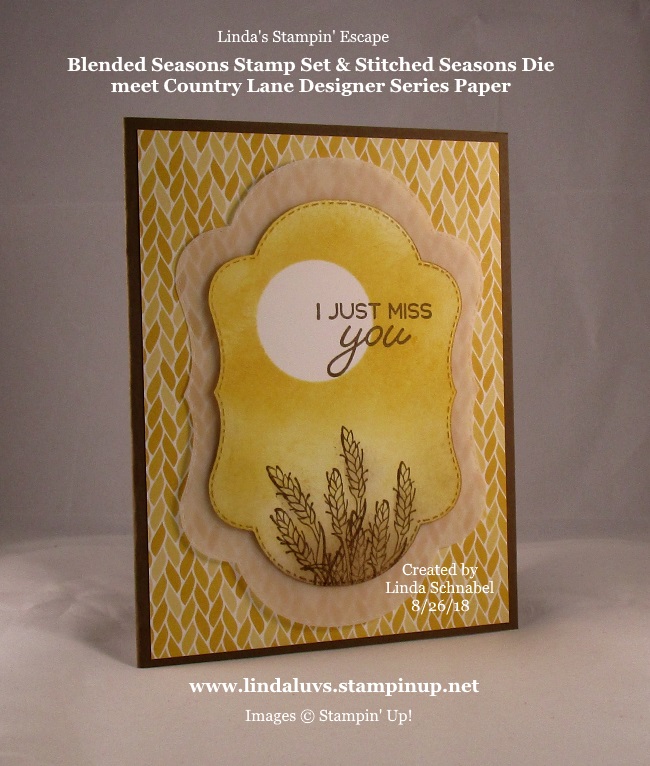
And a Happy September 1st to you!  With fall just around the corner, it seems this is the time many people get reflective and have gratitude for all they have in their life, so my card today reflects the same sentiment.

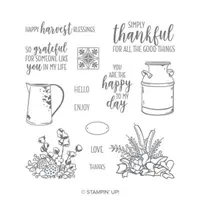
I am using the Country Home stamp set from the Country Lane Suite of products found on pages 42 and 43 of your Holiday Catalog.  This stamp set reminds me of a simpler time … the pitcher from grandma’s kitchen and when I used to work in a flower shop! I loved designing dried flower arrangements … you don’t see that much anymore.

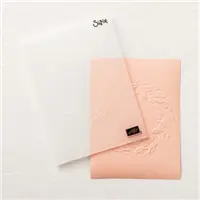
I will also be highlighting the Galvanized Metallic paper and the Tin Tile Dynamic Embossing Folder ….

The base of our card is Basic Black and the inside and the piece we stamp our images are Crumb Cake cardstock. Our background is the Galvanized Metallic paper embossed with the Tile Dynamic Embossing Folder.  This is such a dramatic piece and looks great embossed with any paper medium.

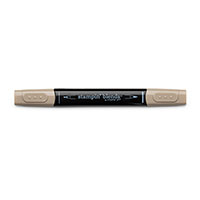
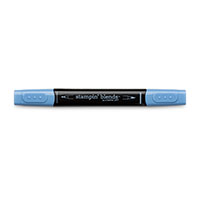
Next we stamp our two images … the pitcher and the floral piece (there are two) Using the Photopolymer stamps makes it easy to align the pitcher and floral images.  When you’re done, you can begin to color.  I used the Stampin’ Blends Markers because they are so quick and easy to use and can create so much dimension on the image.

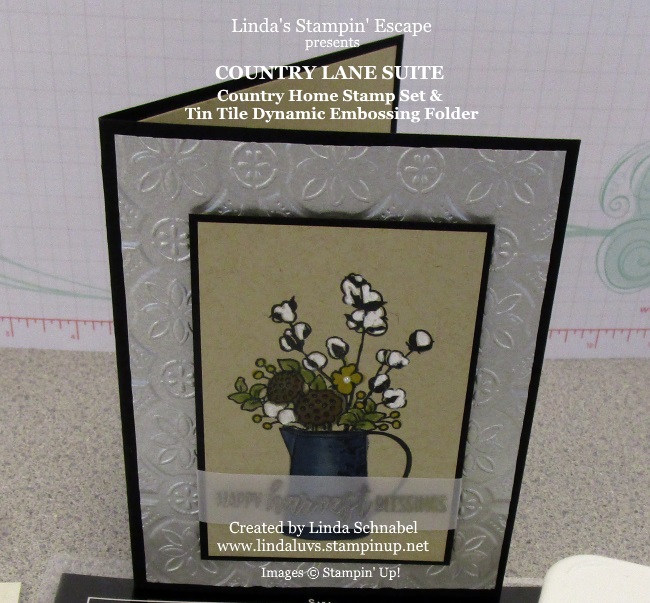
For the pitcher … I just followed the sides of the pitcher with my marker twice, giving me nice dark color along the sides and leaving the center untouched.  Then I simply colored the pitcher going side to side with the marker to fill in the blank spaces leaving an area that looks like the light is bouncing off of it (highlighting it).

Again, I used the Stampin’ Blends to do the floral piece except for the cotton … that was done with the White Stampin’ Chalk Marker.  Don’t you just love the way the chalk marker brings the cotton to life!!

Our greeting “Happy Harvest Blessings” was stamped with VersaMark® onto the Vellum Cardstock and then heat embossed with Silver Embossing Powder… this ties all of our elements on the card together, so nothing looks out of place, just a nice flow in the design.

Thanks much for stopping by today, I have the list of ingredients below. Click on any image to see more details about the product of to begin shopping.  HOWEVER, the Country Lane product suite is not available to purchase until the 5th of September … so just a few short days and the Holiday Catalog will come alive!!

Have a great Saturday, September 1st … and I’ll see you back here tomorrow for my Simply Sunday post.

TODAY’S STAMPIN’ SUPPLY LIST …


Last Chance plus FREE Rhinestones!

Hello Stampin’ Friends ~

Today I’m going to share one more card from the Color Your Season Bundle: The Blended Seasons Stamp set and the Stitched Seasons Dies and then we’ll take a look at all of the different and beautiful cards you can make with this one bundle … and this bundle goes away today.  True, today is the last day to order this amazing stamp set and die.

We made this card at my Holiday Catalog Launch Party …

I used the middle size die and stamped the Holly swag onto it.  The holly was colored with the Watercolor Pencil Assortment 2 which are available with the Blended Season stamp set and dies. The designer paper is the Under the Mistletoe and is the driver of my color pallet.

I stamped my greeting in Real Red ink onto the Vellum Cardstock and then I heat embossed it with clear embossing powder. It is much prettier on the card than what shoes up on the photo. Oh yes … and the little berries on the holly are the pretty Red Rhinestones. YOU CAN GET THEM FREE (Keep reading)

Here is another card with this bundle in which I you could use the Red Rhinestones  …

One more Christmas card to share with you.  Kind of fun to see them all together!

What comes after Christmas … but spring! This is one of Stampin’ Up!s card creations, I just love how they created a wreath using the leaves …

I also have a card that can be used anytime during the year … Spring, Summer, you name it~

How about one more before the color weather returns and the colors begin to change …

Even the last 3 cards look so different from each other … yet all so pretty.

Next would be Fall / Autumn cards … I challenged myself because I had not used the “wheat” stamp up to this point so here it is…

The Country Lane Designer paper used on this card will first be Available Sept.5th).  Now … if you purchase the bundle today, you will qualify for the Bonus Buy and receive a $5 Coupon code to spend next month!!

Here is another card for the upcoming fall season … One of my favorites, this card was heat embossed with Gold embossing powder and colored with the Watercolor Pencils Assortment 2 and blender pen …

I just want to remind you that this bundle is gone today.  Today is the last day you can order the bundle (See below)

I wish this was in our Annual Catalog … it is one stamp set that I have no trouble trying to come up with ideas for!  One that note, here are a few more cards ~

This card was created with the Watercolor Pencils Assortment 2 and today is possibly the last to get them for sure …

This was yesterday’s card where I also used the Watercolor Pencils and the Blender pen …

Wow … amazing right!! So many styles, so many occasions … This is such a fun and versatile stamp set and dies.  And don’t forget the Watercolor pencils.  IN FACT, If you purchase the bundle from me and include the watercolor pencils … I will send you the Real Red Rhinestones as a special gift for shopping with me.

PLUS … It’s Bonus Days, so you will receive a $5 Bonus Coupon Code to spend in September.  That’s not all … YOU will also receive your Virtual Rewards Points from me!! This is a really sweet deal for a really sweet bundle!!

PLEASE … Let me know if you need help placing your order, or if you have any questions about this promotion.

I hope you are having a wonderful day … and let the weekend begin!

TODAY’S STAMPIN’ SUPPLY LIST …


A Spooky Little Peek into the Holiday Catalog …

Hello Stampin’ Friends ~

Today a I have a spooky little Halloween card from the Holiday Catalog. I’m featuring the Toil & Trouble Product Suite on pages 48 and 49. Today’s card highlights the Cauldron Bubbles Designer Series paper and the “Sponging” technique and has a fun little twist!

First … let’s start with our designer paper, grab the pattern with the bats on, bring over the Daffodil Delight, Gorgeous Grape, and Night of Navy ink pads and some sponges.  Wait … I have another technique for you! Masking!! You will need your 1-1/4″ Circle punch.

First you will use the paper that you punched the hole from and align it onto your cardstock so you can sponge yourself a moon.  Now take the circle you punched out, add a touch of removable adhesive (so your mask comes back off) and place it over you moon on your batty paper.

Once your moon is done and you have placed your mask over the top … you can begin sponging your Gorgeous Grape around the sky.  The fun part is … your bats are already there.  Now I added some Night of Navy to create a deeper nighttime color.  I also sponged a little color over the moon to create a spooky little effect.

Now I’m sure you noticed that the bats were flying high about the houses … I love the silhouette look that using the die cuts from the Hometown Greetings Edgelits.  Who said it just had to be used on Christmas cards! I like to cross-over a lot of my stamping supplies – gives me the best value for my buck!

Sponging creates so much dimension on your card and it’s so simple to create. The greeting comes from the Cauldron Bubbles stamp set and was cut out with the Layering Ovals Framelits.  Wow … that at that, you just created this really cute card in minutes.

Thank you for hanging out and stamping with me today.

Make today a good one … enjoy.

Today’s Stampin’ Supply List … Don’t forget Bonus Days. I appreciate your order and choosing me as your demonstrator.  Thank you.


Oh What a Night …

Hello Stampin’  Friends ~

Oh what a night … I always liked that song! And last night was a blast! I held my Catalog Launch party and we gathered to made 8 Holiday cards, ranging from Halloween to Christmas. Even our snacks ranged from Halloweens Nutter Butter Peanut Butter Mummies to White Chocolate Dipped Rice Krispy Yummies!

We all had a great time, met some new people and enjoyed a night full of stamping …

Let’s start our card share with Halloween!! This enchanting card will put a spell on you with it’s bubbling cauldron of fun. It comes from the new Toil & Trouble product suite …

Our Granny Apple Green background was embossed with the  Scattered Sequins Embossing Folder … I like that it looked like little bubbles floating up, just like my cauldron is doing!  It was matted with the Gorgeous Grape and adhered to the Basic Black base… all of these are in the Toil & Trouble Cardstock pack.

My bubbling cauldron is from the Toil & Trouble Designer Series paper and cut with the Cauldron Framelits Dies. I stamped the bubbles above it, added some pearls colored with the Granny Apple Green Stampin’ Blends and a touch of the Wink of Stella! I finished off my card with the awesome Black Glitter Ribbon – LOVE IT!!

I forgot to tell you that my sweet -n- spooky ghost was created with the Gorgeous Grape Watercolor Pencil from  Assortment 2, a blender pen and a touch of Wink of Stella.  I also used the Watercolor Pencils on my Fall card …

There it is … that Blended Seasons Bundle again!! I have more cards up in my head because there is are just so many things you can to with bundle. I don’t think I need to explain much on this card, I’ve said it all before with my past cards… This stamp really should be in your stamp collection.

The last card I’m going to share with you is the Christmas card … so simple and so elegant!  My base is the new Balmy Blue. The greeting is from the new Timeless Tidings stamp set and is Heat Embossed in white. It brings out that touch of white that surrounds the silver.

We embossed the “Seasonal Wreath” onto the Silver Foil Sheet. If you like it on the photo, you should see it in person … it’s stunning!!

We also added some Silver Twine and the Clear Faceted Gem to add some bling, dimension and texture.

I hope you enjoyed the cards we made last night, and we’d love to have you join us at our next stamp camp ..

Thank you so much coming over today. See you soon.

Just a reminder that with each $50 purchase (before shipping & handling) you will receive a Bonus Buy coupon code worth $5 from Stampin’ Up! to spend on your September purchase … when the Holiday Catalog goes live!!  AND … you will also get a Virtual Rewards point from me as well … double the fun!

TODAY’S STAMPIN’ SUPPLY LIST …


Simply Sunday: Reflections + One

Hello Stampin’ Friends ~

I have some new subscribers … welcome everyone!  I’m so excited today to share my reflection of the Color Your Season cards I’ve created so far (I have 2 more for my Launch Party tomorrow) and a new one to share today.

Lets begin with the Spring / Summer cards … This card was created from a mistake I made in class (there are no mistakes in stamping … just opportunities to improve or embellish!)  I just realized that I never shared the original card! lol  I must admit, I don’t always share the cards we do in class, I want them to be special for my attendees.

This is one of Stampin’ Up!s card creations, I just love how they created a wreath using the leaves …

Next would be Fall / Autumn cards … I challenged myself today because I have not used the “wheat” stamp up to this point so I’m introducing you to my creation today. This really is a simple card to create, and made easier when I looked up and saw this beautiful pattern paper sitting in front of me (I originally had a hand-stamped background) ~

Sponging is that “old” technique that will never go away … It’s quick, easy and creates a dramatic look!! When I think of wheat, I think of fields of wheat dancing in the breeze on a warm sunny day, and the golden color is so beautiful.

I cut my card front out first with the middle size die (there are 3 in the die set) and the vellum cardstock with the largest die.  I punched a 1-1/4 circle punch and used it to mask my front.  The sponging was done in Crushed Curry and at the very bottom there is a touch of Sahara Sand.

The wheat and the greeting (included in the stamp set) are stamped in Crumb Cake. I know, it looks much darker, but it is the gold tones that really bring out the richness of the Crumb Cake.

Now remember … the background for the base of my card was originally hand-stamped but as fate had it, I looked up and saw the Country Lane Designer paper (Available Sept.5th).  I laid the card front on top of it and knew that is exactly what this card need to finish it off!!

I just want to remind you that this bundle is only available for a few more days (or while supplies last) …

I wish this was in our Annual Catalog … it is one stamp set that I have no trouble trying to come up with ideas for!  One that note, here are a few more cards ~

This card was created with the Watercolor Pencils Assortment 2 which is also leaving in a few days …

This was yesterday’s card where I also used the Watercolor Pencils and the Blender pen …

My Christmas card was created using the Stampin’ Blends … that is the beauty of this bundle.  There are endless coloring techniques you can use!!

Again, I used the Stampin’ Blends and did some fussy cutting to create the arrangement on my wreath.  The bow is cut from the Silver Foil paper and colored with the Cherry Cobbler Stampin’ Blend.

So … what do you think? Versatile right? I haven’t shown the bells yet … In class we used them for a wedding card.  Here is today’s card once more, I think it turned out even better than I imaged when I began.

Oh wow … it appears I can’t spell – lol. That is “Blended Seasons” … Oh my!!

Thank you so much for joining me this Sunday. I appreciate you taking the time to visit on your weekend.

I hope you are having a wonderful and relaxing day.

TODAY’S STAMPIN’ SUPPLY LIST …


Reminder … Holiday Catalog Launch Party!

Hello Stampin’ Friends ~

Just a friendly reminder that today is the last day to RSVP to the Holiday Catalog Launch Party.

If you were a Club Member or Hostess this past year … You won’t want to miss this event!!

EVERYONE IS INVITED!!
RSVP now and be part of this fun filled night of stamping…
Invite your friends and enjoy a girls night out.
I’ll have all the work done for you, so let’s stamp & have FUN!
BRING A FRIEND!!

You can RSVP by phone 262-334-1009 or email me at: lindaluvs2stamp@aol.com

Thank you so much for stopping by today … Make sure you come back tomorrow because I’ve got a card that will WOW you!!

Kick off the weekend right and have a fabulous Friday!!

Catalog Launch Party

Winter Woods Bundle

Hello Stampin’ Friends ~

Today I have a card to share with you that was created using the Winter Woods bundle in the Holiday Catalog.  This will also give you a bit of a sneak peek into my Holiday Catalog Launch Party as this is just one of the bundles that will be featured and highlighted at my party.  There is still time to RSVP … but only until Friday!

Today’s card is one of the cards that was featured on the Stampin’ Up! Alaskan Cruise … they get their hands on the Holiday catalog first and have a special room set up for all the achievers to come in and view the product and samples from the catalog!!  You know I’m working on achieving the next Incentive trip (Greek Isles Cruise)!!

This simple card is perfect for the new stamper, someone who has a lot of cards to make … or someone who needs to make cards in a hurry! lol

The cardstock is stamped to create a beautiful background and then a piece of vellum is used to highlight the greeting (which is included in the stamp set) and is punched out using the Everyday Label punch. Behind our greeting are a few embellishment that adorns the card.

The die cut embellishments really give your card some beautiful texture, as does the twine which wraps around the card and really helps draw your eye to the focal point … which is your greeting. I really like the simplicity of this card because sometimes less is more.

Thank you for joining me today, I hope you have enjoyed todays card.

Have a great day ~

Today’s Stampin’ Supply List …


Technique Tuesday: Embossing Paste

Hello Stampin’ Friends ~

Today I have a cute little Halloween card for you, and it has a technique the was requested by Olivia. She wanted to learn more about the Embossing Paste … and that was a good choice, because I’ve had it for some time now, but never used it!!  Thanks Olivia for challenging me to use the stuff I bought!! lol  I think we all have a tendency to do that once in a while.

First; What is Embossing Paste? It’s a product that is super easy to use and adds great texture to your projects! Apply it over decorative masks, then let dry for easy texture. This paste can be changed to any color you desire with a drop or two of your ink refill! In fact, this paste is so fun and can be used in so many ways … I have decided to host a class!

Now you are ready to create your textured backgrounds on scrapbook pages, cards and more. You see that I am mixing the paste with a drop of my ink refill, with one of the 3 pallet knifes that we offer.  They are plastic with no sharp edges and the work well for applying and scrapping off the excess paste.  It’s also a good idea to have some warm soapy water near so you can clean up right away … before it dries onto your tools.  I use an old cake pan and towel … they work great!

There are 4 masks included in the decorative mask package offered by Stampin’ Up! I will be using the brick pattern in the project today and will be doing just partial texturing verses adding the paste over the entire project …

The three different pallet knifes make it easy to apply the paste where you want it, others work great for taking off the excess paste.  Once it’s applied you can take off your mask and allow it to dry. (Clean off your supplies in the warm soapy water) It doesn’t take too long to dry … depends on how thick it is, humidity, etc. You can use your heat gun, although that may “puff” it up a bit.

Here is the card I created using my paste … I am using the Cauldron Bubble Stamp set, the Cauldron Framelits Dies, and the Toil and Trouble Designer Series Paper… just too cute!!

I actually colored my paste Smoky Slate, same as my card front … the texture is so cool on the card!! There are actually several techniques used on todays card! Besides the Embossing Paste, did you know that the dies in our bundle coordinate with some of the images in our Toil and Trouble Designer Series Paper!! Only the broom is stamped and colored … the cat and witch are from the designer paper.

I also brought back “sponging” … I’ve sponged the punched moon to create a dimensional effect. I did coloring on my broom and finally I did a “double stamp” on my greeting… I stamped my greeting and then stamped again but slightly off because I wanted to create a “shadow” effect. Looks great for Halloween.

My spider web was created with the new Black Foil Sheets in the Holiday Catalog and the Cauldron Framelits Dies. Well … I couldn’t let the spider web outshine my stars to I added a touch of the Wink of Stella on each star and around the edge of the moon.

I hope you enjoyed seeing how the Embossing paste is used, I’m sure I’ll be making many more cards with this now that I found out how easy it is to use!

Watch for an upcoming class on the Embossing paste … my guess I’ll schedule it sometime in September or October.

Thank you for sharing a part of your day with me, and I hope I inspired you to pull out something in your stamp room that you haven’t used yet.

Have an awesome day.

TODAY’S STAMPIN’ SUPPLY LIST …


Join the Party… Holiday Catalog Launch!

Hello Stampin’ Friends ~

There has been a lot of announcements lately and today I have another … A PARTY!!

The Holiday Catalogs are being delivered as we speak! Now it’s time to get your hands on the awesome stamp sets and accessories & create 8 wonderful cards with envelopes.

PLUS, If you were a Hostess of mine this past year or so … I have a special gift for you when you arrive!! Let’s Party!

If you were a Club Member or Hostess this past year … You won’t want to miss this event!!

EVERYONE IS INVITED!!
RSVP now and be part of this fun filled night of stamping…
Invite your friends and enjoy a girls night out.
I’ll have all the work done for you, so let’s stamp & have FUN!
BRING A FRIEND!!

You can RSVP by phone 262-334-1009 or email me at: lindaluvs2stamp@aol.com

Thank you so much for stopping by today … Make sure you come back tomorrow because I’ve got a card that will WOW you!!

Kick off the weekend right and have a fabulous Friday!!

Catalog Launch Party

Holiday Catalog Sneak Peek: Sincerely Santa

Hello Stampin’ Friends ~

Today I have another Sneak Peek into the Holiday Catalog!!  If you need a simple way to make beautiful tags for your Christmas gifts, Sincerely Santa Project Kit for you. The tags in this kit are perfect for the holiday season!

Today you will get to view a video on “How To” create these cute tags and some photos showing you exactly what you are getting in this kit!

Give your presents style with adorable gift tags. This kit includes supplies for 30 gift tags and coordinates with the Sincerely Santa Stamp Set (Sold Separately).

Let the tags do the talking on your gifts this year and do it in style! Gather with your friends and spend an afternoon crafting these fun tags … you’ll be prepared for the holidays and have a wonderful afternoon spent with friends!

Thank you for joining me today and I’ll meet you back here tomorrow for my Technique Tuesday post!

Have a great day ~


Simply Sunday: Happy Blessings

Hello Stampin’ Friends ~

Hope you are enjoying your weekend. I promised to share a sneak peek into the Holiday Catalog so I chose the Country Home stamp set to share with you today.

Just like the name says, this stamp set takes you home to the country. For me, it is the “milk can” that takes me back. Back to my grandpa’s farm and running in the fields on those warm summer days, the smell of grandma’s kitchen as she always had something baking in the oven, and the pretty flowers in the garden … all take me back.

I teamed up the images from the Country Home stamp set with the Festive Farmhouse Designer Series paper. It may be located in the Christmas section of the catalog but I thought it was perfect for my card.  It reminds me of Shiplap!! A little Farmhouse Chic 🙂 What do you think … Will I get a thumbs up from Chip and Joanna Gaines?

I stamped the milk can with VersaMark and embossed it with Silver onto the Galvanized Metallic paper. Next I used the Garden Green Watercolor Pencil and the Aqua Painter to “tarnish” my milk can. The flowers were colored with the Stampin’ Blends, I used the Light & Dark Old Olive, Light & Dark Crumb Cake, Light and Dark Pink Pirouette and Light Crushed Curry. The Stampin’ Blends make coloring so easy and it looks sooo good.

You can see the “tarnish” a little better from this angle … You can also see that I popped up both stamped images (these are two separate stamps). I find coloring very relaxing, and while I was relaxed I didn’t mind cutting out these images and adhering them together. It really does remind me of Farmhouse Chic. The greeting completes the card.

I hope you enjoyed todays card share, and I thank you for sharing a part of your day with me.

Happy Blessings and Have a beautiful day ~


Dashing Along Designer Paper Card Share …

Hello Stampin’ Friends ~

So what did you think of the Dashing Along Designer paper .. cute right 🙂 and free is pretty good too.

The Dashing Along Designer Series Paper has a mix of old favorites and new patterns to bring you beautiful, traditional Christmas paper. This collection of patterns has an eclectic feel and is perfect for layering, and while the newsprint design isn’t Christmas-themed, we selected it for its versatility and popularity with customers.

I’ve got another card to share with you today …

First of all … the Dashing Along designer series paper is too cute!  I’m also lovin’ the Dashing Deer stamp set and excited that he’s tucked inside that UPS / Stampin’ Up! box that arrived yesterday. Can’t wait till Friday when I can bust it open and begin to play.

Thanks much for stopping by ….

Enjoy your day!!


Wednesday Wow … Free Designer Paper & 2 Card shares for you!!

Hello Stampin’ Friends ~

Yesterday I shared with you the Dashing Along “Host” promotion, in which you can earn a beautiful package (or more!) of the Dashing Along Designer paper, and I said I would share a card with you today! Actually … I have two for you!!

The Dashing Along Designer Series Paper has a mix of old favorites and new patterns to bring you beautiful, traditional Christmas paper. This collection of patterns has an eclectic feel and is perfect for layering, and while the newsprint design isn’t Christmas-themed, we selected it for its versatility and popularity with customers.

Check out this beautiful card created with the Dashing Along Designer Series paper and the Dashing Deer bundle from the upcoming Holiday Catalog! WOW …

YES … the dies that created the stunning background on this card come in the Dashing Deer Bundle.  This baby is on it’s way to my house right now!! I’m so excited with all the amazing stamp sets, bundles, card kits and accessories … Why don’t YOU be the first to host a holiday party in September and get the Dashing Along Designer paper and MORE FREE!!

I don’t want to sound pushy …  I just think this is an amazing opportunity, and I want to share it with all of you.  Besides, parties are fun!! I’ll do the work … you bake the brownies … we’ll all make some cute cards … then you get to pick out your free stuff 🙂  And yes, you can use your Hostess Benefits in the New Holiday Catalog!!

The paper really is fun and will make your card making a breeze, just add the Dashing Deer Bundle and you be rockin’ this Christmas in style.  Keep an eye out for more card shares with this pretty paper.

Until then … Have a good day and thank you for the visit today!!


IT’S COMING YOUR WAY … How excited are YOU to get your hands on the New Holiday Catalog??


Technique Tuesday: Pick Your Tool …

Hello Stampin’ Friends ~

Today I have something special to show you … not quite a technique but an awesome new tool created by Stampin’ Up! to aid us in all our card making and scrapbooking. It’s the new “Take Your Pick” tool that will be released in September when the Holiday Catalog goes live!!

Are you looking for a tool that makes your crafting life even easier? Dani Baker, senior product strategy specialist here at Stampin’ Up!, is here to introduce the Take Your Pick tool.

Isn’t that the neatest thing since sliced bread? Or then new cell phones that do everything … lol  Can’t wait to get my hands on it because I have some other ideas that I would like to try out with that tool! , I have more … September is rockin’ with some awesome opportunities …

1st ~ The Holiday Catalog is goes live on September 5th and

2nd ~ Is the Dashing Along Host promotion! 

Hosting a holiday catalog event is always fun—and Stampin’ Up! has made it even more delightful with the exciting Dashing Along Host Promotion. Host a party with just $250 in sales from September 1–30, you’ll earn our FREE, exclusive Dashing Along Designer Series Paper. I’d like to get you the “Pick Your Tool” for FREE too!! No place to host a party?? You can use my Stampin’ Studio!! Let’s chat and set a date.

To create our exclusive Dashing Along Designer Series Paper, we decided to use a mix of old favorites and new patterns to bring you  beautiful, traditional Christmas paper. This collection of patterns has an eclectic feel and is perfect for layering, and while the newsprint design isn’t Christmas-themed, we selected it for its versatility and popularity with customers. We hope you’ll love this Designer Series Paper as much as we do, and remember, it’s available for a limited time and with qualifying sales only! That means you can be your own “hostess” and reap all the benefits!

Stop back tomorrow and I’ll share a beautiful card created with this fabulous paper!

Thanks for checking out my blog and I wish you a great day!!!

Current Promotions …


Sneak Peek: Holiday Catalog ~ Timeless Tidings Project Kit

Hello Stampin’ Friends ~

What did you think of the Winter Woods bundle … beautiful right! And the fact that it was made to coordinate with our two current stamp sets; Lovely as a Tree and the Rooted in Nature bundle… made it a must have on my Wish List.

Today I’d like to know if you are looking for a simple way to create beautiful Christmas cards? Because, the cards in the Timeless Tidings Project  kit are perfect for the holiday season!  Watch Shannon as she shares this amazing kit with us …

So elegant!  This is the perfect project kit if you find yourself running out of time to get your cards done. These elegant cards take just minutes to stamp and assemble … great for beginners or seasoned stampers.

I hope you have enjoyed the video and sneak peek into the Holiday Catalog … I have ordered them for all my current customers and extras will be coming so I have plenty to share at my upcoming stampin’ event.

Make sure you’re on the invitation list by signing up for my mailing list … Thank you!!

Have a great day!