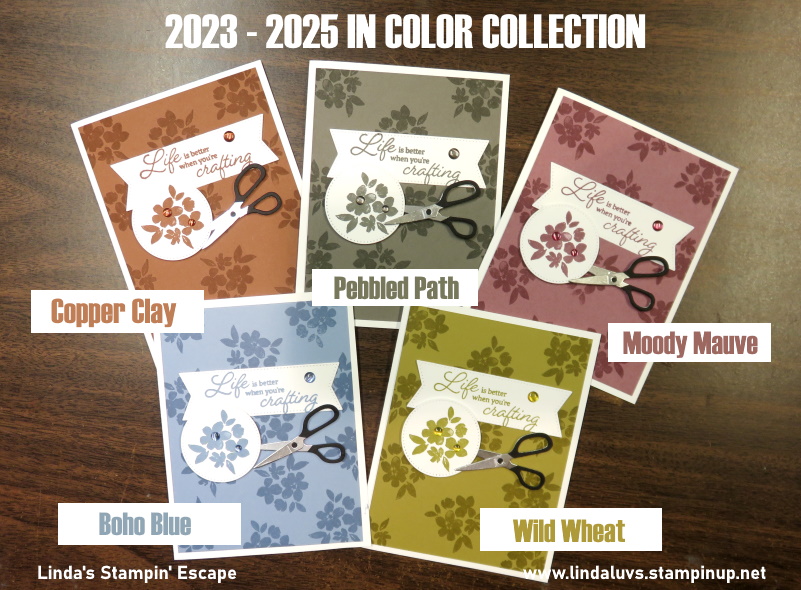
Now that you have had time to play with the NEW 2023-2024 In Colors…. Which new In-Color is YOUR favorite?
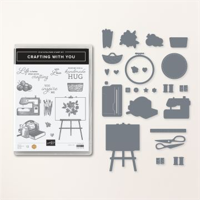
Here you can get a close up look at them. I am using the New “Crafting with You” bundle … wow, this is fun to play with. I have much more playing to do!! lol
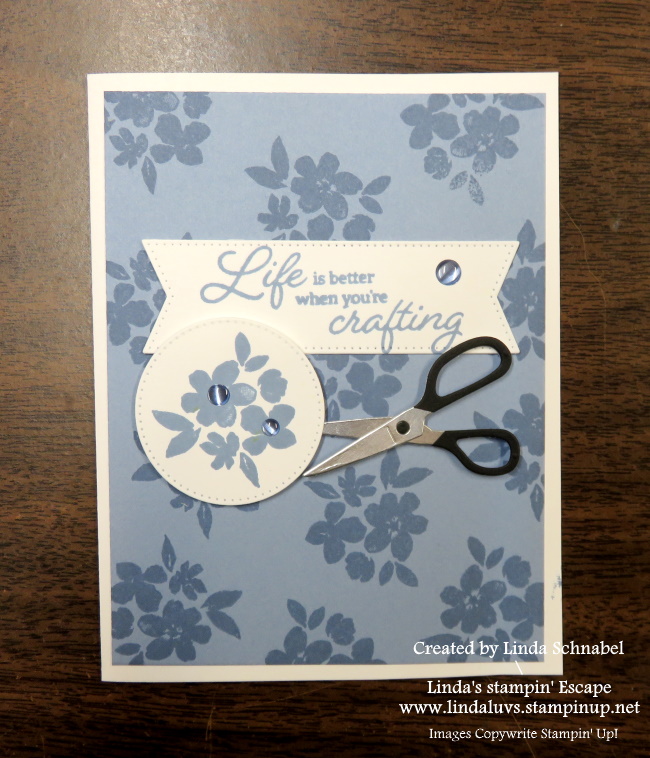
Let’s begin with the Boho Blue …
Each of my cards are made exactly the same so you can get the “real” effect of the color! I began with a Basic White base and then I stamped onto my In Color card front (Boho Blue) with the coordinating In Color ink.
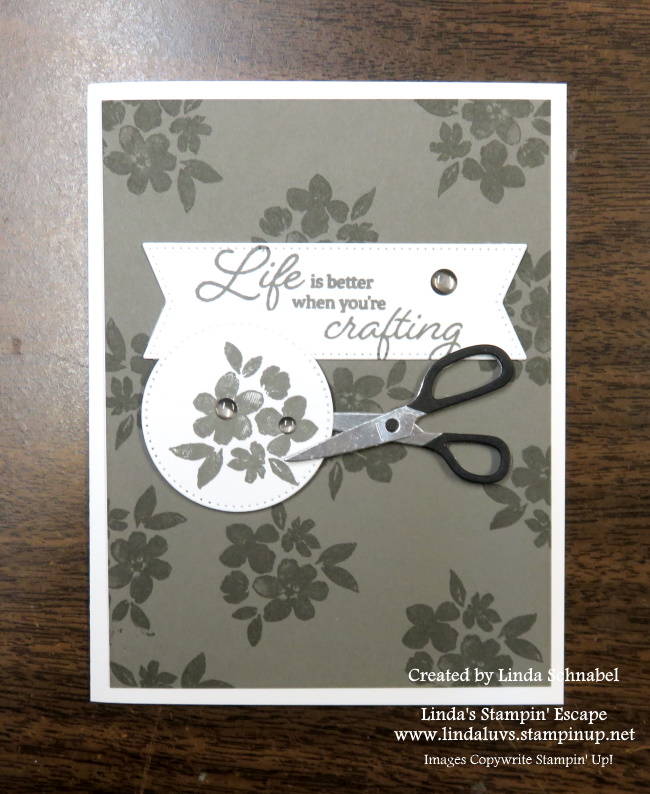
The next card is the Pebbled Path ….
After stamping the “color on color” (which is an old technique I still use a lot) I stamped the In Color floral piece and greeting, both of which are from the “Crafting with You” bundle.
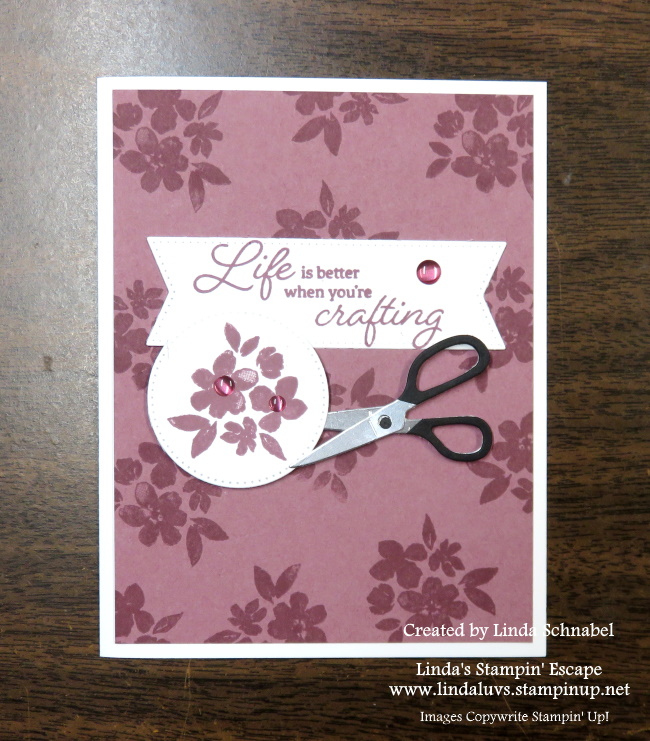
Next up is the Moody Mauve ….
Once I had the greeting and flowers stamped onto the white in the coordinating ink, I die cut them using the Stylish Shapes dies. These dies are so versatile and a must have in your stamping supplies.
Speaking of die cuts, let’s take a look at that adorable scissors ….
This little cutie is pretty easy to make. I die cut one out of Silver Foil and a second set out of Basic Black. Using my Paper Snips as an example, I cut the black handle part to look like my Paper Snips!! I then used the Liquid Glue to attach the black scissor tops .
A Glue Dot was used to hold the two pieces of the scissors together and then I popped the little black circle into the circle area of the scissors. Easy peasy!
Next up is the Wild Wheat ….
Not one of my favorites to start with, but I appreciated it much better when using it with the Designer Papers that coordinate with this color! Who knew!!
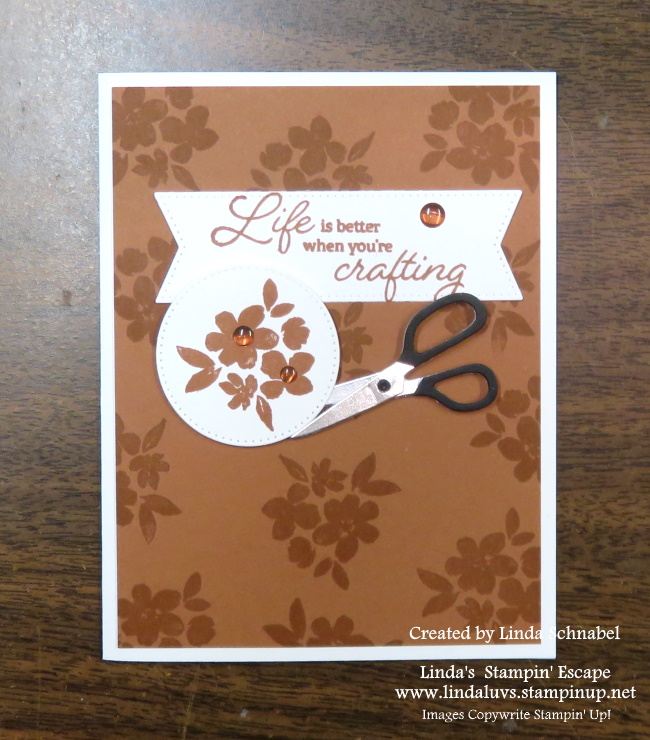
The last of my 2023-2024 In Colors is the Copper Clay …
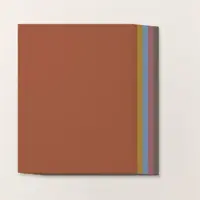
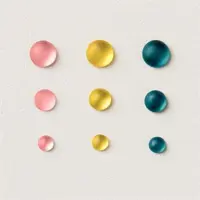
I love this color, it’s so pretty and we were in need of a rich earth tone! Now, to finish off my cards, I used the 2023-2024 In Color Dots … I wanted to show you how beautifully they coordinate with the cardstock and ink.
Which of the NEW 2023-2024 In Colors is YOUR favorite. I’d like to know, and you can just leave your answer in the comments below. Thank you.
I have a list of supplies for you below, including the “Multi-packs” of the In Colors for your convenience.
Today I’m sharing my Pink & Black Gorgeous Garden Card with you because I had so many comments on this card. The pale pink of the Bubble Bath cardstock and the stark Basic Black imagery from the die really creates a stunning impact.
The dimensions are pretty tight on this one because I cut the black pretty close to the size of the die. Basic Black card base is as usual: 8-1/2″ x 5-1/2″ scored and folded at 4-1/4″. My Bubble Bath is cut to: 5-7/8″ x 4-1/8″ and the black for the die cut is 5-7/8″ x 4.
I used the Tombo Liquid glue to secure my die cut floral onto the Bubble Bath mat … making sure I got all the edges and parts of the design that may pop up (like the buds). The greeting comes from Layering Leaves (my GO TO stamp set for sentiments) and was die cut with the circle die from the Stylish Shapes (another must have in your stash!). It’s stamped with Memento Ink.
I dyed my ribbon using the Bubble Bath Stampin’ Blend …. use your brush tip and using the side of the brush, gently slide it down the ribbon. You don’t need much pressure because the Alcohol Ink will absorb easily into your ribbon. Let dry (it dries rather quickly). I secured the ribbon from the pink mat on the card front and tied a bow and trimmed off the ends. I used dimensionals to pop up the greeting and then I tucked it behind my ribbon.
To complete my card I used the Iridescent Rhinestones to add a little sparkle, and these rhinestones pick up the colors that your using on your card, so it enhances the pinks on today’s card!
Image the possibilities that you can create with this die alone, and there a two dies in the Gorgeous Garden Dies … the leaves I shared with you yesterday.
Have a wonderful Thursday and Thank You for spending a part of your day with me?
I’m excited to share the cards from my Facebook LIVE last night and the bonus card I promised. You’ll see simple / fun techniques that will enhance the Gorgeous Garden Dies and take your cards to the next level. Layering, Sponging and Blending Brushes Oh My!
Let’s watch the video first and then I’ll highlight the cards ….
So what do you think? So pretty … right!! Let’s start with my first card. Layers of color on color, or should I say white. The Basic White card base is 8-1/2″ x 5-1/2″ then scored and folded at 4-1/4″. Each of the white die cut pieces are 4-1/8″ x 5-7/8″ … be sure to center your die before cutting so they line up nicely.
I will share details on the pink card tomorrow ….
Our next card has an Basic Black 8-1/2″ x 5-1/2″ then scored and folded at 4-1/4″. Then you will need one Basic Black and one Basic White piece cut at 4-1/8″ x 5-7/8″. The black piece is die cut and the white piece will be colored with Daffodil Delight, Pumpkin Pie, Old Olive, Cajun Craze and Cherry Cobbler and the use of Blending Brushes.
Ok … now we are going to use up the items we had left for the Facebook LIVE. Please note that we will be using the same dimensions on this card as we did on the last, and then I’ll let you in on a few changes.
Let’s begin with the white piece we colored with the blending brushes … this is the piece we will die cut. Then attach it to the Basic Black piece of cardstock using your glue as shown in the video.
NOW … we are going to trim or die cut piece down to 5″ x 3-3/4″. You can use your paper cutter or a guillotine cutter that works great. Once trimmed down, layer the card front onto a piece of 5-1/4″ x 4″ Old Olive cardstock, then layer onto your Basic Black cardbase.
We’ll mount our greeting onto a piece of vellum cardstock and pop it up using Stampin’ Dimensionals, and then embellish it with the In-Color gems. As I stated in the video, you can use some of the left over colored paper for the inside of your.
I’m not sure which one I prefer … the black die cut layered over the color or the colored die cut layered over the black. Either way they both look cool and I love they layered white … it’s so delicate and subtle.
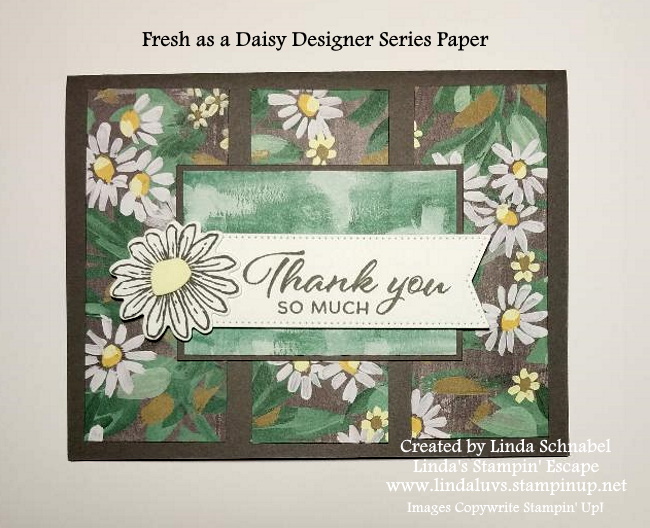
Today I have 2 additional cards from the beautiful Fresh As A Daisy Designer Series Paper. I have more of the NEW Colors share with you today too.
My first card today highlights the “returning” Pretty Peacock and the New Wild Wheat. I am also highlighting the NEW Layering Leaves stamp set (I LOVE this set!!) on both cards today, yesterday I used the greetings from the Cheerful Daisy stamp set.
The designer paper piece cuts to 4″ x 5-1/4″ and has a Wild Wheat mat that measures 4-1/8″ x 5-3/8″ … The card front was then layered onto the returning color; Pretty Peacock that measures 5-1/2″ x 8-1/2″ then scored and folded at 4-1/4″.
Using a piece of scrap, I stamped my greeting in Pretty Peacock and die cut it using the NEW Nested Essentials Dies, then I used the small banner die from the same set and cut two Wild Wheat and two Pretty Peacock banners to create the layering behind the greeting … it creates and nice focal point to the card. I then embellished the card with the Wild Wheat dots from the 2023-25 In Color Dots.
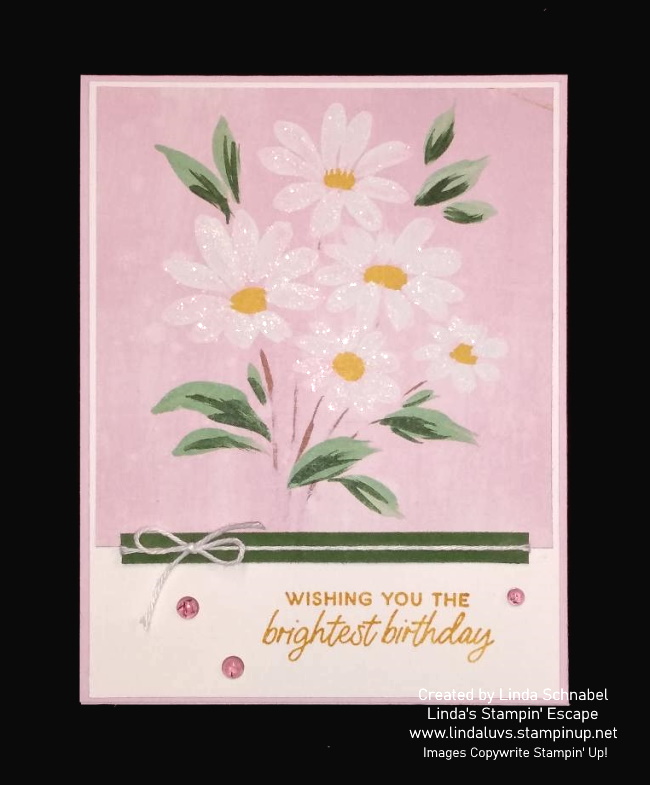
My last card for the day highlights the NEW Bubble Bath and Pebbled Path … I love pink and grey together and this card turned out stunning!
The designer paper that looks like it was painted in Pebbled Path measures 3″ x 4″ and is not matted, instead I used 3 Bubble Bath squares that were die cut from Stylish Shapes and were just “left overs” from my retreat. I also stamped my greeting in Pebbled Path directly onto one of the blocks.
The Pebbled Path base measures 5-1/2″ x 8-1/2″ then scored and folded at 4-1/4″ was stamped with the Daisy image in Pebbled Path to create dimension and a cute background. I really like using the “Color on Color” technique! My daisy and center was stamped in Moody Mauve and then highlighted with a hint of Bubble Bath in the center by using the Sponge Dauber … both were die cut along with extra leaves and they layered onto the front of the card. I then embellished the card with the Pebbled Path dots from the 2023-25 In Color Dots.
I hope you are enjoying all the samples of cards created from the pieces cut from that 12″ x 12″ sheet of Fresh As A Daisy Designer Series paper. I have more in store!!
Today I have 2 additional cards from the beautiful Fresh As A Daisy Designer Series Paper. These are two of the smaller 3″ x 2″ designs that I cut from this sheet of designer paper.
My first card today highlights the “NEW” Moody Mauve… it’s prettier in person, not the best lighting on this photo and I appologize. I am also using the NEW Layering Leaves stamp set on both cards today.
The designer paper piece cuts to 3″ x 2″ and has a Basic White mat that measures 3-1/8″ x 2-1/8″ … The card front has a strip of Moody Mauve that I stamped the floral images in the coordinating Moody Mauve ink. This piece measures 5-1/2″ x 1-1/2″ then matted with Basic White measuring 5-1/2″ x 1-5/8″.
Using a piece of scrap, I stamped my greeting in Moody Mauve and die cut it using the Stylish Shapes. Dies. I’m thinking I should have added some bling to this card! What do you think?
My second card for today highlights the NEW Pebbled Path and another design from our Fresh as a Daisy Designer paper.
The “green” designer paper designer paper piece cuts to 3″ x 2″ and has a Pebbled Path mat that measures 3-1/8″ x 2-1/8″. The three strips of designer paper are cut to 4″ x 1-1/2″ and are leftovers from my stamping retreat … I can’t let that pretty paper go to waste!
I stamped my greeting and daisy in Pebbled Path and die cut both … the greeting dies come from the Stylish Shapes. I use them a lot! Super simple cards to make, but that is the point right!? I want to inspire you to use up these little pieces from this sheet of designer paper.
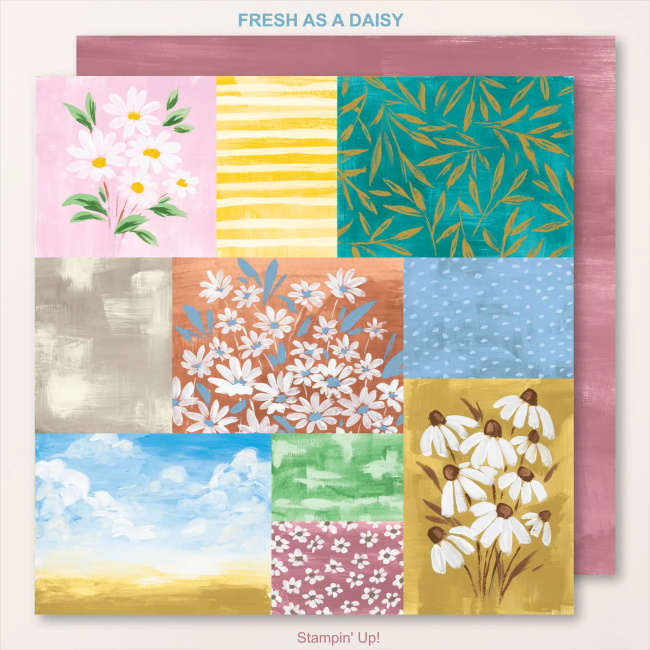
Today I have 3 cards I’d like to share with you from the beautiful Fresh As A Daisy Designer Series Paper. The sheet that I am using was designed for you to create many different cards!! You’ll see how easy it is to create the pretty cards in no time at all … plus you’ll be introduced to some of the NEW colors.
Let me start with the new Bubble Bath (pink) …
The daisies cut to 4″ x 4″ from the sheet and was adhered to a piece of 4-1/8″ x 5-3/8″ Basic White. Our base is 11″ x 4-1/4″ then scored and folded at 5-1/2″. I used a piece of Garden Green scrap for a pop of color and tied a pretty little bow from White Bakers twine. I then stamped my greeting in Crushed Curry to pull that color from the flowers, and added 3 Tinsel Gems (4 pack) that are “Berry Burst” color but looked great on my card. I finished it off with some Wink of Stella on the White daisy petals.
My second card highlights the new Wild Wheat ….
The flower piece cuts to 3-3/4″ x 5-1/4″ and has an Early Espresso mat that measures 3-7/8″ x 5-3/8″ … I then added a strip of Wild Wheat to each side so it stretched out to 4-1/8″ inch. The card front was then layered onto the Basic White base that measures 5-1/2″ x 8-1/2″ then scored and folded at 4-1/4″. Using a piece of scrap, I stamped my greeting in Early Espresso and snipped the ends off at an angle to create a different look.
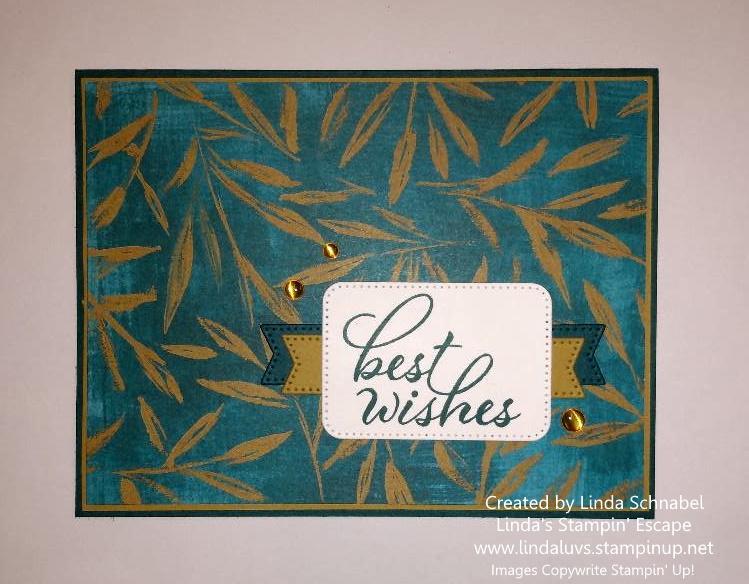
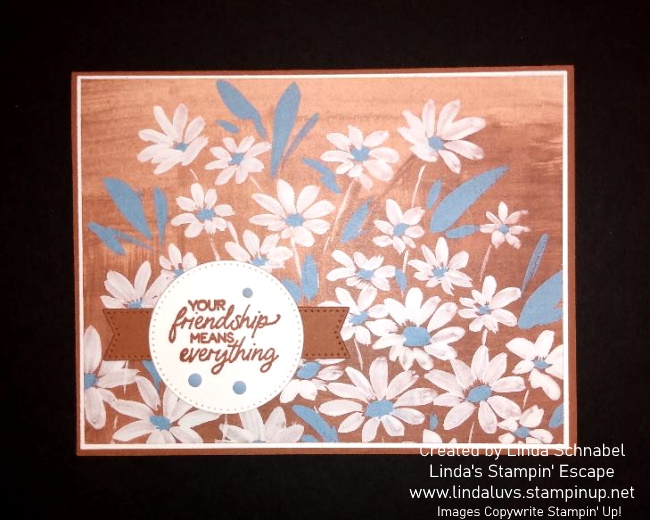
My third and last card for the day highlights the NEW Copper Clay and Boho Blue…
The daisies cut from our designer paper measure 4″ x 5-1/4″ and matted with Basic White measuring 4-1/8″ x 5-3/8″ … this is secured to the Copper Clay base that measures 5-1/2″ x 8-1/2″ then scored and folded at 4-1/4″. I used the Stylish Shapes to cut out my circle for the greeting (stamped in Copper Clay) and the Copper Clay cardstock to die cut the banner. I embellised with the Adhesive Backed Solid Gems in Boho Blue.
I hope you enjoyed and felt inspired by the beautiful “Fresh As A Daisy” Designer Paper … and this is only from one sheet! Thank you for taking time out of your Sunday to visit my blog.
Thought I would change things up a bit today and share my Sending Smiles Card created in Lemon Lolly. Who know I would flip head over heals for this new color. It’s so cheerful and some days we all need a little more cheer in our lives.
I created this card for the Tutorial Group that I am in …. Our June theme is our favorite new color.
Let me know if you would like the PDF for this card… just leave me a comment below. You will need WORD to open the file … I’d be happy to share this one with you.
Thanks for stopping by my blog today. Have a good one!!
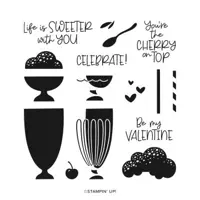
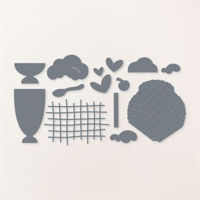
Have you ever made a card … thought it was cute …. but the more you looked at it, the more you thought it needed something? That is how I felt about this card I created with the Share a Milkshake stamps & Dies, along with the Wanted to Say Dies.
My cardbase is Early Espresso to coordinate with my chocolate ice cream, or if you’re a Chocolate Shoppe Ice Cream fan (out of Madison, WI) we call that deep rich chocolate; Zanzibar! My background is the Stargazing Designer paper and matted with Basic White. The cone is made from the Pecan Pie cardstock. It looked a little plain so I used the “waffle” die and pow ….. gave my pop I was looking for.
The Happy Birthday base or mat, is also die cut from the Stargazing designer paper and then topped off with the Basic White … a touch of Wink of Stella on our Happy Birthday. Just like building our cone! A few Berry Burst Tinsel Gems (4-pack) to embellish our cone … or you could call them “sprinkles”.
Making ice cream cones is pretty easy with these few ingredients and soooo tasty looking too. And that cone is going to be so good with all the warm weather we’ve been having
Thanks for joining me for a cone… Enjoy your weekend!
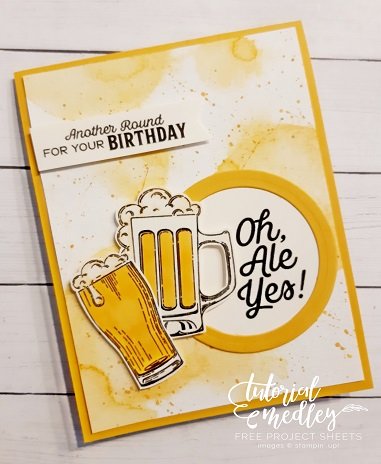
Raise your glasses, beer lovers! Today, we come together to celebrate International Beer Day, a delightful occasion that unites people from all corners of the globe in the appreciation of the world’s oldest and most beloved alcoholic beverage… Beer!
And when you come from Wisconsin and it’s a Friday, this tasty beverages is usually paired with a Fish Fry!! Today, I have a fun “refreshing” card to share with you along with the instructions to make it.
Measurements:
Card Base: Crushed Curry 5 ½” x 8 ½”
Cardstock #2: Basic White 4” x 5 ¼”
Instructions:
Cut a 5 ½’ x 8 ½” Crushed Curry card base. Fold in half.
Cut a 4” x 5 ¼” Basic White panel.
Stamp (3) large and (4) small Watercolor Circles onto the Basic White panel using Crushed Curry ink.
Lightly spritz a little water to soften the edges. Let dry completely.
Using a Water Painter, add Crushed Curry ink to the brush and tap to speckle ink all over the panel as desired. Let dry completely.
Adhere the panel to the card front.
On a scrap piece of Basic White, stamp the glasses and foam using Jet Black Stazon ink.
Color the glasses using Crushed Curry ink and a Water painter. Cut.
Cut a ¾” x 2 ½” strip of Basic White cardstock.
Stamp the sentiment using Jet Black Stazon ink. Cut the right edge to form a banner.
Adhere the sentiment to the top of the card using Stampin’ Dimensionals.
Cut a 2 ¾” Crushed Curry circle.
Cut a 2 1/8” Basic White circle.
Stamp the sentiment onto the circle using Jet Black Stazon ink.
Adhere the sentiment to the Crushed Curry Circle.
Adhere the circle to the card front.
Adhere the glasses to the card front using Stampin’ Dimensionals.
What better way to commemorate this joyous day than with a handmade card using the charming Brewed for You stamp set by Stampin’ Up! Let’s raise our glasses and dive into the creative world of crafting cards and beers!
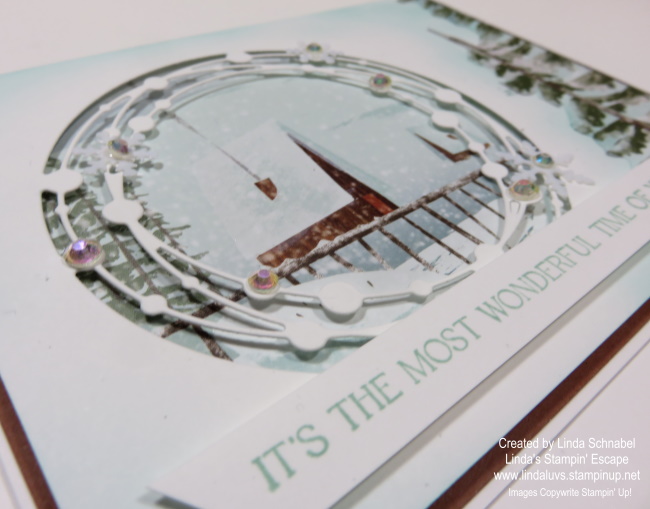
With the heat wave going on, I thought it would be nice to “chill” things out a bit and I’m doing so with some of the One Horse Open Sleigh and Irresistible Blooms On-Line Exclusive items. This card turned out stunning if I do say so myself!
I missed using the beautiful circle die image from the Irresistible Blooms and thought it would work perfect with the gorgeous One Horse Open Sleigh Designer paper… I chose the pattern with the A-Frame home so the die cut would frame the house.
I began with Basic White cardstock and die cut the circle out. Cut my designer paper so that it would “peek through” … I used dimensionals to pop up the white. The left over designer paper was “fussy” cut and glued to the front on my card.
I felt the white was too stark so I used Pool Party and my Blending Brush to soften the difference between the white and the designer paper and noticed how beautifully it enhanced the look of the card. When finished with the brushing, I mounted my card front onto a piece of Pecan Pie to pull the color of the house.
Next, I began the embellishing … first with the Adhesive Backed Snowflakes and then with the Iridescent Rhinestones. I places them on the little circle spots on the die cut.
The greeting I chose “was” from a set in the Clearance Rack but has since sold out … so chose what works best for you. It was stamped in Pool Party and when attached to the front, I attached then entire cardfront / mat onto my Basic White cardbase.
It reminds me of those old fashioned Christmas cards that we all loved, but updated with the beautiful die cut and embellishment.
Thanks for joining me today, and I hope my card took you back to the Most Wonderful Time of Year.
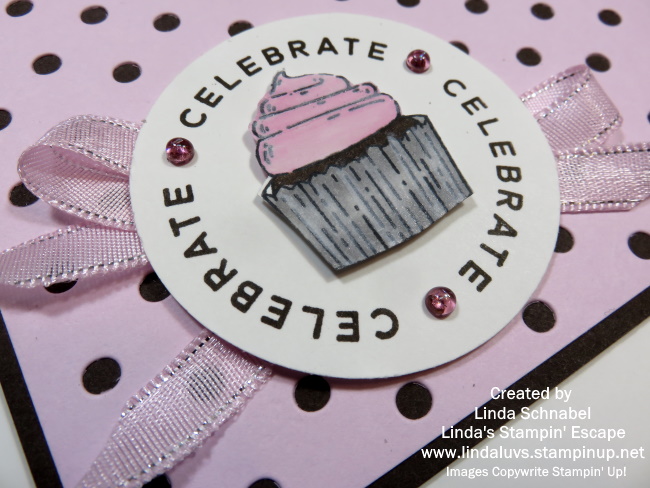
Today we are Thinking of You on Your Birthday and celebrating with a pretty pink and gray card created with the Circle Sayings and Patchwork pieces dies. There are so many combinations you can make with these two crafting tools in your stamp room… and they are fun to play with!
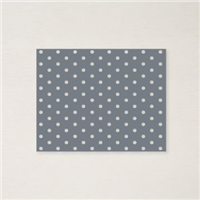
My cardbase is a piece of 8-1/2″ x 5-1/2″ Bubble Bath scored at 4-1/4″ then scored and folded. Next I cut a piece of Smoky Slate for my mat that will be used to arrange my die cut patchwork pieces. The pieces were cut from the Bright & Beautiful 6″ x 6″ Designer Series paper.
I used the Smoky Slate cardstock as a guide to align the pieces … starting with the corners and then filling in the rest of the pieces and spacing them evenly. I used my Tombo Liquid glue to secure them to the mat.
Using the Memento Ink I stamped the cupcake … colored it with Smoky Slate and Bubble Bath Stampin’ Blends. I stamped the flowers in Bubble Bath and then the “Thinking of You” over the top of the flowers with Memento Ink … then I punched it out with the coordinating 2-3/8″ Circle Punch.
The cupcake is fussy cut and popped up with a Stampin’ Dimensionals as was the entire punched circle when finished. I added a little Wink of Stella to the cupcake – just because!
I love the ombre look on the Bright & Beautiful designer paper, it’s subtle but pretty. Check out how I switched out every other die cut so you would get a two-toned look on our “burst” pattern, it gives it a more distinct color pallet. I have more ways to use this die and will be sharing them with you either LIVE on Facebook and / or right here on my blog.
Thank you for coming over to my blog, I appreciate it. Have a great day. PS: I will not be going LIVE today as I am on vacation … more on that too!
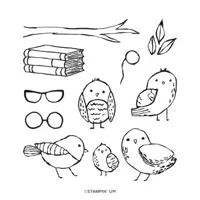
I’m packing for my trip today so I thought I’d share a really cute card with you created by one of my Design Team members, and I don’t have the Birds Eye View stamp set so it’s a treat for both you and me. We had a Tic-Tac-Toe challenge this month (I have not done mine yet … when I get back!)
I’m thinking that it is either … Any Shape / Ribbon / Animal *or* Any Shape / Embossed / Yellow. Which tic-tac-toe pattern do you think it is?? Either way, I think it turned out so cute!
Measurements:
Card Base: Lemon Lime Twist 5 ½” x 8 ½”, scored at 4 ¼”
Cardstock #2: Basic White 4” x 5 ¼”, 2 1/8” circle die, ½” x 2 ½” banner die
Designer Paper: ¾” circle die
Instructions:
Cut out 20 circles from the designer paper using the ¾” circle die. Adhere each circle to the Basic White cardstock.
Stamp the owl and glasses on a scrap Watercolor Paper using Stazon ink. (Make sure that your Stazon is juicy before using it to make sure the image comes out nice and dark on the paper)
Use a water painter to color the owl. (I pressed the ink pad on a Stamping Block, then picked up the color with a bit of water). Cut out the owl using Paper Snip Scissors.
Cut out a circle using the 2 1/8” die. Adhere it to the card.
Stamp “hi” on a piece of scrap Basic White cardstock. Cut it out using the banner die. Add it to the card using Dimensionals.
Add the owl to the card using Dimensionals.
Use the Multipurpose Glue to add a “bubble” to each of the glass lenses.
Make a bow with the silver Simply Elegant Trim and add it to the card using a Glue Dot.
Apply Rhinestones.
I want to thank you my friends for today’s visit to my blog. I’d be happy to hear what Tic-Tac-Toe pattern I should use for my card. You can comment below.
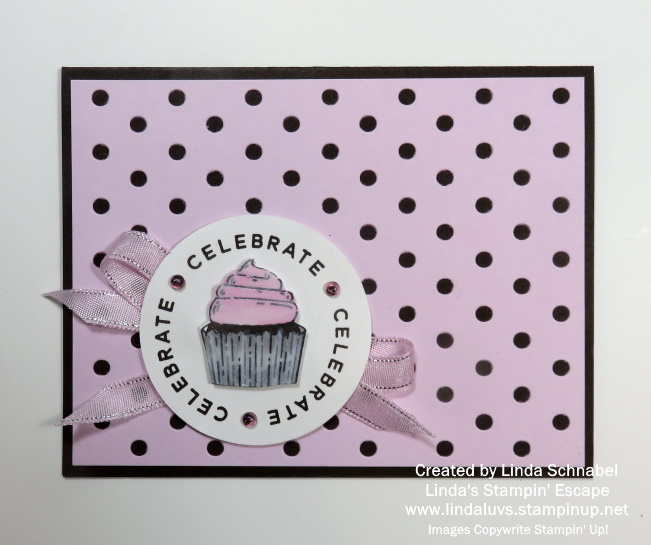
I’m tickled pink to share today’s card with you. I’m using the Circle Sayings Bundle and a “fun” die I just got called “Dot’s & Spots”. If you like polka dots, I think you’ll like this die! Now if this combination doesn’t spark your curiosity, let me add my color combination of our newest pink, Bubble Bath and Early Espresso. The recipe for this card will result in a cuteness overload!
Just take a peek …
We’ll begin with out cardbase which is the Early Espresso… chosen because of our “chocolate” cupcake. The Bubble Bath is cut to a standard 4″ x 5-1/4″ and then die cut with the Dot’s & Spots. Now don’t throw those die cut dots away because they can be used in a future Shaker Card. I attached the die cut piece directly to my card base using the Liquid glue.
On a piece of Basic White I stamped my cupcake with the Memento Ink and the greeting in Early Espresso. The greeting was punched with the coordinating 2-3/8″ punch from the bundle and the cupcake was colored and fussy cut. I used the Bubble Bath, Smoky Slate and #100 Stampin’ Blends to color.
The cupcake once colored was popped up with the Stampin’ Dimensionals. Behind the the greeting is the new Bubble Bath ribbon from the 3/8″ Sheer Ribbon Combo pack. This pack also includes Azure Afternoon and Lemon Lolly. It has a nice shimmer to it and a touch of silver. It almost makes the card look like a pretty little gift!
Once the ribbon was attached to the greeting, I added Stampin’ Dimensionals and attached it to the card front.
To complete my card I added the Bubble Gum Tinsel Gems – 4 pack onto the greeting. There is no shortage of dimension or texture to this card and it is sooo stinkin’ cute! I’m loving those polka dots, so I’m sure you’ll be seeing a lot more of them.
I’d like to thank you for spending a part of your Sunday with me. I hope you enjoyed today’s colors and finished card. Enjoy your day.
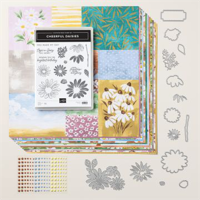
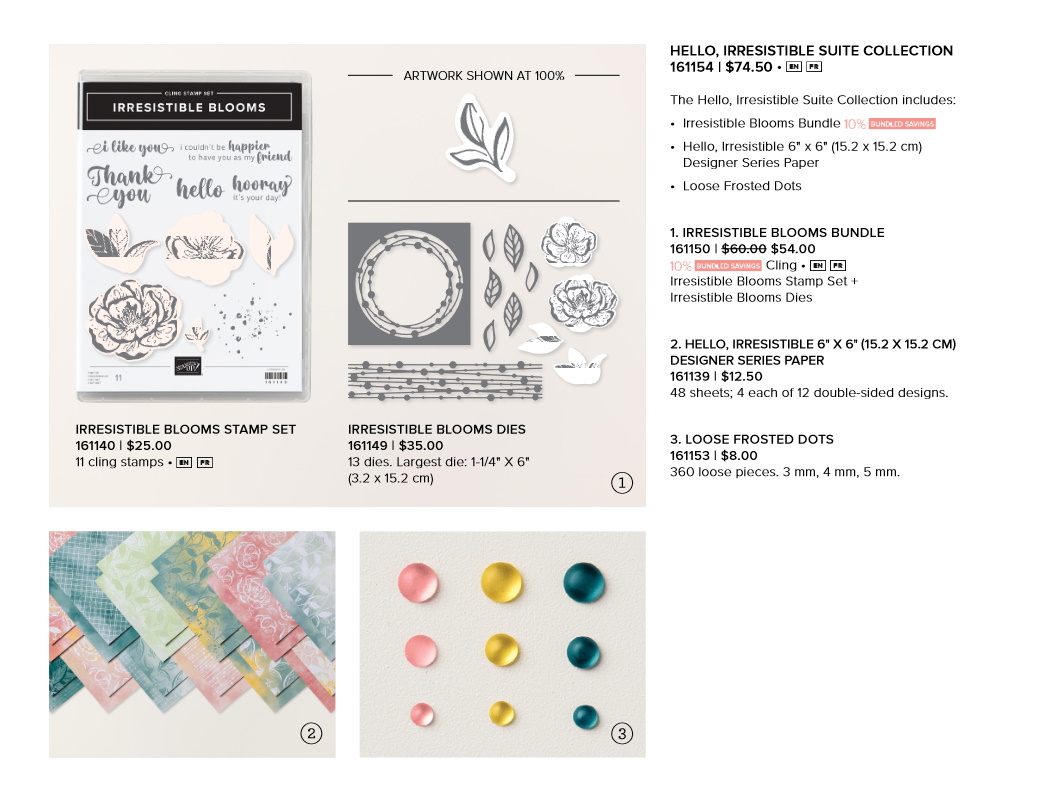
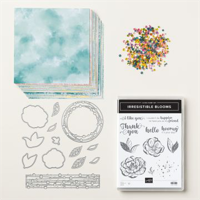
Today I’d like to share with you one of the beautiful bundles in our On-Line Collection; Hello, Irresistible Suite Collection ….
Today I’d like to share two cards that I created … I will include the cutting pattern for these two cards below. I used one of the 6″ x 6″ sheets of designer paper from the Hello, Irresistible paper and cut it to create my cards.
You will be able to CLICK on this photo and download the pattern for your personal use.
I used the 5-1/4″ x 4″ piece of designer paper to create my first card. This layout I’m sharing is very easy yet the designer paper makes your card look stunning ….
The background “is” the designer paper, you don’t have to do anything but choose one of the sentiments from the Stamp Set! I used the Dual Oval punch to highlight the sentiment and stamped it in Flirt Flamingo … same color as my card base.
I used the Daffodil Delight Loose Frosted Dots … HINT: they really pop when you put them over “white”. I’m really liking these dots!
The second card uses the 5-1/4″ x 2″ piece … remember the 3/8″ strips are to be used on the inside of the card.
The second half of the Flirty Flamingo cardstock was used to this card base as well. I used Timeworn Type embossing folder to add texture behind our designer paper, there is also a pop of color – I used So Saffron cardstock behind it.
I popped up the designer paper piece with Stampin’ Dimensionals. I then stamped my sentiment in Flirty Flamingo ink and punched it out using the Lovely Me Punch.
Thanks for stopping by today. This amazing Hello, Irresistible Suite Collection is available in my Online Store … or you can just click on the links below.