A Rosy Thank You …

Hello Stampin’ Friends ~

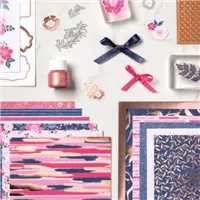
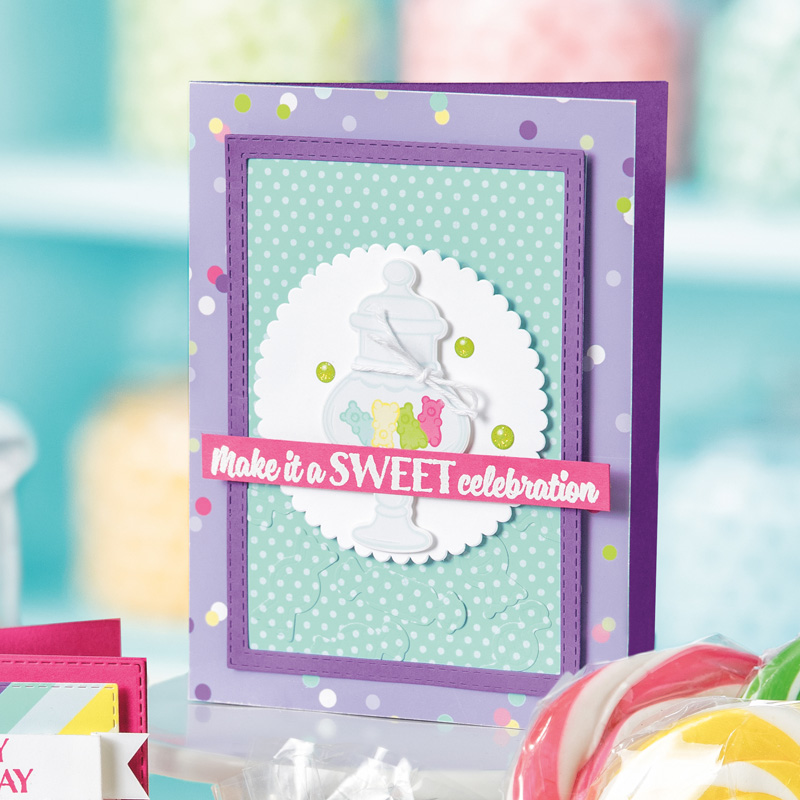
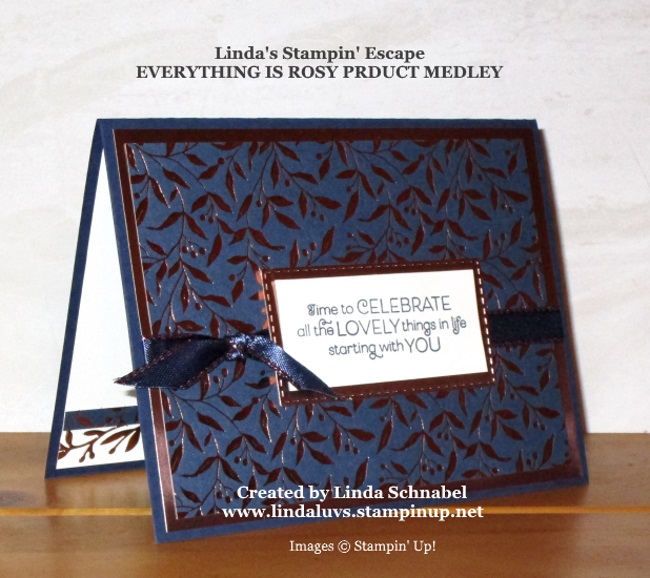
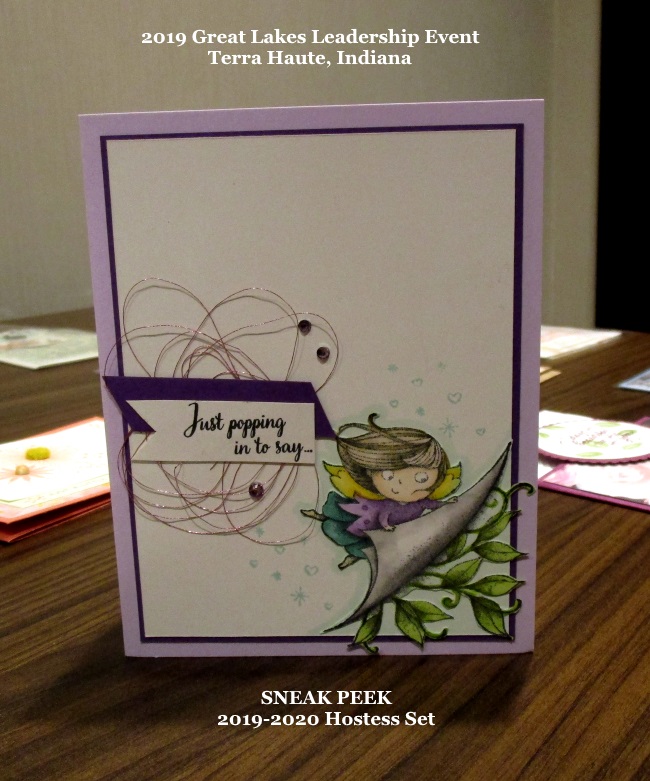
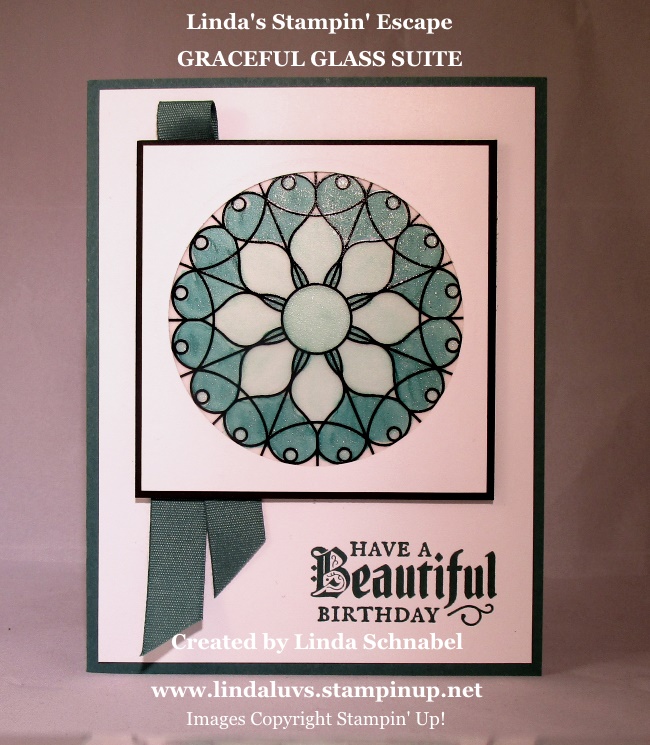
Don’t you just love Fridays!! I do … and I have the day off of work, it can’t get better than that 🙂  Although, I do have a pretty little card to share with you today.  It is from the Everything is Rosy product medley.  Today is the last day you can order this amazing product medley. On this card I showed my “Rosy” class, three fun and easy ways to use the Rose Gold Glimmer paint that is included in the kit … on this card we “stamped”!!

Stamping with this beautiful shimmer paint is only one way to use it, you can also spatter and spritz!!  I have the instructions for all 3 techniques noted in the “Card Instructions” when you purchase the Product Medley from me.  This view shows all the shine … love it!!

Do you see the cute frame around the “stamped” greeting?  That was part of the multiple images we got out of our one pass through the BigShot! They really enjoyed all the stampin’ tips during this class. It’s always my goal to show something fun and new at my card classes.  The beautiful floral embellishment is included in the kit … easy breazy card!!

This view shows a little more detail … sometimes all that shine and glimmer is a little bright for the camera! lol  Not for me, I love it!  The Rose Gold Foil paper in this kit is stunning and so many of the patterns in the designer paper have the Rose Gold Foil in it to coordinate so beautifully.

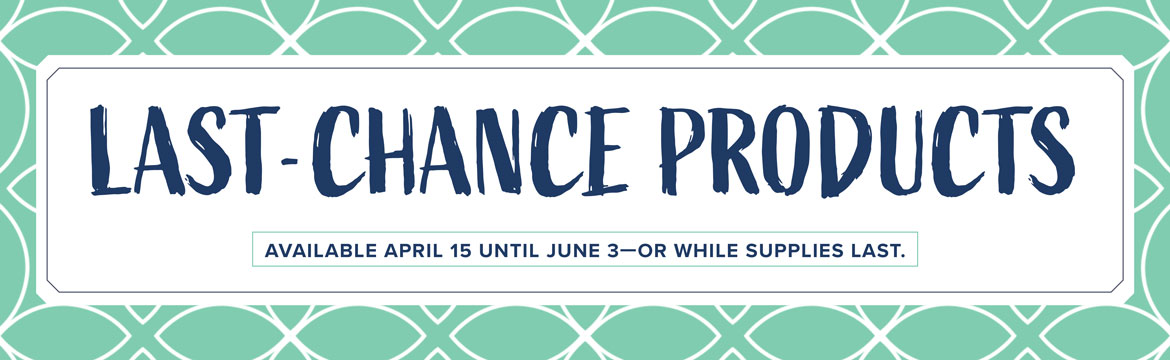
Please let me know if you have any questions on this amazing kit, just remember if you are thinking about ordering it … TODAY is the LAST DAY.  I have listed the items below for your quick reference or shopping… and I thank you!!

Have a great weekend and I’ll see you tomorrow.

TODAY’S PRODUCT LIST …


Last-Chance Products—Discounted Items & Sweet Treats!

Hello Stampin’ Friends ~

Today I have some “sweet” cards and 3-D projects to share with you.  We’re approaching the end of our Last-Chance Products promotion, and in these final days, Stampin’ Up! identified some items they now discounted up to 30%.

The discount pricing will go into effect at 12:00 PM (MT) on Thursday, May 30. I just wanted to let you know to get these discounted products while they last!

Click here to see the list of discounted last-chance products.

Oh my gosh … my club members fell in love with this cute little project we did at our Annual Spring Stamping Retreat, now you can get the goodies at a discount to make them!!

The Sweet Cups are discounted as well as the Sweet Pins & Tags and the Coastal Cabana/Granny Apple Green Reversible Ribbon!

These cute little treat cups were so easy to make!!  I simply took one of them apart, tossing the bottom, and then opening up the seam of the cut so I could lay it flat onto my designer paper and us it as a template to cut the pattern out!

A coordinating piece of designer paper was cut from one of the circle dies to decorate the top of the cover.  We used the Tombo glue to attach our ribbon onto the sides of the cover … tied a bow ant glued that on as well.

I fell in love with this entire product suite … it is so cute and as I’m writing this blog post, the How Sweet It Is Designer paper and the Sweetest Thing Photopolymer Bundle are still available to purchase!  Check out these cute projects you can create with the Product Suite ….

This bundle and designer paper will be hanging out in my stamp room for a while, not sure I can let it go after it retires. This time of year is a whirlwind … we have to say good-bye (unless you snag it up) and then there is the excitement of the new catalog.  I have several hitting the mail box tomorrow … and some tucked inside orders, and even more ready for pick-up … Do I have yours?

I’ve got more on order so I will have them ready for my Catalog Kick-Off Party … Watch for details coming soon!

Contact me if you have any questions on the retiring projects and/or new catalog. Thank you for joining me today.

Hope your day is a good one!


Bowing out “Graceful” …

Hello Stampin’ Friends ~

Today I’m going to share with a the card I promised a while back from the Graceful Glass designer vellum.  The beautiful stained glass imagery is perfect for coloring… and I used the Stampin’ Blends.  Because it’s vellum paper you can create stunning stained-glass effects with it!  The Graceful Glass has 24 vellum sheets: 2 each of 12 single-sided designs.  These are the samples from Stampin’ Up! …

And now … my creation, and probably my last from the Graceful Glass designer vellum since it is retiring in only a few more days.

I did not add the greeting to the front of my card as I wanted to showcase the beautiful design of the vellum.  This would make a beautiful birthday card, a sympathy card or what ever you choose.  I chose a very spring-like color them with Highland Heather, Flirty Flamingo – Light, and Mossy Meadow.

I used the Lace Dynamic Textured Impressions Embossing Folder to add some texture to the card and create interest to the eye. I enjoy using the entire bundle … the dies coordinate nicely with this vellum.

I thank you for sharing a part of your day with me and checking out my blog.

Have a beautiful day ~

TODAY’S STAMPING SUPPLY LIST: If you would like to purchase any of the items used in creating these cards and don’t have a demonstrator, I’d be honored to be your creative coach. With each $50 purchase, you will receive a Rewards Point, when you collect 10, I will send you a coupon for a FREE Stamp set of your choice. Just click on any of the items to get to my online store. If you have any questions, please message me.


Add a Drop of Sunshine

Hello Stampin’ Friends ~

A couple weeks ago, Stampin’ Up! introduced the Everything Is Rosy Medley—and we can’t get enough of it! This medley has everything you need to make so many gorgeous projects—designer series paper, rose gold foil sheets, mirror embellishments, ribbon, dies, and (of course) stamps! You can even use the rose gold shimmer paint or the foil-lined die cuts to add a pop of shine to just about anything you make. Want to know all about how amazing it is and get tips on how to use this medley? Watch the video below …

But hurry, this medley is only available for just a little bit longer and while supplies last. Don’t miss your chance to add this ray of sunshine to your collection, because with the Everything Is Rosy Medley, you can make everything you have—well—rosy!

You will also get the directions for the 5 cards we did in our class, which includes a Gift Card Holder … a big hit in class!!

Thank you for joining me this Tuesday, and I hope you have a good day!

Click on the image to begin shopping … Thank You 🙂 


Loyal & True: Guest Stamper … Gloria

Hello Stampin’ Friends ~

Happy Memorial Day to you… just a quick post today.  I have a very special card to share with you today that was made by my friend and fellow demonstrator Gloria.  She is former military and created this swap at our Leadership event last weekend (and she gave one to me)!!  Gloria used the Loyal & True stamp set …

I loved the swooshes of red so I asked Gloria how she did it, and she said she just sponged the background … Love it!!  It gives a lot of movement to the card, like the flag is actually waving.

The simplicity of the card really makes a statement … Today is the perfect day to share this card with you, as we honor the fallen who gave their all defending our freedoms… true heros.

Thank you for stopping by today, I appreciate it.

Have a wonderful day,

Today’s Stampin’ Supplies …


Simply Sunday … Simply Rosy

Hello Stampin’ Friends ~

Welcome to my blog and thank you for stopping back.  I hope you enjoyed the 6 cards I shared yesterday from the Everything is Rosy Product Medley that were created by the amazing design team at Stampin’ Up!

Today I have a super cute card that I created for our Everything is Rosy Class last Thursday.  I love getting together face to face with my Stampin’ Friends … so watch for some upcoming classes.  I’m also going to reactivate my Monthly Newsletter … I hope you sign up to be on my mailing list, if you haven’t already. Just click on the link located within the black banner at the top of my page.

Enough business … let’s get to the card!!

.

Another “simply” beautiful card … I began by choosing my designer paper which had both the Night of Navy and Melon Mambo (with brilliant streaks of Gold Rose throughout) so I decided to use the Melon Mambo as my base.

The greeting is framed in Rose Gold Foil and surrounded by our pre-printed die cuts which are all in the same color ranges as the designer paper so it matches perfectly (that’s why I love these product medley’s). The frame was die cut at the same time we cut the other frames and backgrounds for my last card… In fact, we cut enough with one pass through the BigShot to make 4 cards!

I thank you for taking time out of your holiday weekend to visit me today… this product medley is amazing and well worth the investment you’d make with your purchase, plus I will send you directions for the 5 cards we did in our class, which includes a Gift Card Holder … a big hit in class!!

Just a reminder … there are only 5 days left to purchase the amazing Everything is Rosy Product medley!

Enjoy your holiday weekend and be safe.

To purchase the Everything Is Rosy Product Medley … Click on the picture below.  Thank you!


Six on Saturday … Cards that is!!

Hello Stampin’ Friends ~

Yesterday I shared a card from my Everything is Rosy class … today I have 6 more card samples!! The Everything is Rosy Product Medley was designed with the avid crafters in mind. Who better to share projects and ideas than the avid crafters from our Concept Art Team. Here are some of the projects they shared on our recent video.

Our first two cards were created by Jen Campbell … This card uses the pre-printed die cuts that are included in the medley … the white leaves were cut using the coordinating dies in the kit.  She sponged Balmy Blue on the background … a nice way to supplement and add color to the Night of Navy and Melon Mambo.

The next card was created with colors not included in the medley.  She used a few of the pre-printed die cuts in the kit, but once you’ve used them up … you will have plenty of life left with this beautiful stamp set and coordinating dies …

The next two cards were made by Leanna and she uses the components of the product medley to create a shaker card!  She also used the Nested Stitched Framelits that will be coming in the new catalog …

Her next creation highlights not only the kit but the Rectangle Framelits Dies that are currently in the Occasions Catalog.  She also used Rocco Rose (NEW In-Color) instead of the Melon Mamba, adds some Pear Pizzaz with the Night of Navy and look at the softness it brings to this card …

The final two cards were created by Cindy Schuster.  You are going to love the Ombre card she created using the edgelit die that is included in the die package included in our Everything is Rosy product medley ….

She used Berry Burst, Melon Mambo, Flirty Flamingo and Powder Pink.  I love the lacy look this die creates when using it this way.  Let me say that it is also stunning when you die cut the Rose Gold Foil paper included in the kit.

On our last card Cindy uses a very different color pallet beyond the kit.  You can keep creating with the amazing stamp set and coordinating dies …

It’s just like any other coordinating bundle you purchase … just stamp, die cut and assemble.  The kit is amazing and I will have another card to share with you tomorrow.  Here is a picture of all the goodies included in your kit …

Please let me know if you have any questions about this product medley … I’m here to answer any questions or concerns you may have.  The Everything is Rosy Product Medley is only available through the end of this month (or until sold out).

Thank you for sneaking away from your holiday weekend to check out my blog, and I hope to see you again tomorrow to view yet another beautiful card using this medley.

Have a great day …

PURCHASE YOUR EVERYTHING IS ROSY PRODUCT MEDLEY HERE …


Wooo Hooo … Everything is Rosy!!

Hello Stampin’ Friends ~

Today I have one of the cards I created using the Everything is Rosy Product Medley.  Wow … this kit is full of goodies and tons of designer paper to create a lot of cards.  We did 5 in class, one of which was a quick and easy gift card! We used different layouts/folds and a learned a couple new techniques … all parts of the kits were covered in the class.

Today’s card features a beautiful designer paper of Night of Navy with Rose Gold leaf pattern and we used the Rose Gold Foil paper with it.  The ladies learned a really cool way to cut the foil paper and die cut it into pieces to create 3 cards!! Here is our first card with this technique …

You can see the designer paper sits upon the foil paper and then adhered to the Night of Navy cardstock base. The greeting is stamped on Whisper White but rests upon another Rose Gold foil die cut.

The card is finished off with the beautiful Night of Navy ribbon with Rose Gold foil edging.  It’s so pretty.  Oh wait … I’m not done, we used one of the edgelit dies that come in the product medley and used it to create a beautiful element inside our card, and then it was topped off with a piece of the Designer paper.

Last night I posted a video from the Stampin’ Up! home office that features 6 more samples from the Everything is Rosy Product Medley … Check it out HERE!

I’ll share another card from my class with you tomorrow … If you are interested in having this kit for yourself, contact me or click on the link below.  If you purchase the kit from me, I will send you a PDF of my class cards which includes step by step instructions on how to make the gift card card!!  My class focused on utilizing the products in the kit, the video shows you more outside the box!!  I’m so excited about this product medley!!

Let me know if you have any questions about todays card, the product medley or anything else related to the contents of my blog.  Thank you so much for sharing a part of your day with me.

Enjoy your holiday weekend.

PURCHASE YOUR EVERYTHING IS ROSY PRODUCT MEDLEY HERE …


From All of Us …

Hello Stampin’ Friends ~

Happy Wednesday!! Today I have another card share featuring the Graceful Glass Designer Vellum … I’ll admit it, I’m having a hard time letting this one go!!  The stained glass imagery is perfect for coloring with your Stampin’ Blends.  I have a cute one for you … if you’re a Goldie Hawn fan you might want to call it “Bird on a Wire” … lol

Such a fun and simple card to make … I think the hardest part was how I was going to color the birds, coloring was easy, I just wasn’t sure what color they should be!  I get a little carried away like that! lol  What’s fun is that the colors blend so you can mix colors together and soften the edges.

The greeting comes from the Itty Bitty Wishes stamp set and then I punched them out with the 1-1/4″ and 1-1/2″ punches.  I think sometimes we are so used to grabbing our BigShot we forget to use our simple tools, like our punches. Quick and handy!!  But, speaking of the BigShot … I did use it to create a beautifully textured background with the Layered Leaves Embossing folder.

I will be back tomorrow with another from the Graceful Glass vellum … I can’t resist!

Thanks so much for joining me today, hope you have a good one.

TODAY’S STAMPING SUPPLY LIST:  If you would like to purchase any of the items used in creating these cards and don’t have a demonstrator, I’d be honored to be your creative coach. With each $50 purchase, you will receive a Rewards Point, when you collect 10, I will send you a coupon for a FREE Stamp set of your choice. Just click on any of the items to get to my online store. If you have any questions, please message me.


Shine Like a Diamond / Guest Stamper: Peggy K.

Hello Stampin’ Friends ~

Well … Well … Well … Made it through Monday!! Hope you had a good day and your Tuesday will be even better!  Today I have another card share from our Stamping Retreat Attendee Swap. This swap was created by Peggy K.

This pretty floral card stands out in black and white with a pop of pink, and the Strong & Beautiful Stamp Set is the focal point to the card.  This is one of my favorite verses stamp set, especially when you are creating cards for friends.

Peggy also uses the Country Floral Embossing folder to create a subtle background with a touch of texture.  This folder was highlighted in the Sale-a-bration catalog but it will however be included in the upcoming 2019 – 2020 Annual Catalog!  Wooo Hooo! That does not happen too often, but I’m glad it is returning because it’s a great addition and it’s beautiful.

I appreciate you coming back to see what I’m up to!! Stop back tomorrow and I’ll have something special to share.

Till then … Have a great day!

I’m back with more Samples!!

Hello Stampin’ Friends ~

I’m back!  I took a little break while I was down in Terra Haute, Indiana for a Stampin’ Up! event … our Great Lakes Leadership event.  I went with my friend and fellow demonstrator Gloria Helmbrecht. There we met with other Stampin’ Up! leaders and our Great Lakes Region Manager … Shannon West. We were there to learn more about our business and how to help our downlines, and that is why I was there!

Plus … there was swapping and samples (some of which I will share today) and share more in the upcoming days. Here is a cute display that my new demo friend Michelle made …

Several demonstrators shared their work to create a beautiful display of cards, many from the new 2019-2020 Catalog! And while I’m on that thought … my catalogs will be arriving shortly!! And if you’re a current customer of mine, you’ll have one with your name on it!! If you don’t have a demonstrator and would like a catalog, message me, I’d be honored to include you in my group of stamping friends.

Here is a sampling of bookmarks that someone made (I do not have a name to give the credit to). These were created from the Everythings Rosie Limited time promotion that is currently taking place, again, contact me if you would like more information.

Aren’t they adorable? I am hosting a class on Thursday with this kit. This was a pre-purchase class, so each participant in the class will come in to their kit and the supplies need to create the cards I designed. I’m looking forward to a fun evening with stampin’ friends.

My last share today is a card that a fellow demonstrator made using the new Hostess Stamp Set; New Wonders. I think this is one of the cutest Hostess sets and I just can’t resist getting it for myself!

I hope you enjoyed this little showcase, I’ll be back with more!! There a so many opportunities to connect with fellow demonstrators and stampers, if you are looking to find like minded individuals, new friends … or your “tribe” so to speak, message me … let’s talk.

Have yourself a beautiful day, and I’ll see you back here tomorrow.

Here is the link to purchase the Everything is Rosy product medley … If you purchases this through me before the end of the month when the promotion ends, I will send you a tutorial of all the project we are making in my Everything is Rosy Class! Thank you.

Saying Goodbye to the Graceful Glass Designer Vellum

Hello Stampin’ Friends ~

One of my favorite products is about to leave the catalog for good … the Graceful Glass Designer Vellum.  I have some of the cards I have created this past year to share with you today.

The Graceful Glass suite by Stampin’ Up! is perfect for all those moments you’ve wanted to steal the stained glass from a church. Brian from Stampin’ Up! shows you the products that make up the Graceful Glass suite, as well as several ideas and different ways to color the vellum.

I’m happy to say that the stamp set and coordinating dies will return in the new catalog … the vellum will be gone (and so will the 10% savings on the bundle).  I colored the vellum from the back with the Stampin’ Blends and then used the Wink of Stella to give it a little shimmer.

The next card is one of the cards that were displayed at our demonstrator OnStage event in Milwaukee last spring.  I love how Pat used the circle dies to create a frame and highlight the vellum.  Notice the wood designer paper … that just recently sold out.

The next card is one I did to showcase the flowers in the vellum pack … it’s one of my favorites, so simple and yet so elegant.  Again, I colored the vellum from the back using the Stampin’ Blends.

I’m on the road again this weekend traveling to Indiana for a Stampin’ Up! Leadership event. I’m a little nervous about this on … I’ve been asked to do a presentation on “Sales”.  This is not something I do but I’m stepping out of my comfort zone and facing the “public speaking” demon!  Talking you to my stampin’ friends is easy … so I’ll just pretend you are there with me.

Thank you for stopping by today…

Have a good one.


To order your own Graceful Glass suite,

Daisy Delights: Two Guest Stampers!

Hello Stampin’ Friends ~

Hope you are enjoying the beautiful weather … it’s been amazing and it’s suppose to be gorgeous today too. OK … I’m not the local weather person, so let me talk more about what I’m good at, stamping!  Today I have two really cute cards that were created by my Spring Retreat Attendees Kellie and Michelle.  The spring floral cards both used the Daisy Punch, which by the way … will be in the upcoming catalog and has another stamp set to coordinate with it!

Let’s start with Kellie’s card, she used both the Daisy Punch and the Daisy Delights stamp set…

I believe Kellie used Blushing Bride and Whisper White as her core color pallet.  The white background was embossed with the Petal Burst Embossing Folder.  I love the little Happy Birthday Banner … it’s so cute and adds a sweet touch to the card.  One of my favorite embellishments, the Faceted Gems! Whether you use the Gold or the Clear, you can’t go wrong and I just love them with this daisy punch!

Count your petals on Michelle’s card …

Is this a card saying … He love me, he loves me not?  I’m not sure but it’s really cute!  Michelle’s daisies were punched out using the beautiful Shimmery White cardstock (No Wink of Stella needed!) this cardstock has a shimmer of it’s own,

Michelle’s color pallet consists of white and the beautifully bold Daffodil Delight, bright and happy! Her background was created using the Layered Leaves Embossing Folder and was cut into 3 panels to highlight each transition of the daisy

Don’t you just love a punch that can create two totally different styles of cards… That’s what I call “cost effective”! lol

Thank you so much for taking time out of your day to join me in “picking daisies”.

Enjoy your day ~

TODAY’S STAMPING SUPPLY LIST: If you would like to purchase any of the items used in creating these cards and don’t have a demonstrator, I’d be honored to be your creative coach. With each $50 purchase, you will receive a Rewards Point, when you collect 10, I will send you a coupon for a FREE Stamp set of your choice. Just click on any of the items to get to my online store. If you have any questions, please message me.


A Little Smile …

Hello Stampin’ Friends ~

Paper Pumpkin and Stampin’ Up! are all about sharing kindness through creativity. And as dedicated as we are to making a difference with our papercrafting, sometimes we just don’t have a card on hand when we need it most.

Enter June’s Paper Pumpkin kit. It helps subscribers share acts of kindness whenever inspiration strikes—and in a fun and easy way. See how we used the June kit to spread kindness and get a peek at the design in this exclusive video, then subscribe today!

Here is the link to subscribe today …. https://www.paperpumpkin.com/en-us/sign-up/?demoid=26646

If you are “NEW” to Paper Pumpkin … June is a good time to subscribe if you love beach-themed fun that lets you spread kindness all summer long. The kit design is fresh and new—with a look you don’t typically see.

If you are one of my existing subscribers … the June kit has a special design for the unique purpose of spreading random acts of kindness. Now that you watched the video, you got a glimpse of the kit in action. Plus you’ll have a stash of cute cards to share whenever the opportunity presents itself.

If your a past subscriber or put your Paper Pumpkin on hold … you may want to return for an original, uniquely designed kit that we created to help you make a difference. This kit will make brightening someone else’s day easier than ever.

Let me know if you have any questions about Paper Pumpkin … you have until June 10th to subscribe for this fun kit.

Thanks for stopping by today, I’ll see you tomorrow with two cards from our Retreat Swap.

Have a good day ~

Two for Tuesday: Sponging Technique

Hello Stampin’ Friends ~

How have you been enjoying the Serene Garden cards so far?  I have another one for you today … it was inspired by the winning Attendee Swap Card Contest at my Spring Stamping Retreat this past weekend.  Kathie’s card was well received and won the contest with its “Resist / Sponging” Technique and then you will see how I used her card to inspire me to create the “Serene Garden” card …

Kathie embossed both the small flowers on the base and the larger flowers which she did on Vellum Cardstock.  The vellum flowers were punched out.  Kathie created a beautifully soft pop of color by sponging it over the flowers.  With a little wipe of a kleenex … you’ll remove the extra ink off the embossed flowers and they white will pop through.  It’s so pretty, it inspired me to do the same technique on my Serene Garden card.


I stamped the main image in the lower left hand corner of my card, sponged the Flirty Flamingo over the top, then wiped off the excess ink off the embossed image to make the white pop.  Using the Flirty Flamigo Stampin’ Write marker, I added some depth to the flowers and then topped it off with Wink of Stella for that touch of glitter!

I also embossed a piece of Flirty Flamingo with white emboss powder using the elegant bird … once it was embossed, I sponged Flirty Flamingo over the head and tail to create some dimension. The wings were highlighted with Wink of Stella and the bird was cut out with the coordinating dies.  My greeting is from the Colorful Seasons Stamp set and was stamped in Flirty Flamingo.

It is amazing how a technique like embossing teamed up with some simple sponging can turn a card into a work of art.  I really like the monochromatic color as well.  Sometimes simple is better.

Thank you for hanging out with me for a bit today…

I hope your day is a good one.

TODAY’S STAMPING SUPPLY LIST: If you would like to purchase any of the items I used to create this card and don’t have a demonstrator, I’d be honored to be your creative coach. With each $50 purchase, you will receive a Rewards Point, when you collect 10, I will send you a coupon for a FREE Stamp set of your choice. Just click on any of the items to get to my online store. If you have any questions, please message me.