Two for Tuesday: Brusho Crystal Colour Techniques

Hello Stampin’ Friends ~

On Sunday I shared a step by step tutorial on how I made my Brusho Floral card, today I’m going to share 2 videos from Stampin’ Up!.  One showing different techniques for the Brusho Crystal Colour and the second will show you how easy it is to create the card that is in the Occasions Catalog!

Watching the videos helped me learn some simple and more advanced techniques in coloring with Brush Crystal Colour, but the best way to learn is to get the Brusho in your hands and play!!

Here is the video that shows how easy it is to recreate the sample in the Occasions catalog … page 26!

I hope these videos and my Sunday post helped you to understand more about the new Brusho Crystal Colour. I will be sharing more cards with you and as I stated, will be hosting a class so you can get a hands-on experience with this fabulous new watercoloring medium.

Thank you for joining me today, I hope your day is a good one!

TODAY’S STAMPIN’ SUPPLY LIST …


Celebrating 5 years!!

Hello Stampin’ Friends ~

Happy birthday to us! March 2018 is Paper Pumpkin’s 5th anniversary and Stampin’ Up! is kicking it off with a truly exciting campaign. Not only are we celebrating five years of creating and sharing together, but we also want to say thank you to all of our customers and demonstrators who have helped us reach this great milestone. And what better way to do that than with a March kit which includes a fantastic, FREE gift and a specially designed, one-of-a-kind box? This kit is gorgeous, collectible, and is almost sure to go down in Paper Pumpkin history as an all-time customer favorite!

Promotion Details

  • The free gift complements the kit but is not needed to complete the kit.
  • The free gift is exclusive to the March Paper Pumpkin kit and cannot be found anywhere else.
  • The free gift is a crafting product with a wide range of use that can be used on a variety of papercrafting projects.
  • The free gift holds an approximate retail value of $6-$8 US when compared to similar products offered by Stampin’ Up!.
  • Subscribe between February 11–March 10 at 11:50 PM (MT).

Five years of meeting you at your mail box. Creating & sharing millions of projects together. Inspiring countless smiles and glad hearts. We are celebrating our 5th anniversary and it’s all thanks to you! Thank you for all you have done to inspire smiles and glad hearts using Paper Pumpkin. Share your favorite Paper Pumpkin story on social media using #paperpumpkin5. And don’t forget to be subscribed by March 10 to receive your free gift and special 5th anniversary box!

Thanks for stopping by today to. Let me know if you have any questions about Paper Pumpkin.

NOW is a great time to try it out … purchase the 3-month subscription and get Sale-a-bration benefits and the March kit with it’s FREE Gift!

Have a great day …

TRY IT OUT NOW or re-new your Paper Pumpkin subscription, either way collect your Sale-a-bration goodies with your purchase. 

Price: $59.00

1 – Level One Sale-A-Bration item

Price: $114.00

1 – Level Two or  2 – Level One Sale-A-Bration item

Price: $215.00

2 – Level Two or 1- Level Two and 2 – Level One or 4 – Level One Sale-A-Bration items!!

Simply Sunday: Brusho Crystal Colour Technique

 Hello Stampin’ Friends ~

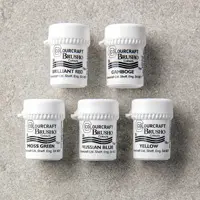
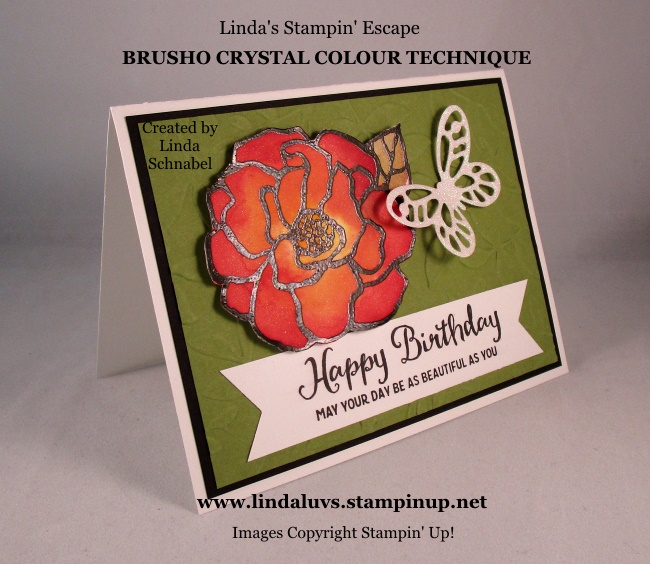
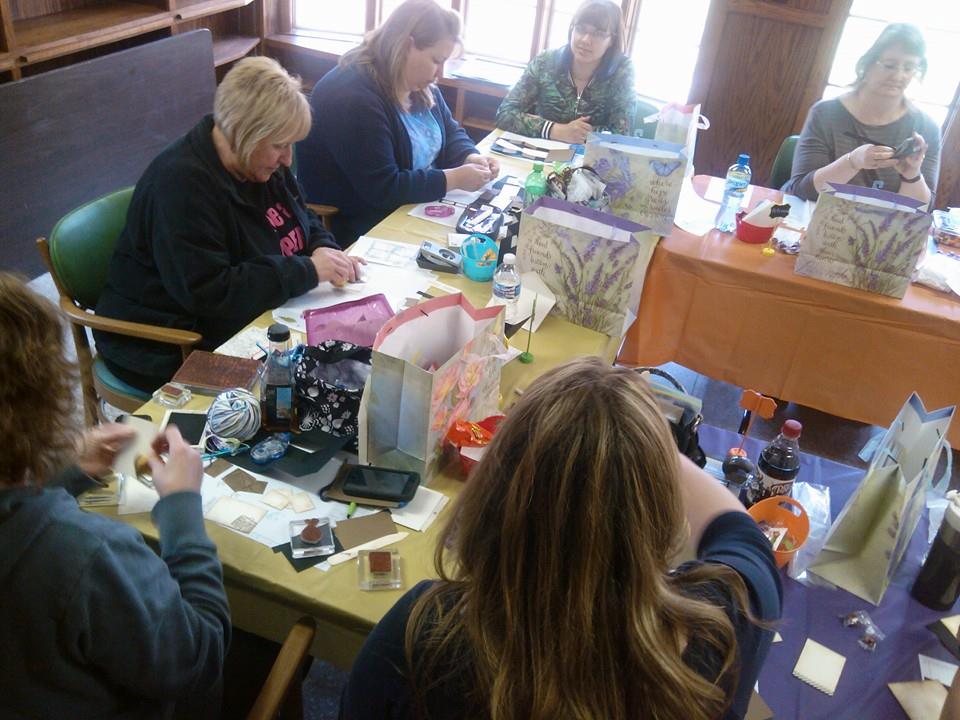
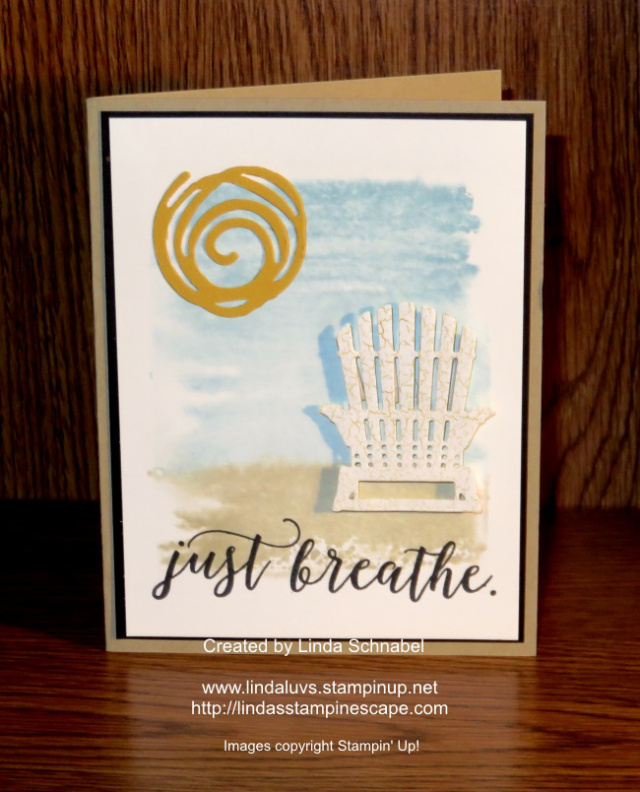
I’m back today with a card that I made with my Stampin’ Clubs this month. They were the first to use the Brusho Crystal Colour technique … a new product that was introduced in the Occasions catalog on page 26.

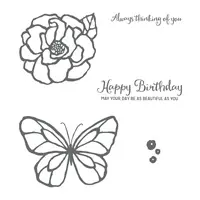
On this card we used the Shimmery White Cardstock and the “Beautiful Day” stamp set.  We will be embossing the flower with the black embossing powder.

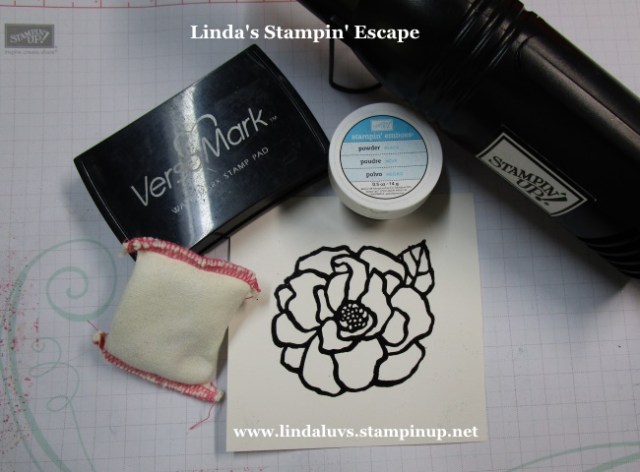
Next thing you want to do is to poke a hole or two in the top of the plastic bottle the Brusho is in. I used my Paper Piercer to poke the hole and then use a push pin to keep it sealed ….

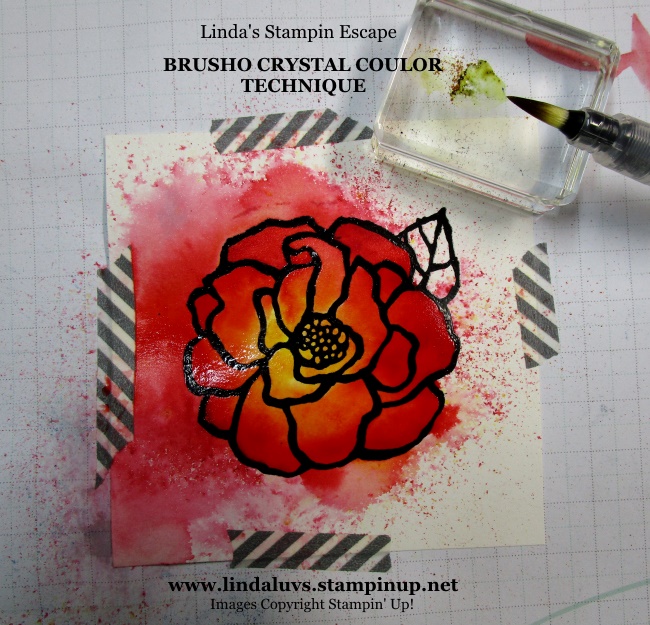
I like to use a little washi tape to hold my sides down … it keep the colors from running together if the paper “rolls up” from the water.  Then you will gently tap the Brusho bottom to dispense the powder … Less is More!  You can always add more but it’s best to start light, especially if you are new to this technique. It looks a little like peppering your food! lol

I started with “Yellow” in the center, “Gamboge” around the center, and then the “Brilliant Red” around the outer petals.

Now with your Stampin’ Spritzer … spritz some water onto the image. I stand during this process and I’m at least 8 – 12″ above my cardstock – You don’t have to measure, but if you are too close it might splatter your color.

Notice I kept the Brusho colors I used away from the leaf — also less spritzing, I can always add water with the use of my Aqua Painter… which I will be using to color in the leaf.

With the use of my Aqua Painter, I began to move my color around starting with the yellow.  I keep a tissue or paper towel handy to keep my Aqua Painter clean.  If you mix your colors too much – you’ll end up with one color or a mess!

Once the color was where I wanted it, I tapped a bit of the Green Brusho onto a block and used my Aqua Painter to pick up the crystals and color in the leaf directly.  That is two techniques you’ve now learned with the Brusho!!  Once DRY you can cut it out and mount it to your card ….

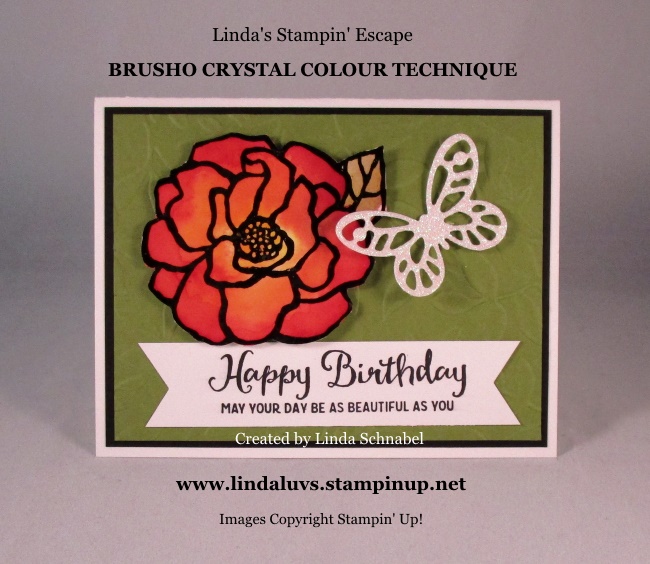
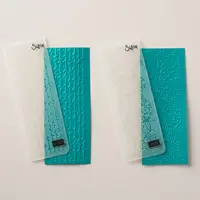
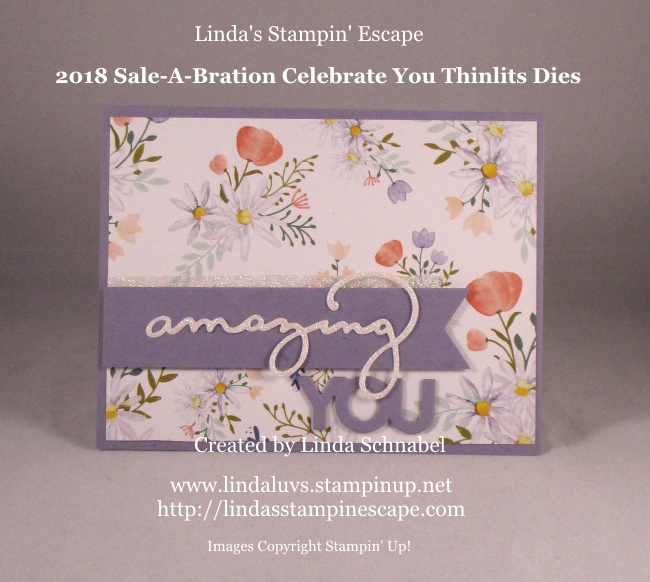
I used a Whisper White base with a Basic Black mat and my background was embossed with the beautiful “Layered Leaves” Dynamic Textured Embossing Folder. The greeting comes from the stamp set “Beautiful Day” which is found on page 26 of the Occasions catalog with the Brusho.

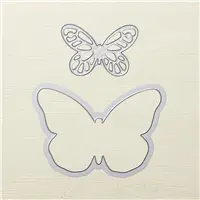
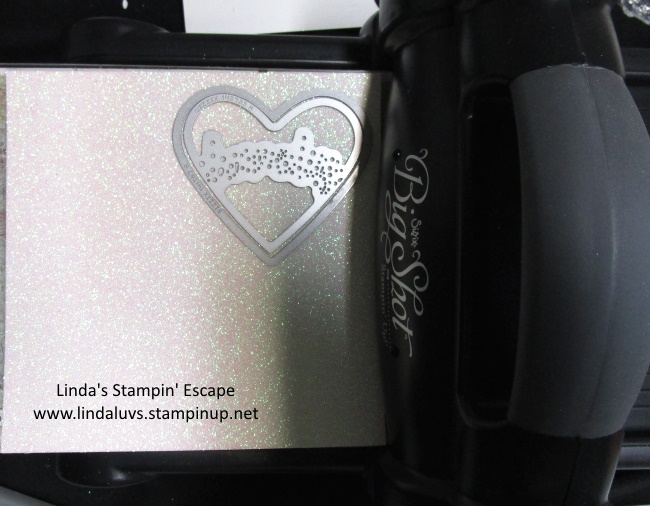
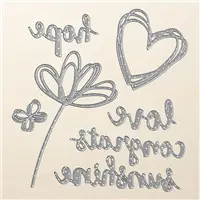
The pretty little butterfly comes from the “Bold Butterfly” Framelits and cut out of the Dazzling Diamonds Glimmer Paper!!

It really is simple to use … Remember, I did this at my Stampin’ Club and each and everyone’s card turned out beautiful yet no two were alike … it was awesome!!

I will be hosting a “Brusho Crystal Colour” Watercoloring Class … be sure you’re on my mailing list! You won’t want to miss this one. I have an entire class list coming out VERY soon!

Thank you for joining me today ~

TODAY’S STAMPIN’ SUPPLY LIST …

Droppin’ by with Hugs for YOU!

Hello Stampin’ Friends ~

Today I’m going to show you the last of the 3 dies from the Lovely Words Thinlits … “Hugs”.  I did say that I had another version of yesterday’s card but due to technical difficulties I could not post it (weird) but I will be sharing it with you soon!

So today’s card not only features the thinlets from the Lovely Inside & Out bundle but 2 Sale-A-Bration items … the Tutti-Frutti Cards w/Envelopes but the Party Panda’s as well! So … Let’s get this party started!

I’m sure you can tell by now which of the 3 panda’s is my favorite! Although the one with the little letter is cute too! This cute little Panda is drifting over to give you “Big Hugs”.

To create the balloon I cut the “hugs” out in the same fashion I cut the heart out … using the coordinating circle die (same as pictured with hearts)

You see the coordinating die outside of the Lovely Words Framelit Die … each of the three can be cut out this way.

Then … out of the leftover card back from our “Lovely” card, I cut out the circle. Both circles come from the “Layering Circles Framlit Dies”. Then I just glued the cut out piece to the circle.  To create the “balloon” … I cut out a triangle from the scraps and glued that on … tied the string and got ready for the Panda!

The Panda was stamped with the Black Archival Ink onto Whisper White cardstock and was had cut. I actually cut the balloon (from the stamp) off but in a way that I can still put it together (like a puzzle) and use it as one again.

Thank you for dropping in on me today! It is appreciated, if you like my project today … please click on the LIKE button at the bottom of the page.

A POP-UP SALE FROM STAMPIN’ UP! …

QUESTIONS on Fast Fuse … Click on the picture, there is even a video!

Thanks again, and have a wonderful day ~

Today’s Stampin’ Supply List …

http://

Lovely Friend …

Hello Stampin’ Friends ~

I’m back today with my third card share from the Lovely Inside & Out Bundle!  These little dies are fun to play with … you are going to LOVE the simplicity of this next card.

I’m using the Pool Party card & coordinating envelope from the 2018 Sale-A-Bration item: Tutti-Frutti Cards & Envelopes.  Don’t forget this is an exclusive FREE item with a qualifying purchase.


When cutting the oval “friend” out the way I did here, you will leave your card “open” … the way it is packed, line up the die on the front. Because this front & back are identical you could get even more cards out of this pack … Stop back tomorrow and I’ll show you how!!

I used the Daisy Punch to create an accent and a little dimension to the card.

I punched two daisies out of Whisper White, put a dimensional between them, then stamped a small circle out of Pool Party.  I used the Fine Tip Glue Pen (138309) and covered the circle with glue then sprinkled it with Dazzling Diamonds Glitter (133751).


Thanks so much for stopping back … don’t forget to check back tomorrow to see another version of this card that will double your card count!

Have a wonderful week ~

TODAY’S STAMPIN’ SUPPLY LIST …


Lovely As Can Be …

Hello Stampin’ Friends ~

Hope you are having a good day so far … a bit chilly again! Cold never bothered my much before but I’m ready for some 50’s … 60’s …. anything!

Yesterday I share a quick -n- easy card that I created with the Lovely Inside & Out Bundle and I paired it with the Tutti-Frutti Cards -n- Envelopes packet from the Sale-a-bration Catalog! Comes with 16 cards (4 each of 4 colors) with coordinating envelopes!!

Well … I could not let the cut out from yesterday’s card go to waste, especially since I cut it out of the Dazzling Diamonds Glimmer Paper!  So I came up with this card …

The left over pieces were glued onto a heart that I cut out from the Tutti-Frutti paper … with that I cut out a few extra hearts (some in Basic Black cardstock).

I cut out a little banner and stamped it with one of the greetings from the stamp set included in the bundle.  The little heart comes from the Metallic Enamel Shapes (141678) and colored it with the Calypso Coral Stampin’ Blend!

Using the framelits to cut around the words is only one way to use these dies, but don’t throw away the left overs … you can always use them!

Thank you for stopping back today  … don’t forget to check back daily to see what else I’ve come up with using this bundle.

So my Two for Tuesday come from the same die cut!!


Have a great day ~

TODAY’S STAMPIN’ SUPPLY LIST … 


Lovely Inside & Out …

Hello Stampin’ Friends ~

I hope you had a wonderful weekend! We had a very snowy one here in Wisconsin … about 6 inches were we live (actually I think it’s the most we had all season, pretty lucky so far).

I was hoping to make it through this winter without a snowblower, but yea … I ended up paying people to clear out my driveway! I have to protect my stampin’ hands! lol

Today I am going to share with you a card I created with the Lovely Inside & Out Bundle … in fact, for the next few days I will be showing you cute creations from this bundle … it will be like attending one of my classes!

You will learn how I made them and some great tips as well. I hope you stop back each day to see them all, and if you like them, please take a second to click the LIKE button on the bottom of my post.

Our “lovely” was cut from the Dazzling Diamonds Glimmer Paper and you can purchase that either from it’s own pack (12 x 12) or in the Myths & Magic Glimmer paper (6 x 6).

When cutting the heart out the way I did here, you will need one of the hearts from the Sweet & Sassy Framelits Dies. You will notice throughout the week that the Lovely Words Framelits coordinate with the hearts, Ovals & Circle Framelits.

Using the framelits to cut around the words is only one way to use these dies, I will show you more in the upcoming days.


The stamped words come from the Lovely Inside & Out Stamp set. I created the little tag with the Triple Banner punch and by omitting the word “great” because I only needed the “For a” to go with my “lovely” and then I hand stamped the “friend”.

I added the little flower from the “Petal Passions” embellishments to balance out my card. The banner made  it a bit top heavy, so the addition of the flower added dimension and balance.

So … you must be wondering “What is that cardstock Linda’s using”??  Well, it’s the cute little Tutti-Frutti Cards -n- Envelopes packet from the Sale-a-bration Catalog! Comes with 16 cards (4 each of 4 colors) with coordinating envelopes… 32 pieces in all!!

Thanks so much for sharing you Monday with me … don’t forget to check back daily to see what else I’ve come up with using this bundle.

Have a wonderful week ~

TODAY’S STAMPIN’ SUPPLY LIST …


Simply Sunday: Wishful Thinking

Hello Stampin’ Friends ~

With 16 pieces, the Happy Wishes Stamp Set has it all! With variety and simplicity, these stamps have an understated elegance. Plus, the designs give you the opportunity to do some coloring, maybe using Stampin’ Blends™, Watercolor Pencils, or even Stampin’ Write® Markers! Watch this video to get some ideas …

During Sale-A-Bration (January 3-March 31, 2018), you can earn the Happy Wishes Stamp Set for FREE with a qualifying purchase! This super versatile set has greetings for every occasion. You won’t want to miss it, so contact me today!

Thanks for checking out my blog today.  Stop back tomorrow for some new ideas with great products!

Have a Super Sunday!! And if your watching the Super Bowl, I hope your team wins … or you enjoy the commercials! lol

Join me on a Stamping Retreat!!

Hello Stampin’ Friends ~

When was the last time you got to escape and do something for yourself?

We have exactly what you need … a Stamping Retreat designed from top to bottom so you have a relaxing yet fun weekend and recharge your creativity.

We would like to invite you to our annual Spring Stamping Retreat! We host our retreat in a stunning 1930’s English Tudor Home on beautiful Green Lake. The surroundings offer a carefree setting for nurturing you and your creativity, allow you time for relaxation, and building new friendships.

We also host a “Card Swap” so you’ll go home with even more cards! Details on the swap will be sent upon your registration.

Join us and let the stress of the work week drift away with the tide… & come back with loads of cards, ideas & totally refreshed! 

Our stamping sessions …
are fun and includes everything you need (cut and prepared for you) to create exceptional cards and projects in a relaxed, stress free environment.
 

All of your meals are included

so you can sit back and relax. Enjoy the wonderful home-cooked meals, desserts and snacks throughout your stay. Coffee, tea, and bottled water are also provided
throughout your stay.
christian writing center bedroom

Lodging is also included…

you will find your room inviting, clean & comfortable. We are NOT “dorm style” so you and your friends can enjoy some well deserved  “girl” time together.  You’ll also be treated to little pillow gifts each night.

You’ll find our All Inclusive Stamping Retreat affordable, fun, and enlightening …
You’ll enjoy this relaxing getaway  & come away with fabulous completed projects, new ideas, stamping tips, & new friendships.

DATES: April 27th – 29th, 2018

COST: $250 Early Bird

RSVP & Payment due by February 11th

 After Early Bird Special / Cost = $275 & Paid by March 21st.  

 RSVP HERE

Our retreats have been copied but do not compare … the closest we have found that compares to what we do for you has  a $450 price tag! Many others have stopped doing them completely!

We would love to have you join us at our Annual Spring Stamping Retreat … Give me a shout out and I will be quick to respond to your questions or to sign you us!!

Thank you for joining me today and checking out this opportunity for stampin’ fun.

Have a great day~

blog-closing-small


Let me tempt you with more Designer papers …

Hello Stampin’ Friends ~

Yesterday I shared 3 birthday cards with three different designer papers … today I have 3 more cards for you, some featuring the same Designer Papers I showed you yesterday!

Just like yesterday, my first card features the Wood Textures Designer Series paper and the Happy Birthday Thinlits dies on page 77 of the Annual Catalog.

 This card uses the designer paper as a background and is teamed up with the Daisy Punch! The background really makes the daisy’s POP!!


My next card features the Color Theory Designer Series paper and the Black Rhinestones for that touch of bling!

Can you see where I used the designer paper??  I used it to cut out the Adirondack Chair!!

We made this card in our Technique Club last year … the background was created by coloring a block with the marker, spritzing it with water and then stamping on the background!


My last card features the Birthday Memories Designer Series paper and this fabulous paper also has an entire product suite … Stamp set … coordinating dies bundle, and more! 

This fun birthday card comes from one of my classes … the background was created by repeatedly stamping the “surprise” from the stamp set that is included in the bundle.

The bear was actually cut out of the designer paper!!  However, there are designs in the paper that have coordinating dies!

I hope you have enjoyed this full week of designer paper and the many cards featured to show you how much fun using these fabulous papers can be.

Don’t forget … while your shopping there is a Sale-A-Bration going on, and for each $50 – you qualify for an exclusive Sale-A-Bration item!

I want to Thank You for joining me today.

Enjoy your Sunday!


Happy Birthday… Happy Birthday… Happy Birthday!!

Hello Stampin’ Friends ~

My cards today are all created with a simple layout and three (3) of our Designer Series papers …

My first card features the Wood Textures Designer Series paper and the Happy Birthday Thinlits dies on page 77 of the Annual Catalog.

Each card will feature the Happy Birthday Thilits Die… the next card features the Color Theory Designer Series paper and the Black Rhinestones for that touch of bling!


My last card features the Delightful Daisy Designer Series paper and a touch of vellum cardstock that helps to highlight the Happy Birthday Thinlits die.

All 3 cards are quick -n- easy to make and can be created for a special birthdaye just by changing out the designer paper.

Thank you for stopping by my blog today!


Today’s Stampin’ Supply List …


Valentine Love …

Hello Stampin’ Friends ~

Hope you enjoyed the Two for Tuesday post where I shared two “blank” layouts and the cards created using those layouts. Today I’m sharing a Valentine card the uses a similar layout to a card our clubs did in January.

Here is our January card …

You can see the entire post for this card by CLICKING HERE!  For today’s card I used the second folder from the Petal Pair Embossing Folder and changed from a vertical layout to a horizontal layout! I also decided to use the “Whole Lot of Lovely” Designer paper again!!

So you can see by just tipping the card sideways … you have another layout!

Both cards have a piece of Whisper White embossed with the Petal Pair Embossing Folders … floral on the first and the vines on the second.  The vines are what inspired me to use the beautiful floral vines in the designer paper.  The ribbon is the same on both cards!!

To create the “Valentine” I used one of the hearts from the Sweet & Sassy Framelits Dies cut in our 2017-2019 In-Color: Powder Pink! Then I added a little LOVE from the Sunshine Wishes Thinlits! This is the same thinlits set that the heart on our first card comes from.

I wanted to highlight the heart just a little more so I added the cute little dots from the Glitter Enamel Dots found on page 196 in our Annual Catalog… and that completes my card.

I hope you have been inspired to try some of these layouts and designer papers when creating your cards.

Thank you for checking back in …

Have yourself a “Lovely” day!

TODAY’S STAMPIN’ SUPPLY LIST …


Two for Tuesday: Layouts & Designer Papers!

Hello Stampin’ Friends ~

Today I have two different layouts for you that will showcase the designer paper! We’re going to start with the ever so popular “Banner” card layout …


I decided to use the “Whole Lot of Lovely” Designer Series paper … it is soooo pretty, and I can’t believe I have not used this one yet!! The patterns in this package work so nicely together for our banner layout.

I added the “Tranquil Tide” ribbon for my bow. I also used the Tranquil Tide cardstock to cut out my “amazing” from the exclusive 2018 Sale-A-Bration “Celebrate You Thinlits Dies” and “Amazing You” Stamp Set!

Our next template is fun and simple, and can be more fun or have a touch of elegance depending on the designer paper and accessories you choose…

For my second card, I’ve decided to have go with a more elegant card and use the same “Whole Lot of Lovely” Designer Series paper!

Simplicity at it’s finest … the core of your card is a 4″ x 5-1/4″ sheet of designer paper. My greeting comes for the beautiful “Charming Café” stamp set found in our Occasions catalog and punched out using the 2″ Circle Punch.

Again … our bow was created by using the Tranquil Tide Ribbon.  Your card making can be so easy if you use simple layouts and use our designer papers to create with.

Hope you enjoyed today’s “”Whole Lot of Lovely” Designer Series paper used on two simple layouts.


Thanks so much for joining me today. Enjoy!


Birthday Party: Cue the Confetti …

Hello Stampin’ Friends ~

Today we are going to get another look at our beautiful designer series paper … or FUN designs!! We are kickin’ off this day with the Picture Perfect Party Designer Paper and coordinating products.

Take a good look because today’s layout is very similar to yesterdays layout!

I cut my Picture Perfect Party designer paper smaller (4-1/2 x 3-1/4) than I did yesterday so my base created a larger border … then I stamped to created a fun but subtle background.  Again … I’m using the banner to highlight my greeting from the Picture Perfect Birthday Stamp Set.

I created my banner today (and yesterday) with the Triple Banner Punch… then cut up some of the Myths & Magic Washi Tape to create some confetti!!

To make sure this card really kicks off the party … I cut out the Noise Maker or what some call “BlowOuts” but it’s cute and fun, fun, fun at the party!

What a difference the designer paper makes even when using similar layouts! Tomorrow I’ll have two different layouts for you for our Two for Tuesday blog post.

Thanks for stopping by today …

Hope your Monday is full of fun!

TODAY’S STAMPIN’ SUPPLY LIST …


Simply Sunday: Amazing You

 Hello Stampin’ Friends ~

I quick post today for a Simple but elegant card! Today I’m using the Delightful Daisy Designer Series paper … If you’re like me, you buy it … use it for the projects you were shown and then you tuck it away and kind of forget about it!

Well this week I’m going to showcase all kinds of our beautiful designer series paper along with some great template to use! Let’s begin with today …

We’ve had some beautiful days here in Wisconsin – about 50 degrees  (amazing for January!) So I was really in the mood for spring flower …. Delightful Daisy Designer Series Paper!

Banner are hot right now, and are great for making quick -n- easy cards. The “amazing you” die cuts come from the Celebrate You Thinlits dies in the Sale-A-Bration catalog … You can get this exclusive item FREE with a $100 purchase!! I used the Myths & Magic Glimmer paper for the “amazing”.

 I borrowed some items from my Myths & Magic product suite … the “amazing” was cut from the glimmer paper (comes in 3 colors) and if you look above the banner you will see the coordinating Washi Tape.  This is be BEST washi tape we’ve ever had … at least I think so 🙂

So head down to your stamp room and start creating with your designer paper … this simple layout is a great place to start, and depending on what paper you use – each card will have a different look.

Thanks for checking back with me today, and hang in there this week for a great line up of “Designer Series” Paper cards & layouts!

Have a great day!

Today’s Stampin’ Supply List ….

http://