Hello Stampin’ Friends,
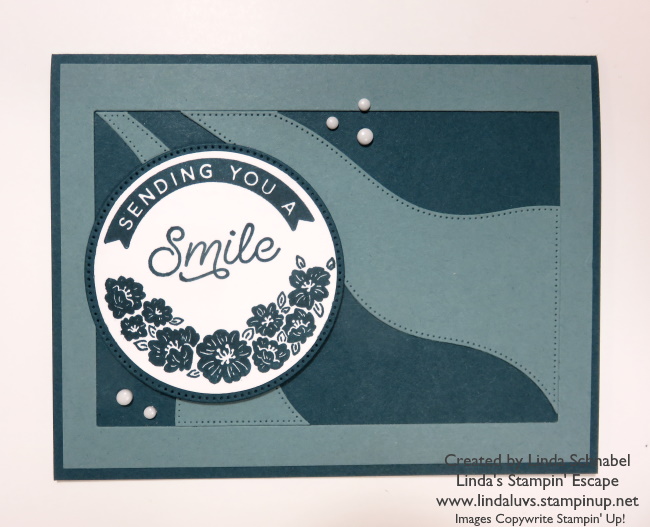
I’m tickled pink to share today’s card with you. I’m using the Circle Sayings Bundle and a “fun” die I just got called “Dot’s & Spots”. If you like polka dots, I think you’ll like this die! Now if this combination doesn’t spark your curiosity, let me add my color combination of our newest pink, Bubble Bath and Early Espresso. The recipe for this card will result in a cuteness overload!
Just take a peek …
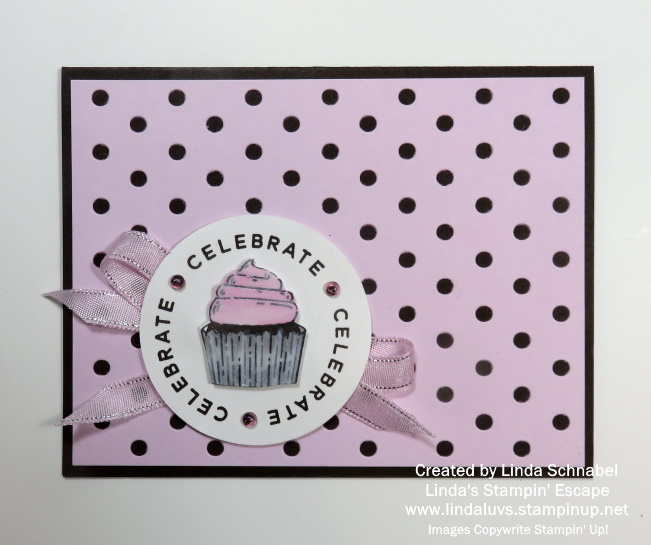
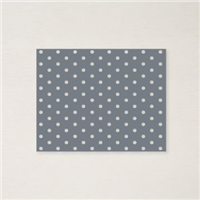
We’ll begin with out cardbase which is the Early Espresso… chosen because of our “chocolate” cupcake. The Bubble Bath is cut to a standard 4″ x 5-1/4″ and then die cut with the Dot’s & Spots. Now don’t throw those die cut dots away because they can be used in a future Shaker Card. I attached the die cut piece directly to my card base using the Liquid glue.
On a piece of Basic White I stamped my cupcake with the Memento Ink and the greeting in Early Espresso. The greeting was punched with the coordinating 2-3/8″ punch from the bundle and the cupcake was colored and fussy cut. I used the Bubble Bath, Smoky Slate and #100 Stampin’ Blends to color.
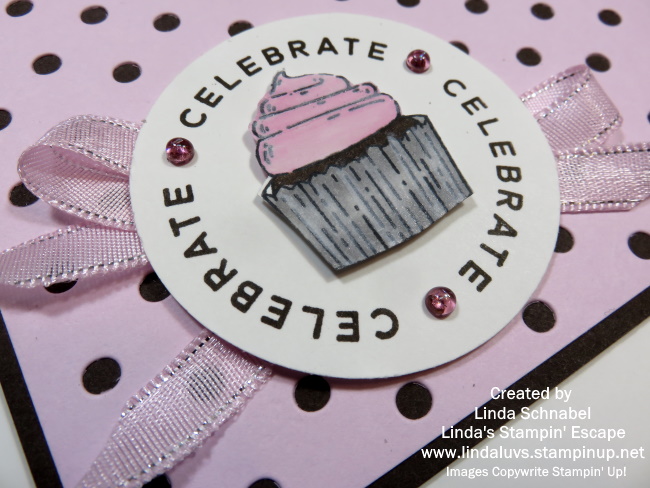
The cupcake once colored was popped up with the Stampin’ Dimensionals. Behind the the greeting is the new Bubble Bath ribbon from the 3/8″ Sheer Ribbon Combo pack. This pack also includes Azure Afternoon and Lemon Lolly. It has a nice shimmer to it and a touch of silver. It almost makes the card look like a pretty little gift!
Once the ribbon was attached to the greeting, I added Stampin’ Dimensionals and attached it to the card front.
To complete my card I added the Bubble Gum Tinsel Gems – 4 pack onto the greeting. There is no shortage of dimension or texture to this card and it is sooo stinkin’ cute! I’m loving those polka dots, so I’m sure you’ll be seeing a lot more of them.
I’d like to thank you for spending a part of your Sunday with me. I hope you enjoyed today’s colors and finished card. Enjoy your day.