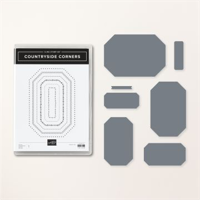
In today’s blog post, I invite you to join me in celebrating the rustic allure of the countryside, accompanied by the delightful twist of a fun fold technique: the tent fold. The stamp set will be leaving us (retiring) at the end of April so check out some creativity and inspiration.
Let’s take a look at the Countryside Inn ….
Let’s take a look at the video which explains the steps on how I created these cards. They look so pretty with the stamped Countryside Inn stamp and the designer papers ….
I also have the picture of the finished Tent Fold card with the Delightfully Eclectic designer paper (also retiring). You can see how the stamp set creates texture and dimension to our card. It really adds that special touch to your cards.
Thank you for taking time out of your day to join me and watching the video. I hope you enjoyed it and that you were inspired to try making this fun Tent Fold card.
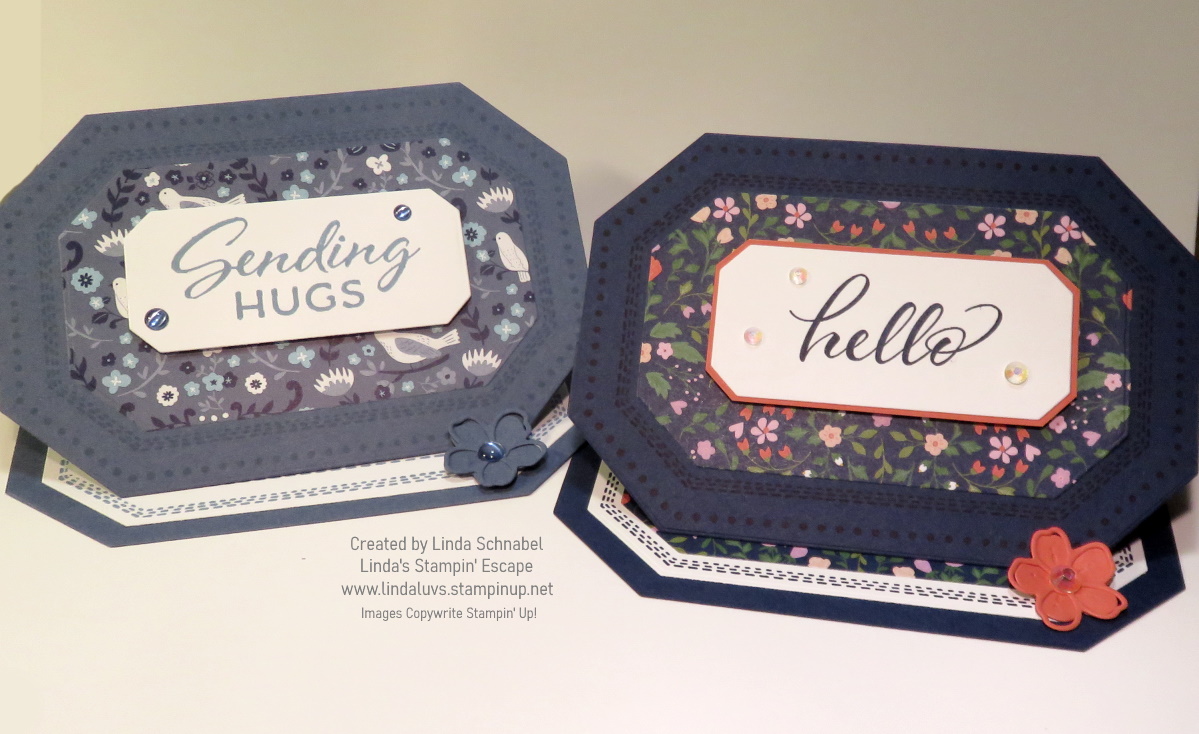
Are you in need of some creative inspiration for your next crafting project? Look no further! Today, we’re diving into the wonderful world of card making using the Circle Sayings Bundle, coupled with the charming Delightfully Eclectic Designer Paper. Get ready to create adorable, floral-themed cards perfect for birthdays, sending well wishes, or just letting someone know you’re thinking of them.
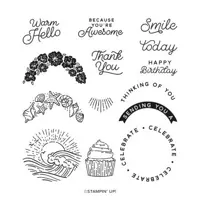
The Circle Sayings Bundle is a versatile set that offers a plethora of options for crafting enthusiasts. With its delightful mix of sentiments and coordinating punch.
We’re going to start with the quick & easy card that is just stamped, colored and punched out. I use Memento Ink when I combine my coloring with the Stampin’ Blends. In the video you got to see a highlight of my coloring technique … also easy!
The second card uses a template punched from your coordinating punch to align your half stamps to create a full round image… So simple, just stamp inside the template. To enhance the imagery I used scraps behind it … easy, resourceful and clever! lol
With the Circle Sayings Bundle and the Delightfully Eclectic Designer Paper, creating beautiful and thoughtful cards has never been easier. Whether you’re crafting for a special occasion or just because, these quick and easy cards are sure to bring joy to both the maker and the recipient. So gather your supplies, unleash your creativity, and let’s get crafting! Don’t wait, as both these products are retiring soon!
Looking to infuse your card making with an extra dose of charm and whimsy? Look no further than the Just Kidding Designer Series Paper! With its delightful array of adorable kid characters engaged in various activities, this paper is sure to bring a smile to your face and add a playful touch to any project.
From baking and sports to reading and outdoor adventures, the Just Kidding Designer Series Paper captures the essence of childhood joy and exploration. Imagine crafting birthday cards adorned with little bakers creating sweet treats, or scrapbook layouts featuring children playing soccer or basketball with boundless energy. The possibilities are endless with this versatile and lively paper collection.
Here we have two kiddo’s having some fun …
What sets the Just Kidding Designer Series Paper apart is its vibrant colors, playful patterns, and charming illustrations. Each sheet is filled with cute and whimsical designs that make it perfect for a wide range of projects, whether you’re creating cards, scrapbook pages, or even home decor items.
But the fun doesn’t stop there! For even more creative possibilities, consider pairing the Just Kidding Designer Series Paper with the Eclectic Designer Paper. The eclectic patterns and bold colors of the Eclectic paper complement the playful designs of Just Kidding, allowing you to mix and match to your heart’s content.
Today’s card boosts the heart pattern which looks adorable with the hearts on the Just Kidding Designer paper. And our kids are highlighted by using the Everyday Details Dies, frames them perfectly!
What’s even better is that both designer papers can be easily obtained during Sale-a-bration! Whether you choose to purchase them or earn them for free with qualifying purchases, now is the perfect time to stock up on these fun and versatile papers.
So why wait? Let your creativity run wild with the Just Kidding Designer Series Paper and bring a little bit of childhood magic to your crafting projects. Whether you’re making cards, scrapbooking memories, or creating handmade gifts, this paper collection is sure to inspire hours of creative fun.
Thank you for stopping by, you’ll be seeing more from our “Just Kidding” Designer paper because I find it irresistible and have to play!
Brace yourselves for a wave of excitement as we unveil the newest additions to our Sale-a-bration promotion. I’m thrilled to share some irresistibly delightful items. Today I’ll be showcasing the enchanting Delightfully Eclectic Designer Series Paper. Get ready to embark on a creative journey that promises a fusion of whimsy and elegance, all while enjoying an exclusive fun fold tutorial with a video that will spark your imagination and set your crafting heart aflutter!
Let’s begin with my Sending Smiles Fun Fold card. Today I will be sharing a video of my replay from a Facebook LIVE. It features the Delightfully Eclectic Designer paper that has just been added to the list of Sale-a-bration items… Wooo Hooo!
Let’s take a look at our video …
DIMENSIONS:
Cardbase: 11″ x 4-1/4″ then Scored at 2-1/8″ and 5-1/2″
Basic White for (Diamond) Front Flap: 2-3/4″ x 2-3/4″
Colored Cardstock or Designer Paper for Front Flap: 2-1/2″ x 2-1/2″
Designer Paper for front (3-1/8″) & inside(2-1/4″): You can use 4″ x 5-1/2″ … just make sure your 3-1/8″ piece is on the front, then you can attach the remainder to the inside.
I hope this cutie inspires you to try this fun fold, it is pretty quick and easy to make and doesn’t require a lot of layers or designer paper so have fun! Here’s another with the Delightfully Eclectic Designer Paper.
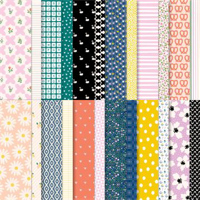
Our latest offering, the Delightfully Eclectic Designer Series Paper, is a celebration of vibrant colors, eclectic patterns, and endless creative possibilities. Imagine a kaleidoscope of hues and designs, ready to breathe life into your paper crafts. Whether you’re a seasoned crafter or a novice looking to infuse some energy into your creations, this paper is a game-changer.
Let’s see what else I’ve created with this fun paper pack ….
This is the split card technique … you will find step by step directions to create this card by Clicking HERE.
Now I want to share one of my favorite patterns in this pack ….
With such a fun and whimsical pattern, I chose the Alphabest stamp set and coordinating Best Label punch. I first stamped the outer design in Tuxedo Black Memento Ink and then stamped my greeting in the Fresh Freesia ink. To learn more CLICK HERE!
Here’s a little cutie that is soooo simple to make!
With patterns ranging from bold geometrics to delicate watercolor florals, the Delightfully Eclectic Designer Series Paper opens the door to a world of versatility. Elevate your projects with this dynamic paper that effortlessly blends contemporary chic with classic charm.
Here’s another cute pattern that I teamed up with the Circle Sayings bundle ….
There is another card and video that go along with this. Check them both out HERE.
Now, let’s talk about why you shouldn’t delay in indulging your creative cravings. Our Sale-a-bration promotion is all about giving back to our amazing crafting community. For every qualifying purchase, you can choose exclusive free items from our Sale-a-bration catalog. And yes, that includes the stunning Delightfully Eclectic Designer Series Paper!
Thanks so much for dropping in today for a visit … Don’t miss out on this crafting fiesta! Head to my online store, explore the wonders of Sale-a-bration, and let the joy of crafting fill your creative space.
Here is a list of highlighted products from today’s card parade ….
Today I have two cards for you from our Circle Sayings bundle and featuring the Delightfully Eclectic designer paper. I’ll share my Video replay of last nights Facebook LIVE along with close up shots of both cards. The video demonstrates the different stamps included in the set and the punch from the bundle.
Grab a cup of coffee or your favorite brew and sit back a spell and join me for this short video … it has some fun tips on how I use the Circle Sayings stamp so they align the way I want them to.
We’re going to start with the quick & easy card that is just stamped, colored and punched out. I use Memento Ink when I combine my coloring with the Stampin’ Blends. In the video you got to see a highlight of my coloring technique … also easy!
The second card demonstrated in the video showcased the technique of using a template to align your half stamps to create a full round image. To enhance the imagery I used scraps behind it … easy, resourceful and clever! lol
And just a little reminder about the 24-hour Stamp Sale today! All Stamp Sets in the Annual Catalog are 15% OFF today before 11:59 MT.
Hope you enjoyed today’s video and cards …. I will share another one of my Circle Saying designs with you tomorrow. Till then, have an amazing day!
Happy Sunday! Today I’d like to share one of my Stampin’ Tips for creating with designer paper who’s patterns are a bit, well … BOLD!! Some designs we look at and know exactly what we would like to do with them, others leave us with a question mark … lol.
Yesterday I highlighted the pattern with a simple die cut, today it’s all in the pattern of the card. When you have bold patterns you are not sure how to use them … go small! Today I turned a bold pattern into a simple little block that will create our focal point.
I was not sure how I wanted to use those big X’s, and the other pattern… well, it kind of hurt my eyes!! lol But cut into smaller blocks (1-1/2″ x 1-1/2″) we tame them down and create a cute design of blocks. I love the little swans so I added them into my Black & White themed card … it is what gave my my pop of color.
I matted my designer paper blocks with Calypso Coral measuring 1-5/8″ x 1-5/8″. Then I used my Stampin’ Blends to color the White Bakers Twine to Calypso Coral! The blocks were placed onto a 3-1/2″ x 3-1/2″ piece of Basic White…. this fun pattern of blocks create the focal point of our card.
I popped up the entire assembly with the foam adhesive sheets. I stamped my greeting from the Layering Leaves stamp set with Memento Ink and finished it off with the Classic Matte Dots in Black. The front was then layered onto a Basic Black card base.
I love all the texture and dimension of this card, and those crazy patterns make this card fun! If there is ever a pattern in your pack of designer paper that you are not sure what to do with it … tame it! Cut it down into blocks, or maybe use a collection of circles. Just have fun with it, and use it up.
Thank you for taking time out of your Sunday to visit me!
I have been sharing cards created with the Delightfully Eclectic Designer paper so today I picked a pattern I wanted to have a little fun with. I grabbed my Stylish Shapes dies and using the smallest of the square dies, I cut out the floral pieces from the design … you can see how they could be cut both ways.
Once I got them die cut, I tied a pretty bow using the natural Bakers Twine. I then attached the die cuts to the adhesive foam and popped them up. I layered them onto a piece of Garden Green and then used the Bubble Bath cardstock for my card base.
Simple and sweet … A card to say hello. The greeting comes from the Sending Smiles stamp set and die cut with the Sending Dies. I layered that with Garden Green before attaching it to the card front using Mini Dimensionals.
I thought this would be a fun little twist to this designer paper and to add some texture and dimension to my card. Hope you enjoyed.
Discover how easy it is to create my Sending Smiles Fun Fold card. Today I will be sharing a video of my replay from last nights Facebook LIVE. I’m also featuring the Delightfully Eclectic Designer paper that is currently on sale … Wooo Hooo!
OH… and we have FREE SHIPPING today only! Enjoy Free shipping and 15% off your Designer papers. I love it when we can combine these promotions.
Let’s take a look at our video …
DIMENSIONS:
Cardbase: 11″ x 4-1/4″ then Scored at 2-1/8″ and 5-1/2″
Basic White for Inside Card: 5-1/4″ x 4″
Basic White for (Diamond) Front Flap: 2-3/4″ x 2-3/4″
Colored Cardstock or Designer Paper for Front Flap: 2-1/2″ x 2-1/2″
Designer Paper for front (3-1/8″) & inside(2-1/4″): You can use 4″ x 5-1/2″ … just make sure your 3-1/8″ piece is on the front, then you can attach the remainder to the inside.
I hope this cutie inspires you to try this fun fold, it is pretty quick and easy to make and doesn’t require a lot of layers or designer paper so have fun!
Thanks so much for dropping in today for a visit … please feel free to leave a comment and let me know how you liked today’s fun fold.
Don’t forget the FREE SHIPPING today …. with qualifying order of $75 or more.
Today I will be sharing the second card that I showed in my video it also features the Delightfully Eclectic Designer paper but you can use any designer paper for this fun fold pattern.
DIMENSIONS:
Cardbase: 11″ x 4-1/4″ then Scored at 2-1/8″ and 5-1/2″
Basic White for Inside Card: 5-1/4″ x 4″
Basic White for (Diamond) Front Flap: 2-3/4″ x 2-3/4″
Colored Cardstock or Designer Paper for Front Flap: 2-1/2″ x 2-1/2″
Designer Paper for front (3-1/8″) & inside(2-1/4″): You can use 4″ x 5-1/2″ … just make sure your 3-1/8″ piece is on the front, then you can attach the remainder to the inside.
So are you ready to try this fun fold?? What designer paper are you going to use?
Thanks for stopping by today … I appreciate your visit.
Don’t forget the FREE SHIPPING today …. with qualifying order of $75 or more.
Today I’ll be sharing the replay of last nights Facebook LIVE, creating the Tent Fold Card with the Delightfully Eclectic designer paper. You’ll also see my original design using the Countryside Inn Designer paper. Both papers are on SALE until the end of June … I also have a “special” which includes 3 Free PDF’s (step by step instructions).
Let’s take a look at the Countryside Inn ….
Let’s take a look at the replay / video which explains the steps on how I created these cards. They look so pretty with the stamped Countryside Inn stamp and the designer papers ….
I also have the picture of the finished Tent Fold card with the Delightfully Eclectic designer paper. If you really love this paper, I’ll send you three PDF files with instructions for the two cards you were shown in the video, and then another surprise card!! Remember, orders must be made through me CLICK HERE and before the end of June so you can also get the awesome discount!!
Thank you for taking time out of your day to join me and watching the video. I hope you enjoyed it and that you were inspired to try making this fun Tent Fold card.
Today I’m sharing another Delightfully Eclectic Designer Series paper card, a Fun Fold, and yes … the Faux Step card again. I am hooked on this quick & easy fun fold. Ohhhh, wait to you see the pattern I picked for this card …
Those pretty pink posies and the stripes look great together and create a fun background. There are so many great patterns in this big bundle of designer paper, picking it up this month while it’s on sale is a smart move and a savings of almost $5.00
You can never have too much patterned paper. And with the Delightfully Eclectic 12″ x 12″ Designer Series Paper, you’ll always have plenty on hand. This extra-generous stack of paper has designs you can use for holidays, birthdays, seasons, and everyday use. Stripes, flowers, dots, grids, geometric designs—there’s a design for every project you want to make!
Side view ….
Card Base: 9″ x 4-1/4″ which is scored at 1-1/4″ … 2-1/2″ … and 5-3/4″.
Center step: 8-1/2″ x 2-1/4″ then score at 3″.
You need 3 pieces of designer paper; 4″ x 3″ … 4″ x 1″ (those will go on the base of the card). The 4″ x 1″ goes on the smallest panel to the front, then skip a panel, and then the 4″ x 3″ piece will go on the 3rd panel. The third measures 2″ x 5-1/4″ which goes on the step portion of your card.
If you have enjoyed this designer paper for the past two days, join me tonight when I share a couple of cuties using the Delightfully Eclectic designer paper on my Facebook LIVE tonight at 6:30 central time …. CLICK HERE to get onto my page. Then “Follow Me” so that you don’t miss out on any of the stampin’ action.
Thank you for hanging out with me today, and I hope to see you tonight.
I took the weekend off but I’m back to say HELLO in a fun & whimsical way. I am using the Delightfully Eclectic 12 x 12 Designer Series paper. This paper is so much fun with a total of 48 sheets … you’ll get 4 sheets each of 12 double-sided designs. That is 24 “delightfully eclectic” patterns. I’ve used several already and I’m sharing one of them with you today.
My pattern choice today was the fun floral in Fresh Freesia and Basic Black. I matted my paper with the black and chose the Fresh Freesia cardstock as my base. Once layered I added the Black & White 1/4″ Gingham Ribbon which I tied in a cute little bow.
With such a fun and whimsical pattern, I chose the Alphabest stamp set and coordinating Best Label punch. I first stamped the outer design in Tuxedo Black Memento Ink and then stamped my greeting in the Fresh Freesia ink.
With the Alphabest being photopolymer stamps, it’s a breeze to align the letters inside your stamped outer designs.
I popped up my greeting using the Mini Dimensionals and attached them in a playful way … I find this a “no stress” way to add my individually punched pieces because I don’t have to make sure it’s perfectly straight.
To finish off the card, I added my favorite “Iridescent Ice” Rhinestones … they go on everything!! I love the way the pick up the colors that are one your card. Perfect for a super simple, fun and whimsical card.
Thank you for joining me today. I hope you have a great week ahead.