12 Days of Christmas – Day 8: Simple to Stunning Christmas Cards

Hello Stampin’ Friends ~

Welcome back to Day 8 of our 12 Days of Christmas series! Today, I’m sharing two beautiful Christmas cards created with the Regal Winter Designer Paper. Whether you’re looking for something quick and easy or want to elevate your design to something stunning, these cards are perfect for your holiday crafting. Let’s dive in!

The Simple Magic of 4″ x 6″

One of my favorite ways to maximize Designer Series Paper is with the 4″ x 6″ cut. With this method, you can create 6 cards from just one sheet of 12″ x 12″ paper—talk about economical crafting!

Here’s the breakdown:

  1. Cut your designer paper into 4″ x 6″ pieces.
  2. Trim off 3/4″ from the 6″ side, leaving you with a perfect 4″ x 5 1/4″ piece for your card front.
  3. Save the trimmed strip—it’s the perfect touch to embellish the inside of your card!

Next, choose a coordinating cardstock for your card base. I selected Blackberry Bliss for one card and Night of Navy for the second card. Once your Designer Paper is attached, all that’s left is adding a greeting and a few embellishments to bring your card to life. Let’s take a look.

The Blackberry Bliss card keeps things simple yet festive with a warm, bold pattern. I adhered the Designer Paper directly to the card base and used the trimmed strip to decorate the inside panel for a polished look.

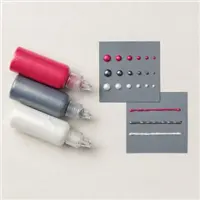
For embellishment, I added a piece of Blackberry Bliss & Gold Textured Ribbon and a cluster of Adhesive-Backed Metallic Gems in Gold. A beautiful stamped sentiment in coordinating ink from the Peaceful Season stamp set completed the card, keeping it quick but oh-so-stylish!

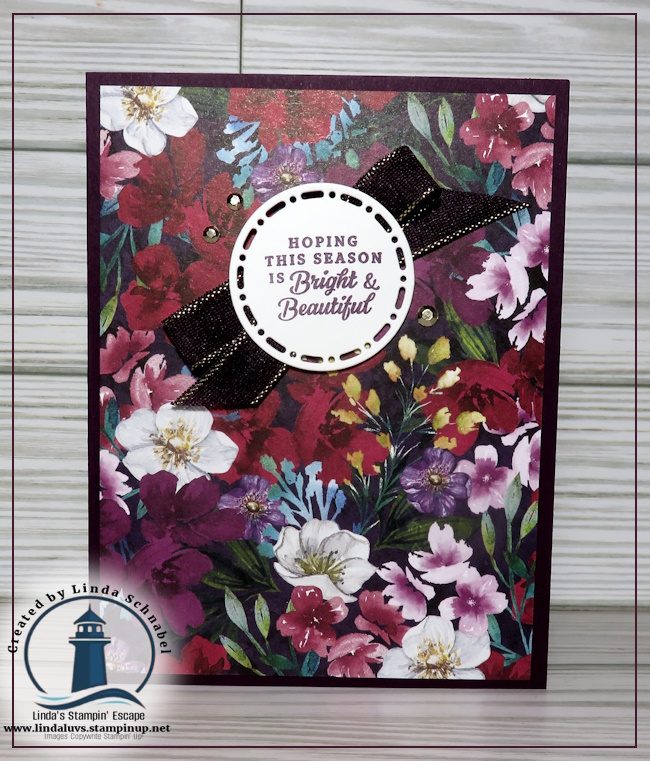
For the Night of Navy card, I used a warm floral pattern from the Regal Winter Designer Paper pack. To add a bit of flair, I trimmed the Designer Paper to 3 3/4″ x 5″ then matted the paper onto a 4″ x 5 1/4″ Silver Foil sheet . This silver mat creates a stunning frame that makes the design pop.

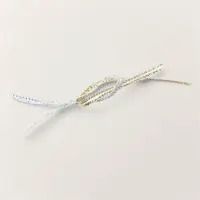
To finish, I wove the Silver Ribbon from the Gold & Silver Combo Pack behind the greeting. The greeting comes from the Sparkling Snowflakes stamp set and was die cut from the Deckled Rectangles Dies. I then scattered a few Rhinestone Gems for that frosty sparkle.

You will also see that extra little piece of designer paper on the inside of this card too. It just adds a nice coordinating / finishing touch!

Whether you’re going for the elegance of Navy and Silver accents or the warmth of traditional Blackberry Bliss, this simple-to-stunning approach is a must-try. Grab your favorite Designer Paper, a coordinating cardstock, and a touch of sparkle to create your own holiday masterpieces.

Which card is your favorite—the Blue Beauty or the Redish Radiance? Let me know in the comments below! Don’t forget to check back tomorrow for Day 9 of our 12 Days of Christmas series.

Happy crafting, and may your season be merry and bright! 🎄✨

– santa with blank billboard

Day 2 of 12 Days of Christmas: Peaceful Painted Trees with a Touch of Pearl

Hello Stampin’ Friends ~

Welcome to Day 2 of my 12 Days of Christmas celebration! Today, I’m thrilled to share a card that combines elegance with ease. This design features the stunning Painted Trees 3-D Embossing Folder, the Peaceful Season Bundle, and introduces the dazzling Pearlized Enamel Effects – Basics. This card was a hit with my Stamp Club, where members enjoyed learning the step-by-step process to create it. Now it’s your turn to dive in and see just how simple it is to bring this beautiful design to life!

Christmas cards hold a special kind of magic, and the Painted Trees 3-D Embossing Folder delivers that magic effortlessly. The intricate trees scene provides a textured backdrop, setting the stage for a serene, peaceful holiday message. Pairing it with the Peaceful Season Bundle—complete with coordinating stamps and dies—adds layers of charm. To top it off, the Pearlized Enamel Effects add just the right amount of shimmer, and truly highlighting our trees.

Step-by-Step Instructions:

  1. Card Base:
    Night of Navy: 8 1/2″ x 5 1/2″ scored and folded at 4 1/4″. Attach 4″ x 5 1/4″ piece of Basic White to the inside / stamp sentiment if desired.
  2. Basic White / Embossed Trees:
    Cut to 3 3/4″ x 5 1/2″. Using the Painted Trees embossing Folder, place your white cardstock in the center of the folder and “center” the largest tree to be the focal point of your card.
  3. Add Pearlized Details:
    Now for the fun part! Using a Sponge Dauber, lightly tap the Pearlized Enamel Effects onto your trees to add delicate covering on them, truly highlighting the beautiful detail of the embossing folder. Set aside and let dry while you continue.
  4. Gold Foil Mat::
    The Gold mat is 4″ x 5 1/2″. Using the “detailed” CHRISTMAS die from the Peaceful Season Bundle, you will place this in the center of the Gold Mat and die cut your greeting. At this time, using a scrap piece of Night of Navy… cut the coordinating Mat / Bold CHRISTMAS die. Adhere the two die cut pieces together with glue, and don’t forget the dot for your “i”.
  5. Assemble the Card:
    Begin by layering your greeting over the embossed trees. Add “MERRY” at this time. Now place your embossed tree piece over the Gold Mat. Now is the perfect time to add the beautiful Night of Navy and Gold Glitter Ribbon to your piece. Once you’ve added your bow, attach this assembly to your card base. You can adhere directly or add Stampin’ Dimensionals to pop it up.
  6. .Embellish:
    This will complete your card! I added the Gold Textured Adhesive Backed Dots. Feel free to use any of your favorite embellishments… I just wanted to stick with the GOLD and NAVY theme, as it’s so elegant.

This card was a joy to make and a delight to give. The combination of texture, elegant embossing, and that touch of pearly shine creates a timeless holiday greeting that anyone would cherish.

I hope you’ve enjoyed the Step by Step Instructions and feel inspired to give this card and the Enamel paint technique a try. The Painted Trees 3-D Embossing Folder and Peaceful Season Bundle are must-haves for your holiday crafting, and the Pearlized Enamel Effects truly elevate your designs. Let me know if you recreate this card—I’d love to see your version!

Stay tuned for Day 3 of my 12 Days of Christmas, where more holiday inspiration awaits.

Happy crafting ~

The Wait is Over – The Holiday Mini Catalog is LIVE!

Hello Stampin’ Friends ~

Great to be back … It’s the moment we’ve all been waiting for – the September-December Mini Catalog is officially LIVE! 🎉 From festive stamps to dazzling designer papers, this catalog is overflowing with everything you need to make your holiday season truly magical. Whether you’re a card-making enthusiast or a scrapbooker at heart, there’s something for everyone in this spectacular collection.

Holiday Magic at Your Fingertips

This year’s Holiday Mini Catalog is bursting with creative potential. Imagine crafting your holiday cards with stunning new stamp sets, coordinating dies, and gorgeous designer papers. The catalog includes everything from cozy winter scenes to elegant holiday florals, ensuring that your projects will stand out in style. And don’t forget the embellishments! With glittery accents, beautiful ribbons, and more, you can add the perfect finishing touches to all your holiday creations.

Here are a couple projects I made during my Facebook LIVE yesterday … featuring the “Take a Bow Bundle”

I also wanted to share another project you can do with your “bow” strips – create a background for a card. Along with the awesome Take a Bow designer paper, I incorporated some of the die cuts from the “A Little Bit Festive” pieces!

Introducing the Scrapbooking Catalog & New Cardstocks

But wait, there’s more! Alongside the Holiday Mini Catalog, Stampin’ Up! has also launched the brand-new Scrapbooking Catalog – a digital-only guide filled with everything you need to preserve your precious memories. Whether you’re a seasoned scrapbooker or just getting started, this catalog is a treasure trove of inspiration. Check out the video walkthrough showcasing some of the products …

I’d also like to share the video introduction of the Two-Tone Cardstocks. These versatile papers are designed to coordinate perfectly with your scrapbook layouts, giving your pages a polished and professional look. With a range of rich, complementary colors, these cardstocks are perfect for capturing the essence of the holiday season.

The wait is finally over – you can now shop all the goodies you’ve been eagerly awaiting! Whether you’re planning to make your holiday cards, scrapbook your family memories, or both, these catalogs are packed with everything you need to make this season unforgettable.

Let’s kick off this holiday season with creativity, joy, and a whole lot of crafting! I can’t wait to see what you create with these fantastic new products. Watch for upcoming classes too!

Happy stamping, and happy holidays! 🌟