Simply Sunday: Happy National Poinsettia Day!

Hello Stampin’ Friends ~

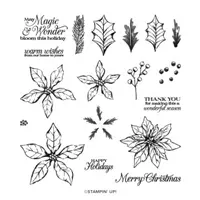
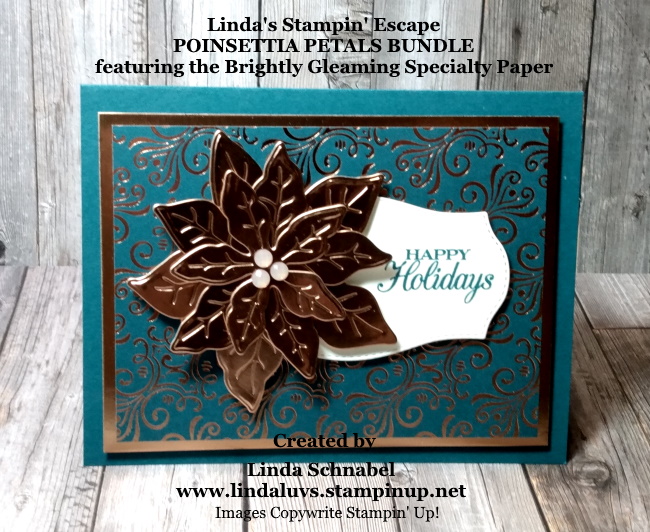
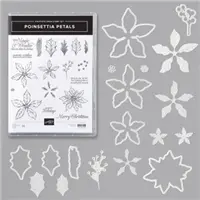
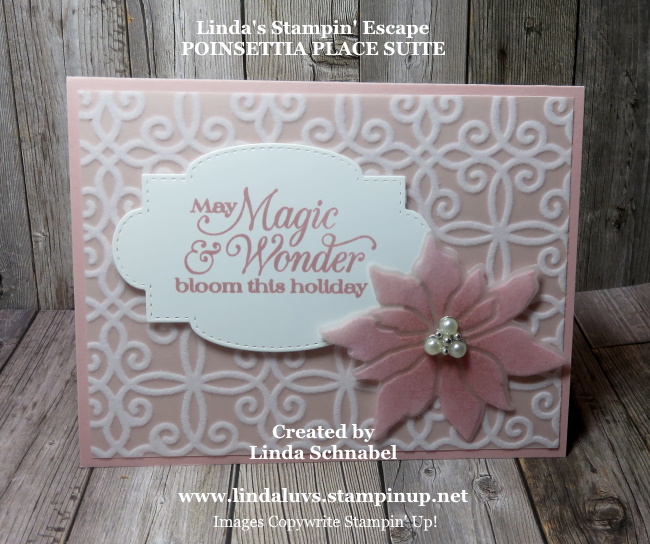
Today I have a beautiful card to share highlighting the Poinsettia Petals Stamp set. Today I began with just Stamp * Ink * and Paper …. then introduced our Stampin’ Blends to create the stunning color on our poinsettia and a little texture on the background.

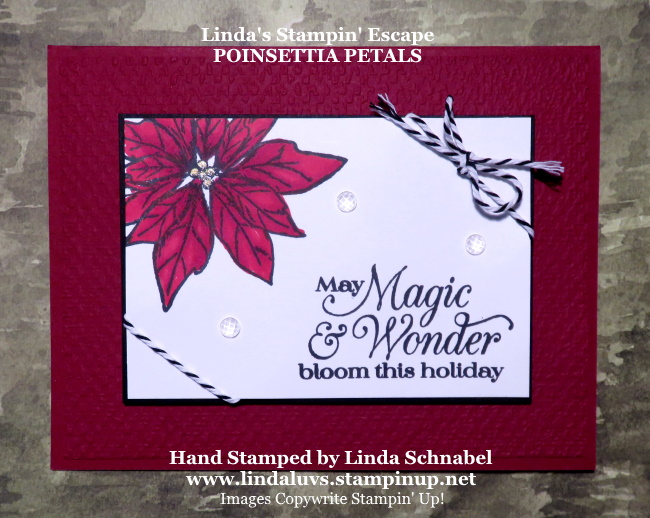
The card base is Cherry Cobbler as is the piece that I textured using the Tasteful Textile Embossing folder … The texture really makes the focal point of the card pop! My Basic White stamped piece measures 4″ x 2-3/4″ and the Basic Black mat measures 4-1/8″ x 2-7/8″ … you can use 1/4″ measurements on the mat to make it easier cutting (4-1/4″ x 3″).

Next, I stamped the Poinsettia in the upper-left hand corner, and the greeting in the lower-left hand corner.

Now it’s time to color … I’m using the Dark Poppy Parade and Dark Cherry Cobbler. I color the entire petal with the Dark Poppy Parade and then use the lines in the image to color in the Dark Cherry Cobbler. They blend so easily together and give you a deep rich color (the photo does not do it justice!) Once finished, I go back with the Dark Cherry Cobbler and color just the area closest to the yellow center … this was colored with Dark Daffodil Delight and highlighted with Wink of Stella.

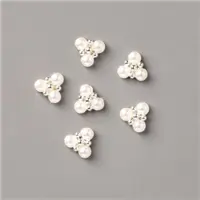
I finished off the card with three of my favorites, the Elegant Faceted Gems and tied it up with the Bakers Twine from the Playful Pets Trim Combo pack. Don’t ever be afraid to grab items from another bundle / suite to enhance your cards & hand stamped projects!

Thank you for checking in on me today …

Enjoy your Sunday!

TODAY’S STAMPIN’ SUPPLY LIST … If you liked the products used in todays projects, I have links for you below. Just click on the item you would like more information on, or to begin your shopping. It will take you directly to my website. Thank you ❤

Ho Ho Ho … Look at the Snow!

Hello Stampin’ Friends ~

They say third time is a charm, so today is my third and last (for now) in my series of cards from the Trimming the Town Suite Collection. Today I’ll be using the dies from the bundle with focus on the Trimming the Town designer paper.

Our back ground is Pool Party and Snow … well, Whisper White cut into hills of fluffy layers of snow.

The dies not only cut out the stamped images but they also cut the house images on your designer paper … now that is what I call extra value.

I have another great tip that will bring even more value to your bundle … when cutting out the images on your designer paper (yes, you can cut out the trees too!) Don’t forget to cut the partial images as well … this is what I used, and hid them behind the snow!!

With our partial buildings and trees deep in the snow banks, I couldn’t help but add those sweet little Adhesive-backed Snowflakes.

This next picture shows a spattering of the “Wink of Stella” … this is done by tapping it onto a marker or such…

Just a reminder ….

When you purchase the Coming Home Stamp set individually or as part of the bundle or suite … $3 will be donated to charities devoted to adoption, foster care, and infertility. You can help make a difference in the lives of those affected.

Thank you for stopping by today.

Have a great day ~

TODAY’S STAMPIN’ SUPPLY LIST … If you liked the products used in today’s projects, I have links for you below. Just click on the item you would like more information on, or to begin your shopping. It will take you directly to my website. Thank you ♥ 

From My Home to Yours …

Hello Stampin’ Friends ~

Today is the second in my series of cards from the Trimming the Town Suite Collection. Today I’ll be using the dies from the bundle along with the designer paper.

The Trimming the Town designer series paper is the backdrop to the card … with the forest of trees and a sprinkling of snow, it’s the perfect setting for my cabin.

I stamped my cabin on Whisper White with Tuxedo Black Momento ink and then colored it with the Soft Suede Stampin’ Blends. I also used the Real Red for the Door and So Saffron for the Windows.

The snow was cut from the die included in the Coming Home Bundle… The greeting comes from the Poinsettia Petals stamp set.

The “Warm Wishes” greeting fits perfectly in this serene setting. I have fallin’ in love with this bundle… besides being an amazing bundle/suite, you can make a difference with the purchase of the set …

When you purchase the Coming Home Stamp set individually or as part of the bundle or suite … $3 will be donated to charities devoted to adoption, foster care, and infertility. You can help make a difference in the lives of those affected.

Thank you for taking the time out of your busy day to visit me and learn about this opportunity to help others. Please let me know if you have any questions …. I am available to help.

Have yourself a wonderful day ~

TODAY’S STAMPIN’ SUPPLY LIST … If you liked the products used in today’s projects, I have links for you below. Just click on the item you would like more information on, or to begin your shopping. It will take you directly to my website. Thank you ♥ 

Wednesday Wow: Poinsettia Petals Card

Hello Stampin’ Friends ~

I hope you enjoyed the video yesterday, as I’m back today with the stunning card featured in the video. My attendee’s were so excited with the Brightly Gleaming Specialty paper from that product showcase that I carried it into the Poinsettia Petals showcase … the results were nothing short of amazing!!

We’ll begin with our card base … Pretty Peacock which coordinates with our Brightly Gleaming Specialty Paper; enhanced with a mat of Copper Foil.

The focal point of our card is the stunning poinsettia embossed and cut with the specialty dies included in the Poinsettia Petals Bundle! I also hope you caught my tip on how to keep your dies aligned (it’s in the video).

It’s easy to see the beautiful texture and dimension these dies can created. And we finished off our poinsettia by adorning the center with the “Elegant Faceted Gems”… they are more stunning in person as they have a champagne color to them which really complements the Copper Foil Poinsettia.

Our poinsettia sits upon a piece of Very Vanilla cut from the Tasteful Labels dies and stamped in Pretty Peacock. Don’t ever be afraid of mixing and matching your bundles … they really can enhance your stamping experience.

For those of you who missed the LIVE presentation, don’t fret … I will be hosting another “All Day Stamp Party” on November 28th, 2020 – Small Business Saturday! I will have LIVE demonstrations, deals, prizes and a full day of fun!!

Thank you for joining me today,

Have a great day!

TODAY’S STAMPIN’ SUPPLY LIST … If you liked the products used in today’s projects, I have links for you below. Just click on the item you would like more information on, or to begin your shopping. It will take you directly to my website. Thank you ♥ 

A Magical Transformation …

Hello Stampin’ Friends ~

I hope you got a chance to see yesterday’s card … the Poinsettia Place Suite and featured the Plush Poinsettia Specialty paper. I shared how easy it was to color the flocking on the paper so you could expand the use of your paper.

I thought it would be fun to see how different colors transform the look of the Plush Poinsettia Specialty paper...

I used 1-3/4″ squares of each of the three patterns of the Plush Poinsettia Specialty paper and then backed it with a 1-7/8″ mat of Night of Navy, Cherry Cobbler and Mossy Meadow.

I then stamped the greeting in Night of Navy onto a piece of Whisper White and ran it through the Stampin’ Die Cut and Emboss machine using the Subtle embossing folder ….

The blocks were popped up with Stampin’ Dimensionals and arranged onto the card, and then to complete my card, I added the blue Rhinestones from Holiday Rhinestones.

I hope you will be joining me and your fellow stamping enthusiasts at my Holiday Catalog Virtual Retreat Party. Bring your friends along with you! Enjoy in the comfort of your own home! (Information below).

If you would like to join in on the FUN … Copy this link: https://www.facebook.com/groups/1497489893793307/   and put it in the Search Box … then request to be a member! I would love to have you join us! There will be LIVE Demonstrations, Games, Exclusive Specials and PRIZES!! It’s going to be a party!!

Thank you for joining me today, I hope you have a wonderful day ~

Coloring Flocked Paper

Hello Stampin’ Friends ~

Happy Wednesday!! Today I’d like to share with you my card and video of the technique I shared LIVE last night on Facebook. The technique is “Coloring Flocked Paper” … and I used the beautiful Plush Poinsettia Specialty Paper from the Poinsettia Place Suite.

Grab a cup of coffee or your favorite tea and sit down and relax while you watch this short video on how to color the flocked specialty paper….

When pictures are a thousand words … then videos hit the jackpot! I love being able to show and tell you how to make cards. The base was cut 8-1/2″ x 5-1/2″ and scored at 4-1/4 to fold in half. The Plush Poinsettia Specialty paper with the scrolls was cut 4″ x 5-1/4″.

The poinsettia was trimmed from the paper and the die cut with the coordinating die from the Poinsettia Bundle. The greeting also comes from the bundle and was die cut from the Stitched So Sweetly Dies.

The stunning Beaded Pearls are part of the entire product suite … you will find the Poinsettia Place Suite on pages 14 through 16 in the Holiday Mini Catalog.

I will be sharing another card with you tomorrow that features the Plush Poinsettia Specialty Paper. I will also be highlighting the Poinsettia Place Suite at my Holiday Catalog Virtual Retreat Party. I hope you plan on joining me (see information below).

If you would like to join in on the FUN … Copy this link: https://www.facebook.com/groups/1497489893793307/   and put it in the Search Box … then request to be a member! I would love to have you join us! There will be LIVE Demonstrations, Games, Exclusive Specials and PRIZES!! It’s going to be a party!!

Thank you for joining me today, I hope you got inspired to think outside of the box and change up a product and make it the focal point of your card.

Have yourself a wonderful Wednesday ~

TODAY’S STAMPIN’ SUPPLY LIST … If you liked the products used in today’s projects, I have links for you below. Just click on the item you would like more information on, or to begin your shopping. It will take you directly to my website. Thank you ♥