Taking Simple Card-Making to the Next Level

Hello Stampin’ Friends,

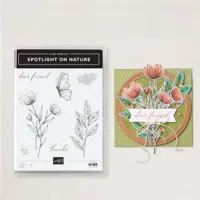
The other day, I shared a simple and fun project using the Basic White Notecards and Envelopes paired with the Spotlight on Nature stamp set, done in our NEW Peach Pie ink color.

CLICK HERE TO VIEW FULL POST

Today, we’re going to elevate our card-making game with a new design that adds an extra pop of color and dimension.

Supplies You’ll Need:

  • Basic White Cardstock (8 1/2″ x 5 1/2″)
  • Basic White Stamping Piece (3 3/8″ x 4 7/8″)
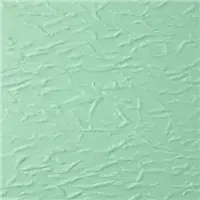
  • Summer Splash Cardstock (3 1/2″ x 5″)
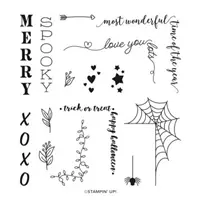
  • Spotlight on Nature Stamp Set
  • Layering Leaves Stamp Set
  • Ink Pads in Summer Splash
  • Scoring Tool
  • Bone Folder
  • Your Favorite Adhesive
  • 2024-2026 In-Color Shimmer Gems

Steps to Create Your Card:

  1. Prepare Your Base: Start with a piece of Basic White Cardstock, measuring 8 1/2″ x 5 1/2″. Score it at 4 1/4″ and fold it in half to create your card base. Use a bone folder to get a crisp fold.
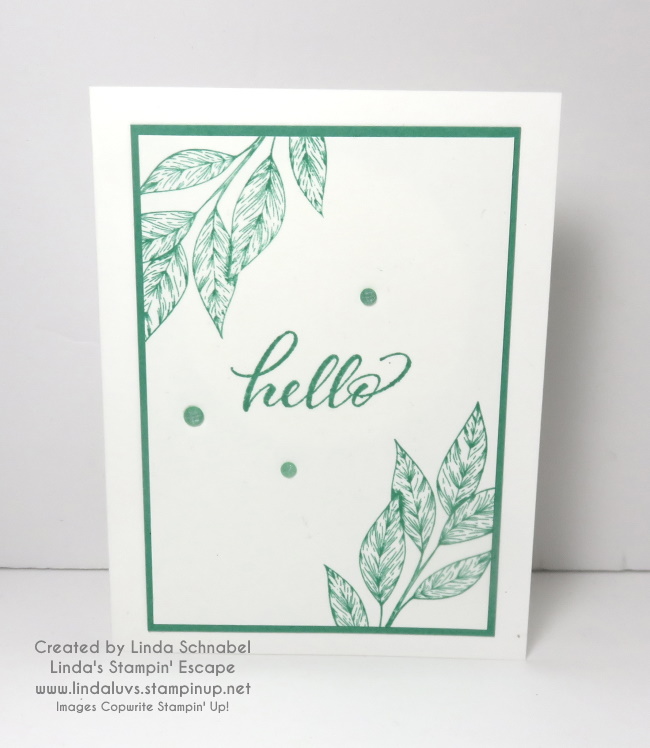
  2. Stamp Your Design: Take the Basic White stamping piece (3 3/8″ x 4 7/8″) and stamp the leaf image from the Spotlight on Nature stamp set in Summer Splash ink. The vibrant greenish blue will bring a fresh and lively touch to your card.
  3. Add Your Sentiment: Choose a sentiment from the Layering Leaves stamp set and stamp it onto your design. This adds a heartfelt message to your beautiful card.
  4. Create the Mat: Cut a piece of Summer Splash cardstock to 3 1/2″ x 5″. This new In-Color will provide a vibrant mat that coordinates and makes your stamped piece stand out.
  5. Assemble the Card: Adhere your stamped piece onto the Summer Splash mat, ensuring you center it for an even border. Then, attach this layered piece to your card base.
  6. Embellish with Shimmer Gems: Complete your card by adding the NEW In-Color Sparkle Gems. These gems add a touch of shimmer and elegance to your design.

Once your card is assembled, tuck it into an envelope and send it to a friend. It’s a quick and easy project that looks sophisticated and stylish, perfect for brightening someone’s day.

Happy crafting! I can’t wait to see what you create with this stepped-up design. Be sure to share your projects and let me know if you have any questions.

Until next time,

FREE Tutorial Sunday! Biggest Wish Fun Fold Card

Hello Stampin’ Friends ~

Welcome to a Free Tutorial Sunday, where creativity knows no bounds and fun is always at the forefront! Are you ready to embark on a crafting adventure filled with and easy and innovative fold? Well, you’re in luck because today we’re diving headfirst into a world of paper crafting delight, fueled by the spirit of sharing and the joy of trying something new!

Let me introduce you to the Biggest Wish Thank You “FUN FOLD” Card

At the heart of today’s tutorial lies the captivating allure of the Biggest Wish Stamp Set and the enchanting charm of the Meandering Meadows Designer Series paper. These two crafting treasures are our companions on this journey of discovery as we explore this easy to make fun fold card and let our imagination run wild, so many different patterns to choose from.

Cardstock Measurements:

  • Blueberry Bushel Cardstock (card base):  5 ½” x 9 ¼”
  • Meandering Meadows DSP:  6” x 6” piece
  • Very Vanilla Cardstock:  5 ¼” x 3 ½”
  • Very Vanilla Cardstock:  Scrap piece for the sentiment

Instructions:

  • Cut a piece of Blueberry Bushel cardstock to 5 ½” x 9 ¼”.
  • On the 9 ¼” side, score your cardstock at 1 ½” and 2 ¾”.  Turn your paper 180 degrees, and score the other end of your cardstock at 1 ½” and 2 ¾”.  Fold and burnish your card base as shown in the top view of the pictures above.
  • Use a piece of 6″ x 6″ Meandering Meadows Designer Series Paper (DSP) to create the focal points for your card. 
  • Pay attention to the direction of the pattern in your DSP.  Cut off ¾” from the top or bottom of your 6″ x 6″ piece, depending on what part of the design you want to keep.  You’ll end up with a piece measuring 6″ wide and 5 ¼” tall.
  • Cut the 6″ x 5 ¼” DSP piece into three pieces.  Two pieces will be 1 ¼” x 5 ¼”.  The remaining piece will be 3 ½” x 5 ¼”.  If you’re using a DSP that has a continuing design, like the one I used, cut the 1 ¼” x 5 ¼” pieces from either side, leaving the 3 ½” x 5 ¼” piece from the middle of the design.
  • The 3 ½” x 5 ¼”DSP piece is adhered to the center of the card.
  • The two DSP pieces measuring 1 ¼” x 5 ¼” are adhered to the sides of the card, as pictured.  You could also turn these pieces over and adhere them to the sides of the card.  Some DSP designs work really well with this option since both sides of the paper coordinate well with each other.
  • Use the ¾” strip that you cut off your original piece of 6″ x 6″ DSP as decoration on the front of the card.  This strip helps bring the design together.
  • Use Blueberry Bushel ink and the thanks scripted stamp from the Biggest Wish stamp set to create your sentiment.  Stamp the sentiment onto a scrap of Very Vanilla cardstock.  Punch out the sentiment using the Heartfelt Hexagon Punch.
  • Before adding the sentiment, you may want to embellish your card a little.  Put a few glue dots in the middle of my DSP strip and lay some of the gold Simply Elegant Trim onto the glue dots.  This will allow you to shape the trim into a faux bow. 
  • The sentiment is added with dimensionals to give it a little more pop!
  • Finally, the cards needed some bling, right?!  Add a few of the gorgeous Brushed Brass Butterflies on the center panel of the card.
  • To add your message, simply cut a piece of Very Vanilla cardstock to 3 1/2″ x 5 1/4″.  Add that piece to the back of the center panel.

If you enjoy the tutorials and love fun folds and the Meandering Meadow Designer Paper, join me on Tuesday night at 6:30 on my Linda’s Stampin’ Escape Facebook page. I will be going LIVE with a great Fun Fold done two different ways!

Thank you for taking time out to visit … Enjoy your Sunday.

From Scraps to Splendid … Cards!

Hello Stampin’ Friends ~

Yesterday I share two card layouts with you that are perfect for using up your scraps of designer paper!! Our first layout uses 9 – 1″ squares ….

The Whisper White piece that holds these 9 designer paper pieces measures 3-1/2″ x 3-1/2″ and the Real Red mat behind it is 3-3/4″ x 3-3/4″.

The card base is Real Red and measures 4-1/4″ x 11″ and the Whisper White measures 4″ x 5-1/4″ … both white pieces were embossed with the Subtles Embossing Folder. Before embossing it, the greeting was stamped from the Itty Bitty Christmas stamp set.

OK … Here’s the fun part. I’m sharing they layouts and I would like to see what you come up with!! You can post them on my Linda’s Stampin’ Escape Facebook pagewe’ll have a contest!!

Our second layout …

Strips of Designer Paper and a bow is all you need to create with this layout, but I did add a little more! The base of the card is Blackberry Bliss and the Basic Black mat was embossed with the Old World 3-D Embossing Folder.

The strips of designer paper come from the Magic in this Night Designer Series paper and a strip of the Black Glitter Paper. I did stamp my greeting directly onto the Blackberry designer paper … it comes from the Festive Corners stamp set.

I’ll post a notice on my Facebook page and then make sure you share cards. We’ll do a SPIN 2 WIN on all the entries. Let’s have some FUN this Friday!

See you on my Linda’s Stampin’ Escape Facebook page!

TODAY’S STAMPIN’ SUPPLY LIST … If you liked the products used in today’s projects, I have links for you below. Just click on the item you would like more information on, or to begin your shopping. It will take you directly to my website. Thank you ♥ 

Fun Friday Layouts …

Hello Stampin’ Friends ~

We’ve been having some fun lately with card layouts and how helpful they are when you are ready to start creating! So today I’d like to share two more card layouts with you … Grab your scraps!!

OK … Here’s the fun part. I’m sharing they layouts and I would like to see what you come up with!! You can post them on my Linda’s Stampin’ Escape Facebook pagewe’ll have a contest!!

The first layout is 9 – 1″ x 1″ squares … Have fun with it and come up with any occasion you prefer. I’ll be sharing my cards with you here!

Our second layout …

or template is a layering of designer paper all tied up pretty with a bow. However, you could put your greeting tag across the top instead of the bow … or the greeting can be stamped along the bottom. As far as the banners – make them with any width or length … Use up those scraps! Again, have fun with it and don’t forget to share.

I’ll post a notice on my Facebook page and then make sure you share cards. We’ll do a SPIN 2 WIN on all the entries. Let’s have some FUN this Friday!

See you on my Linda’s Stampin’ Escape Facebook page!

Simply Sunday: Quick Card Layouts

Hello Stampin’ Friends,

I hope you enjoyed your July 4th celebrations, or got to relax a little, if not, grab a cup of coffee and join me as I share two layouts featuring the “Peony Garden” Designer Series paper.

Hope you had a chance to check out the Peony Garden suite that I shared yesterday … today, I’m highlighting only the designer paper. The soft florals and versatile designs make this paper a treasured find for your collection.

Let’s start with out first card, a bit of a surprise considering out designer paper is called “Peony Garden” …

I couldn’t wait to share this pattern with you, not what you expected but the pattern suits a masculine card perfectly. I teamed this one up with our “A Good Man” stamp set. A simply layout … yes, but it is simply Sunday.

Wait till you see this same designer paper pattern used on my next card!! The design reminds me of a tweed so I paired it with a lovely floral pattern in Petal Pink ….

We are stepping up our layout for the second card. I used two strips of designer paper in different patterns – these are cut to 1-3/8″ x 3-3/4″ … they are cut off at 1-1/4″ and then placed on a 4″ x 3″ Basic Grey mat. This is then attached to the Petal Pink which is embossed with the new Tasteful Texture 3D embossing folder.

The “thank you” comes from the “Borders Abound” stamp set . I share a card with you a few days ago featuring that stamp set (See Here). Check it out … I think you will enjoy it. I love this font and think it adds an elegant touch to the card. It was heat embossed in white and the ends punched with the Detailed Trio Punch.

It is amazing how a designer paper pattern can influence the style of your card. On our first the gray is masculine but on the second, it adds a formal touch, and combined with the softness of the floral pattern and fanciful font … you end up with charming card.

Thank you for taking time out of your holiday weekend to join me. I will be sharing “more” with the Peony Garden Designer paper the next few days. If you LIKED today’s post … please click the LIKE button at the bottom of the page.

Enjoy the rest of your day.

Here is a list of the product I used to today’s cards. Find out more information about these products by clicking on the image … or you can begin your shopping from here as well. Thank you!