Simple, Cute & Creative Cards: 3 Fun Ways to Use the 3 Banner Punch!

Hello Stampin’ Friends ~

Sometimes the simplest crafting tools lead to the most creative ideas! Today, I’m sharing three fun ways to use the 3 Banner Punch, paired with the Soiree Salutations stamp set.

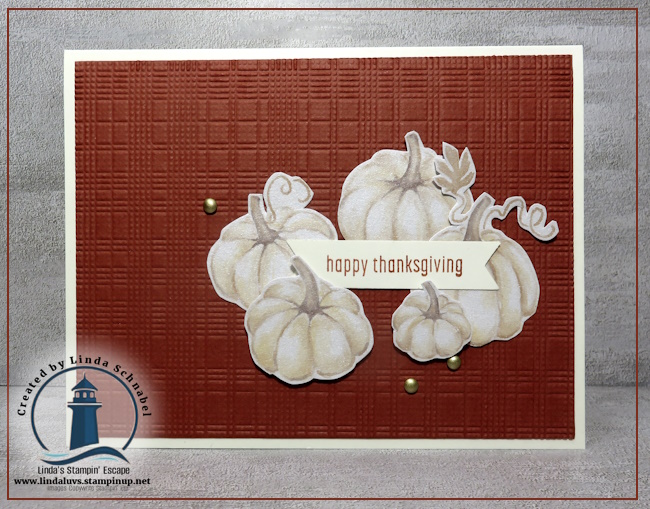
You may recognize the first card from a few days ago, when I asked you to choose how many pumpkins you preferred. It was so much fun seeing which version caught your eye! Those little punched banners provided the perfect spot for the greeting while allowing the pumpkins to remain the star of the card.
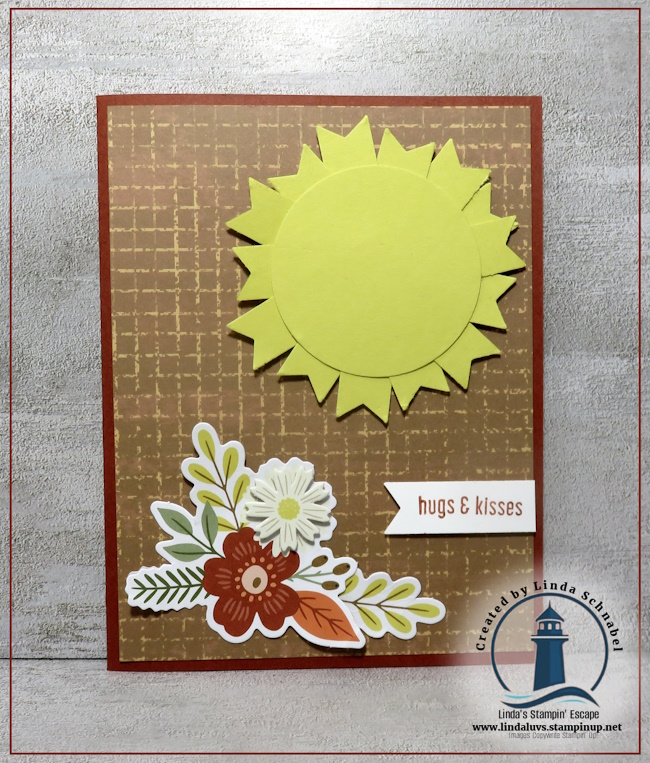
For my second card, I looked at the punch in a completely different way. Instead of creating a banner, I used the punched pieces to form the rays of a bright and cheerful sun! Arranged around a cardstock circle, those simple shapes become something entirely new. Add a pretty floral arrangement and a sweet “hugs & kisses” greeting, and you have a card filled with warmth and sunshine.
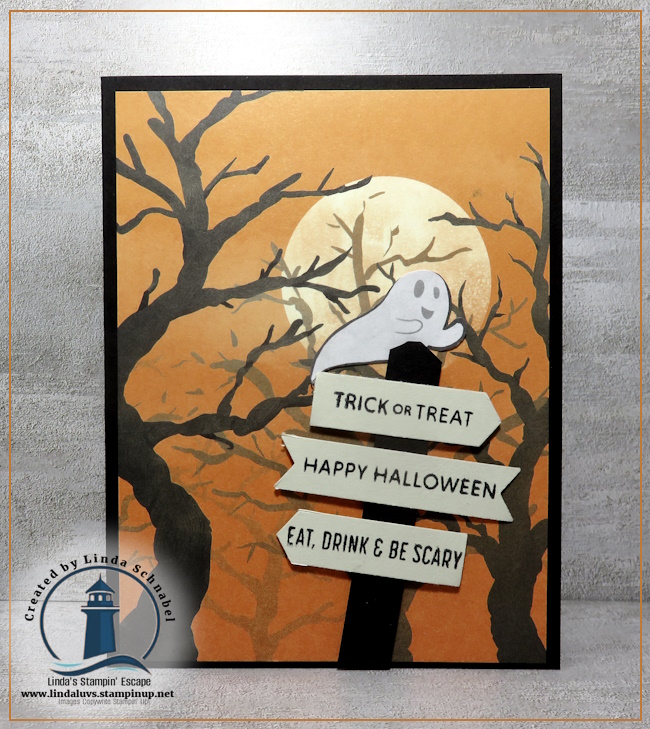
Then we took another creative turn with our final card. This time, the punched banners became a quirky road sign to help our friendly ghost find his way through his Halloween haunts! The different greetings point him toward plenty of spooky fun, including a little reminder to “Eat, Drink & Be Scary!”
That is what I love about a versatile punch. It may be designed to create banners, but with a little imagination, it can become sunshine, road signs, decorative accents, and so much more.

Simple doesn’t mean boring when you add creativity!

Be sure to watch the video as I walk you through each card and show you how I used the 3 Banner Punch in three completely different ways. Then take another look at the punches in your own craft room. What unexpected design could you create?

Watch on YOUTUBE … Click Here!

If you like these videos, I am putting the link HERE for you to watch the entire sires of our Kick Off Party. Until next time, keep creating and finding new ways to use the supplies you already love!

Shining the Light on Creativity,
Linda

“A Little Christmas” Fun Fold Card!

Hello Stampin’ Friends ~

Yesterday I shared two cards and a video creating with the A Little Christmas Designer Series Paper. Today, I have another card to share with you from that very same sheet, but this time we’re adding a little twist… a fun fold!

And you know how I feel about a good fun fold, especially one that looks impressive but is actually quite simple to create!

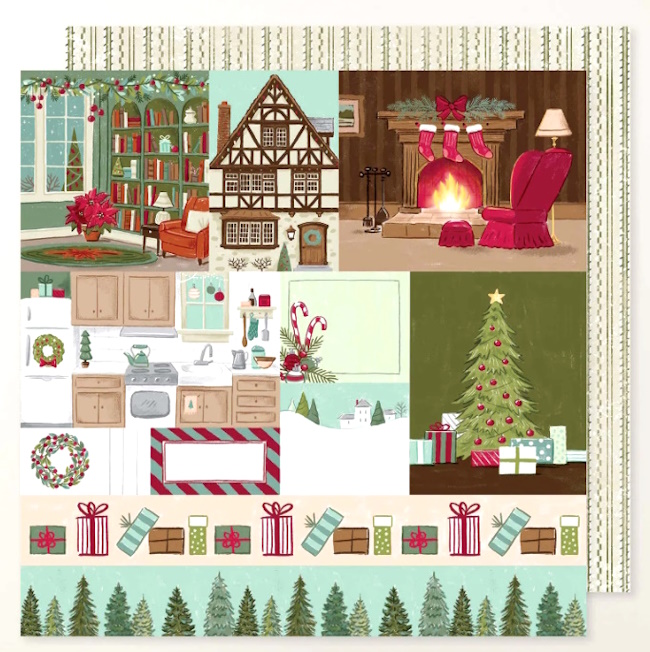
What I really love about the A Little Christmas Designer Series Paper is how much of the work it does for us. This cozy little Christmas scene, with the decorated room, tree, bookshelves, poinsettias and presents, practically creates the card all by itself. By carefully cutting the Designer Series Paper, we can turn one of those beautiful scenes into the focal point of our card.

Creating the Fun Fold

Start with a piece of Pool Party cardstock measuring 8-1/2″ x 5-1/2″. Score and fold it at 4-1/4″ just as you would for a traditional card base.

Now comes the twist! On the front of the card, measure 1-1/4″ from the score line and cut from that point all the way to the bottom. This separates that narrow section from the rest of the card front. The left-side flap gets glued down, while the larger portion remains free to open.

It’s such a simple change to a traditional card base, but suddenly you have a fun fold!

For my Designer Series Paper, I cut the beautiful Christmas room scene to 3-7/8″ x 3-7/8″. The coordinating tree pattern on the left measures 3/4″ x 3-7/8″.

To really make those patterns pop, I brought in Cherry Cobbler cardstock for the mats. You’ll need two pieces measuring 4″ x 4″, along with a 1″ x 3-7/8″ piece for the narrow side panel. I love how that Cherry Cobbler pulls the reds right out of the Designer Series Paper!

Inside the card, add a piece of Basic White measuring 3-7/8″ x 3-7/8″, giving you plenty of room to write your Christmas message.

I finished the front with a crisp Merry Christmas greeting from Soiree Salutations, punched with the 3 Banner Punch. That little banner stretches across the fun fold and adds another layer without covering up too much of that gorgeous Christmas scene.

And for a final touch of Christmas sparkle, I added a few Christmas Epoxy Shapes.

The result is a card with plenty of detail, but the Designer Series Paper is doing much of the heavy lifting. That’s one of my favorite ways to create! Start with beautiful paper, add a clever fold, pull a few coordinating colors from the design, and suddenly you have a card that looks like you spent much more time on it than you actually did.

If you joined me yesterday for my first two A Little Christmas cards, I hope today’s project gives you yet another reason to take a closer look at each sheet in that paper pack. Don’t just see a piece of Designer Series Paper… look for the little scenes, colors and details that can become the star of your next card.

If you love fun folds, tuck this one away in your idea file. It’s an easy layout you can use again and again with … let me know if you’ll be trying it! And I have links to the product below if you’d like to grab some for yourself.

Thank you for joining me today! Linda

Quick & Easy Christmas Cards with A Little Christmas Designer Paper

Hello Stampin’ Friends ~

Sometimes the Designer Series Paper does so much of the work for us that all we need to do is cut, layer, and have a little fun! That’s exactly what I’m sharing today with the A Little Christmas Designer Series Paper.

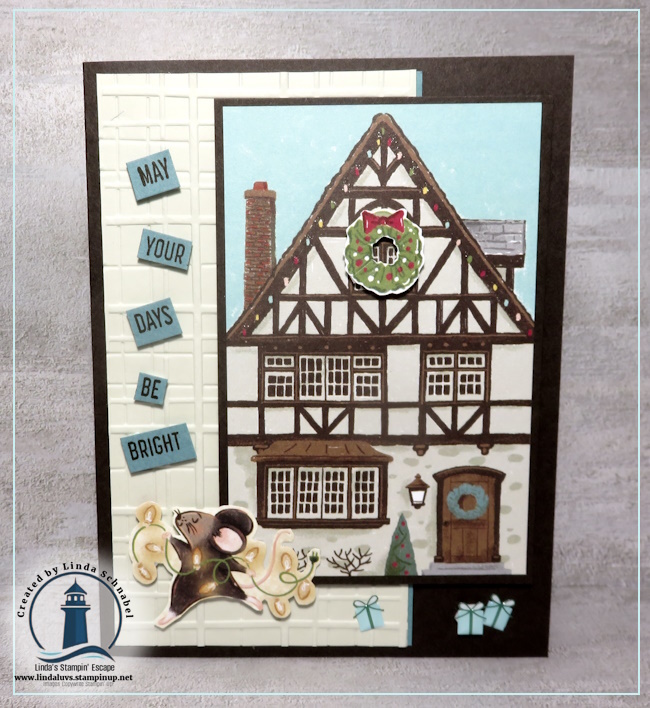
This adorable paper is filled with sweet, storybook-style Christmas scenes, and one particular sheet caught my eye immediately. With cozy rooms, a charming Tudor-style house, Christmas trees, gifts, and other festive images, it almost feels like we have a collection of little Christmas card fronts just waiting to be used!

And that means one thing… quick & easy card making! This fun sheet takes you from picturesque card fronts, to borders and tags!! I had so much fun playing with this sheet alone!!

Card #1: Sweet & Simple

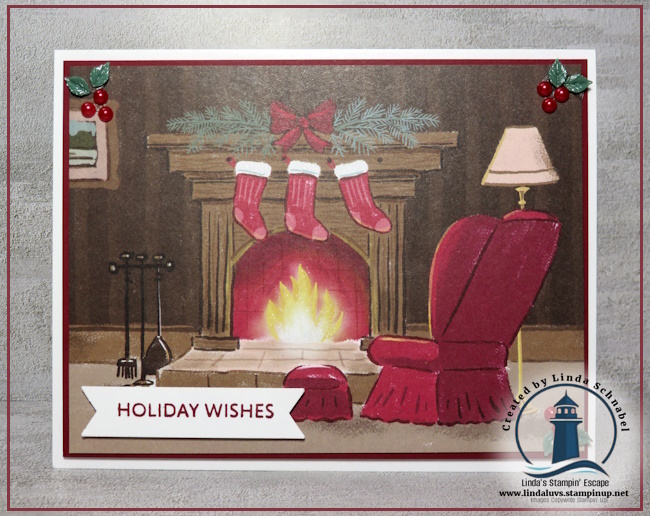
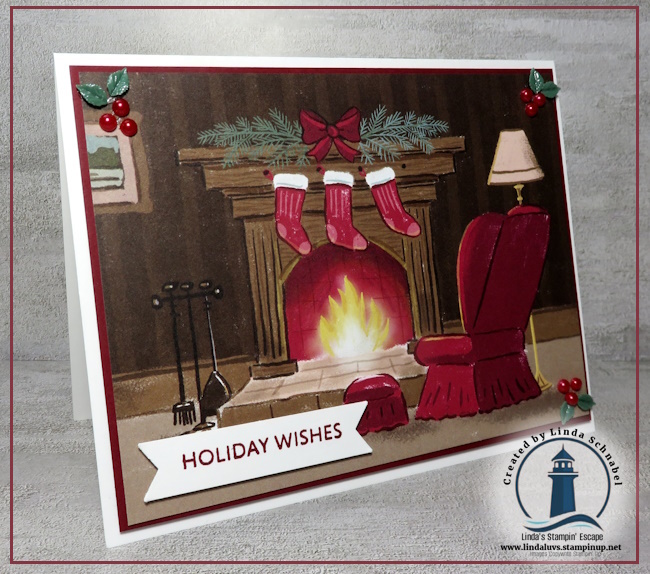
For my first card, I chose that warm and cozy fireplace scene. Honestly, when the artwork is this cute, you really don’t need to do much to it!

I simply let the Designer Paper become the focal point of the card, added a few layers to frame the scene, and finished it with my Holiday Wishes greeting from the Soiree Salutations and the 3 Banner Punch. A few little holly embellishments in the corners were the perfect finishing touch.

This is such a great reminder that simple does not mean boring! When your Designer Paper has beautiful artwork, sometimes the best thing you can do is let it shine.

Card #2: Let’s Add Some Layers!

For my second card, I stepped things up just a bit while still keeping the card surprisingly easy to create.

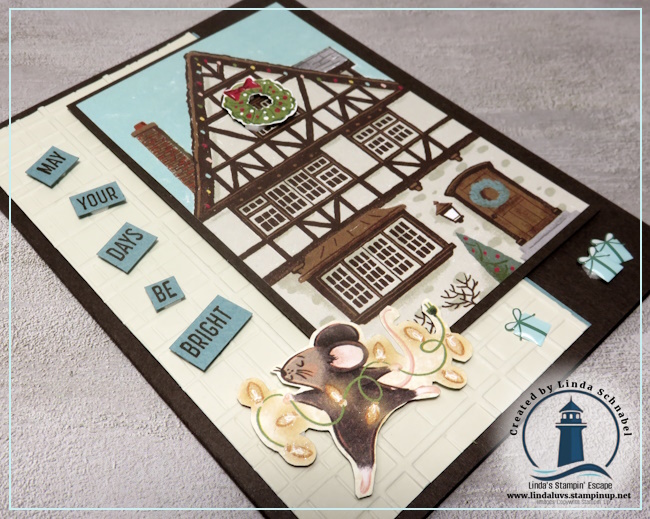
I used the wonderful Tudor-style house from that same sheet of Designer Paper, but this time I added layers to create more dimension and interest. I especially love the way the white embossed panel gives me the perfect place to add my greeting.

And instead of using one large sentiment, I stamped then cut the greeting apart into individual words! What a fun way to make the greeting part of the overall card design!

Of course, I couldn’t resist adding that sweet little mouse and a few presents along the bottom. Those little details take an already adorable piece of Designer Paper and turn it into something extra special.

Look at Your Designer Paper Differently

Here’s my challenge for you: Before you start cutting your Designer Series Paper into standard-sized pieces, really look at it.

Are there scenes you can use as card fronts? Images you can cut apart? Little details you can layer or turn into embellishments?

That’s one of my favorite things about papers like A Little Christmas. You can certainly use the patterns as backgrounds, but you can also let the artwork become the star of the card. It makes creating faster, easier, and a whole lot of fun!

And if you’d like to see exactly how I created both of these cards, I’ll be including my step-by-step video …

CLICK HERE TO WATCH ON YOUTUBE

You can stamp along with me and see how these two very different cards came together from the same sheet of Designer Paper.

So grab your paper, your scissors, and your adhesive… and let’s make A Little Christmas magic!

Shining the Light on Creativity,
Linda
Linda’s Stampin’ Escape

Simple or ??? Which Card Would You Choose?

Hello Stampin’ Friends ~

Sometimes the fun of card making isn’t about creating something completely different. Sometimes it’s about taking the same supplies, same colors, and same basic design and making just one little change.

And that’s exactly what happened with these two cards today!

Same Card… Two Different Looks

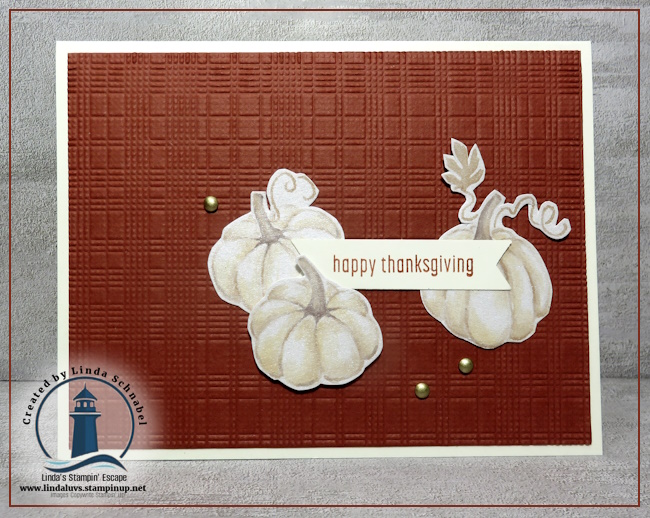
Both cards begin with that gorgeous warm, textured background. I love how the deep autumn color of Cajun Craze and embossing it with the NEW Softly Woven 3D embossing folder adds texture and makes those soft shimmery pumpkins from the Glow of Harvest Designer paper really stand out!

Our greeting comes from the NEW Soiree Salutations and I’ve used the Three Banner Punch to punch it out. These two pair together beautifully, and you’ll get so much use out of both.

From there, I simply played around with the arrangement.

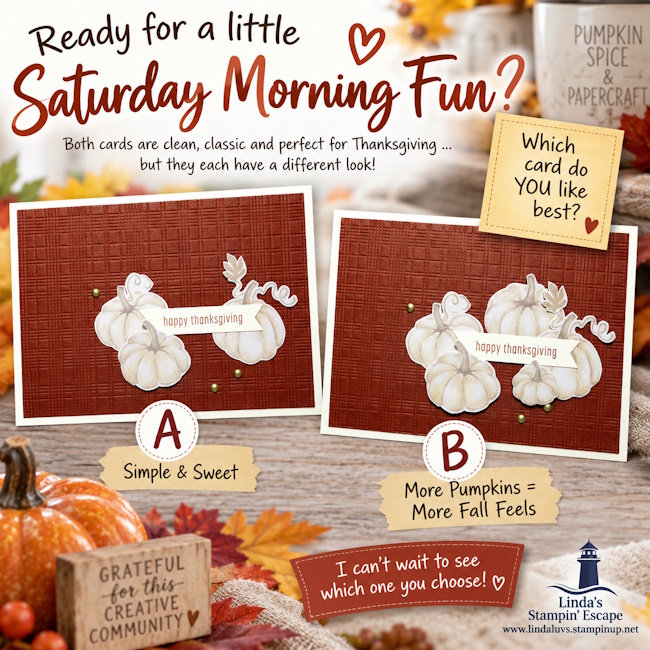
Card A keeps things a little more simple. There’s more open space around the pumpkins, and your eye is drawn right toward that Happy Thanksgiving greeting. It’s clean, uncomplicated and lets each element have its moment.

Then there’s Card B.…

I added a couple more pumpkins and clustered everything together around the greeting. It’s fuller, a little more abundant, and definitely gives me those “pumpkins everywhere, fall has arrived!” vibes.

What I love is that neither card required a completely different design. Just changing the number of pumpkins and their placement gave the card a whole new feel.

And Now It’s YOUR Turn!

Take another good look at the two cards. Are you drawn to…

🍂 Card A — Simple & Sweet
or
🎃 Card B — More Pumpkins, More Fall Feels?

I’d love to know which one YOU would make — A or B? And even better, tell me why! Are you usually a clean-and-simple stamper, or are you in the “there’s always room for one more pumpkin” camp?

A Little Creative Reminder

This is also one of my favorite things about stamping. You don’t always need another stamp set, another die, or an entirely new card layout to create something fresh.

Sometimes, simply moving your pieces around, adding one more element, or leaving a little extra white space is enough to completely change the look of your card.

So the next time you make a card you love, before you put those supplies away, make another one and change just one thing. You might be surprised which version becomes your favorite!

Thanks for stopping by Linda’s Stampin’ Escape and joining in our Saturday fun. 💕 I can’t wait to see whether A or B wins over here!

Happy Stampin’!
Linda
Linda’s Stampin’ Escape
Shining the Light on Creativity 🗼