Daisy Garden: Spotlighting Technique

Hello Stampin’ Friends ~

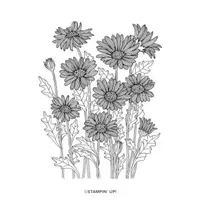
Tired of the cold? I’ve got the perfect card to warm you up … bright and colorful highlighting the Daisy Garden Stamp set and the Spotlight Technique! This little cutie will make you yearn for Spring!

*** I love this technique – It’s a great way to add a pop of color to images that one would think needs the entire image to be colored, so it’s quick and easy and still beautiful.

Measurements

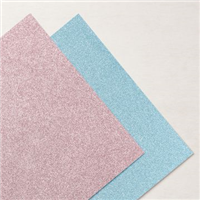
  • Parakeet Party:  5 ½” x 8 ½”, scored at 4 ¼” 
  • Polished Pink: 4” x 5 ¼”  
  • 2 pieces of Shimmery White: 3 ¾” x 5”

Instructions:

  • Stamp the Daisy Garden Stamp on 2 separate pieces of Shimmery White cardstock. (Use the Stamparatus to ensure that you have a nicely stamped dark image. If a part of the image is not stamped nicely on the cardstock, you can re-ink and stamp it again.)
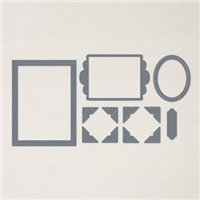
  • Use the 3 smallest sizes of the circle dies from the Stylish Shapes Dies cut out pieces from the 2nd stamped Shimmery White cardstock.
  • Colour the flowers and leaves that are in the cut-out circles using Stampin’ Blends. (Tip: I used the Light Pool Party Stampin’ Blend to fill all the “white space” on the circles.)
  • Use the Wink of Stella Glitter Brush to add shimmer to the flower petals.
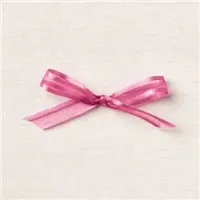
  • Add a piece of ribbon to the fully stamped Shimmery White cardstock. Take a smaller piece of ribbon and tie a knot on the right hand side of the card.
  • Add the Stitched Circles on top of the cardstock using Dimensionals.
  • Adhere the Shimmery White cardstock to the Parakeet Party cardstock.
  • Add the layers to the card using Stampin’ Seal Adhesive.
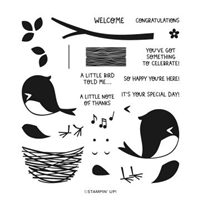
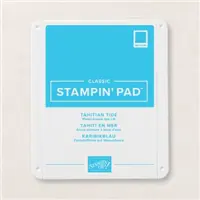
  • Stamp the greeting from Sweet Songbirds stamp set on a small piece of Shimmery White cardstock using the Polished Pink ink. (I cut the cardstock to the correct size after stamping it)

I hope this card inspires you to try out this technique … it really is quite simple, and can really add a pop of color! What a great way to warm someones day when it’s so cold outside (at least it is where I am) lol

Thanks for joining me today, hope your day is a good one.

Here is a list of supplies used to create this card ….

FREE TUTORIAL FRIDAY: A Note of Thanks

Hello Stampin’ Friends ~

Today I’m going to share the cutest card with you… on my FREE TUTORIAL FRIDAY! This card features the Sweet Songbirds stamp set. This cute little bird is delivering a note of thanks.

Measurements: 

  • Card Base: Thick Basic White 4-1/4” x 11, scored at 5-1/2”
  • Cardstock #1: Tahitian Tide 4” x 5-1/4”
  • Cardstock #2: Parakeet Party 3-3/4” x 5″
  • Cardstock #3: Tahitian Tide 3-3/4” x 4-1/4” (for die cut frame)
  • Cardstock #4: 2-3/8” x 3”
  • Cardstock #5: Basic White 1-3/4” x 1/2”
  • Scraps of Basic White, Crumb Cake, Mango Melody Cardstock and Supple Shimmer Specialty Paper for stamped / punched images

Instructions:

  • Fold the Thick Basic White card base in half and burnish the fold.
  • Die cut the Parakeet Party Cardstock with the Stitched Greenery Die, then adhere to the Tahitian Tide Cardstock.
  • Adhere the Tahitian Tide Cardstock layer to the Thick Basic White card base.
  • Die cut the frame from the Tahitian Tide Cardstock and adhere to the card.
  • Stamp the musical notes on the piece of Basic White Cardstock in Tahitian Tide ink, then adhere to the inside of the frame with Stampin’ Dimensionals.
  • Stamp the nest in Soft Suede ink on a scrap of Crumb Cake Cardstock, fussy-cut around image and adhere to the card with Stampin’ Dimensionals.
  • On a scrap of Basic White Cardstock, stamp the bird in Tahitian Tide ink, stamp the bird’s eyes in Soft Suede ink, then punch the bird out and adhere to the card with   Stampin’ Dimensionals
  • Punch the bird’s wing and chest from a scrap of Supple Shimmer Specialty Paper and adhere to the bird’s body.
  • Punch the bird’s beak from a small scrap of Mango Melody Cardstock and adhere to the bird.
  • Stamp the sentiment in Soft Suede ink on the strip of Basic White Cardstock, punch the right side with the Banner Pick a Punch and adhere to the card with Stampin’ Dimensionals.
  • Tie a bow using the Tahitian Tide Metallic Woven Ribbon and adhere to the card using a Mini Glue Dot.
  • Add three Rhinestone Basic Jewels (one large, two small) to the card front as shown.

Don’t you just LOVE this color combination? It’s a sure sign of spring. Such a cute card.

Thank you for joining me today. I hope today’s FREE TUTORIAL FRIDAY has inspired you too add a little sparkle to your projects ~

Have a wonderful day!!

TODAY’S STAMPIN’ SUPPLY LIST … If you liked the products used in todays projects, I have links for you below. Just click on the item you would like more information on, or to begin your shopping. It will take you directly to my website. Thank you ❤