Hello Stampin’ Friends ~
How are you on this fine Monday? Me? I’m great … starting a much needed vacation! So while I got my computer running better, I’m power blogging so I don’t miss a beat while I’m gone. I’ve got some great cards to show you this week!
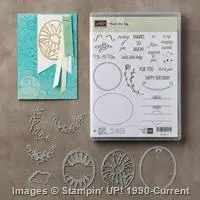
Today we’re going to step it up a notch. Yesterday I share two cards with you that used the “Falling in Love” Designer paper and the “That’s the Tag” Bundle, so today I took the pink card and I’m going to show you how you can “step it up” ….

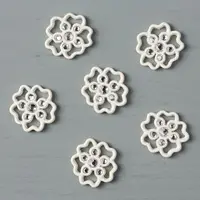
We are taking the pretty flower cut from the Timeless Tags Framelits Die and we’re going to mount it to a piece of coordinating cardstock – Sahara Sand and then cutting out the same image in two different colors so we can “piece” those pieces into our original frame. Here are the results ….

Isn’t that pretty! The colors coordinate so nicely especially against that Bokeh background on our designer paper.
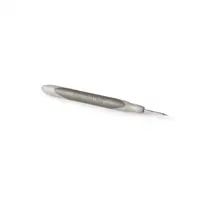
I have some great stampin’ tips for you when using this technique. Mount the frame of your image onto your mat before you begin … I use the Fine Tip Glue Pen. Set it aside for now.
When die cutting your colors: Only use a small piece of Pear Pizzazz to cut out your leaves, you do not need the entire flower, pop out the pieces you need and mount them directly into your frame. Again, I use the Fine Tip Glue Pen and put the glue into the recessed area of your frame.

Next, I used Blush Blossom for my petals – I die cut the entire image. DO NOT POP OUT YOUR PIECES (Petals) Take them out as you assemble them, that way you will know exactly where that piece belongs. When you are all done with your petals, you can pop out the other pieces and save your frame for the next card!

Lastly, I cut the center of the flower with a scrap piece of Pear Pizzazz. I also did a bit of paper piercing around the edge of my flowers center.
You could use a yellow if you wish, however I thought using just these two colors worked best and really brought out the sparkly color from out Dazzling Diamonds Glimmer Paper Frame.
Hope you enjoyed my “Stepped Up” Timeless Tag card. If you would like to learn how to do this “Hands On”- I’m hosting a TIMELESS TAG class on Wednesday, February 15th. / Cost $60
This class will include: That’s the Tag Stamp Set, Timeless Tags Thinlits Dies, Fine Tip Glue Pen, Paper Piercer, Stampin’ Mat and a minimum of 3 projects! Wow, that’s a basket full!! BUT WAIT, I’m not done – YOU also qualify for a FREE Sale-a-Bration item of your choice!! A $75+ Total Value!!
MUST RSVP by FEB. 1st, 2017 to ensure we get all your supplies & goodies ordered by class time. Limited seating: 8 attendee’s per class. I will schedule a second if the first class fills.
You will learn: Hands On the Paper Piecing / Puzzle technique used on today’s card, plus additional tips and techniques that highlight the fabulous dies and stamps in the “That’s the Tag” Bundle!!
Hope to see you in my Timeless Tags class. You can also RSVP by calling me at 262-334-1009
Thank you for joining me today, I hope you have a fabulous Monday!


STAMPIN’ SUPPLY LIST …